1999 HONDA ODYSSEY change time
[x] Cancel search: change timePage 21 of 343
Protecting Adults
Advice for Pregnant Women
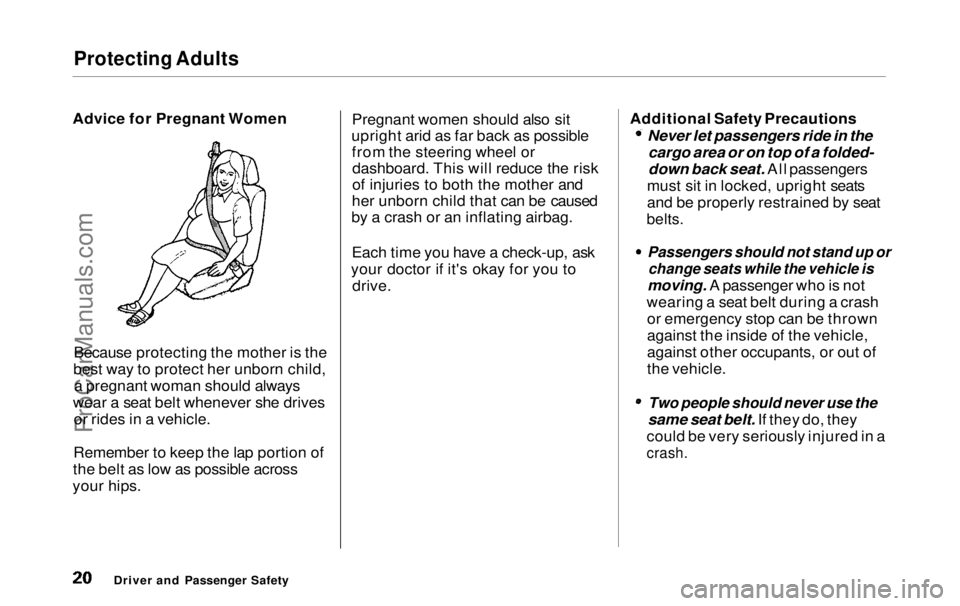
Because protecting the mother is the
best way to protect her unborn child, a pregnant woman should always
wear a seat belt whenever she drives or rides in a vehicle.
Remember to keep the lap portion of
the belt as low as possible across
your hips. Pregnant women should also sit
upright arid as far back as possible from the steering wheel ordashboard. This will reduce the risk
of injuries to both the mother and
her unborn child that can be caused
by a crash or an inflating airbag.
Each time you have a check-up, ask
your doctor if it's okay for you to drive. Additional Safety Precautions Never let passengers ride in the
cargo area or on top of a folded-
down back seat. All passengers
must sit in locked, upright seats
and be properly restrained by seat
belts.
Passengers should not stand up or
change seats while the vehicle is
moving. A passenger who is not
wearing a seat belt during a crash or emergency stop can be thrown
against the inside of the vehicle,
against other occupants, or out of
the vehicle.
Two people should never use the
same seat belt. If they do, they
could be very seriously injured in a
crash.
Driver and Passenger SafetyProCarManuals.comMain Menu Table of Contents s t
Page 61 of 343

Indicator Lights
Power Sliding Door
Indicator
EX model only
This indicator comes on for a few
seconds when you turn the ignition
switch ON (II). If it comes on at anyother time, there is a problem in the
power sliding door system. With this
light on, move the main switch on
the dashboard to the OFF position, and have the system checked by
your Honda dealer as soon as possible. You can still open or closeeach sliding door manually. For
more information on the power
sliding doors, see page 90 . Turn Signal and
Hazard WarningIndicators
The left or right turn signal light blinks when you signal a lane changeor turn. If the light does not blink or
blinks rapidly, it usually means one of the turn signal bulbs is burned out (see page 267). Replace the bulb as
soon as possible, since other drivers
cannot see that you are signalling.
When you turn on the Hazard
Warning switch, both turn signal lights blink. All turn signals on theoutside of the vehicle should flash. Door and Brake Lamp Monitor
The appropriate light comes on in this display if the tailgate or any door
is not closed tightly. If a brake lightdoes not work, the BRAKE LAMP
indicator comes on when you push
the brake pedal with the ignition switch ON (II).
A burned out brake light is a hazard
when drivers behind you cannot tell you are braking. Have your brake
lights repaired right away.
All the lights in the monitor display come on when you turn the ignitionswitch ON (II). The lights go off
after the engine starts and the
tailgate and all doors are closed
tightly.
Instruments and Controls
SLIDING
DOOR
BRAKE LAMPProCarManuals.comMain Menu Table of Contents s t
Page 70 of 343

Controls Near the Steering Wheel
In intermittent, the wipers operate
every few seconds. You can vary
how often the wipers sweep the
windshield by turning the INT TIME ring next to the rotary switch. Thesweep interval will change slightly
with speed; getting shorter as you drive faster. In low speed and high
speed, the wipers run continuously. If you turn the INT TIME ring to the
shortest delay, the wipers will
change from intermittent to low speed operation when vehicle speed
exceeds 12 mph (20 km/h).
To operate the wipers in mist mode,push the control lever down. The
wipers run at high speed until you release the lever. This gives you aquick way to clear the windshield.
Instruments and ControlsProCarManuals.comMain Menu Table of Contents s t
Page 79 of 343

Keys and Locks
As required by the FCC:
This device complies with Part 15 of the
FCC rules. Operation is subject to the
following two conditions: (1) This device way not cause harmful interference, and (2) this device must accept any
interference received, including interference that may cause undesired
operation.
This device complies with DOC
regulations in Canada.
Changes or modifications not expressly
approved by the party responsible for
compliance could void the user's
authority to operate the equipment.
Ignition Switch
The ignition switch is on the right side of the steering column. It has
four positions: LOCK (0)
ACCESSORY (I)
ON (II)
START (III)LOCK (0) — You can insert or
remove the key only in this position.
To switch from ACCESSORY to LOCK, you must push the key inslightly as you turn it. The shift lever
must also be in Park. The anti-theft
lock will lock the steering column
when you remove the key.
If the front wheels are turned, the
anti-theft lock may sometimes make
it difficult to turn the key from LOCK to ACCESSORY. Firmly turn
the steering wheel to the left or to
the right as you turn the key.
Instruments and ControlsProCarManuals.comMain Menu Table of Contents s t
Page 99 of 343
HomeLink Universal Transmitter
3. Press the Training button on the motor/control unit until the
Training light comes on, then release it.
4. Press and release the desired button on the HomeLink
transmitter.
5. Press and release the HomeLink transmitter button again. Thisshould turn off the training light
on the motor/control unit. (Some
systems may require you to press
and release the button three times.)
6. Press the transmitter button again. It should operate the garage door.
Erasing Codes
To erase the codes stored in all three buttons, press and hold the two outside buttons until the red light
begins to flash, then release the
buttons.
You should erase all three codes before selling the vehicle. As required by the FCC:
This device complies with Part 15 of the
FCC rules. Operation is subject to the
following two conditions: (1) This device
may not cause harmful interference, and (2) this device must accept any
interference received, including
interference that may cause undesired
operation.
This device complies with DOC
regulations in Canada.
Changes or modifications not expressly
approved by the party responsible for compliance could void the user's
authority to operate the equipment.
Instruments and ControlsProCarManuals.comMain Menu Table of Contents s t
Page 171 of 343
Audio System
You can switch to the radio while a CD is playing by pressing the AM/
FM button. Press the CD button to
return to playing the CD. The CD
will begin playing where it left off.
If you turn the system off while a CD
is playing, either with the PWR/VOL
knob or by turning off the ignition,
the disc will stay in the drive. When
you turn the system back on, the CD will begin playing where it left off.
Press the eject button to remove thedisc from the drive.
If you eject the disc, but do not
remove it from the slot, the system
will automatically reload the disc after 15 seconds and put the CD
player in pause mode. To begin
playing the disc, press the CD button. You can use the TUNE and SEEK/
SKIP bars while a disc is playing toselect passages and changers tracks.
To move rapidly within a track, press and hold the TUNE bar. Press the side to move forward. You will
see CUE in the display. Press the side to move backward. You
will see REW displayed. Release the
bar when the system reaches the
point you want. Each time you press the side of
the SEEK/SKIP bar, the system
skips forward to the beginning of the next track. Press the side to
skip backward to the beginning of
the current track. Press it again to skip to the beginning of the previous
track.
REPEAT — To activate the Repeat
feature, press and release the RPT
button. You will see RPT in the
display. The system continuously
replays the current track. Press the
RPT button again to turn it off.
RANDOM PLAY — This feature,
when activated, plays the tracks on the CD in random order, rather thanin the order they are recorded on theCD. To activate Random Play, press
and release the A. SEL/RDM button.
You will see RDM in the display. The system will then select and play
tracks randomly. This continues
until you deactivate Random Play by
pressing A. SEL/RDM again.
If the system is in Repeat mode, you
must turn it off by pressing the RPT
button before selecting Random Play.
Comfort and Convenience FeaturesProCarManuals.comMain Menu Table of Contents s t
Page 180 of 343
Audio System
Remote Audio Controls
On EX model
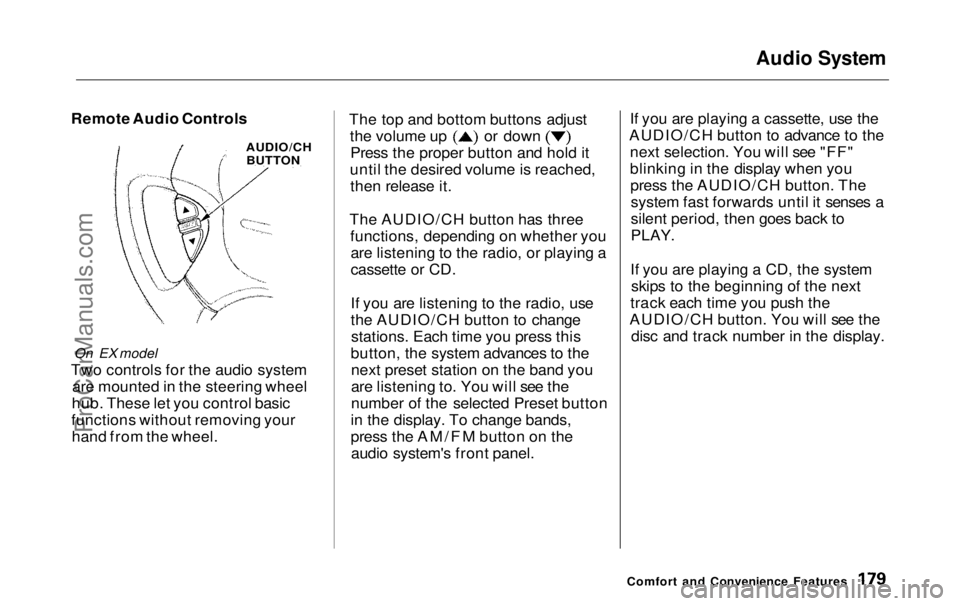
Two controls for the audio system are mounted in the steering wheel
hub. These let you control basic
functions without removing your hand from the wheel. The top and bottom buttons adjust the volume up or down
Press the proper button and hold it
until the desired volume is reached, then release it.
The AUDIO/CH button has three functions, depending on whether youare listening to the radio, or playing a
cassette or CD.
If you are listening to the radio, use
the AUDIO/CH button to changestations. Each time you press this
button, the system advances to the next preset station on the band you
are listening to. You will see the
number of the selected Preset button
in the display. To change bands,
press the AM/FM button on the audio system's front panel. If you are playing a cassette, use the
AUDIO/CH button to advance to the next selection. You will see "FF"
blinking in the display when youpress the AUDIO/CH button. Thesystem fast forwards until it senses a
silent period, then goes back to
PLAY.
If you are playing a CD, the system skips to the beginning of the next
track each time you push the
AUDIO/CH button. You will see the disc and track number in the display.
Comfort and Convenience Features
AUDIO/CH
BUTTONProCarManuals.comMain Menu Table of Contents s t
Page 185 of 343
Service Station Procedures
3. Remove the fuel fill cap slowly.
You may hear a hissing sound aspressure inside the tank escapes.Place the cap in the holder on the
fuel fill door.
4. Stop filling the tank after the fuel pump automatically clicks off. Donot try to "top off" the tank, leavesome room for the fuel to expand
with temperature changes.
5. Screw the fuel fill cap back on, tighten it until it clicks at least
three times. If you do not properly
tighten the cap, the MalfunctionIndicator Lamp may come on (see
page 303 ).
6. Push the fuel fill door closed until it latches.
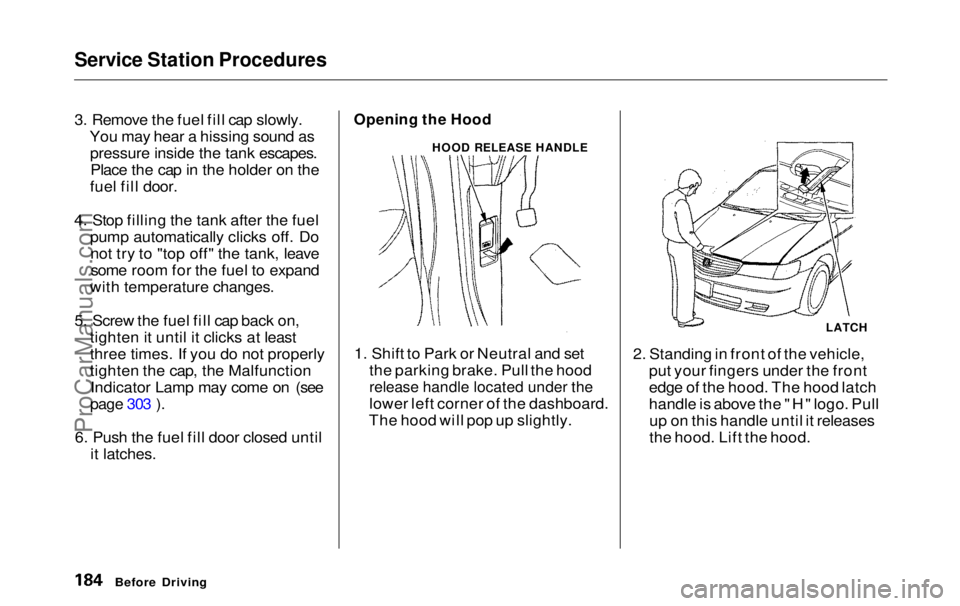
Opening the Hood
1. Shift to Park or Neutral and set the parking brake. Pull the hood
release handle located under the
lower left corner of the dashboard.
The hood will pop up slightly. 2. Standing in front of the vehicle,
put your fingers under the front
edge of the hood. The hood latch
handle is above the "H" logo. Pullup on this handle until it releases
the hood. Lift the hood.
Before Driving
HOOD RELEASE HANDLE
LATCHProCarManuals.comMain Menu Table of Contents s t