1999 HONDA ODYSSEY air condition
[x] Cancel search: air conditionPage 220 of 343

Maintenance
This section explains why it is important to keep your vehicle well
maintained and to follow basic
maintenance safety precautions.
This section also includes Maintenance Schedules for normaldriving and severe driving conditions,
a Maintenance Record, and instruc-
tions for simple maintenance tasks
you may want to take care of yourself.
If you have the skills and tools to per-
form more complex maintenance tasks on your Honda, you may want
to purchase the Service Manual. See page 333 for information on how toobtain a copy, or see your Honda
dealer.
Maintenance Safety.......................
220
Important Safet
y
Precautions ..
221
Maintenance Schedule.................
.
222
Required Maintenance Record.... 229
Owner Maintenance Checks........ 231
Fluid Locations............................... 232
Engine Oil....................................... 233
Adding Oil................................... 233
Recommended Oil..................... 233
Synthetic Oil............................... 234
Additives..................................... 235
Changing the Oil and Filter...... 235
Cooling System.............................. 237
Adding Engine Coolant............. 237Replacing Engine Coolant........ 239
Windshield Washers..................... 242
Automatic Transmission Fluid..... 243
Brake Fluid..................................... 244
Brake System............................. 244
Power Steering............................... 245
Air Cleaner Element...................... 246
Hood Latch..................................... 248
Spark Plugs..................................... 248
Replacement............................... 248
Specifications............................. 250
Battery............................................ 251
Wiper Blades.................................. 253
Air Conditioning System............... 255
Air Conditioning Filter.................. 256
Drive Belts...................................... 256
Timing Belt..................................... 257
Tires................................................ 257 Inflation....................................... 257
Inspection................................... 259Maintenance............................... 260
Tire Rotation.............................. 260
Replacing Tires and Wheels.... 261
Wheels and Tires....................... 262 Winter Driving........................... 262
Snow Tires.............................. 263
Tire Chains............................. 263
Lights..............................................264
Headlight Aiming...................... 266
Replacing Bulbs......................... 266
Storing Your Vehicle..................... 275
MaintenanceProCarManuals.comMain Menu s t
Page 229 of 343
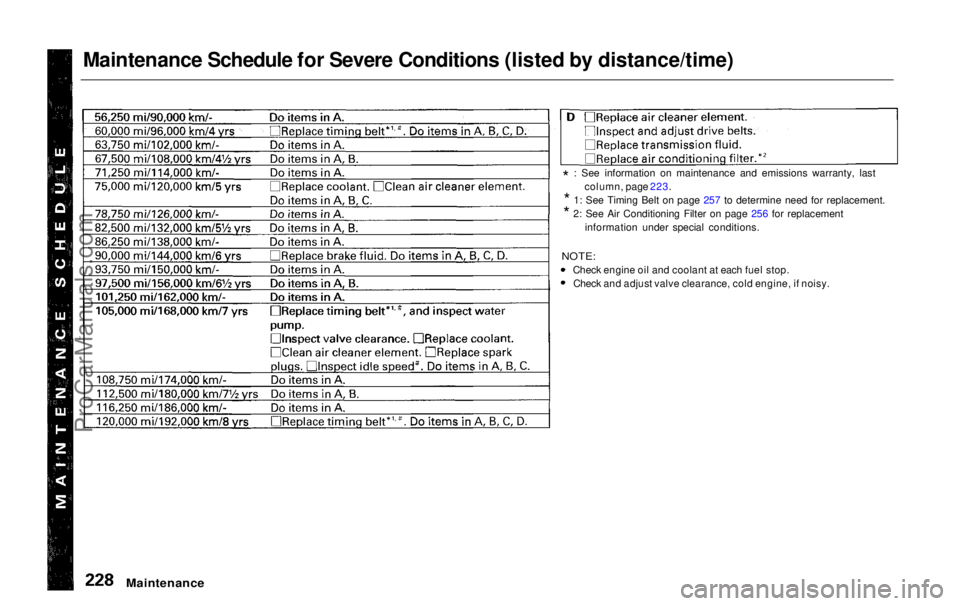
Maintenance Schedule for Severe Conditions (listed by distance/time)
Maintenance
*
: See information on maintenance and emissions warranty, last
column, page 223.
*
1: See Timing Belt on page 257 to determine need for replacement.
*
2: See Air Conditioning Filter on page 256 for replacement
information under special conditions.
NOTE:
Check engine oil and coolant at each fuel stop. Check and adjust valve clearance, cold engine, if noisy.
ProCarManuals.comMain Menu Table of Contents s t
Page 247 of 343
Air Cleaner Element
The air cleaner element should be cleaned or replaced according to the
time and distance recommendations in the maintenance schedule.
Cleaning (Severe Conditions)Clean the air cleaner element by
blowing compressed air through it in
the opposite direction to normal air
flow. If you do not have access to compressed air (such as a service
station), ask your Honda dealer to do
this service.
Follow the replacement procedure
for removal and reinstallation. Replacement
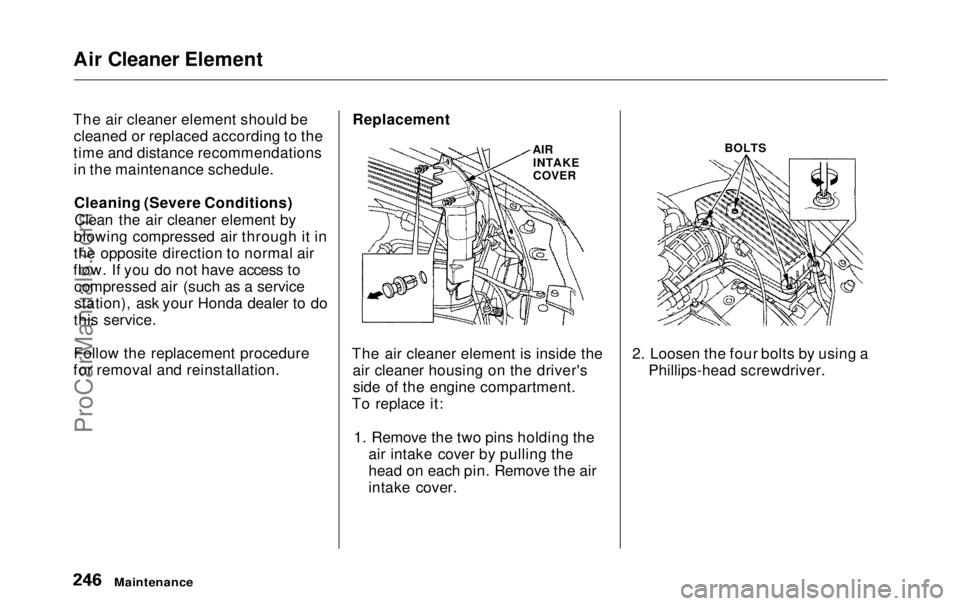
The air cleaner element is inside the air cleaner housing on the driver'sside of the engine compartment.
To replace it:
1. Remove the two pins holding the air intake cover by pulling the
head on each pin. Remove the air
intake cover. 2. Loosen the four bolts by using a
Phillips-head screwdriver.
Maintenance
AIR
INTAKE
COVER BOLTSProCarManuals.comMain Menu Table of Contents s t
Page 256 of 343
Air Conditioning System
Your vehicle's air conditioning is a sealed system. Any major mainte-
nance, such as recharging, should be
done by a qualified mechanic. You
can do a couple of things to makesure the air conditioning works
efficiently.
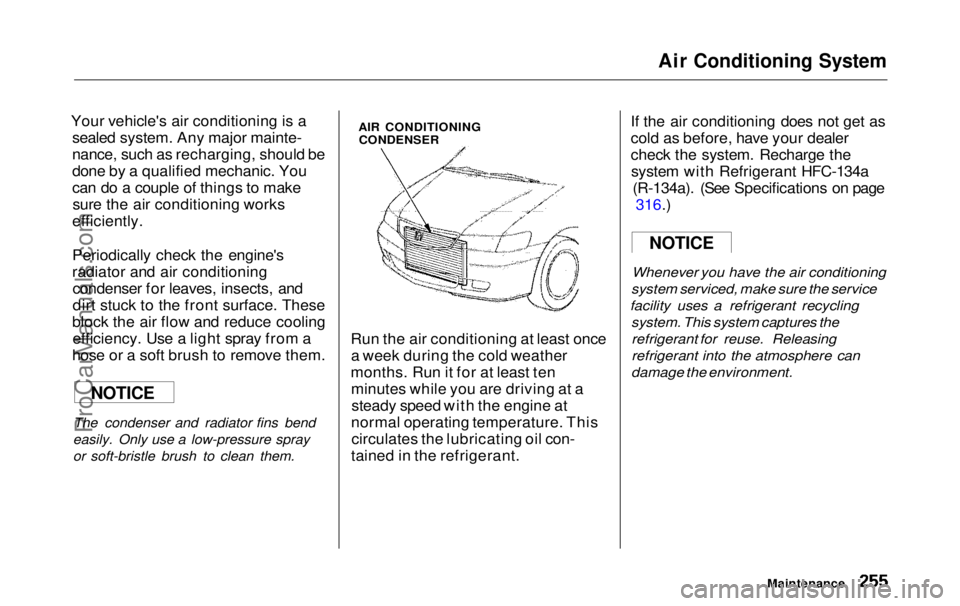
Periodically check the engine's
radiator and air conditioning condenser for leaves, insects, and
dirt stuck to the front surface. These
block the air flow and reduce cooling efficiency. Use a light spray from a
hose or a soft brush to remove them.
The condenser and radiator fins bend
easily. Only use a low-pressure spray
or soft-bristle brush to clean them. AIR CONDITIONING
CONDENSER
Run the air conditioning at least once a week during the cold weather
months. Run it for at least ten minutes while you are driving at asteady speed with the engine at
normal operating temperature. This circulates the lubricating oil con-
tained in the refrigerant. If the air conditioning does not get as
cold as before, have your dealer
check the system. Recharge the
system with Refrigerant HFC-134a (R-134a). (See Specifications on page 316.)
Whenever you have the air conditioning
system serviced, make sure the service
facility uses a refrigerant recycling
system. This system captures the
refrigerant for reuse. Releasing
refrigerant into the atmosphere can
damage the environment.
Maintenance
NOTICE
NOTICEProCarManuals.comMain Menu Table of Contents s t
Page 257 of 343
Air Conditioning Filter, Drive Belts
Air Conditioning Filter
The air conditioning filter removes pollen and dust that is brought in
from the outside through the heating and cooling system/climate control
system.
This filter should be replaced every 30,000 miles (48,000 km) under
normal conditions. It should be
replaced every 15,000 miles (24,000
km) if you drive primarily in urbanareas that have high concentrationsof soot in the air from industry and
diesel-powered vehicles. Replace it
more often if air flow from the
heating and cooling system/climate control system becomes less than
usual. Have the air conditioning filter
replaced by your Honda dealer.
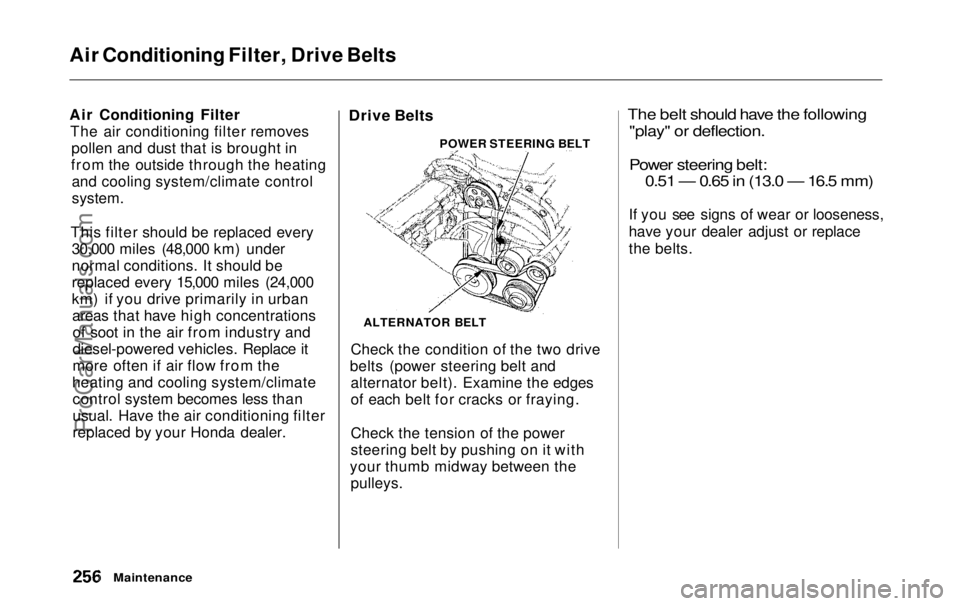
Drive Belts
POWER STEERING BELT
Check the condition of the two drive
belts (power steering belt and alternator belt). Examine the edges
of each belt for cracks or fraying.
Check the tension of the power
steering belt by pushing on it with
your thumb midway between the pulleys.
The belt should have the following
"play" or deflection.
Power steering belt: 0.51 — 0.65 in (13.0 — 16.5 mm)
If you see signs of wear or looseness,
have your dealer adjust or replace
the belts.
Maintenance
ALTERNATOR BELTProCarManuals.comMain Menu Table of Contents s t
Page 258 of 343

Timing Belt, Tires
Timing Belt
The timing belt should normally be replaced at the intervals shown in
the maintenance schedule.
Replace the belt at 60,000 miles (U.S.)
or 100,000 km (Canada) if you regu-
larly drive your vehicle in one or more of these conditions: In very high temperatures
(over 110°F,43°C).
In very low temperatures
(under —20°F, —29°C).
Tires
To safely operate your vehicle, yourtires must be the proper type and size, in good condition with adequate
tread, and correctly inflated. The
following pages give more detailed information on how and when to
check air pressure, how to inspect
your tires for damage and wear, and
what to do when your tires need to be replaced.
Inflation
Keeping the tires properly inflated
provides the best combination of
handling, tread life and riding comfort. Underinflated tires wear
unevenly, adversely affect handling and fuel economy, and are more
likely to fail from being overheated. Overinflated tires can make your
vehicle ride more harshly, are more prone to damage from road hazards,
and wear unevenly.
We recommend that you visually check your tires every day. If you
think a tire might be low, check it
immediately with a tire gauge.
CONTINUED
Maintenance
Using tires that are excessively
worn or improperly inflated can cause a crash in which you canbe seriously hurt or killed.
Follow all instructions in this
owner's manual regarding tire inflation and maintenance.ProCarManuals.comMain Menu Table of Contents s t
Page 259 of 343
Tires
Use a gauge to measure the air
pressure at least once a month. Even
tires that are in good condition may
lose one to two psi (10 to 20 kPa, 0.1
to 0.2 kgf/cm2) per month. Remember to check the spare tire at
the same time you check all the other tires.
Check the pressure in the tires when
they are cold. This means the vehicle
has been parked for at least three hours. If you have to drive the
vehicle before checking the tire pressure, the tires can still be
considered "cold" if you drive less
than 1 mile (1.6 km). If you check the pressure when the
tires are hot (the vehicle has been
driven several miles), you will see
readings 4 to 6 psi (30 to 40 kPa, 0.3
to 0.4 kgf/cm2) higher than the cold
reading. This is normal. Do not let air out to match the specified cold
pressure. The tire will be
underinflated.
You should get your own tire pressure gauge and use it whenever
you check your tire pressures. This
will make it easier for you to tell if a pressure loss is due to a tire problemand not due to a variation between
gauges.
Recommended Tire Pressures for
Normal Driving
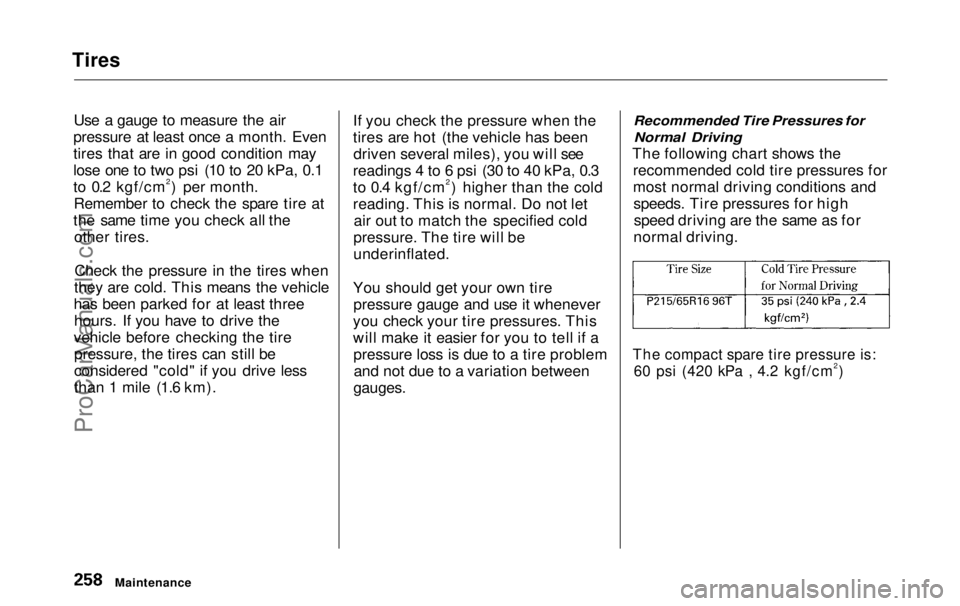
The following chart shows the recommended cold tire pressures for
most normal driving conditions andspeeds. Tire pressures for highspeed driving are the same as for
normal driving.
The compact spare tire pressure is: 60 psi (420 kPa , 4.2 kgf/cm2)
MaintenanceProCarManuals.comMain Menu Table of Contents s t
Page 303 of 343
Brake System Indicator
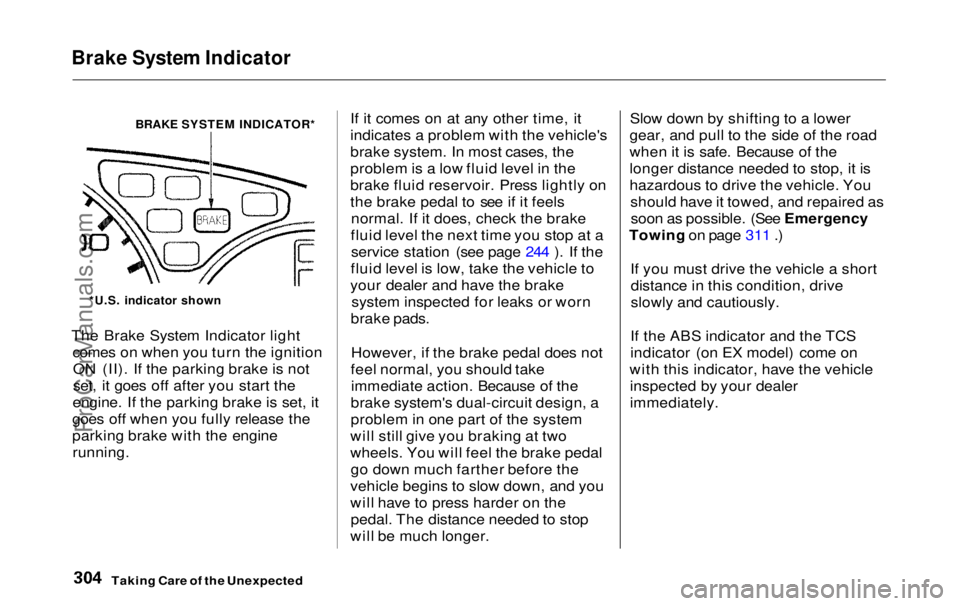
BRAKE SYSTEM INDICATOR*
The Brake System Indicator light comes on when you turn the ignitionON (II). If the parking brake is not
set, it goes off after you start the
engine. If the parking brake is set, it
goes off when you fully release the
parking brake with the engine
running.
If it comes on at any other time, it
indicates a problem with the vehicle's
brake system. In most cases, the
problem is a low fluid level in the
brake fluid reservoir. Press lightly on
the brake pedal to see if it feels
normal. If it does, check the brake
fluid level the next time you stop at a service station (see page 244 ). If the
fluid level is low, take the vehicle to
your dealer and have the brake system inspected for leaks or worn
brake pads.
However, if the brake pedal does not
feel normal, you should take immediate action. Because of the
brake system's dual-circuit design, a
problem in one part of the system
will still give you braking at two
wheels. You will feel the brake pedal go down much farther before the
vehicle begins to slow down, and you
will have to press harder on the pedal. The distance needed to stop
will be much longer. Slow down by shifting to a lower
gear, and pull to the side of the road
when it is safe. Because of the
longer distance needed to stop, it is
hazardous to drive the vehicle. You should have it towed, and repaired assoon as possible. (See Emergency
Towing on page 311 .)
If you must drive the vehicle a shortdistance in this condition, drive
slowly and cautiously.
If the ABS indicator and the TCS
indicator (on EX model) come on
with this indicator, have the vehicle inspected by your dealer
immediately.
Taking Care of the Unexpected
*U.S. indicator shownProCarManuals.comMain Menu Table of Contents s t