Page 232 of 343
Owner Maintenance Checks
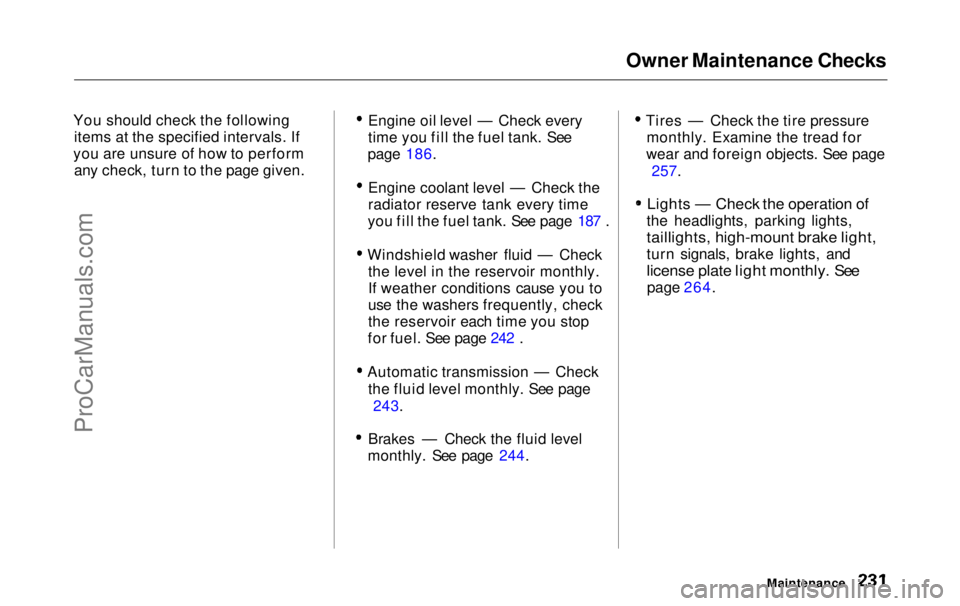
You should check the following items at the specified intervals. If
you are unsure of how to perform any check, turn to the page given. Engine oil level — Check every
time you fill the fuel tank. See
page 186.
Engine coolant level — Check the
radiator reserve tank every time
you fill the fuel tank. See page 187 .
Windshield washer fluid — Check the level in the reservoir monthly.
If weather conditions cause you to
use the washers frequently, check
the reservoir each time you stop
for fuel. See page 242 .
Automatic transmission — Check the fluid level monthly. See page 243.
Brakes — Check the fluid level
monthly. See page 244. Tires — Check the tire pressure
monthly. Examine the tread for
wear and foreign objects. See page
257.
Lights — Check the operation of
the headlights, parking lights,
taillights, high-mount brake light,
turn signals, brake lights, and
license plate light monthly. See
page 264.
MaintenanceProCarManuals.comMain Menu Table of Contents s t
Page 233 of 343
Fluid Locations
ENGINE OIL DIPSTICK
(Orange loop)
WASHER FLUID (Blue cap)
COOLANT
RESERVOIR
POWER STEERING
FLUID (Red cap) BRAKE FLUID
(Gray cap)
RADIATOR CAP ENGINE OIL FILL CAP
AUTOMATIC
TRANSMISSION
FLUID DIPSTICK
(Yellow loop)
MaintenanceProCarManuals.comMain Menu Table of Contents s t
Page 234 of 343
Engine Oil
Adding Oil Recommended Oil
Oil is a major contributor to your
engine's performance and longevity.
Always use a premium-grade deter- gent oil.
You can determine an oil's SAE viscosity and Service Classificationfrom the API Service label on the oil
container.
A fuel-efficient oil is recommended for your Honda. This is shown on the
API Service label by the words "Energy Conserving." This oil is
formulated to help your engine use
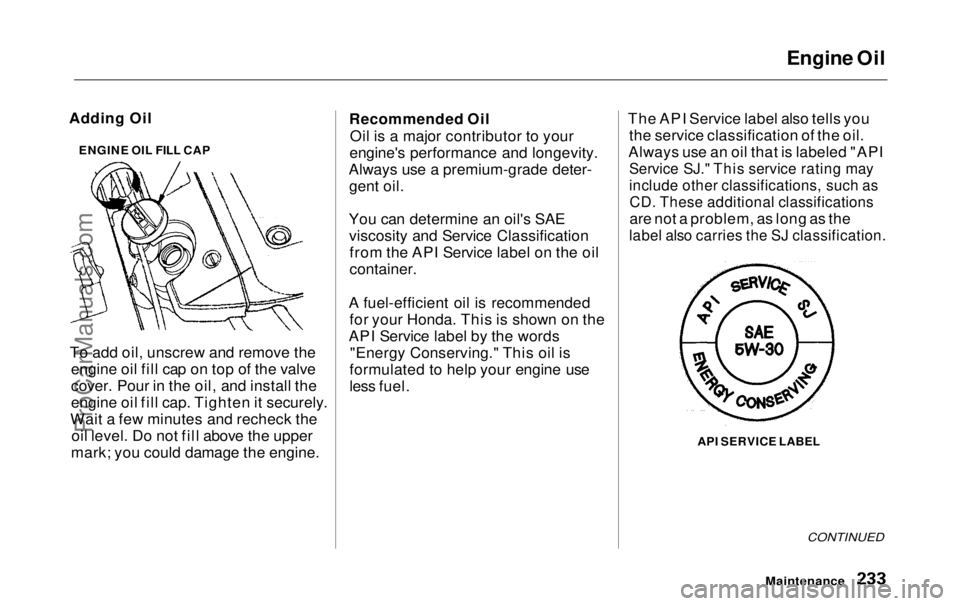
less fuel. The API Service label also tells you
the service classification of the oil.
Always use an oil that is labeled "API
Service SJ." This service rating may
include other classifications, such as
CD. These additional classifications
are not a problem, as long as the
label also carries the SJ classification.
API SERVICE LABEL
CONTINUED
Maintenance
To add oil, unscrew and remove the
engine oil fill cap on top of the valve
cover. Pour in the oil, and install the
engine oil fill cap. Tighten it securely.
Wait a few minutes and recheck the oil level. Do not fill above the upper
mark; you could damage the engine. ENGINE OIL FILL CAPProCarManuals.comMain Menu Table of Contents s t
Page 235 of 343
Engine Oil
The oil container may also display the API Certification seal. Make sure
it says "For Gasoline Engines."
API CERTIFICATION SEAL
The SAE numbers tell you the oil's
viscosity or weight;. Select the oil foryour vehicle according to this chart.
Ambient Temperature
An oil with a viscosity of 5W-30 is preferred for improved fuel economy
and year-round protection in your
Honda. You may use a 10W-30 oil if
the temperature in your area never
goes below 20°F (—7°C). Synthetic Oil
You may use a synthetic motor oil if it meets the same requirements
given for conventional motor oil; energy conserving, a service
classification of SJ, and the proper
weight as shown on the chart. When using synthetic oil, you must follow
the oil and filter change intervals
given in the maintenance schedule.
MaintenanceProCarManuals.comMain Menu Table of Contents s t
Page 236 of 343
Engine Oil
Additives Your Honda does not need any oil
additives. Purchasing additives for
the engine or transmission will not
increase your vehicle's performance
or longevity. It only increases the
cost of operating your vehicle. Changing the Oil and Filter
Always change the oil and filter according to the time and distance (miles/kilometers) recommenda-
tions in the maintenance schedule.
The oil and filter collect contami- nants that can damage your engine if
they are not removed regularly.
Changing the oil and filter requiresspecial tools and access from
underneath the vehicle. The vehicle should be raised on a service station-
type hydraulic lift for this service. Unless you have the knowledge and
proper equipment, you should have
this maintenance done by a skilled
mechanic.
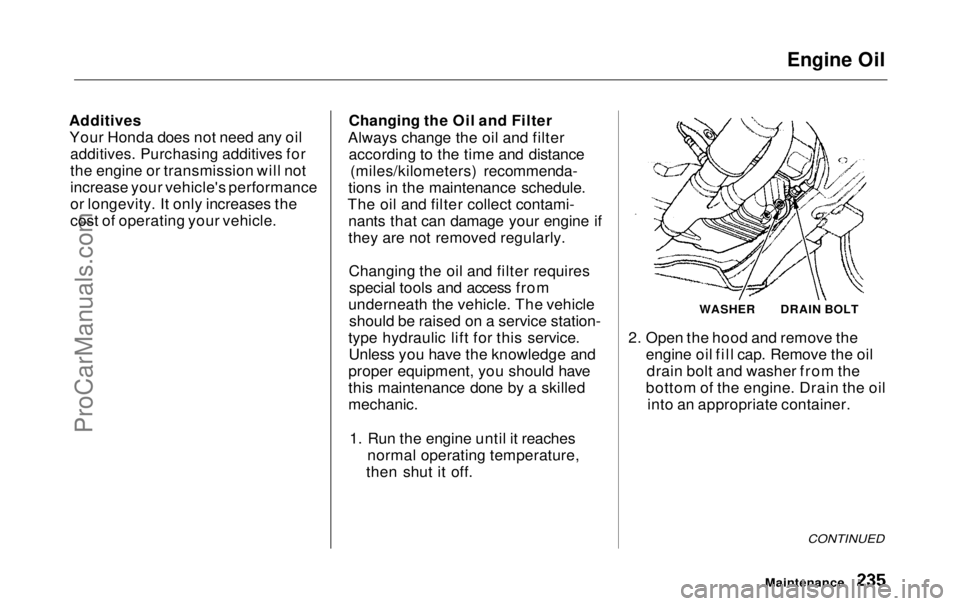
1. Run the engine until it reaches normal operating temperature,
then shut it off. WASHER
2. Open the hood and remove the engine oil fill cap. Remove the oildrain bolt and washer from the
bottom of the engine. Drain the oil into an appropriate container.
CONTINUED
Maintenance
DRAIN BOLTProCarManuals.comMain Menu Table of Contents s t
Page 237 of 343
Engine Oil
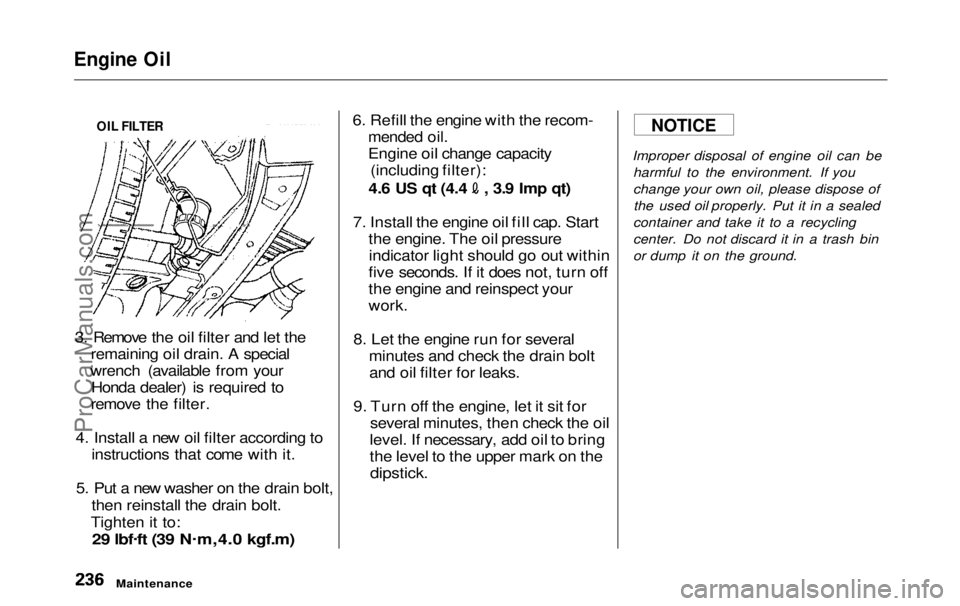
3. Remove the oil filter and let the remaining oil drain. A special
wrench (available from your Honda dealer) is required to
remove the filter.
4. Install a new oil filter according to instructions that come with it.
5. Put a new washer on the drain bolt, then reinstall the drain bolt.
Tighten it to:
29 lbf .
ft (39 N .
m,4.0 kgf.m)
6. Refill the engine with the recom-
mended oil.
Engine oil change capacity(including filter): 4.6 US qt (4.4 , 3.9 Imp qt)
7. Install the engine oil fill cap. Start the engine. The oil pressureindicator light should go out within
five seconds. If it does not, turn off
the engine and reinspect your
work.
8. Let the engine run for several minutes and check the drain boltand oil filter for leaks.
9. Turn off the engine, let it sit for several minutes, then check the oil
level. If necessary, add oil to bring
the level to the upper mark on the
dipstick.
Improper disposal of engine oil can be
harmful to the environment. If you
change your own oil, please dispose ofthe used oil properly. Put it in a sealed
container and take it to a recycling
center. Do not discard it in a trash bin
or dump it on the ground.
Maintenance
NOTICE
OIL FILTERProCarManuals.comMain Menu Table of Contents s t
Page 251 of 343
Spark Plugs
7. Torque the spark plug. (If you do not have a torque wrench, tighten
the spark plug two-thirds of a turn
after it contacts the cylinder head.)
Tightening torque:
13 lbf .
ft (18 N .
m, 1.8 kgf.m)
Tighten the spark plugs carefully. A
spark plug that is too loose can
overheat and damage the engine. Overtightening can cause damage to
the threads in the cylinder head.
8. Install the ignition coil. Reinstall
the hexagon socket head cap bolt.
9. Push the wire connector on to the ignition coil. Make sure it locks in
place.
10. Repeat this procedure for the other five spark plugs.
11. Reinstall the cover on the front cylinder bank while putting its
mounting clip in the hole on the
passenger's side. Secure the cover
by turning the heads of the two holding clips one-quarter turnclockwise with a flat-tippedscrewdriver.
Specifications:
NGK: PZFR5F-11
DENSO: PKJ16CR-L11
Spark Plug Gap:
0.04
in
(1.1
mm)
Maintenance
NOTICE
ProCarManuals.comMain Menu Table of Contents s t
Page 256 of 343
Air Conditioning System
Your vehicle's air conditioning is a sealed system. Any major mainte-
nance, such as recharging, should be
done by a qualified mechanic. You
can do a couple of things to makesure the air conditioning works
efficiently.
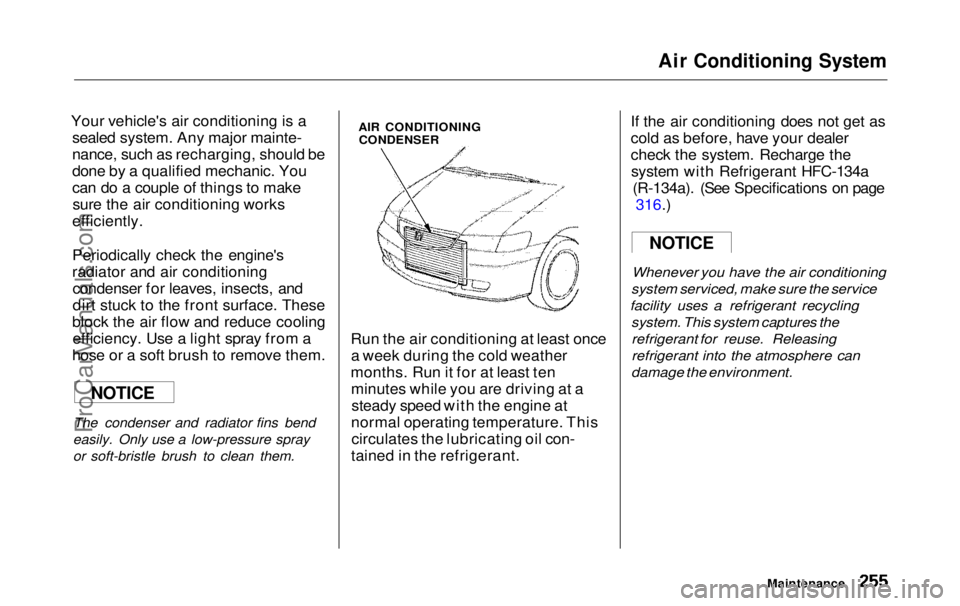
Periodically check the engine's
radiator and air conditioning condenser for leaves, insects, and
dirt stuck to the front surface. These
block the air flow and reduce cooling efficiency. Use a light spray from a
hose or a soft brush to remove them.
The condenser and radiator fins bend
easily. Only use a low-pressure spray
or soft-bristle brush to clean them. AIR CONDITIONING
CONDENSER
Run the air conditioning at least once a week during the cold weather
months. Run it for at least ten minutes while you are driving at asteady speed with the engine at
normal operating temperature. This circulates the lubricating oil con-
tained in the refrigerant. If the air conditioning does not get as
cold as before, have your dealer
check the system. Recharge the
system with Refrigerant HFC-134a (R-134a). (See Specifications on page 316.)
Whenever you have the air conditioning
system serviced, make sure the service
facility uses a refrigerant recycling
system. This system captures the
refrigerant for reuse. Releasing
refrigerant into the atmosphere can
damage the environment.
Maintenance
NOTICE
NOTICEProCarManuals.comMain Menu Table of Contents s t