Page 52 of 269

Instruments and Controls
This section gives information about
the controls and displays thatcontribute to the daily operation of
your Honda. All the essential
controls are within easy reach.
Control Locations............................ 52
Indicator Lights................................ 53
Gauges.............................................. 57
Speedometer................................ 57
Tachometer.................................. 57
Odometer...................................... 57
Trip Meter.................................... 57
Fuel Gauge................................... 58
Temperature Gauge.................... 58
Maintenance Required
Indicator.................................... 59
Controls Near the Steering Wheel........................................ 60
Headlights.................................... 61
Daytime Running Lights............. 61
Instrument Panel Brightness..... 62
Turn Signals................................. 62
Windshield Wipers...................... 63
Windshield Washers................... 63
Hazard Warning........................... 64
Rear Window Defogger.............. 64
Steering Wheel Adjustment....... 65
Steering Wheel Controls ................ 66 Cruise Control.............................. 66
Keys and Locks................................ 69
Keys.............................................. 69
Ignition Switch............................. 69
Door Locks................................... 70
Power Door Locks....................... 71
Remote Transmitter.................... 72
Trunk............................................ 75
Seat Adjustments............................. 76
Front Seat Adjustments.............. 76
Rear Seat Access......................... 77
Head Restraints........................... 77
Folding Rear Seat............................ 78
Power Windows............................... 79
Moonroof.......................................... 81
Mirrors.............................................. 81
Adjusting the Power Mirrors..... 82
Parking Brake.................................. 83 Glove Box......................................... 83
Beverage Holder.............................. 84
Accessory Power Socket................ 85
Ashtrays............................................ 85
Interior Light.................................... 86
Instruments and ControlsMain Menu s t
Page 54 of 269
Indicator Lights
The instrument panel has many indicators to give you important
information about your car.
Instruments and Controls
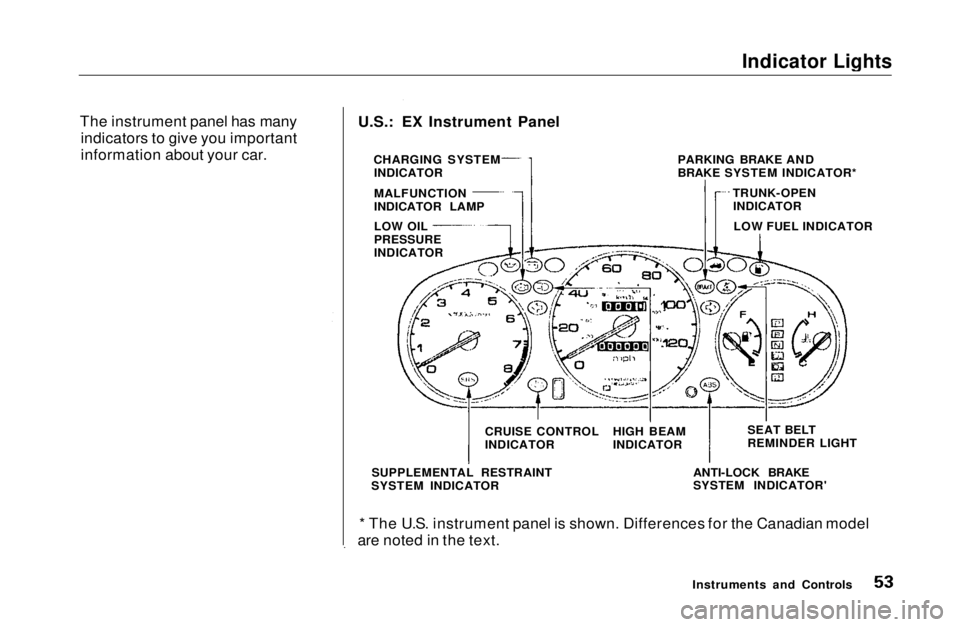
U.S.: EX Instrument Panel
CHARGING SYSTEMINDICATOR
MALFUNCTION
INDICATOR LAMP
LOW OIL
PRESSURE
INDICATOR
CRUISE CONTROL
INDICATOR
SUPPLEMENTAL RESTRAINT
SYSTEM INDICATOR HIGH BEAM
INDICATOR
SEAT BELT
REMINDER LIGHT
ANTI-LOCK BRAKE
SYSTEM INDICATOR'
* The U.S. instrument panel is shown. Differences for the Canadian model
are noted in the text. PARKING BRAKE AND
BRAKE SYSTEM INDICATOR*
TRUNK-OPENINDICATOR
LOW FUEL INDICATORMain Menu Table of Contents s t
Page 55 of 269

Indicator Lights
* Differences in the indicators for Canadian models are noted in the text. Seat Belt Reminder Light
This indicator lights when you turn the ignition switch ON (II). It is a
reminder to you and your passengers
to protect yourselves by fastening the seat belts. A beeper also sounds
if you have not fastened your seat
belt.
If you do not fasten your seat belt,
the beeper will stop after a few seconds but the light stays on until
you do. Both the light and the beeper stay off if you fasten your seat belt
before turning on the ignition.
Supplemental Restraint
System Indicator
This indicator lights when you turn the ignition switch ON (II). If itcomes on at any other time, it
indicates a problem in thesupplemental restraint system. For
complete information, see page 47.
Instruments and Controls
U.S.: DX, Canada: LX
HIGH BEAM INDICATOR
CHARGING SYSTEM
INDICATOR
LOW OIL
PRESSURE
INDICATOR
PARKING BRAKE AND BRAKE
SYSTEM INDICATOR'
TRUNK-OPENINDICATOR
LOW FUEL INDICATOR
SEAT BELT
REMINDER LIGHT
ANTI-LOCK BRAKE SYSTEM INDICATOR
(Canadian LX model)
MALFUNCTION
INDICATOR LAMP
SUPPLEMENTAL RESTRAINT
SYSTEM INDICATOR
SRSMain Menu Table of Contents s t
Page 56 of 269

Indicator Lights
Charging System
Indicator
If this light comes on when the
engine is running, the battery is not
being charged. For complete
information, see page 232.
Low Oil Pressure
Indicator
The engine can be severely damaged
if this light flashes or stays on when
the engine is running. For complete
information, see page 232.
High Beam Indicator
This light comes on with the high beam headlights. See page 61 for
information on the headlight
controls.
On Canadian models, this indicator
comes on with reduced brightness
when the Daytime Running Lights (DRL) are on (see page 61). Parking Brake
and Brake
System
Indicator
This light has two functions:
1. It lights as a reminder that you have not released the parking
brake. Driving with the parking
brake applied can damage the
brakes and tires.
2. If it remains lit after you release the parking brake while the engineis running, or comes on while
driving, it can indicate a problem
in the brake system. For complete information, see page 234 .
Malfunction Indicator
Lamp
See page 233.
Anti-lock Brake
System (ABS)Indicator
Only on cars equipped with ABS (see
page 153)
This light normally comes on for a few seconds when you turn theignition switch ON (II), and when
the ignition switch is turned to START (III). If this light comes on at
any other time, there is a problem in
the ABS. If this happens, take the car to your dealer to have it checked.
With the light on, your car still has normal braking ability but no anti-
lock.
Instruments and Controls
U.S.
Canada
BRAKE
ABS
U.S.
CanadaMain Menu Table of Contents s t
Page 62 of 269
Controls Near the Steering Wheel
Headlights
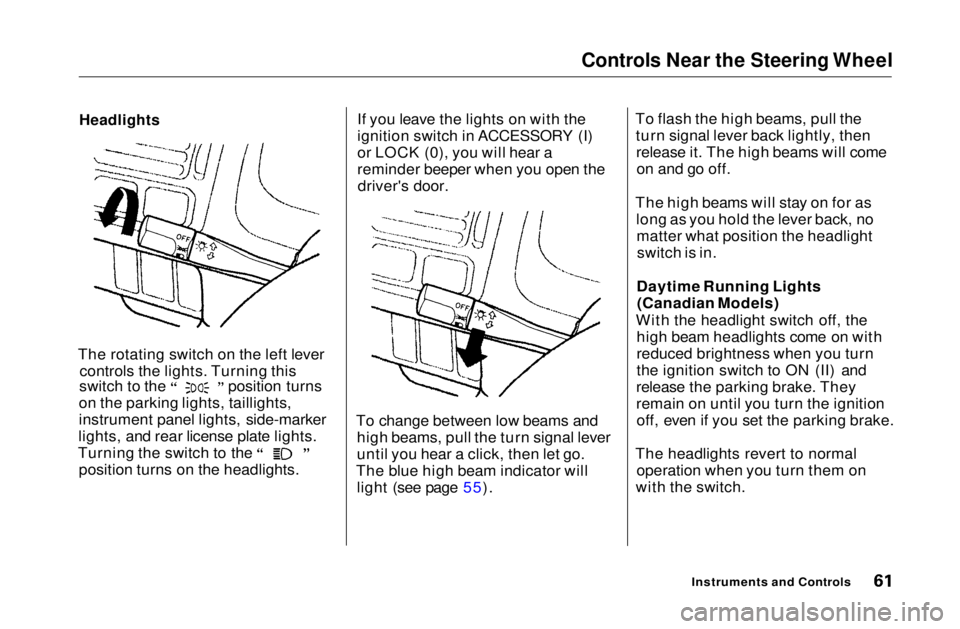
The rotating switch on the left lever controls the lights. Turning this switch to the position turns
on the parking lights, taillights,
instrument panel lights, side-marker
lights, and rear license plate lights. Turning the switch to the
position turns on the headlights. If you leave the lights on with the
ignition switch in ACCESSORY (I)
or LOCK (0), you will hear a
reminder beeper when you open the
driver's door.
To change between low beams and high beams, pull the turn signal lever
until you hear a click, then let go.
The blue high beam indicator will light (see page 55). To flash the high beams, pull the
turn signal lever back lightly, thenrelease it. The high beams will comeon and go off.
The high beams will stay on for as long as you hold the lever back, nomatter what position the headlightswitch is in.
Daytime Running Lights (Canadian Models)
With the headlight switch off, the high beam headlights come on with
reduced brightness when you turn
the ignition switch to ON (II) and
release the parking brake. They
remain on until you turn the ignition off, even if you set the parking brake.
The headlights revert to normal operation when you turn them on
with the switch.
Instruments and ControlsMain Menu Table of Contents s t
Page 84 of 269
Parking Brake, Glove Box
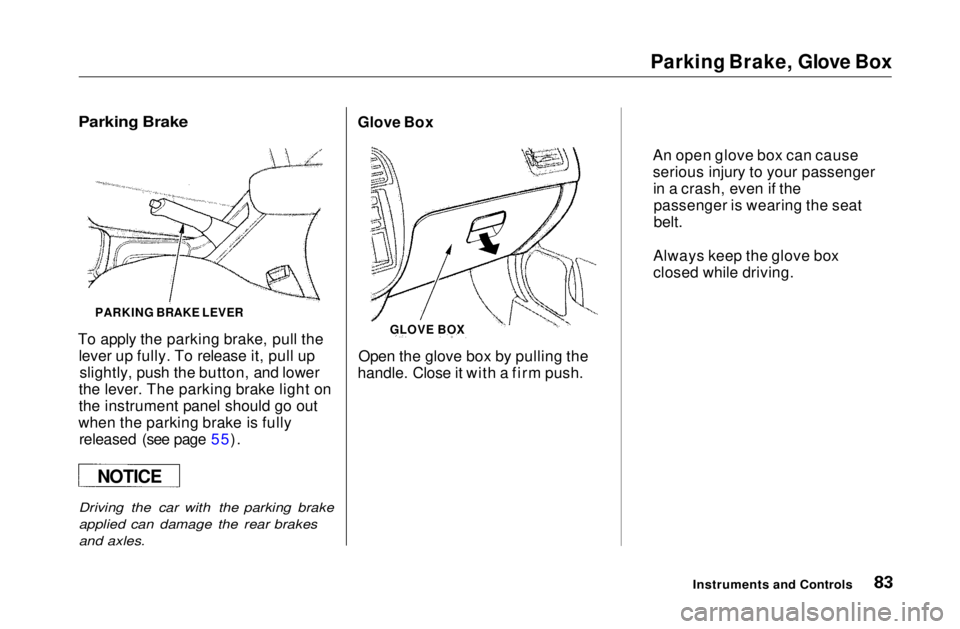
PARKING BRAKE LEVER
To apply the parking brake, pull the lever up fully. To release it, pull upslightly, push the button, and lower
the lever. The parking brake light on
the instrument panel should go out
when the parking brake is fully released (see page 55).
Driving the car with the parking brake
applied can damage the rear brakes
and axles.
Open the glove box by pulling the
handle. Close it with a firm push.
Instruments and Controls
GLOVE BOX
Glove Box
An open glove box can cause
serious injury to your passengerin a crash, even if thepassenger is wearing the seat
belt.
Always keep the glove box
closed while driving.
NOTICE
Parking BrakeMain Menu Table of Contents s t
Page 126 of 269
Service Station Procedures
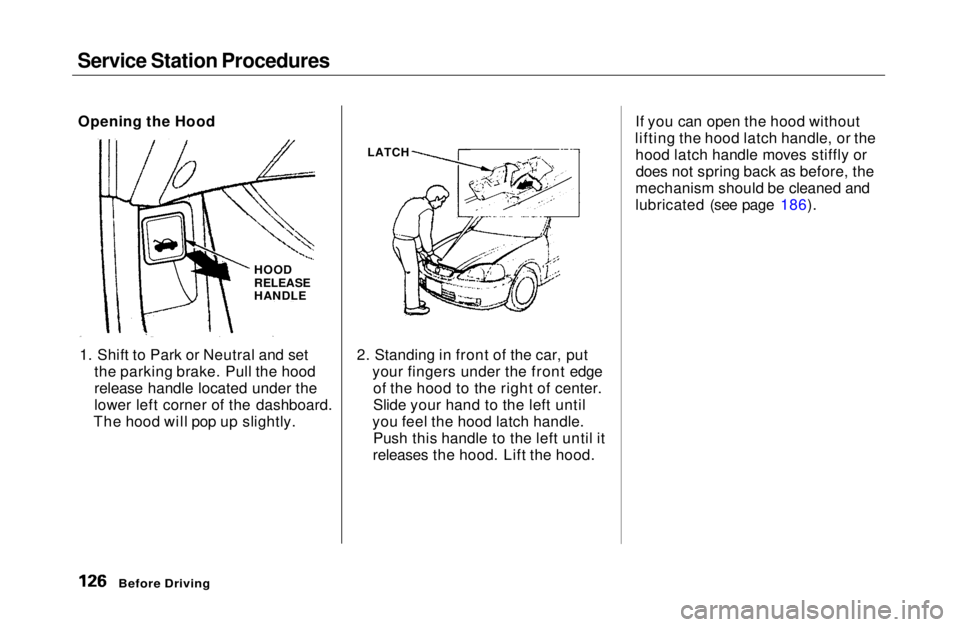
1. Shift to Park or Neutral and set the parking brake. Pull the hood
release handle located under the
lower left corner of the dashboard.
The hood will pop up slightly. 2. Standing in front of the car, put
your fingers under the front edgeof the hood to the right of center.
Slide your hand to the left until
you feel the hood latch handle. Push this handle to the left until it
releases the hood. Lift the hood. If you can open the hood without
lifting the hood latch handle, or the hood latch handle moves stiffly ordoes not spring back as before, the
mechanism should be cleaned and
lubricated (see page 186).
Before Driving
Opening the Hood
HOOD
RELEASE
HANDLE
LATCHMain Menu Table of Contents s t
Page 135 of 269
Driving
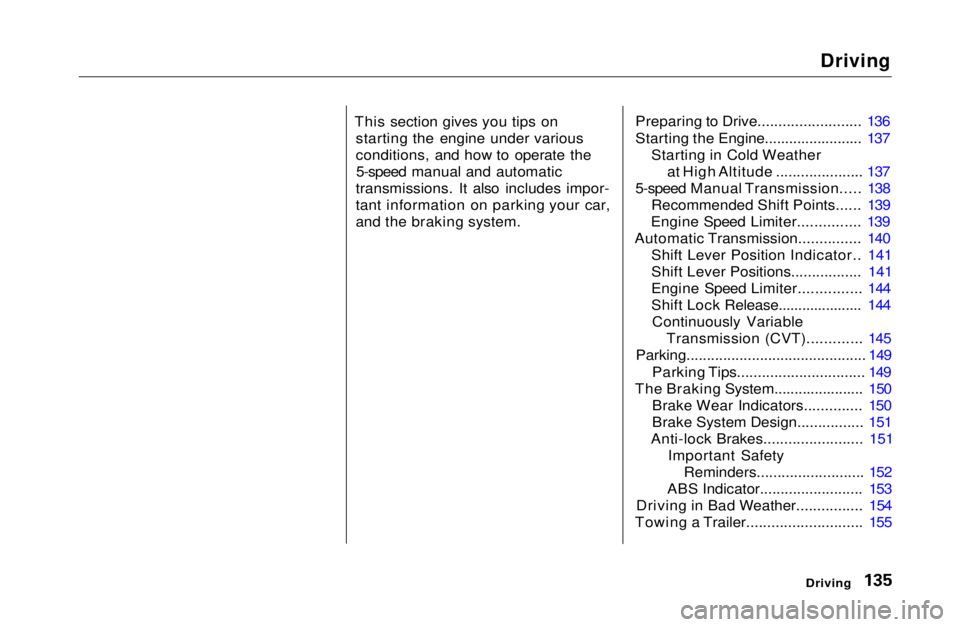
This section gives you tips on starting the engine under various
conditions, and how to operate the5-speed manual and automatic
transmissions. It also includes impor-
tant information on parking your car,
and the braking system. Preparing to Drive......................... 136
Starting the Engine........................ 137
Starting in Cold Weatherat High Altitude ..................... 137
5-speed Manual Transmission..... 138 Recommended Shift Points...... 139
Engine Speed Limiter............... 139
Automatic Transmission............... 140 Shift Lever Position Indicator.. 141
Shift Lever Positions................. 141
Engine Speed Limiter............... 144
Shift Lock Release..................... 144Continuously Variable Transmission (CVT)............. 145
Parking............................................ 149
Parking Tips............................... 149
The Braking System...................... 150 Brake Wear Indicators.............. 150
Brake System Design................ 151
Anti-lock Brakes........................ 151 Important SafetyReminders.......................... 152
ABS Indicator......................... 153
Driving in Bad Weather................ 154
Towing a Trailer............................ 155
DrivingMain Menu s t