1999 HONDA CIVIC COUPE key
[x] Cancel search: keyPage 25 of 269
Protecting Children
If You Must Drive with Several
Children
Your car has three seating positions in the back seat where children can
be properly restrained.
If you ever have to carry more than
three children in your car: Place the largest child in the front
seat, provided the child is large
enough to wear a seat belt
properly (see page 37). Move the vehicle seat as far to the
rear as possible (see page 12). Have the child sit upright and well
back in the seat (see page 18). Make sure the seat belt is properly
positioned and secured (see page 15). If a Child Requires Close
Attention Many parents say they prefer to put
an infant or small child in the front
passenger seat so they can watch the child, or because the child requires
attention.
Placing a child in the front seat
exposes the child to hazards from
the airbag, and paying close attention to a child distracts the
driver from the important tasks of
driving, placing both of you at risk.
If a child requires physical attention
or frequent visual contact, westrongly recommend that another
adult ride with the child in the back seat. The back seat is far safer for a
child than the front. Additional Safety Precaution
Do not leave children alone in your
vehicle. Leaving children without
adult supervision is illegal in most
states and provinces, and can be
very hazardous. For example, infants and small children left in a
vehicle on a hot day can die from heatstroke. And children left alone
with the key in the ignition can accidentally set the vehicle in
motion, possibly injuring
themselves or others.
Driver and Passenger SafetyMain Menu Table of Contents s t
Page 52 of 269

Instruments and Controls
This section gives information about
the controls and displays thatcontribute to the daily operation of
your Honda. All the essential
controls are within easy reach.
Control Locations............................ 52
Indicator Lights................................ 53
Gauges.............................................. 57
Speedometer................................ 57
Tachometer.................................. 57
Odometer...................................... 57
Trip Meter.................................... 57
Fuel Gauge................................... 58
Temperature Gauge.................... 58
Maintenance Required
Indicator.................................... 59
Controls Near the Steering Wheel........................................ 60
Headlights.................................... 61
Daytime Running Lights............. 61
Instrument Panel Brightness..... 62
Turn Signals................................. 62
Windshield Wipers...................... 63
Windshield Washers................... 63
Hazard Warning........................... 64
Rear Window Defogger.............. 64
Steering Wheel Adjustment....... 65
Steering Wheel Controls ................ 66 Cruise Control.............................. 66
Keys and Locks................................ 69
Keys.............................................. 69
Ignition Switch............................. 69
Door Locks................................... 70
Power Door Locks....................... 71
Remote Transmitter.................... 72
Trunk............................................ 75
Seat Adjustments............................. 76
Front Seat Adjustments.............. 76
Rear Seat Access......................... 77
Head Restraints........................... 77
Folding Rear Seat............................ 78
Power Windows............................... 79
Moonroof.......................................... 81
Mirrors.............................................. 81
Adjusting the Power Mirrors..... 82
Parking Brake.................................. 83 Glove Box......................................... 83
Beverage Holder.............................. 84
Accessory Power Socket................ 85
Ashtrays............................................ 85
Interior Light.................................... 86
Instruments and ControlsMain Menu s t
Page 60 of 269
Gauges
Maintenance Required Indicator
U.S. Models
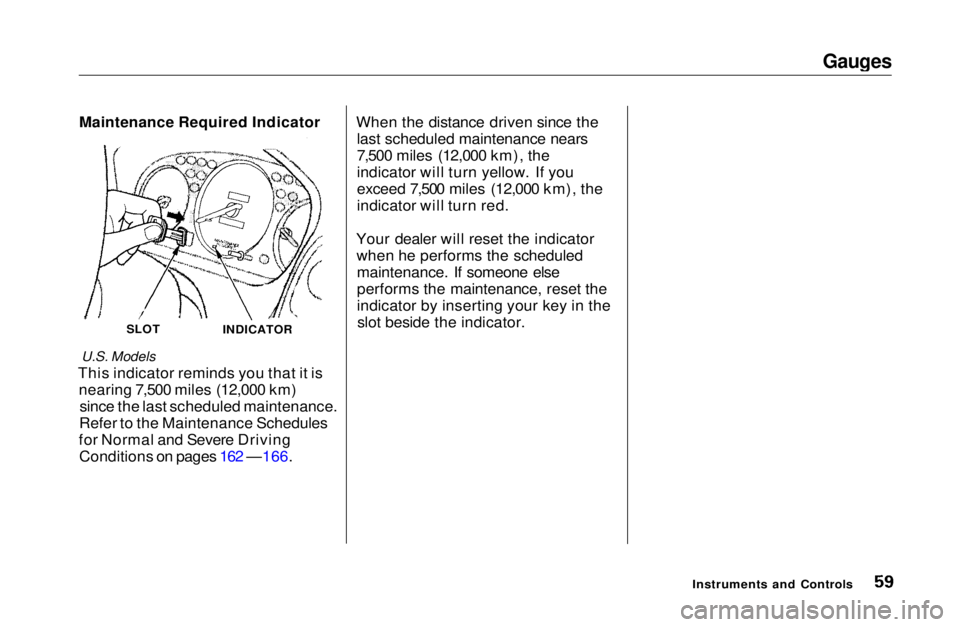
This indicator reminds you that it is nearing 7,500 miles (12,000 km)since the last scheduled maintenance.
Refer to the Maintenance Schedules
for Normal and Severe Driving Conditions on pages 162 —166. When the distance driven since the
last scheduled maintenance nears
7,500 miles (12,000 km), the
indicator will turn yellow. If you
exceed 7,500 miles (12,000 km), the
indicator will turn red.
Your dealer will reset the indicator when he performs the scheduledmaintenance. If someone else
performs the maintenance, reset the
indicator by inserting your key in theslot beside the indicator.
Instruments and Controls
INDICATOR
SLOTMain Menu Table of Contents s t
Page 70 of 269
Keys and Locks
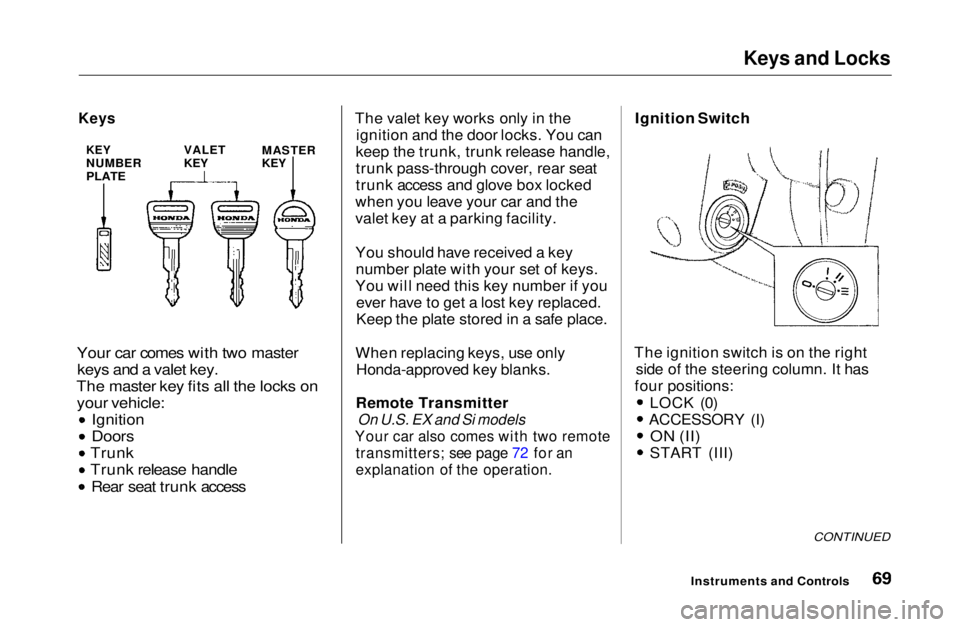
Your car comes with two master keys and a valet key.
The master key fits all the locks on your vehicle: Ignition
Doors
Trunk
Trunk release handle Rear seat trunk access
The valet key works only in the
ignition and the door locks. You can
keep the trunk, trunk release handle,
trunk pass-through cover, rear seat
trunk access and glove box locked
when you leave your car and the
valet key at a parking facility.
You should have received a key number plate with your set of keys.
You will need this key number if you ever have to get a lost key replaced.
Keep the plate stored in a safe place.
When replacing keys, use only Honda-approved key blanks.
Remote Transmitter
On U.S. EX and Si models
Your car also comes with two remote
transmitters; see page 72 for an
explanation of the operation.
Ignition Switch
The ignition switch is on the right side of the steering column. It has
four positions:
LOCK (0)
ACCESSORY (I)
ON (II)
START (III)
CONTINUED
Instruments and Controls
Keys
KEY
NUMBER
PLATE
VALET
KEY
MASTER
KEYMain Menu Table of Contents s t
Page 71 of 269

Keys and Locks
LOCK (0) — You can insert or
remove the key only in this position.
To switch from ACCESSORY to LOCK, you must push the key inslightly as you turn it. If your car has
an automatic transmission, the shift
lever must also be in Park. The anti-
theft lock will lock the steering column when you remove the key.
If the front wheels are turned, theanti-theft lock may sometimes make
it difficult to turn the key fromLOCK to ACCESSORY. Firmly turn
the steering wheel to the left or to
the right as you turn the key. ACCESSORY (I) — In this position,
you can operate the audio systemand the accessory power socket.
ON (II) — This is the normal key
position when driving. All features
and accessories on the car are usable.
Several of the lights on the instru-
ment panel come on as a test when
you turn the ignition switch from
ACCESSORY to ON.
START (III) — Use this position
only to start the engine. The switch
returns to ON (II) when you let go of
the key.
You will hear a reminder beeper if you leave the key in the ignition switch in the LOCK (0) or
ACCESSORY (I) position and open the driver's door. Remove the key toturn off the beeper.
Door Locks
Each door has a lock tab next to the
inside door handle. Push the tab in to
lock the door and pull it out to unlock.
To lock any passenger's door when getting out of the car, push the lock
tab in and close the door. To lock thedriver's door, pull the outside door
handle and push the lock tab in or
push the master switch down. Release the handle, then close the
door.
Instruments and Controls
Removing the key from the
ignition switch while driving
locks the steering. This can
cause you to lose control.
Remove the key from the
ignition switch only when
parked.Main Menu Table of Contents s t
Page 72 of 269
Keys and Locks
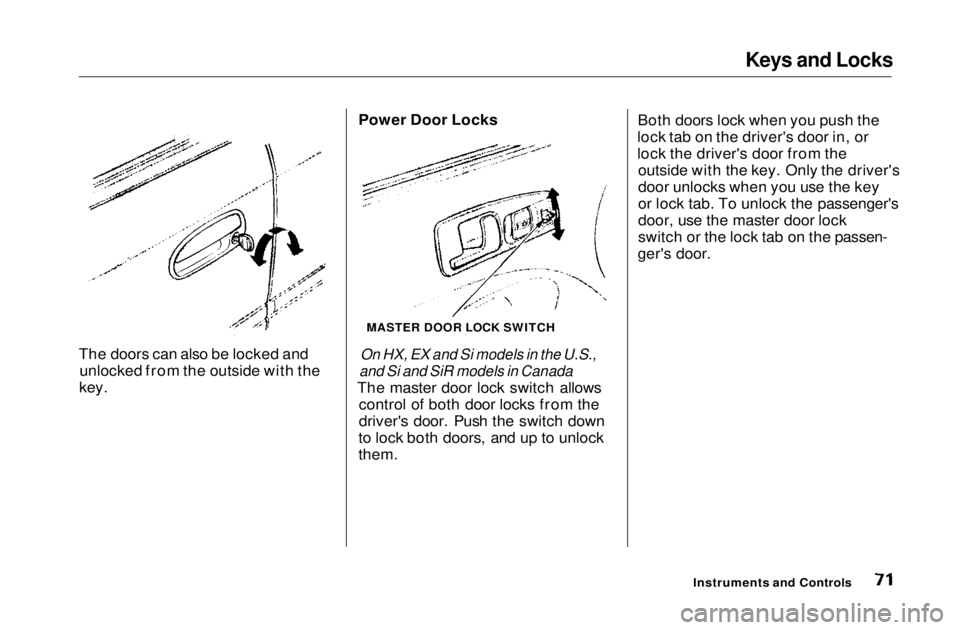
The doors can also be locked and unlocked from the outside with the
key. Power Door Locks
On HX, EX and Si models in the U.S.,
and Si and SiR models in Canada
The master door lock switch allows control of both door locks from the
driver's door. Push the switch down
to lock both doors, and up to unlock
them. Both doors lock when you push the
lock tab on the driver's door in, or
lock the driver's door from the outside with the key. Only the driver's
door unlocks when you use the key
or lock tab. To unlock the passenger's
door, use the master door lock
switch or the lock tab on the passen-
ger's door.
Instruments and Controls
MASTER DOOR LOCK SWITCHMain Menu Table of Contents s t
Page 73 of 269
Keys and Locks
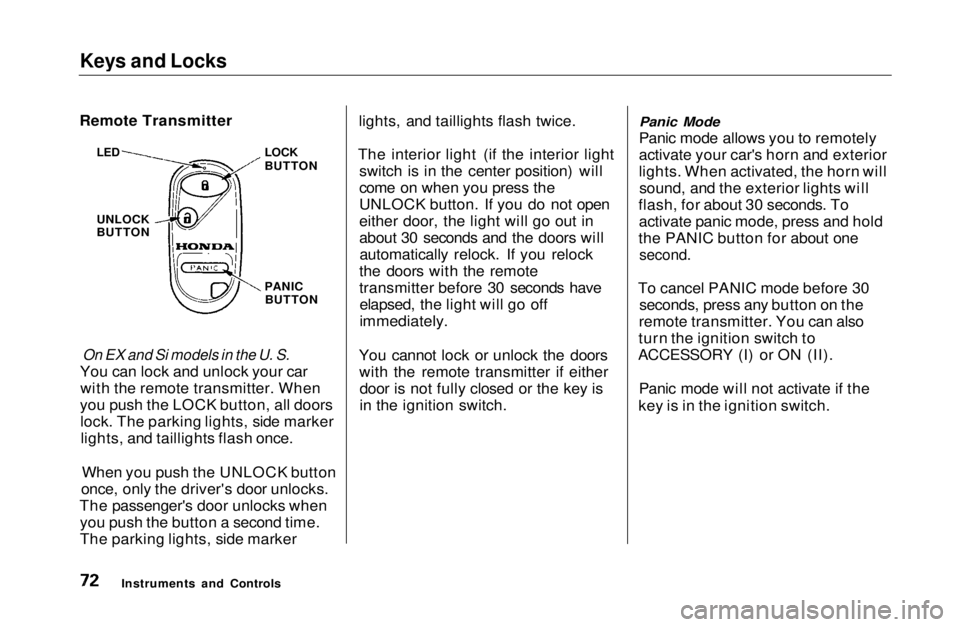
On EX and Si models in the U. S.
You can lock and unlock your car with the remote transmitter. When
you push the LOCK button, all doors lock. The parking lights, side markerlights, and taillights flash once.
When you push the UNLOCK button
once, only the driver's door unlocks.
The passenger's door unlocks when you push the button a second time.
The parking lights, side marker lights, and taillights flash twice.
The interior light (if the interior light switch is in the center position) will
come on when you press the
UNLOCK button. If you do not open
either door, the light will go out in
about 30 seconds and the doors willautomatically relock. If you relock
the doors with the remote
transmitter before 30 seconds have elapsed, the light will go off
immediately.
You cannot lock or unlock the doors with the remote transmitter if eitherdoor is not fully closed or the key is
in the ignition switch.
Panic Mode
Panic mode allows you to remotely
activate your car's horn and exterior
lights. When activated, the horn will sound, and the exterior lights will
flash, for about 30 seconds. To activate panic mode, press and hold
the PANIC button for about one
second.
To cancel PANIC mode before 30 seconds, press any button on the
remote transmitter. You can also
turn the ignition switch to
ACCESSORY (I) or ON (II).
Panic mode will not activate if the
key is in the ignition switch.
Instruments and Controls
Remote Transmitter
LOCK
BUTTON
LED
UNLOCK
BUTTON
PANICBUTTONMain Menu Table of Contents s t
Page 74 of 269

Keys and Locks
Replacing the Battery
When the remote transmitter's battery begins to get weak, it may
take several pushes on the button to
lock or unlock the doors, and the LED will get dim. Replace the
battery as soon as possible.
Battery type: CR2025 To replace the battery, remove the
round cover on the back of the trans-
mitter by turning it counterclockwise
with a coin.
Remove the old battery and note the
polarity. Make sure the polarity of
the new battery is the same (+ side
facing up), then insert it in the transmitter. Reinstall the 0-ring. Align the
mark on the cover with the
mark on the transmitter,
then set the cover in place and turn it
clockwise.
After the battery is changed, the transmitter must be synchronized
with the main unit. With the doorsand trunk lid closed, press either the
LOCK or UNLOCK button six times.
Test the transmitter by locking and unlocking the doors several times.
CONTINUED
Instruments and Controls
Open
Close
ROUND
COVER
CUSHION
RING
BATTERYMain Menu Table of Contents s t