Page 19 of 269

Protecting Adults
6.Adjust the Steering Wheel
Adjust the steering wheel, if needed, so that the wheel points toward your
chest, not toward your face.
Pointing the steering wheel toward
your face decreases the protective capability of the driver's airbag.
See page 65 for how to adjust the
steering wheel.
7.Maintain a Proper Sitting
Position
After all occupants have adjusted their seats and put on seat belts, it is
very important that they continue to sit upright, well back in their seats,
with their feet on the floor, until the car is parked and the engine is off.
Sitting improperly can increase the
chance of injury during a crash. For
example, if an occupant slouches,
lies down, turns sideways, sits
forward, leans forward or sideways, or puts one or both feet up, the
chance of injury during a crash is
greatly increased.
In addition, an occupant who is out of
position in the front seat can be seriously or fatally injured by
striking interior parts of the car, or
by being struck by an inflating airbag. Remember, to get the best
protection from your car's airbags and other safety features, you must
sit properly and wear your seat belt
properly.
Driver and Passenger Safety Sitting improperly or out of
position can result in serious
injury or death in a crash.
Always sit upright, well back in
the seat, with your feet on the
floor.Main Menu Table of Contents s t
Page 20 of 269

Protecting Adults
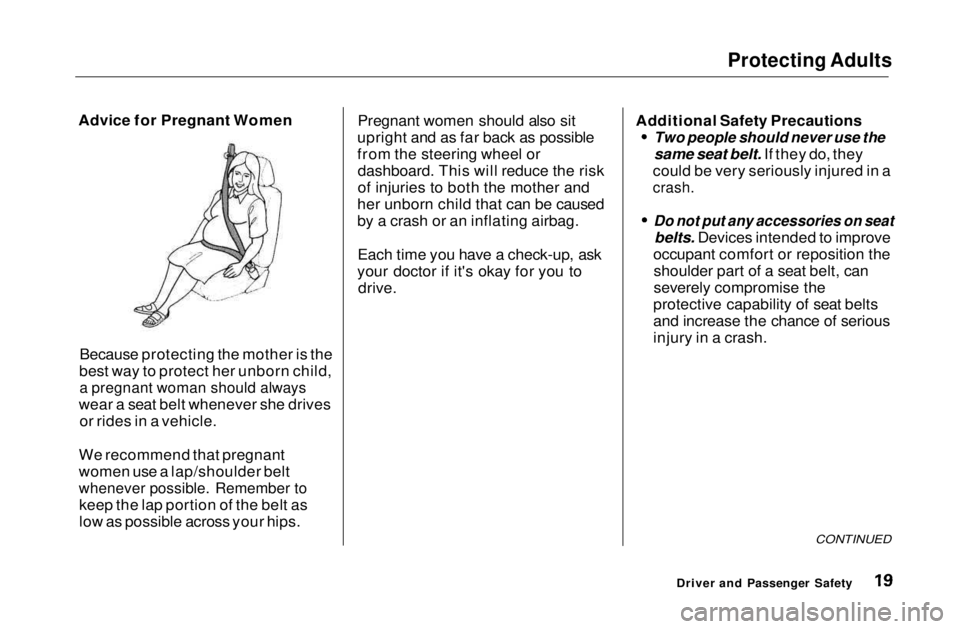
Advice for Pregnant Women
Because protecting the mother is the
best way to protect her unborn child,
a pregnant woman should always
wear a seat belt whenever she drives or rides in a vehicle.
We recommend that pregnant
women use a lap/shoulder belt
whenever possible. Remember to
keep the lap portion of the belt as
low as possible across your hips. Pregnant women should also sit
upright and as far back as possible
from the steering wheel or dashboard. This will reduce the risk
of injuries to both the mother and
her unborn child that can be caused
by a crash or an inflating airbag.
Each time you have a check-up, ask
your doctor if it's okay for you to drive. Additional Safety Precautions
Two people should never use the
same seat belt. If they do, they
could be very seriously injured in a
crash.
Do not put any accessories on seat
belts. Devices intended to improve
occupant comfort or reposition the shoulder part of a seat belt, can
severely compromise the
protective capability of seat belts
and increase the chance of serious
injury in a crash.
CONTINUED
Driver and Passenger SafetyMain Menu Table of Contents s t
Page 46 of 269

Additional Information About Your SRS
SRS Components
Your Supplemental Restraint System (SRS) includes: Two front airbags. The driver's
airbag is stored in the center of
the steering wheel; the front
passenger's airbag is stored in the dashboard. Both are marked "SRS
AIRBAG." Sensors that can detect a
moderate to severe frontal
collision. A sophisticated electronic system
that continually monitors thesensors, control unit, the airbag
activators, and all related wiring
when the ignition is ON (II). An indicator light on the
instrument panel that alerts you to
a possible problem with thesystem (see page 47). Emergency backup power in case
your car's electrical system is disconnected in a crash. How Your Airbags Work
If you ever have a moderate tosevere frontal collision, the sensors
will detect rapid deceleration and signal the control unit to instantly
inflate the airbags.
During a crash, your seat belt helps
restrain your lower body and torso.
Your airbag provides a cushion to help restrain and protect your headand chest.
Driver and Passenger Safety
CONTINUEDMain Menu Table of Contents s t
Page 52 of 269

Instruments and Controls
This section gives information about
the controls and displays thatcontribute to the daily operation of
your Honda. All the essential
controls are within easy reach.
Control Locations............................ 52
Indicator Lights................................ 53
Gauges.............................................. 57
Speedometer................................ 57
Tachometer.................................. 57
Odometer...................................... 57
Trip Meter.................................... 57
Fuel Gauge................................... 58
Temperature Gauge.................... 58
Maintenance Required
Indicator.................................... 59
Controls Near the Steering Wheel........................................ 60
Headlights.................................... 61
Daytime Running Lights............. 61
Instrument Panel Brightness..... 62
Turn Signals................................. 62
Windshield Wipers...................... 63
Windshield Washers................... 63
Hazard Warning........................... 64
Rear Window Defogger.............. 64
Steering Wheel Adjustment....... 65
Steering Wheel Controls ................ 66 Cruise Control.............................. 66
Keys and Locks................................ 69
Keys.............................................. 69
Ignition Switch............................. 69
Door Locks................................... 70
Power Door Locks....................... 71
Remote Transmitter.................... 72
Trunk............................................ 75
Seat Adjustments............................. 76
Front Seat Adjustments.............. 76
Rear Seat Access......................... 77
Head Restraints........................... 77
Folding Rear Seat............................ 78
Power Windows............................... 79
Moonroof.......................................... 81
Mirrors.............................................. 81
Adjusting the Power Mirrors..... 82
Parking Brake.................................. 83 Glove Box......................................... 83
Beverage Holder.............................. 84
Accessory Power Socket................ 85
Ashtrays............................................ 85
Interior Light.................................... 86
Instruments and ControlsMain Menu s t
Page 61 of 269
Controls Near the Steering Wheel
The two levers on the steering column contain controls for driving
features you use most often. The left lever controls the turn signals,
headlights, and high beams. The
right lever controls the windshield
washers and wipers.
The rear window defogger switch is on the dashboard to the right of the
center air vents.
The controls under the left air vent are for the moonroof, mirrors, cruise
control and instrument panel
brightness.
The tilt adjustment lever on the underside of the steering column
allows you to tilt the steering wheel.
Instruments and Controls
CRUISE
CONTROL
INSTRUMENT PANEL
BRIGHTNESS HAZARD WARNING
LIGHTS
REAR WINDOW
DEFOGGER
MOONROOF
MIRROR
CONTROLS HEADLIGHTS/
TURN SIGNALS
TILT ADJUSTMENT
HORNWINDSHIELD
WIPERS/
WASHERSMain Menu Table of Contents s t
Page 62 of 269

Controls Near the Steering Wheel
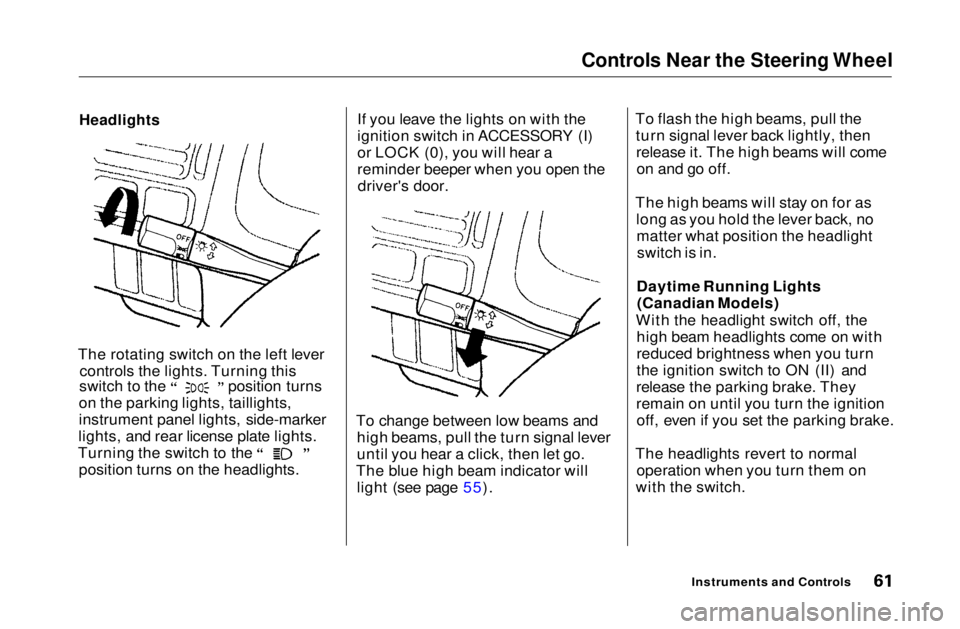
Headlights
The rotating switch on the left lever controls the lights. Turning this switch to the position turns
on the parking lights, taillights,
instrument panel lights, side-marker
lights, and rear license plate lights. Turning the switch to the
position turns on the headlights. If you leave the lights on with the
ignition switch in ACCESSORY (I)
or LOCK (0), you will hear a
reminder beeper when you open the
driver's door.
To change between low beams and high beams, pull the turn signal lever
until you hear a click, then let go.
The blue high beam indicator will light (see page 55). To flash the high beams, pull the
turn signal lever back lightly, thenrelease it. The high beams will comeon and go off.
The high beams will stay on for as long as you hold the lever back, nomatter what position the headlightswitch is in.
Daytime Running Lights (Canadian Models)
With the headlight switch off, the high beam headlights come on with
reduced brightness when you turn
the ignition switch to ON (II) and
release the parking brake. They
remain on until you turn the ignition off, even if you set the parking brake.
The headlights revert to normal operation when you turn them on
with the switch.
Instruments and ControlsMain Menu Table of Contents s t
Page 63 of 269
Controls Near the Steering Wheel
Instrument Panel Brightness
The dial on the dashboard to the left of the instrument panel controls the
brightness of the instrument panel lights. Turn the dial to adjust the
brightness. Turn Signals
Signal a turn or lane change with this
lever. Push down on the lever tosignal a left turn, and up to signal a
right turn. If you push it up or downall the way, the turn signal continues
to blink even when you release the
lever. It shuts off automatically as
you complete the turn. To signal a lane change, push lightly
on the turn signal lever in the proper
direction and hold it. The lever will
return to the center position as soon
as you release it.
Instruments and Controls
TURN SIGNAL LEVERMain Menu Table of Contents s t
Page 64 of 269
Controls Near the Steering Wheel
Windshield Wipers
The right lever controls the wind-
shield wipers and washers. The
rotary switch at the end of the lever
has three positions:
INT: intermittent
: low speed : high speed
In intermittent, the wipers operate
every few seconds. In low speed and
high speed, the wipers run continu- ously. To operate the wipers in mist mode,
push the control lever down. The
wipers run at high speed until you release the lever. This gives you a quick way to clear the windshield. Windshield Washers
To clean the windshield, pull back onthe wiper control lever. The washers
spray until you release the lever.
On Canadian models
The wipers run at low speed while you're pulling the lever, then complete one more sweep of the
windshield after you release it.
Instruments and ControlsMain Menu Table of Contents s t