Page 178 of 224

Replacing headlamp bulbs
Handle a halogen headlamp bulb carefully
and keep out of children's reach. Grasp the
bulb only by its plastic base and do not touch the
glass. The oil from your hand could cause the bulb
to break the next time the headlamps are
operated.
If the bulb is accidentally touched, it should be
cleaned with rubbing alcohol before being used.
To remove the headlamp bulb:
1. Make sure headlamp switch is in OFF position,
then open the hood. If you are replacing the driver
side headlamp, unclip the electronic module on the
right side of the battery and move it out of the way.
2. Locate the headlamp bulb through the hole in the
upper radiator support assembly.
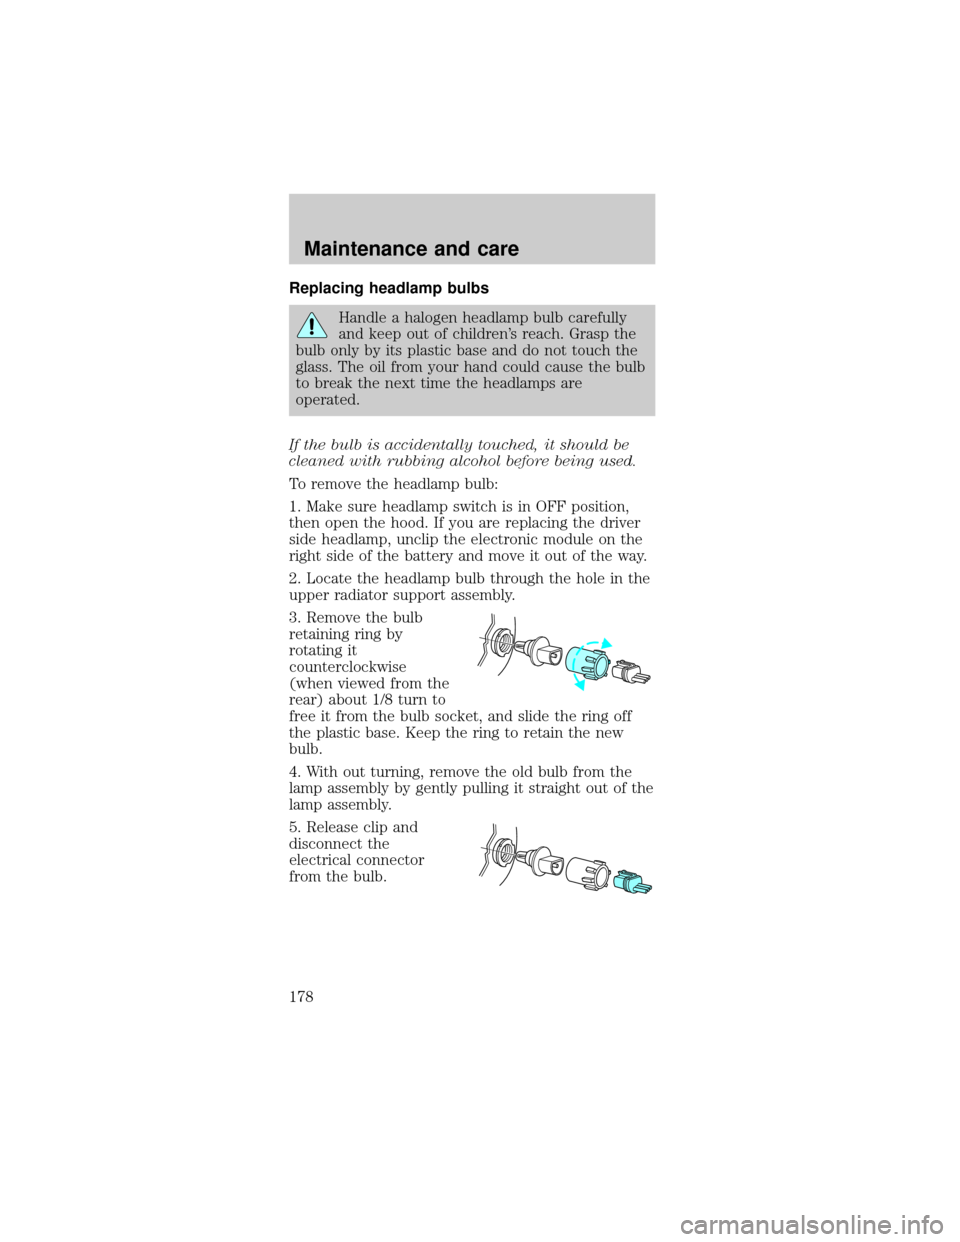
3. Remove the bulb
retaining ring by
rotating it
counterclockwise
(when viewed from the
rear) about 1/8 turn to
free it from the bulb socket, and slide the ring off
the plastic base. Keep the ring to retain the new
bulb.
4. With out turning, remove the old bulb from the
lamp assembly by gently pulling it straight out of the
lamp assembly.
5. Release clip and
disconnect the
electrical connector
from the bulb.
Maintenance and care
178
Page 179 of 224

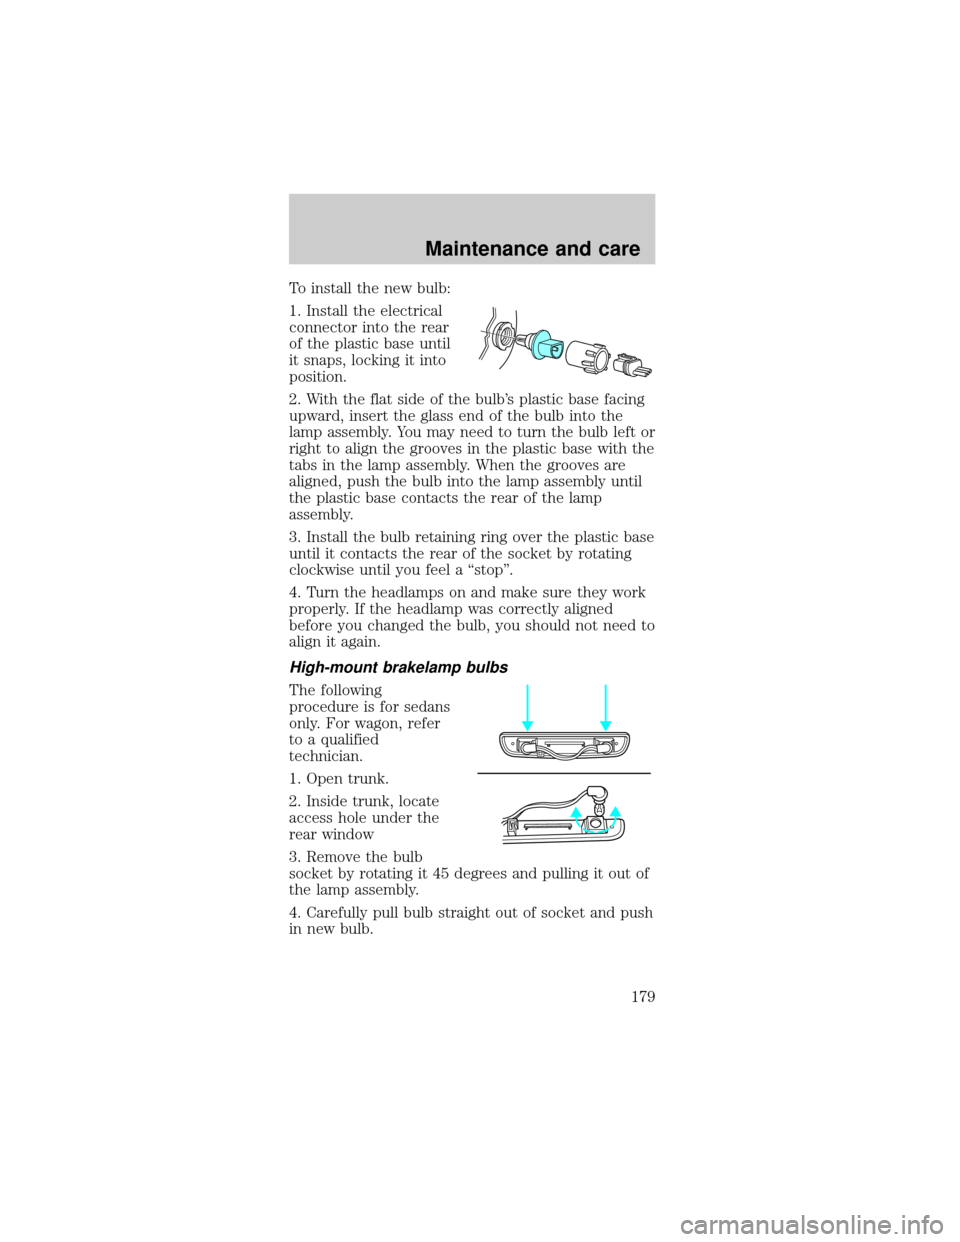
To install the new bulb:
1. Install the electrical
connector into the rear
of the plastic base until
it snaps, locking it into
position.
2. With the flat side of the bulb's plastic base facing
upward, insert the glass end of the bulb into the
lamp assembly. You may need to turn the bulb left or
right to align the grooves in the plastic base with the
tabs in the lamp assembly. When the grooves are
aligned, push the bulb into the lamp assembly until
the plastic base contacts the rear of the lamp
assembly.
3. Install the bulb retaining ring over the plastic base
until it contacts the rear of the socket by rotating
clockwise until you feel a ªstopº.
4. Turn the headlamps on and make sure they work
properly. If the headlamp was correctly aligned
before you changed the bulb, you should not need to
align it again.
High-mount brakelamp bulbs
The following
procedure is for sedans
only. For wagon, refer
to a qualified
technician.
1. Open trunk.
2. Inside trunk, locate
access hole under the
rear window
3. Remove the bulb
socket by rotating it 45 degrees and pulling it out of
the lamp assembly.
4. Carefully pull bulb straight out of socket and push
in new bulb.
Maintenance and care
179
Page 180 of 224
5. To complete installation, follow the removal
procedure in reverse order.
License plate lamp bulbs
To change the license plate bulbs:
Sedan
1. Remove two screws
and the license plate
lamp assembly from
the rear bumper.
2. Remove bulb socket
by turning
counterclockwise.
3. Carefully pull the
bulb out from the
socket and push in the
new bulb.
4. Install the lamp assembly on rear bumper with
two screws.
Wagon
1. Remove screw and
the license plate lamp
assembly from liftgate.
2. Remove bulb socket
by turning
counterclockwise.
3. Carefully pull the
bulb out from the
socket and push in the
new bulb.
4. Install the lamp
assembly on liftgate with screw.
Replacing front parking lamp/turn signal bulbs
For bulb replacement, see a dealer or qualified
technician.
Maintenance and care
180
Page 183 of 224

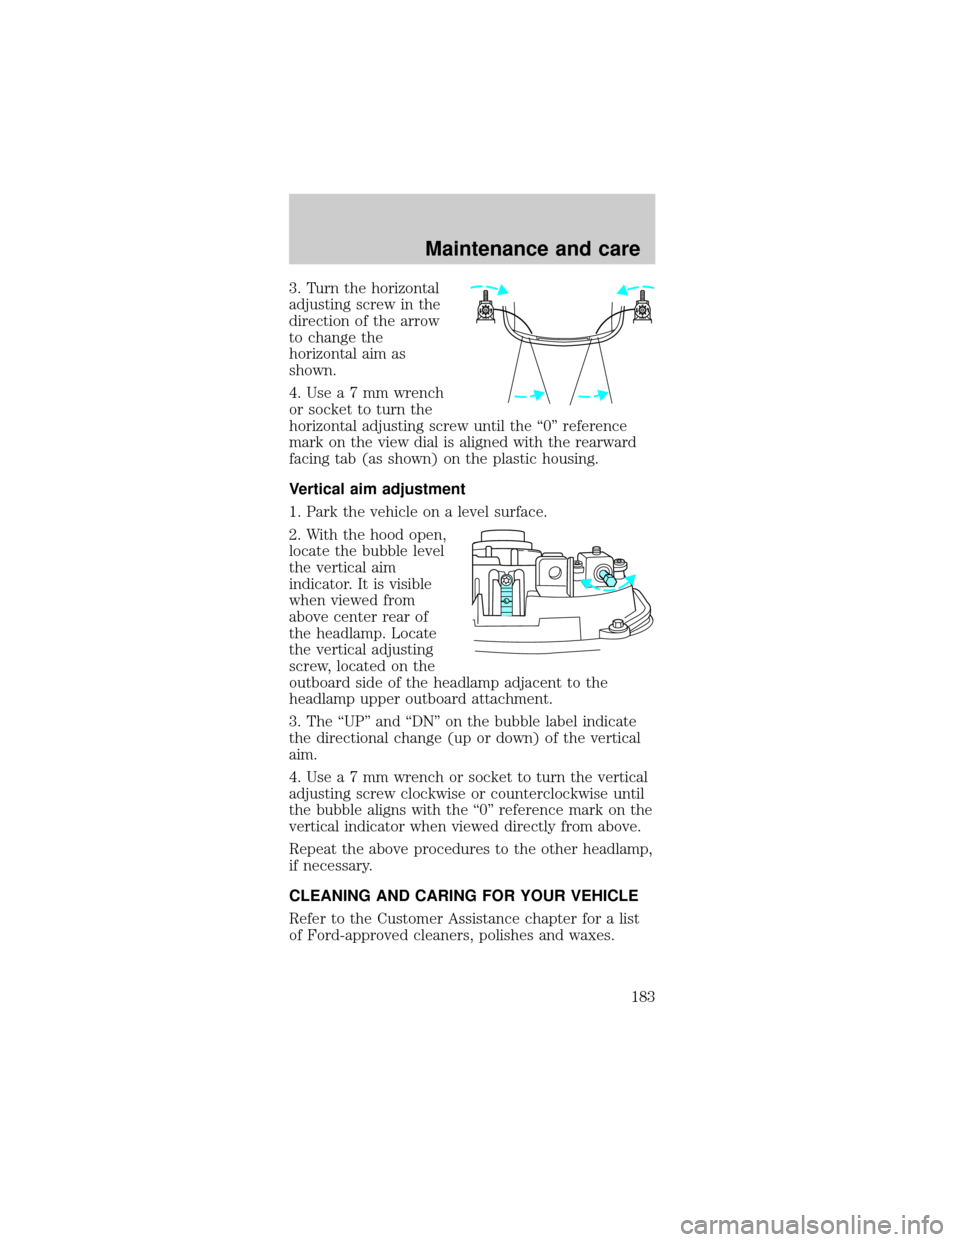
3. Turn the horizontal
adjusting screw in the
direction of the arrow
to change the
horizontal aim as
shown.
4.Usea7mmwrench
or socket to turn the
horizontal adjusting screw until the ª0º reference
mark on the view dial is aligned with the rearward
facing tab (as shown) on the plastic housing.
Vertical aim adjustment
1. Park the vehicle on a level surface.
2. With the hood open,
locate the bubble level
the vertical aim
indicator. It is visible
when viewed from
above center rear of
the headlamp. Locate
the vertical adjusting
screw, located on the
outboard side of the headlamp adjacent to the
headlamp upper outboard attachment.
3. The ªUPº and ªDNº on the bubble label indicate
the directional change (up or down) of the vertical
aim.
4.Usea7mmwrench or socket to turn the vertical
adjusting screw clockwise or counterclockwise until
the bubble aligns with the ª0º reference mark on the
vertical indicator when viewed directly from above.
Repeat the above procedures to the other headlamp,
if necessary.
CLEANING AND CARING FOR YOUR VEHICLE
Refer to the Customer Assistance chapter for a list
of Ford-approved cleaners, polishes and waxes.
Maintenance and care
183
Page 217 of 224

exterior .................. 185
exterior lamps ....... 187
instrument panel .. 188
interior ................... 188
plastic parts .......... 187
safety belts ............ 189
washing .................. 184
waxing ................... 184
wheels .................... 185
wiper blades .......... 187
Clock ..................... 33,41
Console ...................... 56
Controls
power seat ............... 75
Coolant ...... 150,152,153
checking
and adding ............ 151
refill
capacities ........ 153,191
specifications.. 193,194
Customer
Assistance ................ 200
Ford accessories for
your vehicle .......... 209
Ford Extended
Service Plan .......... 201
Getting assistance
outside the U.S.
and Canada ........... 208
Getting roadside
assistance .............. 200
Getting the service
you need ............... 202
Ordering additional
owner's literature... 214
The Dispute
Settlement Board... 204
Defrost
rear window ............ 18
Dipstick
engine oil ............... 145Doors
central unlocking .... 54
door ajar warning ..... 7
Driving under special
conditions
through water ....... 118
Emergencies, roadside
jump-starting ........ 135
Emission
control system ......... 175
Engine ............... 194,195
check engine/service
engine soon light ...... 7
coolant ................... 150
idle speed control.. 157
lubrication
specifications.. 193,194
refill capacities ...... 191
service
points ....... 143,144,145
starting after a
collision ................. 124
Engine
block heater ............ 105
Engine oil ................ 145
checking and
adding ............. 145,147
dipstick .................. 145
filter,
specifications.. 147,190
recommendations... 147
refill
capacities ........ 145,191
specifications ........ 145
147,193,194
Exhaust fumes ........ 105
Floor mats ................. 56
Fluid capacities ....... 191
Fuel .......................... 165
calculating fuel
economy ................ 171
cap ......................... 167
Index
217