Page 60 of 224

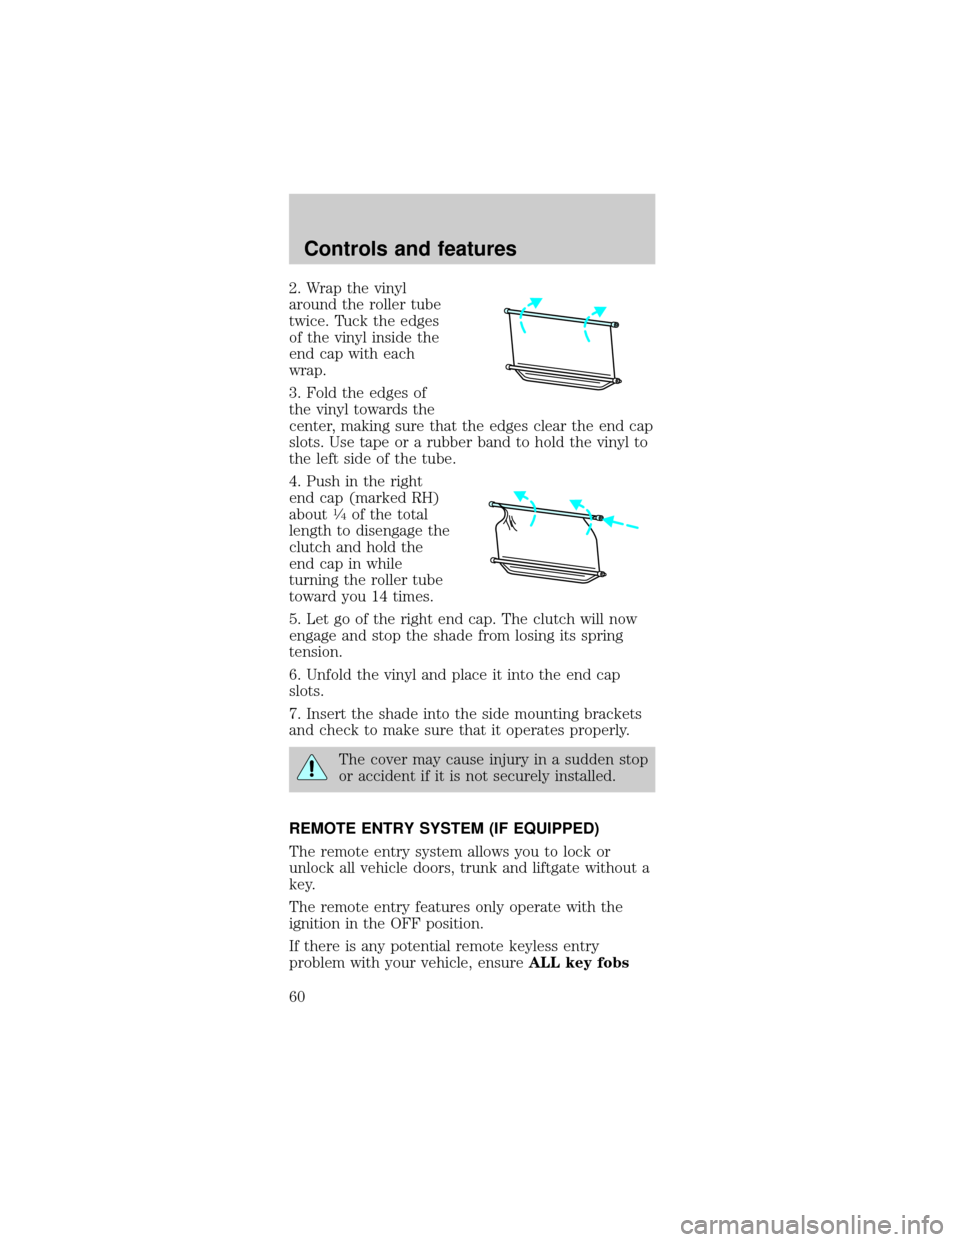
2. Wrap the vinyl
around the roller tube
twice. Tuck the edges
of the vinyl inside the
end cap with each
wrap.
3. Fold the edges of
the vinyl towards the
center, making sure that the edges clear the end cap
slots. Use tape or a rubber band to hold the vinyl to
the left side of the tube.
4. Push in the right
end cap (marked RH)
about
1¤4of the total
length to disengage the
clutch and hold the
end cap in while
turning the roller tube
toward you 14 times.
5. Let go of the right end cap. The clutch will now
engage and stop the shade from losing its spring
tension.
6. Unfold the vinyl and place it into the end cap
slots.
7. Insert the shade into the side mounting brackets
and check to make sure that it operates properly.
The cover may cause injury in a sudden stop
or accident if it is not securely installed.
REMOTE ENTRY SYSTEM (IF EQUIPPED)
The remote entry system allows you to lock or
unlock all vehicle doors, trunk and liftgate without a
key.
The remote entry features only operate with the
ignition in the OFF position.
If there is any potential remote keyless entry
problem with your vehicle, ensureALL key fobs
Controls and features
60
Page 65 of 224
²Press the remote
entry lock control
(doors opened or
closed).
²Press 7/8 and 9/0
controls on the
keyless entry pad at
the same time to
lock the doors
(doors opened or
closed).
²Open a door and press the power door lock
control to lock the doors.
²Use the door key to lock the doors (doors opened
or closed).
If a door or the liftgate (wagon) is open, the system
is prearmed and is waiting for the door to close or
liftgate to close.
Once the doors and liftgate (wagon) are closed, the
system will arm in 20 seconds.
When you press the
lock control twice
within 5 seconds on
your remote entry
transmitter, the horn
will chirp once to let
you know that the
system is armed.
If the doors or liftgate (wagon) are not closed and
you press the remote entry transmitter twice to
confirm the doors are locked, the horn will chirp
twice to warn you that the system is not arming.
123
45678
90
Controls and features
65
Page 66 of 224
Disarming the system
You can disarm the system by any of the following
actions:
²Unlock the doors by
using your remote
entry transmitter.
²Unlock the doors by
using your keyless
entry pad.
²Unlock the doors or liftgate with a key. Turn the
key full travel (toward the front of the vehicle) to
make sure the alarm disarms.
²Turn ignition to ACC or ON.
²Press control on the
remote entry
transmitter. This will
disarm the system
when the alarm is
sounding.
KEYLESS ENTRY SYSTEM
With the keyless entry
keypad, you can:
²lock or unlock the
vehicle doors and liftgate (wagons) without using
the key.
²arm and disarm the perimeter alarm system (if
equipped)
See alsoRemote entry systemandPerimeter
alarm systemin this chapter for more information.
123
45678
90
123
45678
90
Controls and features
66
Page 67 of 224

Your vehicle has a factory-set 5±digit code that
operates the keyless entry system. You can also
program your own 5±digit personal entry code.
The factory-set code is located:
²on the owner's wallet card in the glove
compartment
²taped to the computer module
When pressing the controls on the keyless entry
keypad, press the middle of the controls to ensure a
good activation.
Programming your own personal entry code
1. Enter the factory-set code (keypad will illuminate
when pressed).
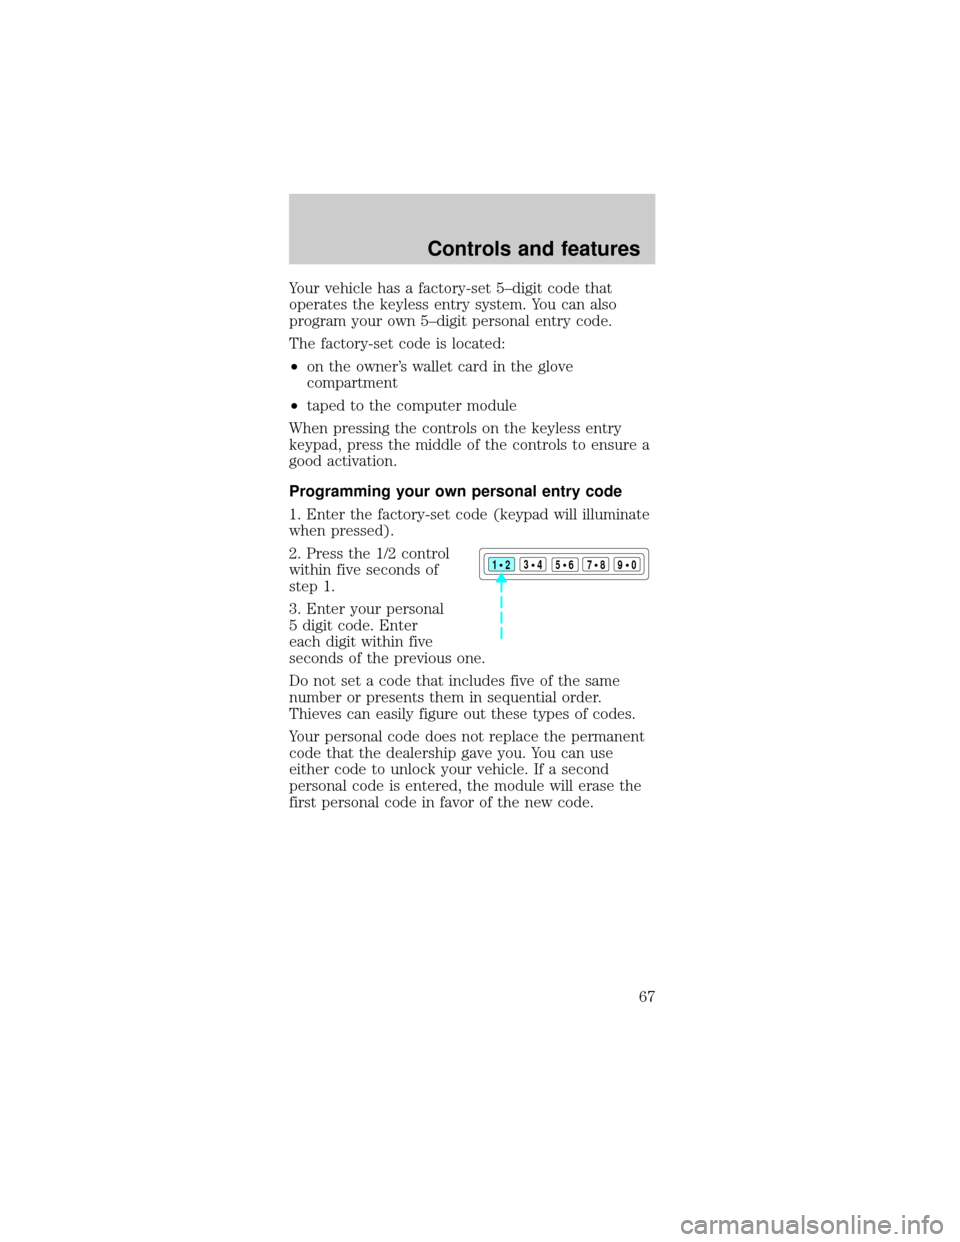
2. Press the 1/2 control
within five seconds of
step 1.
3. Enter your personal
5 digit code. Enter
each digit within five
seconds of the previous one.
Do not set a code that includes five of the same
number or presents them in sequential order.
Thieves can easily figure out these types of codes.
Your personal code does not replace the permanent
code that the dealership gave you. You can use
either code to unlock your vehicle. If a second
personal code is entered, the module will erase the
first personal code in favor of the new code.
123
45678
90
Controls and features
67
Page 68 of 224

If you wish to erase your personal code, use the
following instructions:
Erasing personal code
1. Enter the factory-set code.
2. Press 1/2 within five
seconds of step 1.
3. Press the 7/8 and 9/0
controls at the same
time within five
seconds of step two.
The system will now only respond to the factory-set
code.
Unlocking the doors and releasing the trunk
with the keyless entry system
The driver's door must be unlocked before any
other. If more than five seconds pass between
pressing numbers, enter the code again. The system
has shut down if the keypad light is out. If the
keyless entry system does not work, use the key or
remote entry transmitter(s).
1. To unlock the driver's door, enter one of the two
codes. After pressing the fifth number, the driver's
door unlocks.
2. To unlock the
passenger's door(s) and
liftgate (wagon), press
the 3/4 control within
five seconds of
unlocking the driver's
door.
3. To unlock the trunk
or liftgate (wagon),
enter the five-digit
factory-set code, then
press the 5/6 control
within five seconds.
123
45678
90
123
45678
90
123
45678
90
Controls and features
68
Page 210 of 224

complement the style and aerodynamic appearance
of your vehicle. In addition, each accessory is made
from high quality materials and meets or exceeds
Ford's rigid engineering and safety specifications.
Ford accessories are warranted for up to 12 months
or 20,000 km (12,000 miles) on all cars and light
trucks and 12 months with unlimited distance on
medium/heavy duty trucks unless the accessory is
installed on a new vehicle, then the warranty
becomes the balance of the new vehicle's warranty
or the accessories warranty, whichever is greater.
See your dealer for complete warranty information
and availability.
Not all accessories are available for all models.
Vehicle Security
Remote keyless entry
Styled wheel protector locks
Vehicle security systems
Comfort and convenience
Air conditioner
Air filtration systems
Cargo nets
Cargo organizers
Cargo shades
Cargo trays
Dash trim
Engine block heaters
Gear shift knob
Luggage presenter (Continental only)
Manual sliding rear window
Tire step
Customer assistance
210
Page 219 of 224

Jump-starting
your vehicle ............. 135
Keyless entry
system ........................ 66
autolock ................... 69
keypad ..................... 66
locking and
unlocking doors ...... 68
programming
entry code ............... 67
Keys
key in ignition
chime ....................... 11
positions of the
ignition .................... 45
Lamps
autolamp system ..... 17
cargo lamps ............. 17
daytime running
light .......................... 16
headlamps ........ 16,178
headlamps,
flash to pass ............ 17
instrument panel,
dimming ................... 17
interior lamps .. 51,181
replacing bulbs ..... 177
178,179,180,181
Lane change indicator
(see Turn signal) ...... 49
Liftgate ...................... 61
remote release ........ 57
Lights, warning and
indicator ...................... 6
air bag ...................... 11
anti-lock
brakes (ABS) ..... 9,108
anti-theft ................... 9
brake ........................ 10
charging system ...... 10
cruise indicator ....... 10
door ajar .................... 7high beam ................. 6
low coolant ................ 9
low fuel ...................... 8
oil pressure ............. 10
safety belt ................. 7
service engine soon .. 7
speed control .......... 49
turn signal
indicator .................... 6
Load limits ............... 116
GAWR .................... 116
GVWR .................... 116
trailer towing ........ 116
Locks
childproof ................ 55
Lubricant
specifications .... 193,194
Lumbar support,
seats ........................... 76
Mirrors ....................... 52
heated ...................... 55
side view mirrors
(power) ................... 54
Moon roof .................. 52
Motorcraft
parts .................. 170,190
Octane rating .......... 169
Odometer ................... 14
Overdrive ................. 112
Panic alarm feature,
remote entry
system ........................ 62
Parking brake .......... 109
Parts (see
Motorcraft parts) .... 190
Power distribution
box (see Fuses) ...... 129
Power door locks ...... 54
Power steering ........ 110
fluid, checking
and adding ............ 153
Index
219