1999 FORD F150 fuel cap
[x] Cancel search: fuel capPage 7 of 232

Service engine soon
Your vehicle is equipped with a
computer that monitors the engine's
emission control system. This
system is commonly known as the
On Board Diagnostics System (OBD
II). The OBD II system protects the
environment by ensuring that your vehicle continues to meet
government emission standards. The OBD II system also assists the
service technician in properly servicing your vehicle.
TheService Engine Soonindicator light illuminates when the ignition is
first turned to the ON position to check the bulb. If it comes on after the
engine is started, one of the engine's emission control systems may be
malfunctioning. The light may illuminate without a driveability concern
being noted. The vehicle will usually be drivable and will not require
towing.
What you should do if the Service Engine Soon light illuminates
Light turns on solid:
This means that the OBD II system has detected a malfunction.
Temporary malfunctions may cause yourService Engine Soonlight to
illuminate. Examples are:
1. The vehicle has run out of fuel. (The engine may misfire or run
poorly.)
2. Poor fuel quality or water in the fuel.
3. The fuel cap may not have been properly installed and securely
tightened.
These temporary malfunctions can be corrected by filling the fuel tank
with good quality fuel and/or properly installing and securely tightening
the gas cap. After three driving cycles without these or any other
temporary malfunctions present, theService Engine Soonlight should
turn off. (A driving cycle consists of a cold engine startup followed by
mixed city/highway driving.) No additional vehicle service is required.
If theService Engine Soonlight remains on, have your vehicle serviced
at the first available opportunity.
SERVICE
ENGINE
SOON
Instrumentation
7
Page 12 of 232
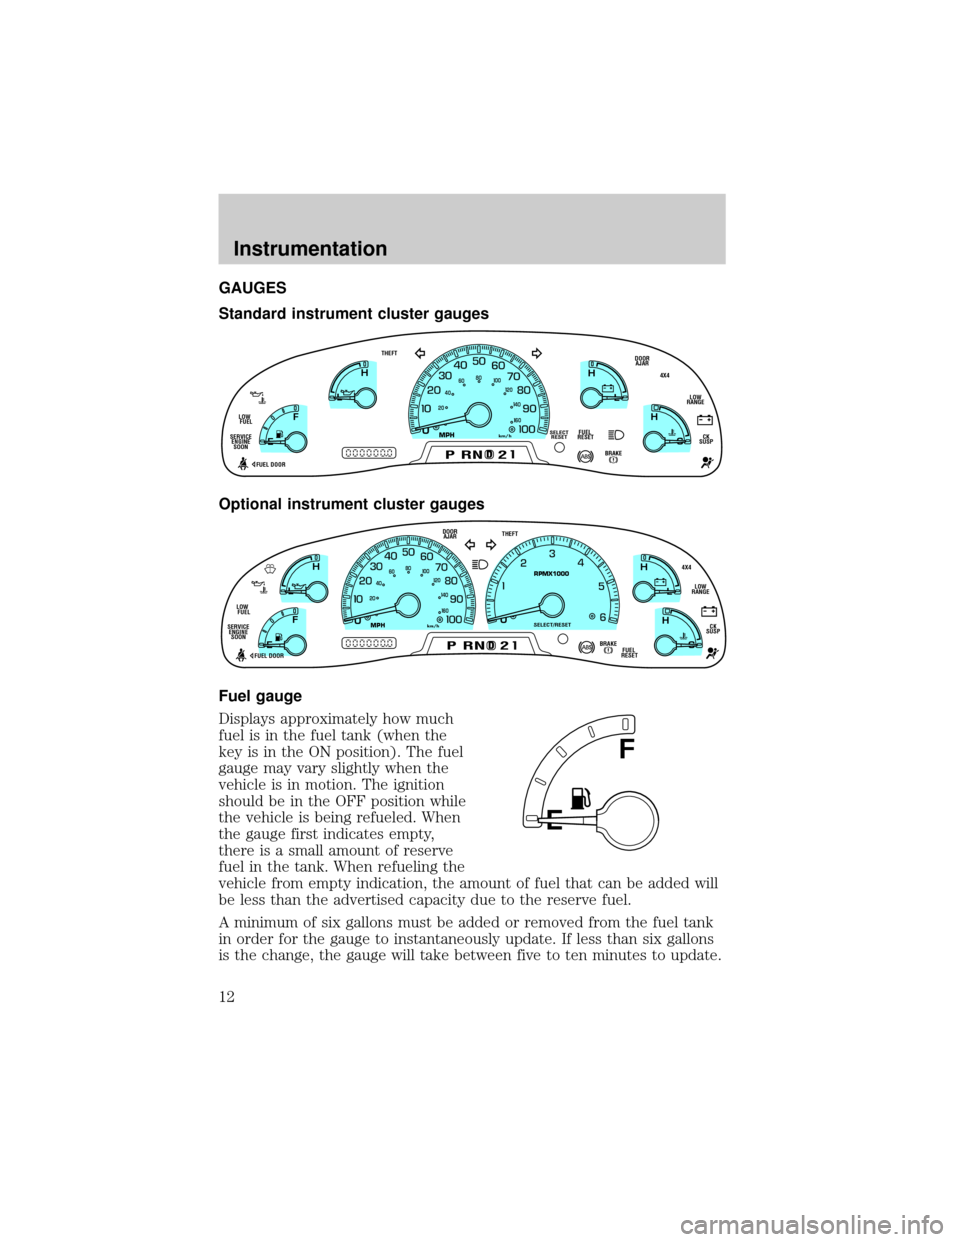
GAUGES
Standard instrument cluster gauges
Optional instrument cluster gauges
Fuel gauge
Displays approximately how much
fuel is in the fuel tank (when the
key is in the ON position). The fuel
gauge may vary slightly when the
vehicle is in motion. The ignition
should be in the OFF position while
the vehicle is being refueled. When
the gauge first indicates empty,
there is a small amount of reserve
fuel in the tank. When refueling the
vehicle from empty indication, the amount of fuel that can be added will
be less than the advertised capacity due to the reserve fuel.
A minimum of six gallons must be added or removed from the fuel tank
in order for the gauge to instantaneously update. If less than six gallons
is the change, the gauge will take between five to ten minutes to update.
0
E
L
L
H H
F
CH
DBRAKE
MPHkm/h
PRND2
FUEL
RESETDOOR
AJARSELECT
RESET
4X4
LOW
RANGE
CK
SUSP THEFT
FUEL DOOR SERVICE
ENGINE
SOONLOW
FUEL
20406080
00
20
40
60
D
L
H
L
H
E
F
C
H
BRAKEPRND2FUEL
RESET DOOR
AJAR
SELECT/RESET
4X4
LOW
RANGE
CK
SUSP THEFT
FUEL DOOR SERVICE
ENGINE
SOONLOW
FUEL
0MPHRPMX1000km/h
20406080
00
20
40
60
E
F
Instrumentation
12
Page 128 of 232
FOUR-WHEEL DRIVE (4WD) OPERATION (IF EQUIPPED)
When Four±wheel drive (4WD) is engaged, power is supplied to all four
wheels through a transfer case. 4WD power can be selected when
additional driving power is desired.
If equipped with the Electronic Shift 4WD System, and the
instrument panel control is moved to 4WD Low while the vehicle
is moving, the system will not engage and no damage will occur to
the 4WD system.
All utility-type vehicles and 4WD vehicles have special design and
equipment features to make them capable of performing in a wide
variety of off-road applications. Specific design characteristics give them
higher centers of gravity than ordinary passenger cars.
Utility and four-wheel drive vehicles arenotdesigned for
cornering at speeds as high as passenger cars any more than
low-slung sports cars are designed to perform satisfactorily under
off-road conditions. Avoid sharp turns or abrupt maneuvers in these
vehicles.
4WD operation is not recommended on dry pavement. Doing so could
result in difficult disengagement of the transfer case, increased tire wear
and decreased fuel economy.
4WD system indicator lights
The 4WD system indicator lights illuminate only under the following
conditions. If these lights illuminate during normal driving, have your
vehicle serviced.
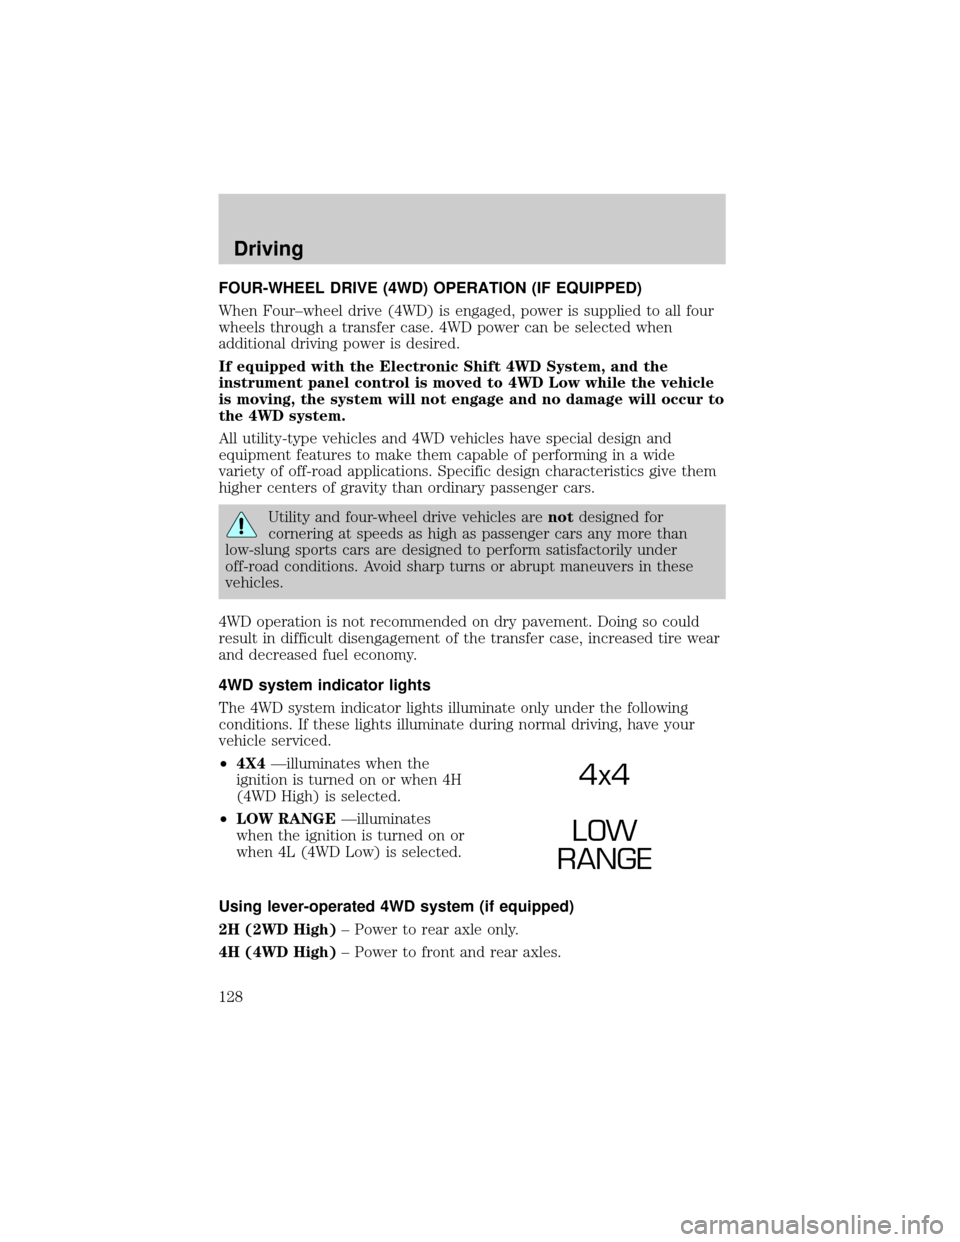
²4X4Ðilluminates when the
ignition is turned on or when 4H
(4WD High) is selected.
²LOW RANGEÐilluminates
when the ignition is turned on or
when 4L (4WD Low) is selected.
Using lever-operated 4WD system (if equipped)
2H (2WD High)± Power to rear axle only.
4H (4WD High)± Power to front and rear axles.
4x4
LOW
RANGE
Driving
128
Page 176 of 232
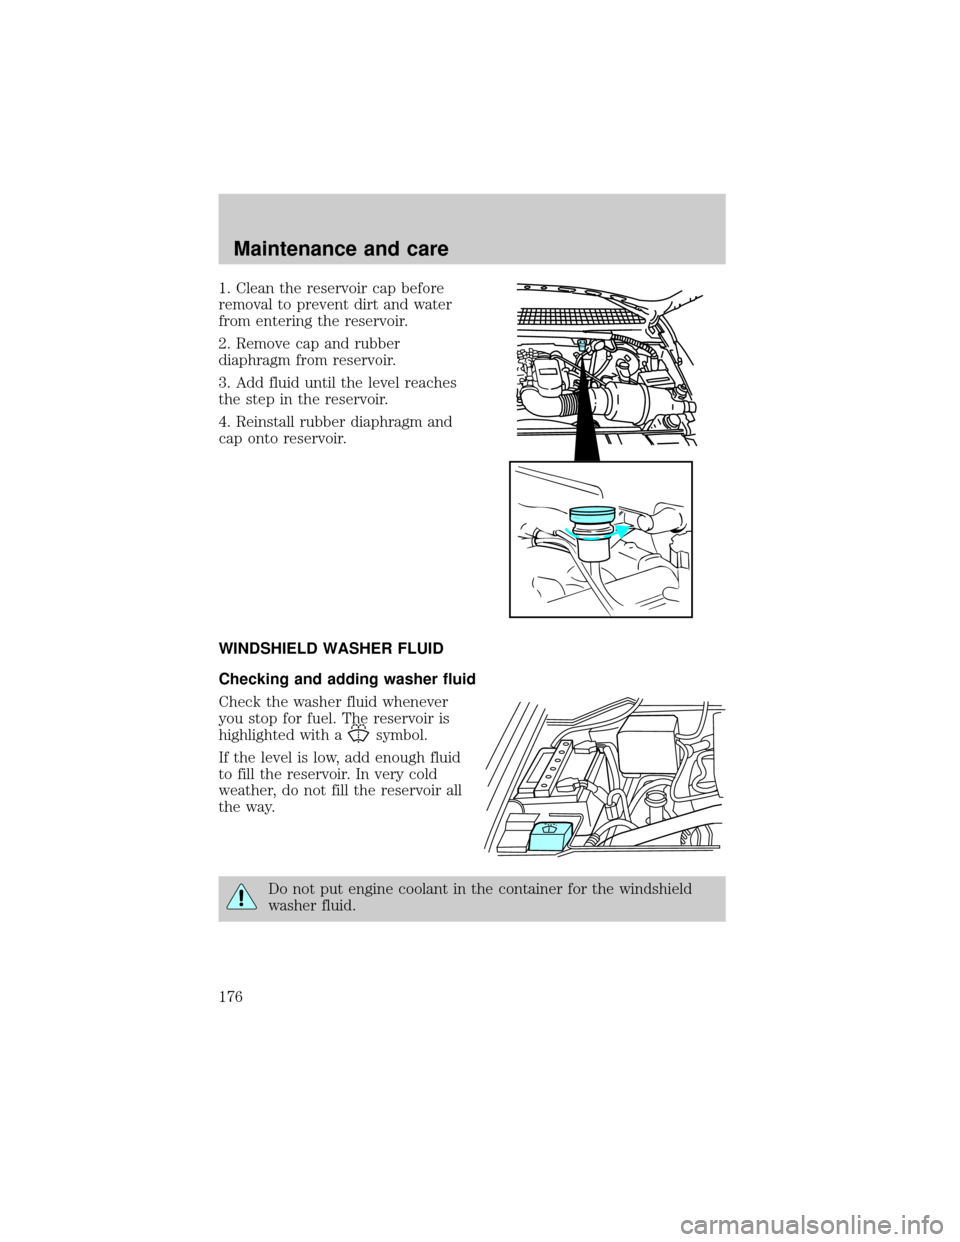
1. Clean the reservoir cap before
removal to prevent dirt and water
from entering the reservoir.
2. Remove cap and rubber
diaphragm from reservoir.
3. Add fluid until the level reaches
the step in the reservoir.
4. Reinstall rubber diaphragm and
cap onto reservoir.
WINDSHIELD WASHER FLUID
Checking and adding washer fluid
Check the washer fluid whenever
you stop for fuel. The reservoir is
highlighted with a
symbol.
If the level is low, add enough fluid
to fill the reservoir. In very cold
weather, do not fill the reservoir all
the way.
Do not put engine coolant in the container for the windshield
washer fluid.
Maintenance and care
176
Page 187 of 232
cells with distilled water. If the battery needs water often, have the
charging system checked.
If your battery has a cover/shield, make sure it is reinstalled
after the battery has been cleaned or replaced.
For longer, trouble-free operation, keep the top of the battery clean and
dry. Also, make certain the battery cables are always tightly fastened to
the battery terminals.
If you see any corrosion on the battery or terminals, remove the cables
from the terminals and clean with a wire brush. You can neutralize the
acid with a solution of baking soda and water.
Batteries normally produce explosive gases which can cause
personal injury. Therefore, do not allow flames, sparks or lighted
substances to come near the battery. When working near the battery,
always shield your face and protect your eyes. Always provide proper
ventilation.
When lifting a plastic-cased battery, excessive pressure on the
end walls could cause acid to flow through the vent caps,
resulting in personal injury and/or damage to the vehicle or battery.
Lift the battery with a battery carrier or with your hands on opposite
corners.
Keep batteries out of reach of children. Batteries contain sulfuric
acid. Avoid contact with skin, eyes or clothing. Shield your eyes
when working near the battery to protect against possible splashing of
acid solution. In case of acid contact with skin or eyes, flush
immediately with water for a minimum of 15 minutes and get prompt
medical attention. If acid is swallowed, call a physician immediately.
Because your vehicle's engine is also electronically controlled by a
computer, some control conditions are maintained by power from the
battery. When the battery is disconnected or a new battery is installed,
the engine must relearn its idle and fuel trim strategy for optimum
driveability and performance. To begin this process:
1. Set your parking brake.
Maintenance and care
187
Page 188 of 232
2. Put the gearshift in P (Park) (automatic transmission) or the neutral
position (manual transmission), turn off all accessories and start the
engine.
3. Let the engine idle for at least one minute.
4. The relearning process will automatically complete as you drive the
vehicle.
²The vehicle may need to be driven 16 km (10 miles) or more to
relearn the idle and fuel trim strategy.
²If you do not allow the engine to relearn its idle trim, the idle quality
of your vehicle may be adversely affected until the idle trim is
eventually relearned.
If the battery has been disconnected or a new battery has been installed,
the clock and the preset radio stations must be reset once the battery is
reconnected.
²Always dispose of automotive
batteries in a responsible manner.
Follow your local authorized
standards for disposal. Call your
local authorized recycling center
to find out more about recycling
automotive batteries.
AIR FILTER MAINTENANCE
Refer to the Scheduled Maintenance Guide for the appropriate intervals
for changing the air filter element.
For information on replacement air filter elements, refer toMotorcraft
Part Numbersin theCapacities and specificationschapter.
Do not start your engine with the air cleaner removed and do
not remove it while the engine is running.
LEAD
RETURN
RECYCLE
Maintenance and care
188
Page 195 of 232
WHAT YOU SHOULD KNOW ABOUT AUTOMOTIVE FUELS
Important safety precautions
Do not overfill the fuel tank. The pressure in an overfilled tank
may cause leakage and lead to fuel spray and fire.
If you do not use the proper fuel cap, the pressure in the fuel
tank can damage the fuel system or cause it to work improperly
in a collision.
The fuel system may be under pressure. If the fuel cap is venting
vapor or if you hear a hissing sound, wait until it stops before
completely removing the cap.
Automotive fuels can cause serious injury or death if misused or
mishandled.
Observe the following guidelines when handling automotive fuel:
²Extinguish all smoking materials
and any open flames before
fueling your vehicle.
²Always turn off the vehicle before
fueling.
²Automotive fuels can be harmful
or fatal if swallowed. Fuel such as
gasoline is highly toxic and if
swallowed can cause death or
permanent injury. If fuel is
swallowed, call a physician immediately, even if no symptoms are
immediately apparent. The toxic effects of fuel may not be visible for
hours.
²Avoid inhaling fuel vapors. Inhaling too much fuel vapor of any kind
can lead to eye and respiratory tract irritation. In severe cases,
excessive or prolonged breathing of fuel vapor can cause serious
illness and permanent injury.
Maintenance and care
195
Page 198 of 232
²Your ªService Engine Soonº light may come on. For more information
on the ªService Engine Soonº light, refer to theInstrumentation
chapter.
Fuel Filler Cap
Your fuel tank filler cap has an indexed design with a one-eighth turn
on/off feature.
When fueling your vehicle:
1. Turn the engine off.
2. Carefully turn the filler cap counterclockwise 1/8 of a turn until it
stops.
3. Pull to remove the cap from the fuel filler pipe.
4. To install the cap, align the tabs on the cap with the notches on the
filler pipe.
5. Turn the filler cap clockwise 1/8 of a turn until it stops.
If the ªService Engine Soon/Check Engineº indicator comes on and stays
on when you start the engine, the fuel filler cap may not be properly
installed. Turn off the engine, remove the fuel filler cap and reinstall it
being careful to align the cap properly.
If you must replace the fuel filler cap, replace it with a genuine
Ford or Motorcraft part. The customer warranty may be void for
any damage to the fuel tank or fuel system if a genuine Ford or
Motorcraft fuel filler cap is not used.
The fuel system may be under pressure. If the fuel filler cap is
venting vapor or if you hear a hissing sound, wait until it stops
before completely removing the fuel filler cap. Otherwise, fuel may
spray out and injure you or others.
If you do not use the proper fuel filler cap, the pressure in the
fuel tank can damage the fuel system or cause it to work
improperly in a collision.
Fuel Filter
Your vehicle is equipped with a fuel filter that is mounted on the
underbody.
Maintenance and care
198