Page 112 of 216

If the parking brake is fully released, but the brake warning lamp
remains illuminated, the brakes may not be working properly.
See your dealer or a qualified service technician.
Driving with a 4±speed automatic transmission
Understanding gearshift positions
Pull the gearshift lever towards you and downward to move the
automatic gearshift.
Hold the brake pedal down while you move the gearshift lever
from P (Park) to another position. If you do not hold the brake
pedal down, your vehicle may move unexpectedly and injure someone.
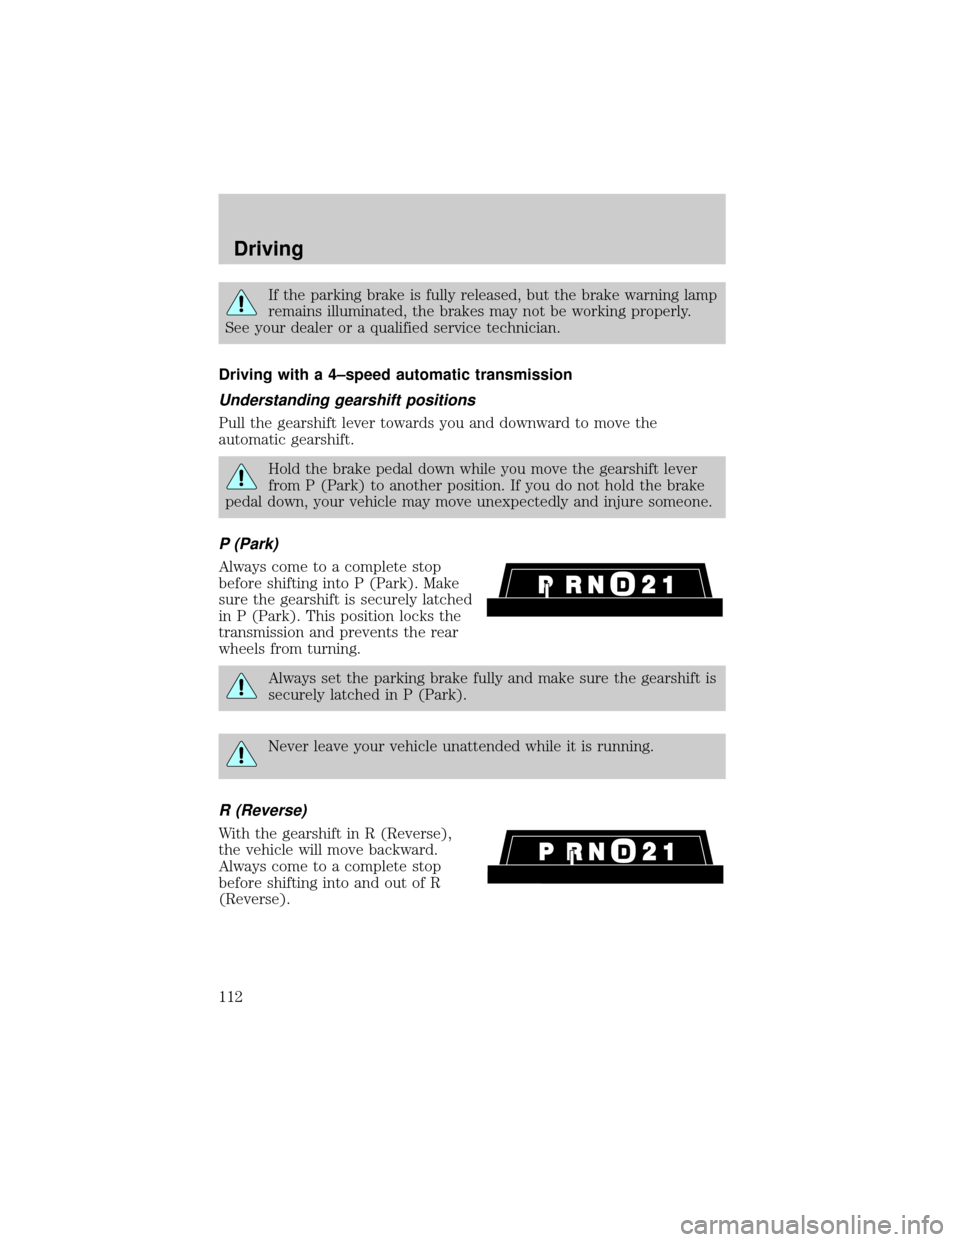
P (Park)
Always come to a complete stop
before shifting into P (Park). Make
sure the gearshift is securely latched
in P (Park). This position locks the
transmission and prevents the rear
wheels from turning.
Always set the parking brake fully and make sure the gearshift is
securely latched in P (Park).
Never leave your vehicle unattended while it is running.
R (Reverse)
With the gearshift in R (Reverse),
the vehicle will move backward.
Always come to a complete stop
before shifting into and out of R
(Reverse).
Driving
112
Page 138 of 216

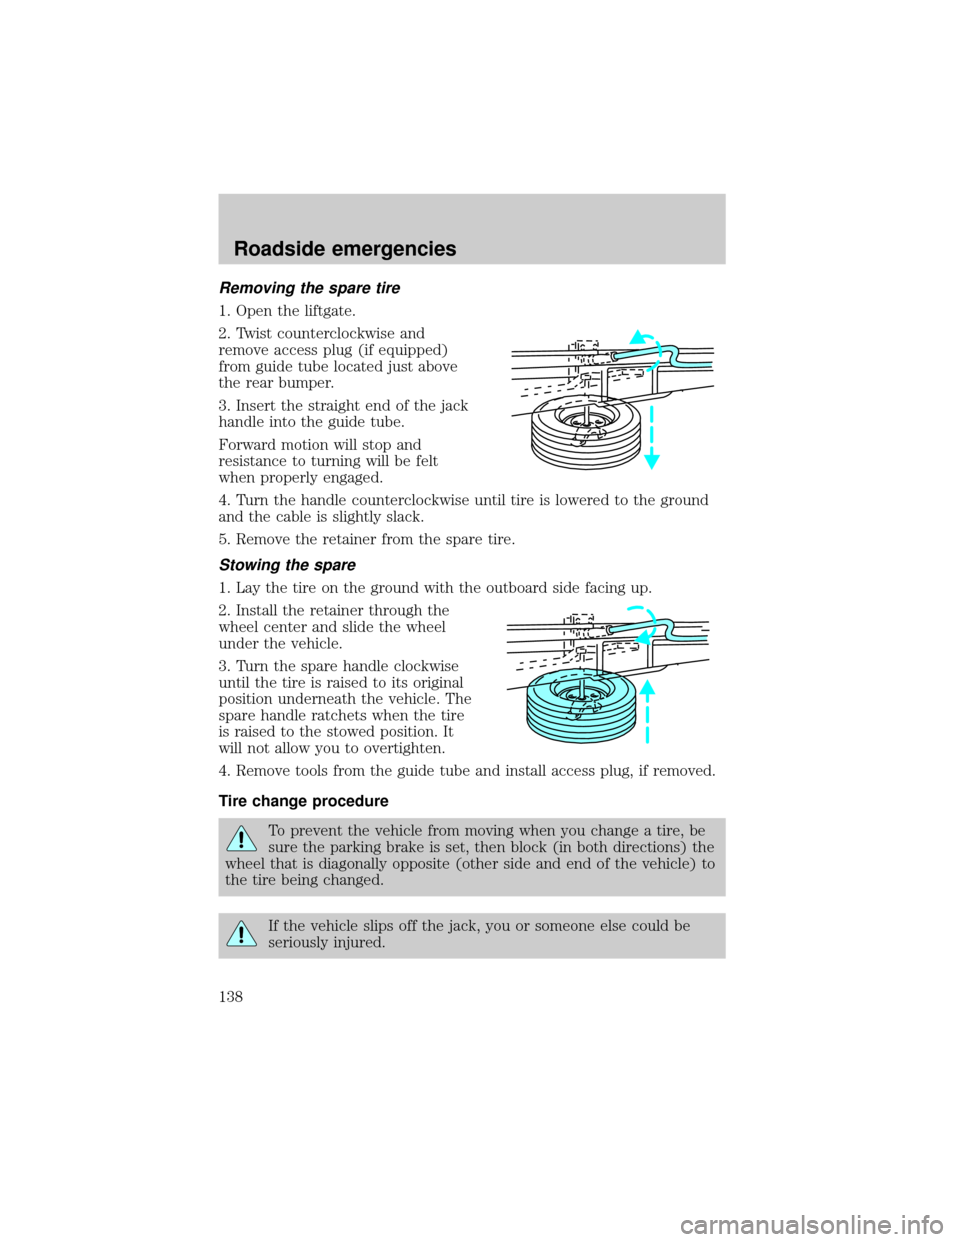
Removing the spare tire
1. Open the liftgate.
2. Twist counterclockwise and
remove access plug (if equipped)
from guide tube located just above
the rear bumper.
3. Insert the straight end of the jack
handle into the guide tube.
Forward motion will stop and
resistance to turning will be felt
when properly engaged.
4. Turn the handle counterclockwise until tire is lowered to the ground
and the cable is slightly slack.
5. Remove the retainer from the spare tire.
Stowing the spare
1. Lay the tire on the ground with the outboard side facing up.
2. Install the retainer through the
wheel center and slide the wheel
under the vehicle.
3. Turn the spare handle clockwise
until the tire is raised to its original
position underneath the vehicle. The
spare handle ratchets when the tire
is raised to the stowed position. It
will not allow you to overtighten.
4. Remove tools from the guide tube and install access plug, if removed.
Tire change procedure
To prevent the vehicle from moving when you change a tire, be
sure the parking brake is set, then block (in both directions) the
wheel that is diagonally opposite (other side and end of the vehicle) to
the tire being changed.
If the vehicle slips off the jack, you or someone else could be
seriously injured.
Roadside emergencies
138
Page 139 of 216
On vehicles equipped with Air Suspension, turn OFF the Air
Suspension switch prior to jacking, hoisting or towing your
vehicle.
Refer to the instruction sheet (located behind the interior trim access
panel with the jack) for detailed tire change instructions.
1. Park on a level surface, activate
hazard flashers and set the parking
brake.
2. Place gearshift lever in P (Park)
and turn engine OFF.
3. Block the diagonally opposite
wheel.
4. Obtain the spare tire and jack
from their storage locations.
5. Use the tip of the lug wrench to
remove any wheel trim.
6. Loosen each wheel lug nut
one-half turn counterclockwise but
do not remove them until the wheel
is raised off the ground.
BRAKE
HOOD
Roadside emergencies
139
Page 140 of 216
7. Turn OFF the air suspension
switch (if equipped).
8. Position the jack according to the
following guides and turn the jack
handle clockwise until the wheel is
completely off the ground.
When one of the rear
wheels is off the ground,
the transmission alone will not
prevent the vehicle from moving
or slipping off the jack, even if the
transmission is in P (Park). To
prevent the vehicle from moving
when you change the tire, be sure
that the parking brake is set and
the diagonally opposite wheel is
blocked. If the vehicle slips off the
jack, someone could be seriously
injured.
²Front (4x2)
AIR SUSPENSION
SWITCH
INTERRUPTEUR DE
LA SUSPENSION
PNEUMATIQUE
OFF
Roadside emergencies
140
Page 142 of 216

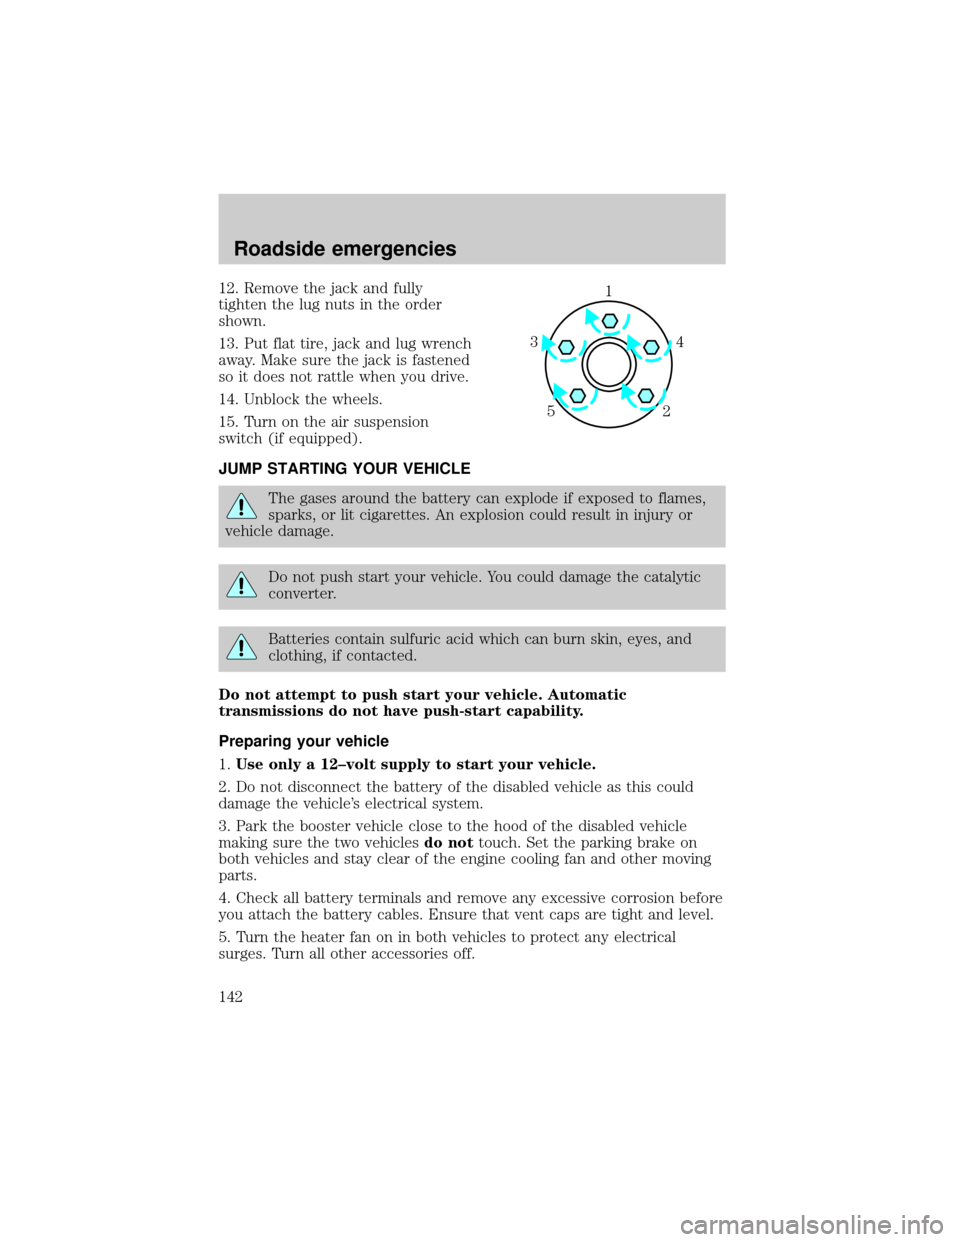
12. Remove the jack and fully
tighten the lug nuts in the order
shown.
13. Put flat tire, jack and lug wrench
away. Make sure the jack is fastened
so it does not rattle when you drive.
14. Unblock the wheels.
15. Turn on the air suspension
switch (if equipped).
JUMP STARTING YOUR VEHICLE
The gases around the battery can explode if exposed to flames,
sparks, or lit cigarettes. An explosion could result in injury or
vehicle damage.
Do not push start your vehicle. You could damage the catalytic
converter.
Batteries contain sulfuric acid which can burn skin, eyes, and
clothing, if contacted.
Do not attempt to push start your vehicle. Automatic
transmissions do not have push-start capability.
Preparing your vehicle
1.Use only a 12±volt supply to start your vehicle.
2. Do not disconnect the battery of the disabled vehicle as this could
damage the vehicle's electrical system.
3. Park the booster vehicle close to the hood of the disabled vehicle
making sure the two vehiclesdo nottouch. Set the parking brake on
both vehicles and stay clear of the engine cooling fan and other moving
parts.
4. Check all battery terminals and remove any excessive corrosion before
you attach the battery cables. Ensure that vent caps are tight and level.
5. Turn the heater fan on in both vehicles to protect any electrical
surges. Turn all other accessories off.
1
4 3
52
Roadside emergencies
142
Page 148 of 216

SERVICE RECOMMENDATIONS
To help you service your vehicle:
²We highlight do-it-yourself items in the engine compartment for easy
location.
²We provide a Scheduled Maintenance Guide which makes tracking
routine service easy.
If your vehicle requires professional service, your dealership can provide
necessary parts and service. Check your ªWarranty Guideº to find out
which parts and services are covered.
Use only recommended fuels, lubricants, fluids and service parts
conforming to specifications. Motorcraft parts are designed and built to
provide the best performance in your vehicle.
PRECAUTIONS WHEN SERVICING YOUR VEHICLE
Be especially careful when inspecting or servicing your vehicle.
²Do not work on a hot engine.
²When the engine is running, make sure that loose clothing, jewelry or
long hair does not get caught up in moving parts.
²Do not work on a vehicle with the engine running in an enclosed
space, unless you are sure you have enough ventilation.
²Keep all lit cigarettes, open flames and other lit material away from
the battery and all fuel related parts.
If you disconnect the battery, the engine must ªrelearnº its idle
conditions before your vehicle will drive properly, as explained inBattery
in this chapter.
Working with the engine off
1. Set the parking brake and ensure the gearshift is securely latched in P
(Park).
2. Turn off the engine and remove the key.
3. Block the wheels to prevent the vehicle from moving unexpectedly.
Working with the engine on
1. Set the parking brake and ensure the gearshift is securely latched in P
(Park).
2. Block the wheels to prevent the vehicle from moving unexpectedly.
Maintenance and care
148
Page 151 of 216
2. Turn the engine off and wait a few minutes for the oil to drain into the
oil pan.
3. Set the parking brake and ensure the gearshift is securely latched in P
(Park).
4. Open the hood. Protect yourself from engine heat.
5. Locate and carefully remove the
engine oil level indicator (dipstick).
6. Wipe the indicator clean. Insert the indicator fully, then remove it
again.
²If the oil level isbetween the MIN and MAX marks,the oil level is
acceptable.DO NOT ADD OIL.
²If the oil level is below the MIN
mark, add enough oil to raise the
level within the MIN-MAX range.
²Oil levels above the MAX mark may cause engine damage. Some oil
must be removed from the engine by a service technician.
7. Put the indicator back in and ensure it is fully seated.
MAX MIN
Maintenance and care
151
Page 159 of 216

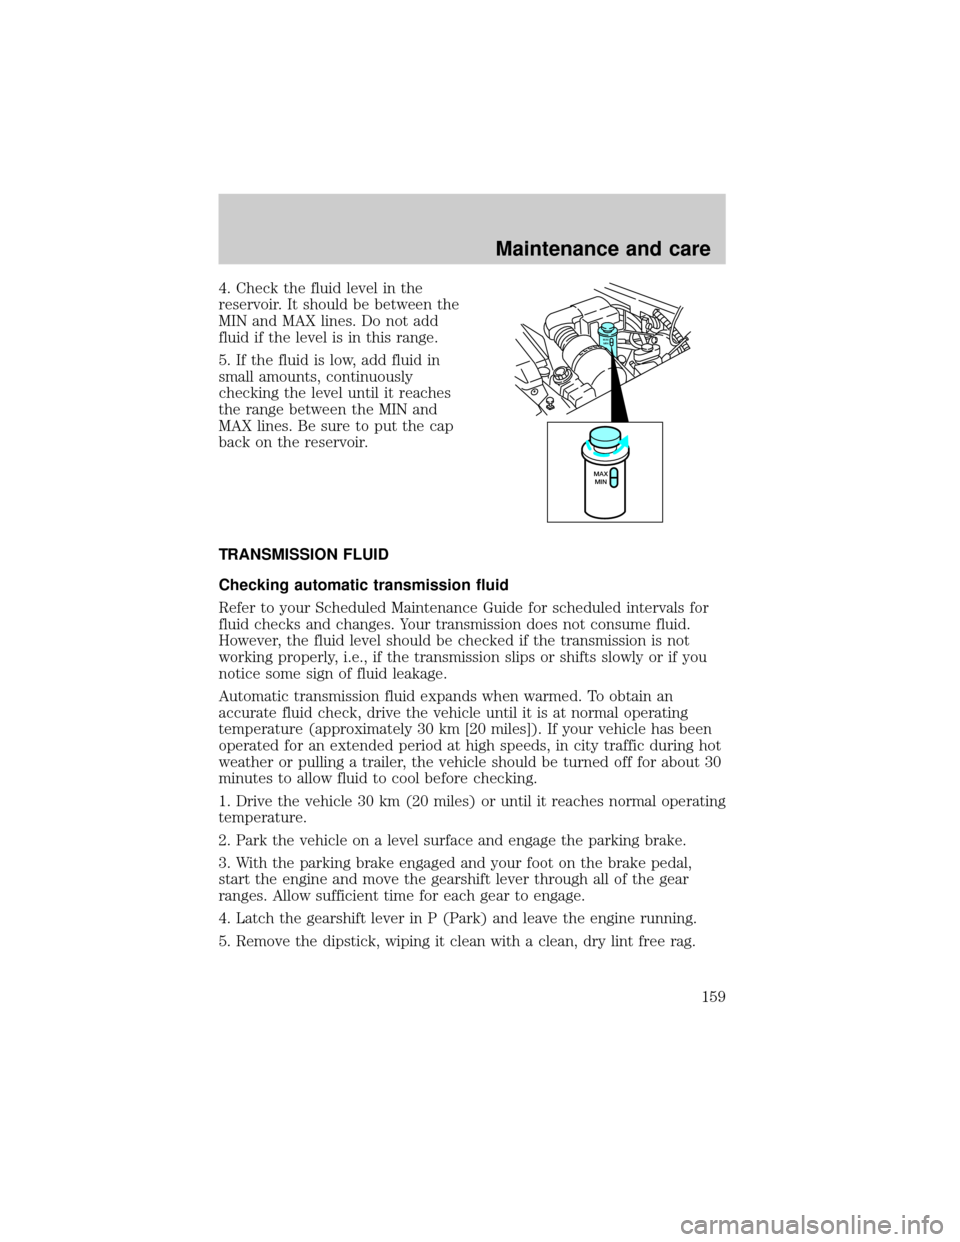
4. Check the fluid level in the
reservoir. It should be between the
MIN and MAX lines. Do not add
fluid if the level is in this range.
5. If the fluid is low, add fluid in
small amounts, continuously
checking the level until it reaches
the range between the MIN and
MAX lines. Be sure to put the cap
back on the reservoir.
TRANSMISSION FLUID
Checking automatic transmission fluid
Refer to your Scheduled Maintenance Guide for scheduled intervals for
fluid checks and changes. Your transmission does not consume fluid.
However, the fluid level should be checked if the transmission is not
working properly, i.e., if the transmission slips or shifts slowly or if you
notice some sign of fluid leakage.
Automatic transmission fluid expands when warmed. To obtain an
accurate fluid check, drive the vehicle until it is at normal operating
temperature (approximately 30 km [20 miles]). If your vehicle has been
operated for an extended period at high speeds, in city traffic during hot
weather or pulling a trailer, the vehicle should be turned off for about 30
minutes to allow fluid to cool before checking.
1. Drive the vehicle 30 km (20 miles) or until it reaches normal operating
temperature.
2. Park the vehicle on a level surface and engage the parking brake.
3. With the parking brake engaged and your foot on the brake pedal,
start the engine and move the gearshift lever through all of the gear
ranges. Allow sufficient time for each gear to engage.
4. Latch the gearshift lever in P (Park) and leave the engine running.
5. Remove the dipstick, wiping it clean with a clean, dry lint free rag.
MAX
MIN
MAX
MIN
Maintenance and care
159