Page 248 of 432

yellowblue
4-58
C-2500 HD (2WD)*
Engine Axle
RatioMax. Trailer Wt.
6000 V8 3.42 7,500 lbs. (3 402 kg)
3.73 8,500 lbs. (3 856 kg)
4.10 10,500 lbs. (4 763 kg)
6.5 L Diesel 3.42 11,000 lbs. (4 990 kg)
4.10 11,000 lbs. (4 990 kg)
* Weight distributing hitch tongue weight 10% to
15% of hitch weight 1,200 lb. (544 kg) maximum.
Fifth
-wheel hitch tongue weight 15% to 25% of hitch
weight 2,500 lb (1 134 kg) maximum.K
-2500 HD (4WD)*
Engine Axle
RatioMax. Trailer Wt.
6000 V8 3.73 8,000 lbs. (3 629 kg)
4.10 10,000 lbs. (4 536 kg)
6.5 L Diesel 3.42 10,500 lbs. (4 763 kg)
4.10 10,500 lbs. (4 763 kg)
* Weight distributing hitch tongue weight 10% to
15% of hitch weight 1,200 lb. (544 kg) maximum.
Fifth
-wheel hitch tongue weight 15% to 25% of hitch
weight 2,500 lb (1 134 kg) maximum.
You can ask your dealer for our trailering information or
advice, or you can write us at the address listed in your
Warranty and Owner Assistance Information Booklet.
In Canada, write to:
General Motors of Canada Limited
Customer Communication Centre
1908 Colonel Sam Drive
Oshawa, Ontario L1H 8P7
Page 253 of 432
yellowblue
4-63
When towing at high altitude on steep uphill grades,
consider the following: Engine coolant will boil at a
lower temperature than at normal altitudes. If you turn
your engine off immediately after towing at high altitude
on steep uphill grades, your vehicle may show signs
similar to engine overheating. To avoid this, let the
engine run while parked (preferably on level ground)
with the automatic transmission in PARK (P) (or the
manual transmission out of gear and the parking brake
applied) for a few minutes before turning the engine off.
If you do get the overheat warning, see ªEngine
Overheatingº in the Index.
Parking on Hills
CAUTION:
You really should not park your vehicle, with a
trailer attached, on a hill. If something goes
wrong, your rig could start to move. People can
be injured, and both your vehicle and the trailer
can be damaged.
But if you ever have to park your rig on a hill, here's
how to do it:
1. Apply your regular brakes, but don't shift into
PARK (P) yet for an automatic transmission, or into
gear for a manual transmission.
2. Have someone place chocks under the trailer wheels.
3. When the wheel chocks are in place, release the
regular brakes until the chocks absorb the load.
4. Reapply the regular brakes. Then apply your
parking brake and shift into PARK (P) for an
automatic transmission, or REVERSE (R) for a
manual transmission.
5. If you have a four
-wheel-drive vehicle, be sure
the transfer case is in a drive gear and not in
NEUTRAL (N).
6. Release the regular brakes.
Page 254 of 432
yellowblue
4-64
CAUTION:
It can be dangerous to get out of your vehicle if
the shift lever is not fully in PARK (P) with the
parking brake firmly set. Your vehicle can roll.
If you have left the engine running, the vehicle
can move suddenly. You or others could be
injured. To be sure your vehicle won't move, even
when you're on fairly level ground, use the steps
that follow.
Always put the shift lever fully in PARK (P) with
the parking brake firmly set.
If the transfer case on four-wheel drive vehicles is
in NEUTRAL (N), your vehicle will be free to
roll, even if your shift lever is in PARK (P). So, be
sure the transfer case is in a drive gear
-- not in
NEUTRAL (N).
When You Are Ready to Leave After
Parking on a Hill
1. Apply your regular brakes and hold the pedal down
while you:
�Start your engine;
�Shift into a gear; and
�Release the parking brake.
2. Let up on the brake pedal.
3. Drive slowly until the trailer is clear of the chocks.
4. Stop and have someone pick up and store the chocks.
Maintenance When Trailer Towing
Your vehicle will need service more often when you're
pulling a trailer. See the Maintenance Schedule for more
on this. Things that are especially important in trailer
operation are automatic transmission fluid (don't
overfill), engine oil, axle lubricant, belt, cooling system
and brake system. Each of these is covered in this
manual, and the Index will help you find them quickly.
If you're trailering, it's a good idea to review these
sections before you start your trip.
Check periodically to see that all hitch nuts and bolts
are tight.
Page 255 of 432
yellowblue
4-65 Trailer Wiring Harness
Your vehicle is equipped with one of the following
wiring harnesses for towing a trailer or hauling a
slide
-in camper.
Basic Trailer Wiring Package
All regular and extended cab gasoline engine pickups
have a six
-wire trailer towing harness.
The six-wire harness is located at the rear of the vehicle
and is tied to the vehicle's frame. The harness requires
the installation of a trailer
-wiring harness connector,
which is available through your dealer.
The six
-wire harness contains the following
trailer circuits:
�Yellow: Left Stop/Turn Signal
�Dark Green: Right Stop/Turn Signal
�Brown: Taillamps
�White: Ground
�Light Green: Back
-up Lamps
�Light Blue: Center High
-Mounted
Stoplamp (CHMSL)
If you need to upgrade your vehicle to heavy
-duty
trailering, a brake controller harness and an underbody
harness with a seven
-pin universal heavy-duty trailer
connector are available from your dealer.
Page 256 of 432
yellowblue
4-66
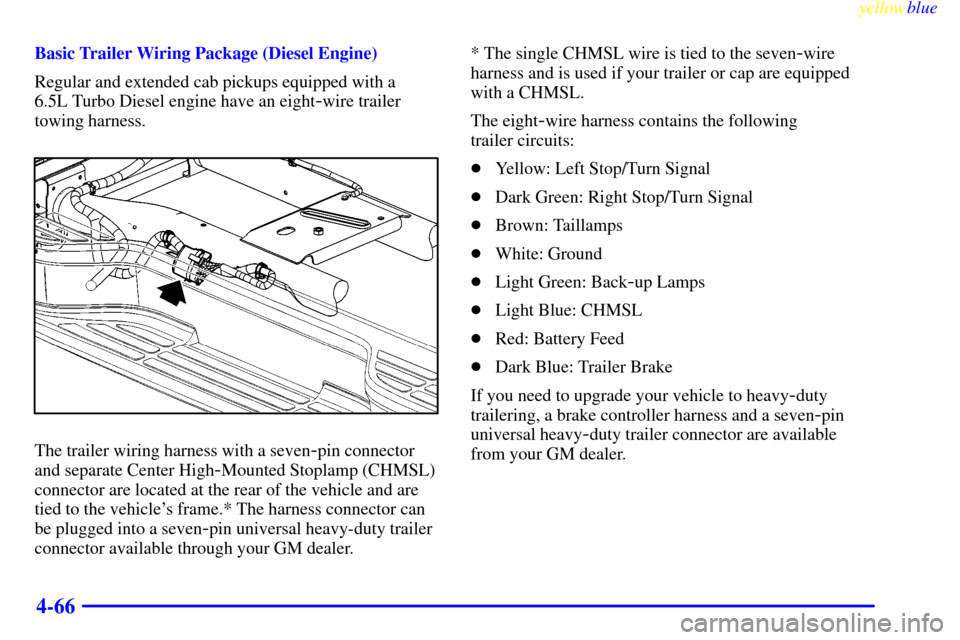
Basic Trailer Wiring Package (Diesel Engine)
Regular and extended cab pickups equipped with a
6.5L Turbo Diesel engine have an eight
-wire trailer
towing harness.
The trailer wiring harness with a seven-pin connector
and separate Center High
-Mounted Stoplamp (CHMSL)
connector are located at the rear of the vehicle and are
tied to the vehicle's frame.* The harness connector can
be plugged into a seven
-pin universal heavy-duty trailer
connector available through your GM dealer.* The single CHMSL wire is tied to the seven
-wire
harness and is used if your trailer or cap are equipped
with a CHMSL.
The eight
-wire harness contains the following
trailer circuits:
�Yellow: Left Stop/Turn Signal
�Dark Green: Right Stop/Turn Signal
�Brown: Taillamps
�White: Ground
�Light Green: Back
-up Lamps
�Light Blue: CHMSL
�Red: Battery Feed
�Dark Blue: Trailer Brake
If you need to upgrade your vehicle to heavy
-duty
trailering, a brake controller harness and a seven
-pin
universal heavy
-duty trailer connector are available
from your GM dealer.
Page 261 of 432
5-
yellowblue
5-1
Section 5 Problems on the Road
Here you'll find what to do about some problems that can occur on the road.
5
-2 Hazard Warning Flashers
5
-3 Other Warning Devices
5
-3 Jump Starting
5
-8 Towing Your Vehicle
5
-9 Engine Overheating (Gasoline Engine)5
-12 Cooling System (Gasoline Engine)
5
-18 Engine Fan Noise
5
-18 If a Tire Goes Flat
5
-18 Changing a Flat Tire
5
-33 If You're Stuck: In Sand, Mud, Ice or Snow
Page 264 of 432
yellowblue
5-4
2. Get the vehicles close enough so the jumper cables
can reach, but be sure the vehicles aren't touching
each other. If they are, it could cause a ground
connection you don't want. You wouldn't be able to
start your vehicle, and the bad grounding could
damage the electrical systems.
To avoid the possibility of the vehicles rolling, set
the parking brake firmly on both vehicles involved in
the jump start procedure. Put an automatic
transmission in PARK (P) or a manual transmission
in NEUTRAL (N). If you have a four
-wheel-drive
vehicle, be sure the transfer case is not in
NEUTRAL (N).
3. Turn off the ignition on both vehicles. Unplug
unnecessary accessories plugged into the cigarette
lighter or accessory power outlets. Turn off all lamps
that aren't needed as well as radios. This will avoid
sparks and help save both batteries. In addition, it
could save your radio!
NOTICE:
If you leave your radio on, it could be badly
damaged. The repairs wouldn't be covered by
your warranty.
4. Open the hoods and locate the positive (+) and
negative (
-) terminal locations on the other vehicle.
Your vehicle has a remote positive (+) jump starting
terminal and a remote negative (
-) jump starting
terminal. The remote positive (+) terminal is located
behind a red plastic cover near the engine accessory
drive bracket. To uncover the remote positive (+)
terminal, open the red plastic cover.
On all V8 gasoline and diesel engines, the remote
negative (
-) terminal is located on the engine
accessory drive bracket. This is marked ªGNDºon
V8 gasoline engines. On V6 engines, the remote
negative (
-) terminal is located on a tab attached to
the engine accessory drive bracket where it is
marked ªGNDº.
You should always use the remote positive (+) and the
remote negative (
-) terminals instead of the positive (+)
and negative (
-) terminals on your battery.
Page 265 of 432
yellowblue
5-5
CAUTION:
Using a match near a battery can cause battery
gas to explode. People have been hurt doing this,
and some have been blinded. Use a flashlight if
you need more light.
Be sure the batteries have enough water. You
don't need to add water to the ACDelco
Freedom
� battery (or batteries) installed in
every new GM vehicle. But if a battery has filler
caps, be sure the right amount of fluid is there. If
it is low, add water to take care of that first. If
you don't, explosive gas could be present.
Battery fluid contains acid that can burn you.
Don't get it on you. If you accidentally get it in
your eyes or on your skin, flush the place with
water and get medical help immediately.
5. Check that the jumper cables don't have loose or
missing insulation. If they do, you could get a shock.
The vehicles could be damaged too.
Before you connect the cables, here are some basic
things you should know. Positive (+) will go to
positive (+) or a remote positive terminal if the
vehicle has one. Negative (
-) will go to a metal
engine part or a remote negative terminal if the
vehicle has one. Don't connect positive (+) to
negative (
-) or you'll get a short that would damage
the battery and maybe other parts too.
On vehicles equipped with dual batteries, make all
battery connections to the remote positive (+) and
remote negative (
-) terminals.
CAUTION:
Fans or other moving engine parts can injure you
badly. Keep your hands away from moving parts
once the engine is running.