Page 96 of 376
yellowblue
2-44
Turn Signal on Chime
A chime will remind you if you leave the turn signal on
for more than 3/4 mile (1.2 km) of driving.
If you need to leave the turn signal on for more than
3/4 mile (1.2 km), turn off the signal and then turn it
back on.
Headlamps
The headlamp band on the turn signal/multifunction
lever controls these lamps:
�Headlamps
�Taillamps
�Parking lamps
�Sidemarker lamps
Turn the band to this symbol to turn on the
headlamps and other operating lamps.
Turn the band to this symbol to turn on the
parking and other operating lamps except for
the headlamps.
Turn the band to OFF to turn off the lamps.
To read the odometer with the ignition off, turn on the
parking lamps.
Page 98 of 376

yellowblue
2-46
Headlamp High/Low-Beam Changer
To change the headlamps
from low beam to high or
high to low, push the turn
signal lever all the way
forward.
When the high beams are on, this light on the instrument
panel also will be on. To change the headlamps from
high to low, pull the lever rearward.
Lamps on Reminder
If you turn the ignition off and leave the headlamps or
parking lamps on and open the door, you will hear a
chime reminding you to turn off all lamps.
Flash-to-Pass
Momentarily pull the turn signal lever toward you. The
high
-beam indicator will flash to indicate to the other
driver that you intend to pass. If the low
-beam
headlamps are off and you have the optional fog lamps
on, the fog lamps will flash.
Windshield Wipers
You can control the windshield wipers by moving the
lever with the wiper symbol on it. This lever is located
on the right side of the steering column.
For a single wiping cycle, push the lever down to MIST.
Hold it there until the wipers start, then let go. The
wipers will stop after one cycle. If you want more
cycles, hold the lever on MIST longer.
Page 102 of 376

yellowblue
2-50
�Move the cruise switch to R/A. Hold it there until
you get up to the speed you want, then release the
switch. (To increase your speed in very small
amounts, move the switch to R/A briefly, then
release it. Each time you do this, the vehicle will go
about 1 mph (1.6 km/h) faster.)
The Driver Information Center (DIC) will display
the cruise set speed.
Reducing Speed While Using Cruise Control
There are two ways to reduce speed while using
cruise control:
�Push in the SET button at the end of the lever until
you reach the lower speed you want, then release it.
The Driver Information Center (DIC) will display
the cruise set speed.
�To slow down in very small amounts, push the SET
button for less than half a second. Each time you do
this, you'll go 1 mph (1.6 km/h) slower.
The Driver Information Center (DIC) will display
the cruise set speed.Passing Another Vehicle While Using Cruise Control
Use the accelerator pedal to increase speed. When you
take your foot off the pedal, the vehicle will slow down
to the cruise control speed you set earlier.
Using Cruise Control on Hills
How well your cruise control will work on hills depends
upon your speed, load and the steepness of the hills.
When going downhill, you may have to brake or shift to
a lower gear to keep your speed down. Of course,
applying the brake takes you out of cruise control. Many
drivers find this to be too much trouble and don't use
cruise control on steep hills.
Ending Cruise Control
There are two ways to turn off the cruise control:
�Step lightly on the brake pedal or push the clutch
pedal, if you have a manual transmission vehicle, or
�Move the cruise switch to OFF.
The Driver Information Center (DIC) will display
the message ªCRUISE DISENGAGED.º
Erasing Speed Memory
When you turn off the cruise control or the ignition,
cruise control set speed memory is erased.
Page 103 of 376

yellowblue
2-51
Exterior Lamps
Daytime Running Lamps / Automatic
Headlamp Control (Optional)
Daytime Running Lamps (DRL) can make it easier for
others to see the front of your vehicle during the day.
DRL can be helpful in many different driving
conditions, but they can be especially helpful in the
short periods after dawn and before sunset.
A light sensor on top of the instrument panel makes the
Automatic Headlamp Control (if equipped) work, so be
sure it isn't covered.
The DRL/Automatic Headlamp Control system will
make the front turn signal lamps come on when:
�the ignition is on,
�the headlamp switch is off and
�the parking brake is released.
When the DRL are on, only the front turn signal lamps
will be on. The headlamps, taillamps, sidemarker and
other lamps won't be on. Your instrument panel won't
be lit up either.When it's dark enough outside, the front turn signal
lamps will turn off and the headlamps and parking
lamps will turn on. The other lamps that come on with
the headlamps will also come on.
When it's bright enough outside, the headlamps will go
off and the front turn signal lamps will come on.
To idle the vehicle with the DRL off, set the parking
brake while the ignition is in OFF or LOCK. Then start
the vehicle. The DRL, headlamps and parking lamps
will stay off until you release the parking brake.
The Automatic Headlamp Control feature can be turned
on or off except for vehicles first sold in Canada. See
ªDriver Information Center (DIC)º in the Index to turn
this feature on or off (if equipped with the Automatic
Headlamp Control feature).
As with any vehicle, you should turn on the regular
headlamp system when you need it.
Page 104 of 376

yellowblue
2-52
Fog Lamps (Option)
Use the fog lamps for better vision in foggy or misty
conditions. Your parking lamps or low
-beam headlamps
must be on or the fog lamps won't work.
To turn the fog lamps on, push the button located on the
instrument panel to the left of the steering column. A
light on the button will come on when the fog lamps are
on. Push the button again to turn the fog lamps off.
Twilight Sentinel (Option)
Twilight Sentinel provides a period of exterior
illumination as you leave the vicinity of the vehicle. The
feature is activated when the headlamps are on due to
the optional Automatic Headlamp Control feature
described previously in this section, and when the
ignition is turned off. Your headlamps will then remain
on until the headlamp switch is moved from OFF to the
parking lamp position or until an illumination period has
elapsed. See ªDriver Information Center (DIC)º in the
Index to select the desired illumination period.
If you turn off the ignition with the headlamp switch in
the parking lamp or headlamp position, the Twilight
Sentinel cycle will not occur.
You can customize the vehicle to activate the Twilight
Sentinel when the ignition is turned off under the
conditions listed previously, or you may choose not to
activate this feature under any conditions. See ªDriver
Information Center (DIC)º in the Index to customize
this feature.
Page 105 of 376

yellowblue
2-53
Interior Lamps
Instrument Panel Brightness Control
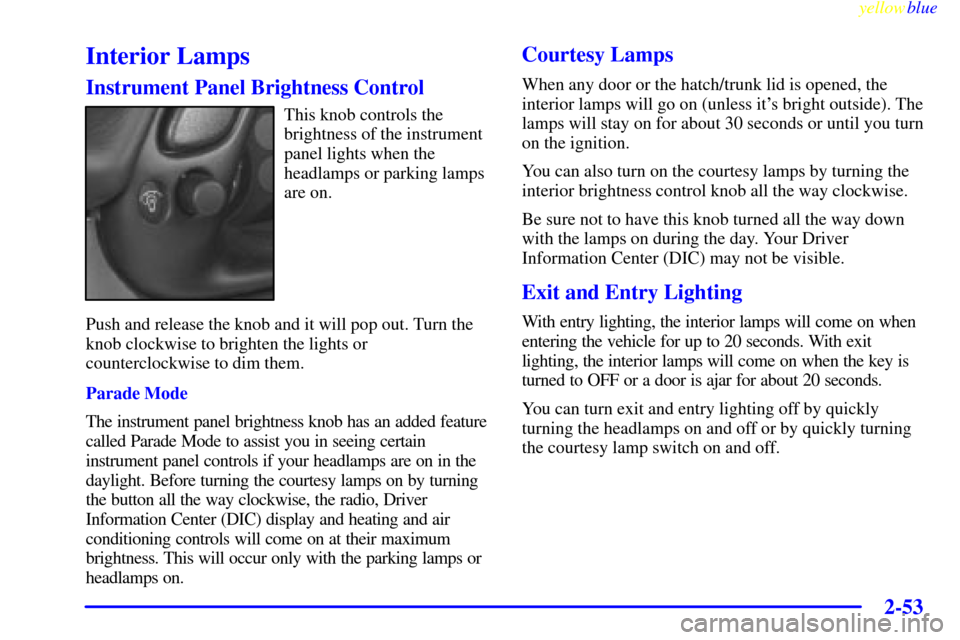
This knob controls the
brightness of the instrument
panel lights when the
headlamps or parking lamps
are on.
Push and release the knob and it will pop out. Turn the
knob clockwise to brighten the lights or
counterclockwise to dim them.
Parade Mode
The instrument panel brightness knob has an added feature
called Parade Mode to assist you in seeing certain
instrument panel controls if your headlamps are on in the
daylight. Before turning the courtesy lamps on by turning
the button all the way clockwise, the radio, Driver
Information Center (DIC) display and heating and air
conditioning controls will come on at their maximum
brightness. This will occur only with the parking lamps or
headlamps on.
Courtesy Lamps
When any door or the hatch/trunk lid is opened, the
interior lamps will go on (unless it's bright outside). The
lamps will stay on for about 30 seconds or until you turn
on the ignition.
You can also turn on the courtesy lamps by turning the
interior brightness control knob all the way clockwise.
Be sure not to have this knob turned all the way down
with the lamps on during the day. Your Driver
Information Center (DIC) may not be visible.
Exit and Entry Lighting
With entry lighting, the interior lamps will come on when
entering the vehicle for up to 20 seconds. With exit
lighting, the interior lamps will come on when the key is
turned to OFF or a door is ajar for about 20 seconds.
You can turn exit and entry lighting off by quickly
turning the headlamps on and off or by quickly turning
the courtesy lamp switch on and off.
Page 106 of 376

yellowblue
2-54
Reading Lamps
Your inside rearview mirror includes two reading lamps.
The lamps will go on when a door is opened. When the
doors are closed, each lamp can be turned on
individually by pressing the switch (each lamp has its
own switch).
There is also an interior console flood lamp located
underneath the rearview mirror which comes on with the
headlamps or parking lamps.
Inadvertent Load Control
Your vehicle has a feature to help prevent you from
draining the battery in case the underhood lamp, vanity
mirror lamps, cargo lamps, reading lamps, console or
glove box lamps are accidentally left on. If you leave
any of these lamps on, they will automatically time out
after 15 minutes. To reset it, all of the above lamps must
be turned off or the ignition key must be in ON.
Mirrors
Inside Day/Night Rearview Mirror
An inside rearview mirror is attached above the
windshield. The mirror has pivots so that you can
adjust it.
You can adjust the mirror for day or night driving. Pull
the tab for night driving to reduce glare. Push the tab for
daytime driving.
Page 112 of 376

yellowblue
2-60
Sun Visors
To block out glare, you can swing down the visors. You
can also swing them to the side.
Visor Vanity Mirrors
Pull down the sun visor and lift the cover to expose the
vanity mirror.
Lighted Visor Vanity Mirrors (Option)
Pull down the sun visor and lift the cover to expose the
lighted vanity mirror. When the cover is lifted, the lamps
will come on automatically, even if the ignition is off.
Accessory Power Outlet
The accessory power outlet is located inside the center
console storage compartment, on the forward left
-hand
side. Remove the tethered cap to use the outlet. The
outlet can be used to connect electrical equipment such
as a cellular phone or CB radio. Be sure to follow the
installation instructions included with the equipment.
Replace the cap when the accessory power outlet is not
in use.
NOTICE:
When using the accessory power outlet:
�The maximum load of any electrical
equipment should not exceed 15 amps.
�Be sure to turn off any electrical equipment
when not in use. Leaving electrical
equipment on for extended periods can
drain the battery.
We recommend that you see a qualified technician or your
dealer for the proper installation of your equipment.
Floor Mats (Option)
Your vehicle's floor mats are specially designed to
remain in position under your feet and out of reach of
the accelerator pedal. The driver's side floor mat is held
in place by two locator hooks and the passenger's side is
held in place by one.
Be sure that the driver's side floor mat is properly
placed on the floor so that it does not block the
movement of the accelerator pedal.