Page 61 of 368

yellowblue
1-53
Accident statistics show that children are safer if they
are restrained in the rear seat. But they need to use the
safety belts properly.
�Children who aren't buckled up can be thrown out in
a crash.
�Children who aren't buckled up can strike other
people who are.
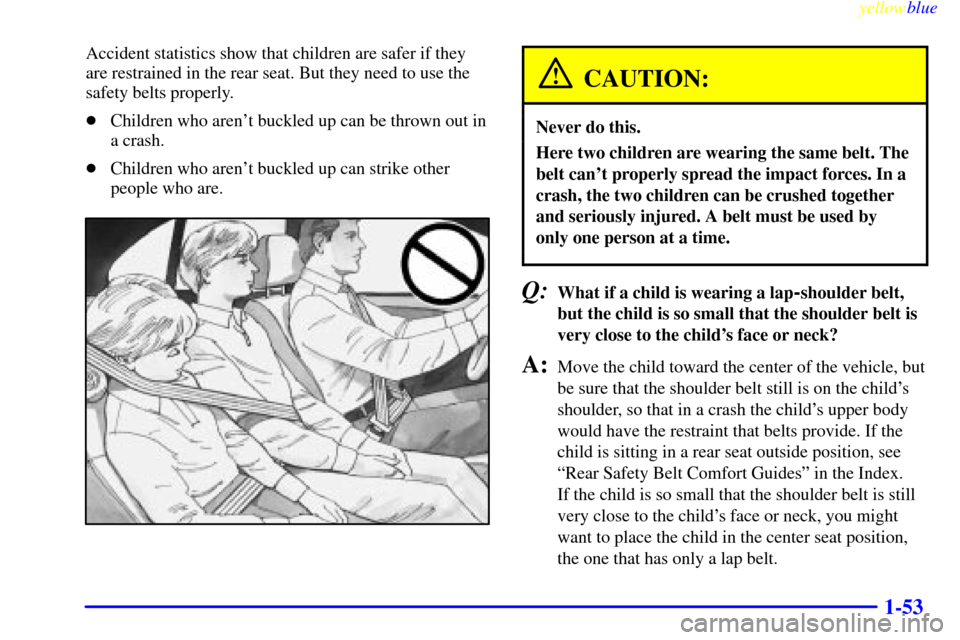
CAUTION:
Never do this.
Here two children are wearing the same belt. The
belt can't properly spread the impact forces. In a
crash, the two children can be crushed together
and seriously injured. A belt must be used by
only one person at a time.
Q:What if a child is wearing a lap-shoulder belt,
but the child is so small that the shoulder belt is
very close to the child's face or neck?
A:Move the child toward the center of the vehicle, but
be sure that the shoulder belt still is on the child's
shoulder, so that in a crash the child's upper body
would have the restraint that belts provide. If the
child is sitting in a rear seat outside position, see
ªRear Safety Belt Comfort Guidesº in the Index.
If the child is so small that the shoulder belt is still
very close to the child's face or neck, you might
want to place the child in the center seat position,
the one that has only a lap belt.
Page 62 of 368
yellowblue
1-54
CAUTION:
Never do this.
Here a child is sitting in a seat that has a
lap
-shoulder belt, but the shoulder part is behind
the child. If the child wears the belt in this way, in
a crash the child might slide under the belt. The
belt's force would then be applied right on the
child's abdomen. That could cause serious or
fatal injuries.
Wherever the child sits, the lap portion of the belt
should be worn low and snug on the hips, just touching
the child's thighs. This applies belt force to the child's
pelvic bones in a crash.
Page 63 of 368

yellowblue
1-55
Safety Belt Extender
If the vehicle's safety belt will fasten around you, you
should use it.
But if a safety belt isn't long enough to fasten, your
dealer will order you an extender. It's free. When you go
in to order it, take the heaviest coat you will wear, so the
extender will be long enough for you. The extender will
be just for you, and just for the seat in your vehicle that
you choose. Don't let someone else use it, and use it
only for the seat it is made to fit. To wear it, just attach it
to the regular safety belt.
Checking Your Restraint Systems
Now and then, make sure the safety belt reminder light
and all your belts, buckles, latch plates, retractors and
anchorages are working properly. Look for any other
loose or damaged safety belt system parts. If you see
anything that might keep a safety belt system from
doing its job, have it repaired.
Torn or frayed safety belts may not protect you in a
crash. They can rip apart under impact forces. If a belt is
torn or frayed, get a new one right away.
Also look for any opened or broken air bag covers, and
have them repaired or replaced. (The air bag system
does not need regular maintenance.)
Replacing Restraint System Parts
After a Crash
If you've had a crash, do you need new belts?
After a very minor collision, nothing may be necessary.
But if the belts were stretched, as they would be if worn
during a more severe crash, then you need new belts.
If belts are cut or damaged, replace them. Collision
damage also may mean you will need to have safety belt
or seat parts repaired or replaced. New parts and repairs
may be necessary even if the belt wasn't being used at
the time of the collision.
If an air bag inflates, you'll need to replace air bag
system parts. See the part on the air bag system earlier in
this section.
Page 68 of 368
yellowblue
2-4
Door Locks
CAUTION:
Unlocked doors can be dangerous.
Passengers -- especially children -- can easily
open the doors and fall out. When a door is
locked, the inside handle won't open it.
Outsiders can easily enter through an unlocked
door when you slow down or stop your vehicle.
This may not be so obvious: You increase the
chance of being thrown out of the vehicle in a
crash if the doors aren't locked. Wear safety belts
properly, lock your doors, and you will be far
better off whenever you drive your vehicle.
There are several ways to lock and unlock your vehicle.
Use your key to unlock your vehicle from the outside.
You can also use the optional remote keyless entry
system to unlock your vehicle. See ªRemote Keyless
Entry Systemº in the Index.
To lock the door from the
inside, push the locking
lever forward.
To unlock the door, pull the locking lever backward.
Page 120 of 368
yellowblue
2-56
7. Store both boot side covers in the trunk.
8. Close the trunk.
9. Raise the rear seatback to the up position. Push the
seat back to make sure it is latched. Ensure that the
rear seatbelts do not become trapped behind the
rear seats.
Raising the Convertible Top
1. Set the parking brake and shift your automatic
transaxle to PARK (P) or your manual transaxle to
NEUTRAL (N).
2. Turn the ignition to RUN.
3. Lower the door windows completely to avoid wear
to the weatherstrips.
4. Push the button in the latch handle and rotate the
handle down.
5. Push the handle forward toward the windshield and
hold it until the convertible top is fully raised, and
the latch pins are all the way in the holes above
the windshield.
Page 129 of 368

yellowblue
2-65
Warning Lights, Gages and Indicators
This part describes the warning lights and gages that
may be on your vehicle. The pictures will help you
locate them.
Warning lights and gages can signal that something is
wrong before it becomes serious enough to cause an
expensive repair or replacement. Paying attention to
your warning lights and gages could also save you or
others from injury.
Warning lights come on when there may be or is a
problem with one of your vehicle's functions. As you
will see in the details on the next few pages, some
warning lights come on briefly when you start the
engine just to let you know they're working. If you are
familiar with this section, you should not be alarmed
when this happens.
Gages can indicate when there may be or is a problem
with one of your vehicle's functions. Often gages and
warning lights work together to let you know when
there's a problem with your vehicle.When one of the warning lights comes on and stays on
when you are driving, or when one of the gages shows
there may be a problem, check the section that tells you
what to do about it. Please follow this manual's advice.
Waiting to do repairs can be costly
-- and even
dangerous. So please get to know your warning lights
and gages. They're a big help.
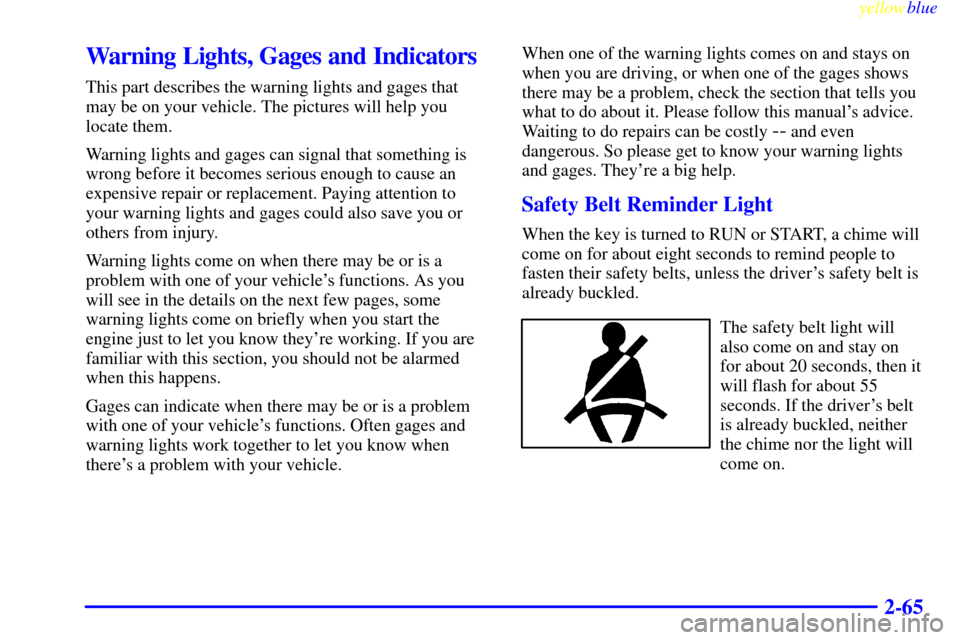
Safety Belt Reminder Light
When the key is turned to RUN or START, a chime will
come on for about eight seconds to remind people to
fasten their safety belts, unless the driver's safety belt is
already buckled.
The safety belt light will
also come on and stay on
for about 20 seconds, then it
will flash for about 55
seconds. If the driver's belt
is already buckled, neither
the chime nor the light will
come on.
Page 130 of 368

yellowblue
2-66 Air Bag Readiness Light
There is an air bag readiness light on the instrument
panel, which shows AIR BAG. The system checks the
air bag's electrical system for malfunctions. The light
tells you if there is an electrical problem. The system
check includes the air bag sensor, the air bag modules,
the wiring and the crash sensing and diagnostic module.
For more information on the air bag system, see ªAir
Bagº in the Index.
This light will come on
when you start your engine,
and it will flash for a few
seconds. Then the light
should go out. This means
the system is ready.
If the air bag readiness light stays on after you start the
engine or comes on when you are driving, your air bag
system may not work properly. Have your vehicle
serviced right away.
The air bag readiness light should flash for a few
seconds when you turn the ignition key to RUN. If the
light doesn't come on then, have it fixed so it will be
ready to warn you if there is a problem.
Charging System Light
The charging system light
will come on briefly when
you turn on the ignition, and
the engine is not running, as
a check to show you it
is working.
Then it should go out when the engine is started.
If it stays on, or comes on while you are driving, you
may have a problem with the electrical charging system.
It could indicate that you have a loose generator drive
belt, or another electrical problem. Have it checked right
away. Driving while this light is on could drain
your battery.
If you must drive a short distance with the light on, be
certain to turn off all your accessories, such as the radio
and air conditioner.
Page 164 of 368

yellowblue
3-24
3. Press and hold the TAPE AUX button for five
seconds. The tape symbol on the display will flash
for two seconds.
4. Insert the scrubbing action cleaning cassette.
5. Eject the cleaning cassette after the manufacturer's
recommended cleaning time.
When the cleaning cassette has been ejected, the cut tape
detection feature is active again.
You may also choose a non
-scrubbing action, wet-type
cleaner which uses a cassette with a fabric belt to clean
the tape head. This type of cleaning cassette will not
eject on its own. A non
-scrubbing action cleaner may
not clean as thoroughly as the scrubbing type cleaner.
The use of a non
-scrubbing action, dry-type cleaning
cassette is not recommended.
After you clean the player, press and hold EJECT for
five seconds to reset the CLN indicator. The radio will
display
--- to show the indicator was reset.
Cassettes are subject to wear and the sound quality
may degrade over time. Always make sure the cassette
tape is in good condition before you have your tape
player serviced.
Care of Your Compact Discs
Handle discs carefully. Store them in their original cases
or other protective cases and away from direct sunlight
and dust. If the surface of a disc is soiled, dampen a
clean, soft cloth in a mild, neutral detergent solution and
clean it, wiping from the center to the edge.
Be sure never to touch the signal surface when handling
discs. Pick up discs by grasping the outer edges or the
edge of the hole and the outer edge.
Care of Your Compact Disc Player
The use of CD lens cleaner discs is not advised, due to
the risk of contaminating the lens of the CD optics with
lubricants internal to the CD mechanism.
Fixed Mast Antenna
The fixed mast antenna can withstand most car washes
without being damaged. If the mast should ever become
slightly bent, you can straighten it out by hand. If the
mast is badly bent, as it might be by vandals, you should
replace it.
Check every once in a while to be sure the mast is still
tightened to the fender.