1998 VOLVO V90 warning lights
[x] Cancel search: warning lightsPage 32 of 175

1998 Volvo S90
Chapter 2 - (cont.)
Sun roof, Hazard warning flasher, Tailgate wiper/washer, heated rear window
pg. 23
C- Heated rear window,
heated side-door mirrors
(certain models)
Depress the switch to start
heating of rear window and side
mirrors. Both orange control
lights in the switch will
illuminate. A timer switches off
the side mirror heating after
approx. 6 minutes and the rear
window demister after 12
minutes. The control lights go
out correspondingly.
D- Hazard warning flasher
The four-way flasher should be
used to indicate that the vehicle
has become a traffic hazard.
NOTE:Regulations regarding the
use of the hazard warning flasher
may vary from state to state.
E-Central lock switch
Press the switch to lock/unlock
the doors and trunk/tailgate.
Lock: press the lower section of
the switch
Unlock: press the upper section
of the switch.
NOTE: The lock function only
operates if the doors are closed.
file:///K|/ownersdocs/1998/1998_SV90/98S90_023.htm (1 of 7)12/30/2006 \
1:52:37 PM
Page 46 of 175
1998 Volvo S90
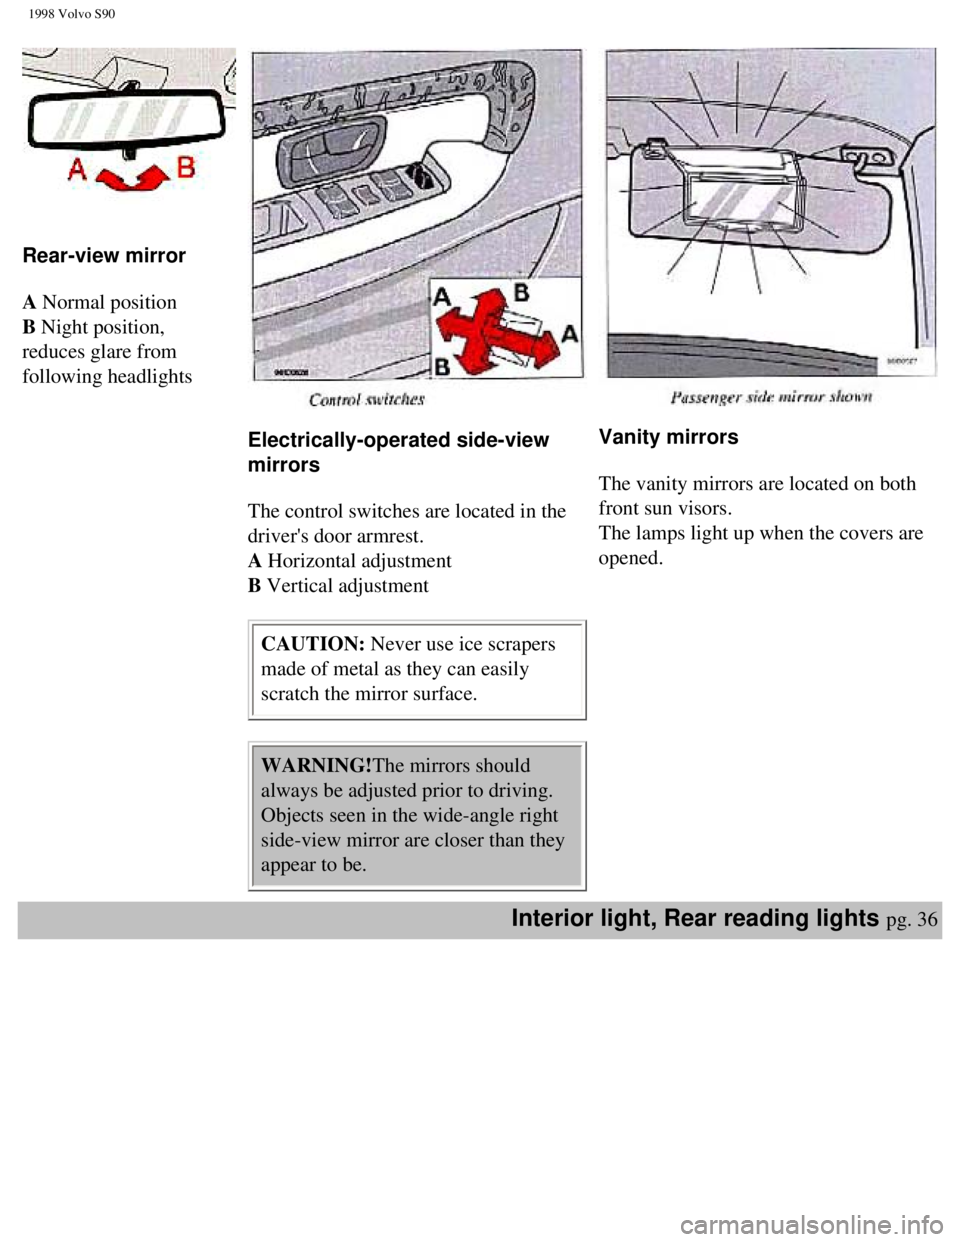
Rear-view mirror
A Normal position
B Night position,
reduces glare from
following headlights
Electrically-operated side-view
mirrors
The control switches are located in the
driver's door armrest.
A Horizontal adjustment
B Vertical adjustment
CAUTION: Never use ice scrapers
made of metal as they can easily
scratch the mirror surface.
WARNING!The mirrors should
always be adjusted prior to driving.
Objects seen in the wide-angle right
side-view mirror are closer than they
appear to be.
Vanity mirrors
The vanity mirrors are located on both
front sun visors.
The lamps light up when the covers are
opened.
Interior light, Rear reading lights pg. 36
file:///K|/ownersdocs/1998/1998_SV90/98S90_031.htm (5 of 6)12/30/2006 \
1:52:39 PM
Page 47 of 175
1998 Volvo S90
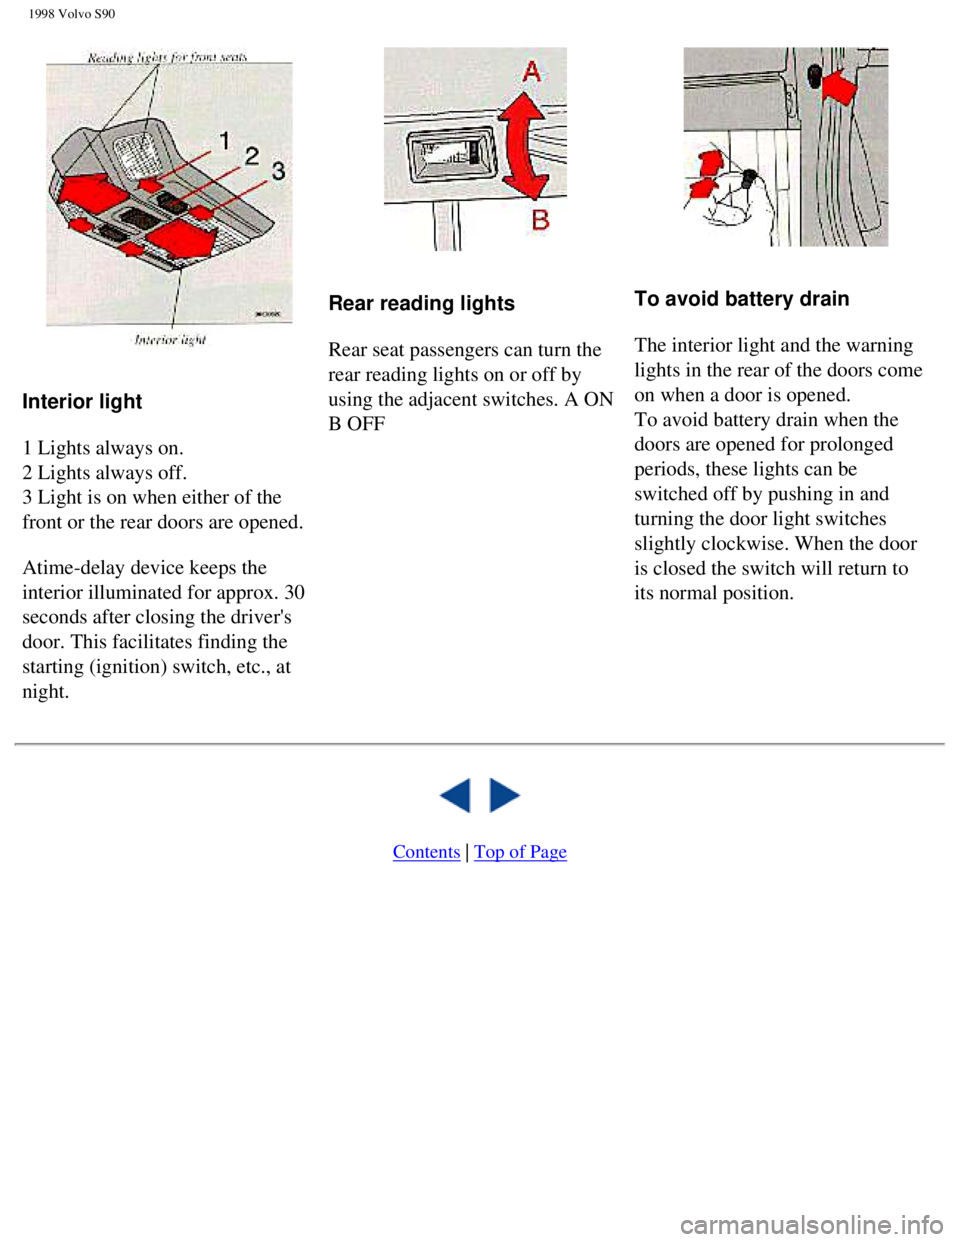
Interior light
1 Lights always on.
2 Lights always off.
3 Light is on when either of the
front or the rear doors are opened.
Atime-delay device keeps the
interior illuminated for approx. 30
seconds after closing the driver's
door. This facilitates finding the
starting (ignition) switch, etc., at
night.
Rear reading lights
Rear seat passengers can turn the
rear reading lights on or off by
using the adjacent switches. A ON
B OFF
To avoid battery drain
The interior light and the warning
lights in the rear of the doors come
on when a door is opened.
To avoid battery drain when the
doors are opened for prolonged
periods, these lights can be
switched off by pushing in and
turning the door light switches
slightly clockwise. When the door
is closed the switch will return to
its normal position.
Contents | Top of Page
file:///K|/ownersdocs/1998/1998_SV90/98S90_031.htm (6 of 6)12/30/2006 \
1:52:39 PM
Page 58 of 175

1998 Volvo S90
WARNING!
Always turn engine off and apply
parking brake when loading/
unloading the vehicle. Place
transmission selector in P (PARK)
position to help prevent
inadvertent movement of selector.
Alarm pg. 51
Alarm LED
Alarm
To lock: Press the lock/panic button
once to lock all doors and trunk/tailgate
and arm the security system. Lamps will
flash to acknowledge that the vehicle is
locked and the security system is armed.
To unlock: Press the unlock button once
to unlock the driver's door only and
disarm the security system.
Press the unlock button again (within 10
seconds) to unlock all doors and trunk/
tailgate.
Emergency function
To activate the " panic alarm
"function:
Press and hold lock/panic button for at
least 3 seconds. The car's lights will
flash and an alarm will sound for
approximately 30 seconds.
This function can be switched off at
any time by pressing either of the
buttons.
Programming a transmitter
New transmitters (max. 4) must be
programmed to function with your
alarm system. To do this:
l Make sure all doors, hood and
trunk/tailgate are closed.
l Turn the ignition on and off 5
times within 10 seconds. On the
fifth try, leave the ignition on.
l Press either button on the
transmitter. NOTE: The first transmitter must be
programmed within 15 seconds, the
others within 10 second intervals.
When the alarm system accepts the
codes from each transmitter, the
LED on the dash will glow steadily
for several seconds.
l Switch the ignition off and test the
transmitter(s).
Batteries
The remote transmitter is powered
by 2 three-volt batteries, type CR
1220. If three short signals are
audible from the transmitter each
time you lock/unlock the car, this
indicates that the batteries are weak.
Replacement: Remove the battery
cover on the back of the transmitter
with a coin. Replace the batteries.
Reinstall the cover, making sure it is
secured tightly to help protect the
transmitter.
NOTE: If only the driver's door is
unlocked, the lock will automatically
reengage (re-lock) and the alarm will
reset after 30 seconds unless the
door has been opened.
If all of the doors were unlocked (by
pushing button 2 twice within 10
seconds) and no door/trunk/tailgate
was opened within two minutes, all
locks will reengage and the alarm
will reset. This is to prevent the
vehicle from being left unlocked if
the unlock button is inadvertently
pressed.
The lock/unlock and alarm features
file:///K|/ownersdocs/1998/1998_SV90/98S90_048.htm (3 of 4)12/30/2006 \
1:52:40 PM
Page 77 of 175
1998 Volvo S90
Chapter 4 (cont)
Brake system
pg. 67
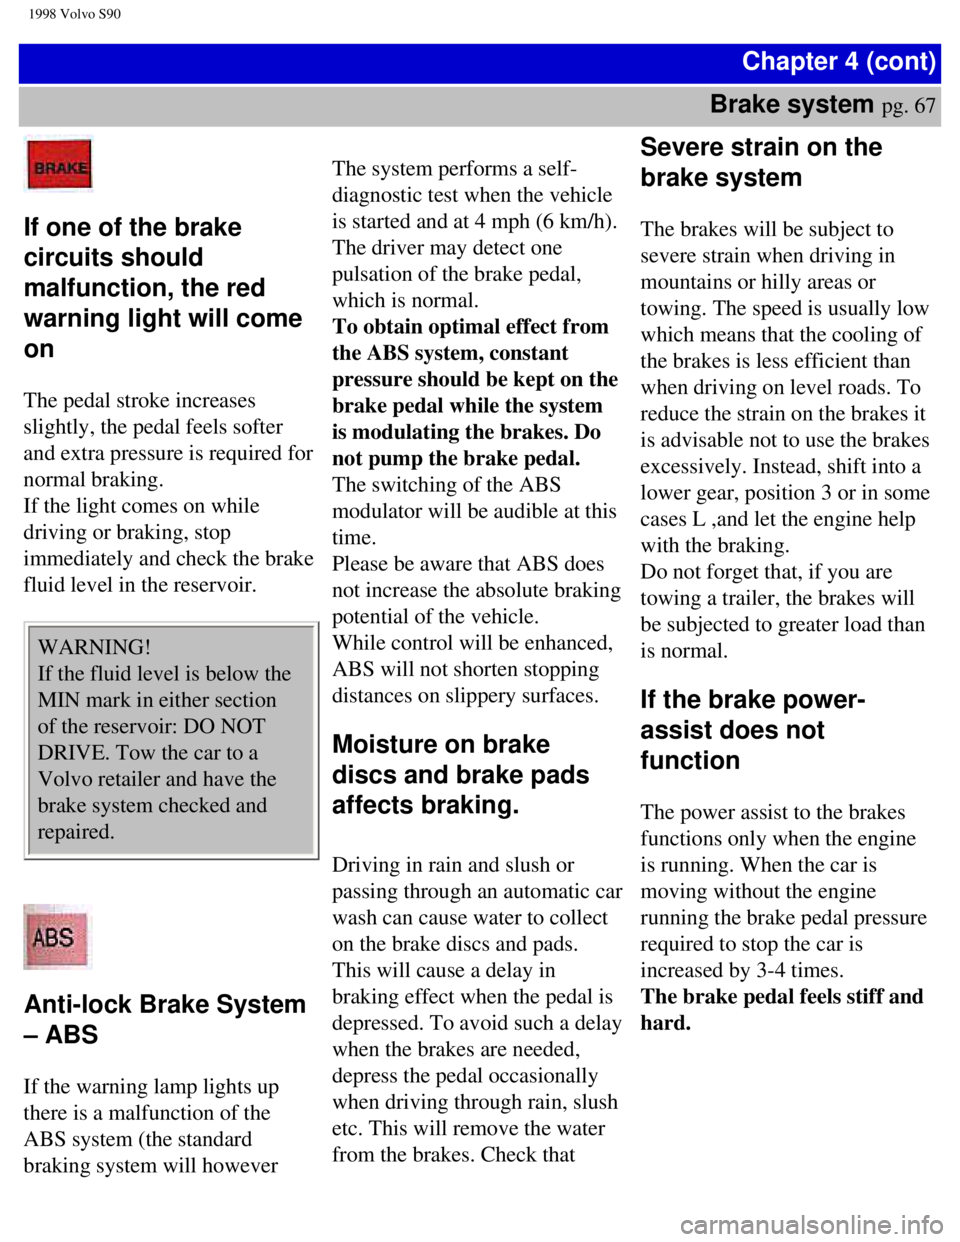
If one of the brake
circuits should
malfunction, the red
warning light will come
on
The pedal stroke increases
slightly, the pedal feels softer
and extra pressure is required for
normal braking.
If the light comes on while
driving or braking, stop
immediately and check the brake
fluid level in the reservoir.
WARNING!
If the fluid level is below the
MIN mark in either section
of the reservoir: DO NOT
DRIVE. Tow the car to a
Volvo retailer and have the
brake system checked and
repaired.
Anti-lock Brake System
– ABS
If the warning lamp lights up
there is a malfunction of the
ABS system (the standard
braking system will however
The system performs a self-
diagnostic test when the vehicle
is started and at 4 mph (6 km/h).
The driver may detect one
pulsation of the brake pedal,
which is normal.
To obtain optimal effect from
the ABS system, constant
pressure should be kept on the
brake pedal while the system
is modulating the brakes. Do
not pump the brake pedal.
The switching of the ABS
modulator will be audible at this
time.
Please be aware that ABS does
not increase the absolute braking
potential of the vehicle.
While control will be enhanced,
ABS will not shorten stopping
distances on slippery surfaces.
Moisture on brake
discs and brake pads
affects braking.
Driving in rain and slush or
passing through an automatic car
wash can cause water to collect
on the brake discs and pads.
This will cause a delay in
braking effect when the pedal is
depressed. To avoid such a delay
when the brakes are needed,
depress the pedal occasionally
when driving through rain, slush
etc. This will remove the water
from the brakes. Check that
Severe strain on the
brake system
The brakes will be subject to
severe strain when driving in
mountains or hilly areas or
towing. The speed is usually low
which means that the cooling of
the brakes is less efficient than
when driving on level roads. To
reduce the strain on the brakes it
is advisable not to use the brakes
excessively. Instead, shift into a
lower gear, position 3 or in some
cases L ,and let the engine help
with the braking.
Do not forget that, if you are
towing a trailer, the brakes will
be subjected to greater load than
is normal.
If the brake power-
assist does not
function
The power assist to the brakes
functions only when the engine
is running. When the car is
moving without the engine
running the brake pedal pressure
required to stop the car is
increased by 3-4 times.
The brake pedal feels stiff and
hard.
file:///K|/ownersdocs/1998/1998_SV90/98S90_067.htm (1 of 5)12/30/2006 \
1:52:43 PM
Page 91 of 175

1998 Volvo S90
Chapter 6 - (cont.)
Replacing bulbs
pg. 81
Replacing bulbs
The method for replacement of bulbs in
the various lighting units is shown on the
following pages. Make sure when
installing bulbs, that the guide pin on the
socket fits into its corresponding recess.
When installing Halogen bulbs, do not
touch the glass with your fingers because
grease, oil or any other impurities can be
carbonized onto the bulb and damage the
reflector.
Use bulbs of correct type and voltage.
Failure to do so could cause the bulb
failure warning light to activate.
NOTE: Turn the ignition and light
switch off before replacing any bulbs.
Headlights (high/low beams)
1. Press the protruding tabs on the plastic
cover and pull out towards the fender.
2. Turn the bulb and connector 1/4 turn
counterclockwise and remove.
3. Remove the connector from the bulb.
4. Press a new bulb into the connector
without touching the bulb itself.
5. Reinsert the bulb into the headlight
housing and turn 1/4 turn clockwise until
the unit seats properly.
6. Reinstall the plastic cover.
Bulb Power US Bulb No.
High beam 70W HB3/9005
Low beam 60W HB4/9006
Headlight adjustment
The height of the headlight beams can be
adjusted according to vehicle load. The
headlights should be re-aimed if heavy
loads are carried in the trunk/cargo area or
rear seat, or when towing a trailer.
To adjust the headlights:
Park the car on a level surface and open
the hood.
The headlights are equipped with a level
which can be seen by looking through the
clear "window" on the top of the headlight
lens.
Turn the height adjustment knob (A) until
the bubble in the level aligns with within
the marking lines on the level.
Lateral headlight adjustment (B) should
only be carried out by an authorized
Volvo retailer. This setting should be
preset to "0".
Replacing bulbs pg. 82
file:///K|/ownersdocs/1998/1998_SV90/98S90_081.htm (1 of 6)12/30/2006 \
1:52:45 PM
Page 94 of 175
1998 Volvo S90
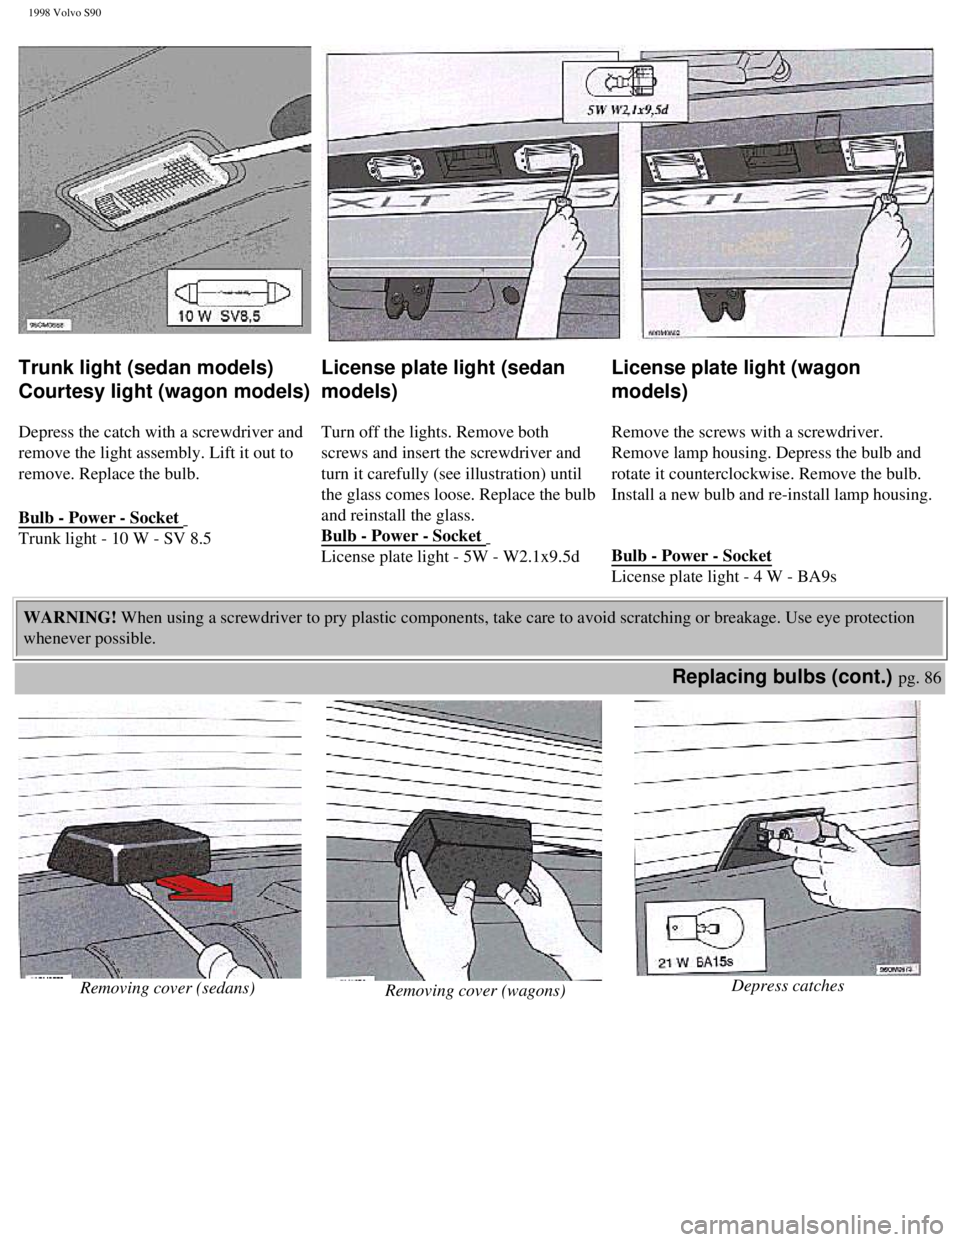
Trunk light (sedan models)
Courtesy light (wagon models)
Depress the catch with a screwdriver and
remove the light assembly. Lift it out to
remove. Replace the bulb.
Bulb - Power - Socket
Trunk light - 10 W - SV 8.5
License plate light (sedan
models)
Turn off the lights. Remove both
screws and insert the screwdriver and
turn it carefully (see illustration) until
the glass comes loose. Replace the bulb
and reinstall the glass.
Bulb - Power - Socket
License plate light - 5W - W2.1x9.5d
License plate light (wagon
models)
Remove the screws with a screwdriver.
Remove lamp housing. Depress the bulb and
rotate it counterclockwise. Remove the bulb.
Install a new bulb and re-install lamp housing.
Bulb - Power - Socket
License plate light - 4 W - BA9s
WARNING! When using a screwdriver to pry plastic components, take care to avoid \
scratching or breakage. Use eye protection
whenever possible.
Replacing bulbs (cont.) pg. 86
Removing cover (sedans)
Removing cover (wagons) Depress catches
file:///K|/ownersdocs/1998/1998_SV90/98S90_081.htm (4 of 6)12/30/2006 \
1:52:45 PM
Page 96 of 175
1998 Volvo S90
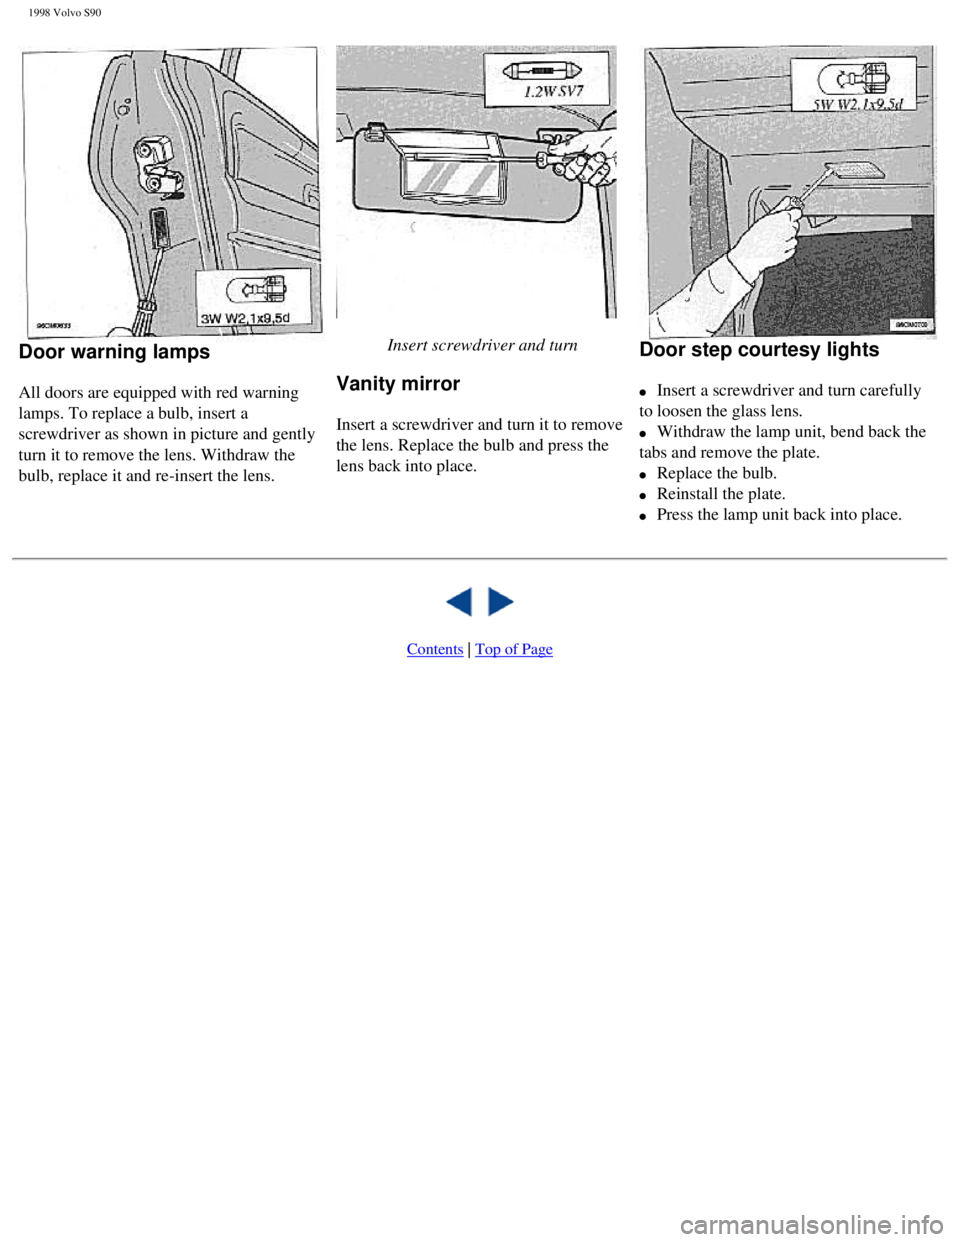
Door warning lamps
All doors are equipped with red warning
lamps. To replace a bulb, insert a
screwdriver as shown in picture and gently
turn it to remove the lens. Withdraw the
bulb, replace it and re-insert the lens.
Insert screwdriver and turn
Vanity mirror
Insert a screwdriver and turn it to remove
the lens. Replace the bulb and press the
lens back into place.
Door step courtesy lights
l Insert a screwdriver and turn carefully
to loosen the glass lens.
l Withdraw the lamp unit, bend back the
tabs and remove the plate.
l Replace the bulb.
l Reinstall the plate.
l Press the lamp unit back into place.
Contents | Top of Page
file:///K|/ownersdocs/1998/1998_SV90/98S90_081.htm (6 of 6)12/30/2006 \
1:52:45 PM