1998 VOLVO V90 hood open
[x] Cancel search: hood openPage 26 of 175

1998 Volvo S90
The warning lights described on pages 18 and 19 should never stay on whe\
n driving
When the ignition key is turned on, and before the engine starts, all of\
the warning lights should be on
to test the function of the bulbs. Should a light not go off after the e\
ngine has started, the system
indicated should be inspected. However, the parking brake reminder light\
will not go off until the
parking brake is fully released.
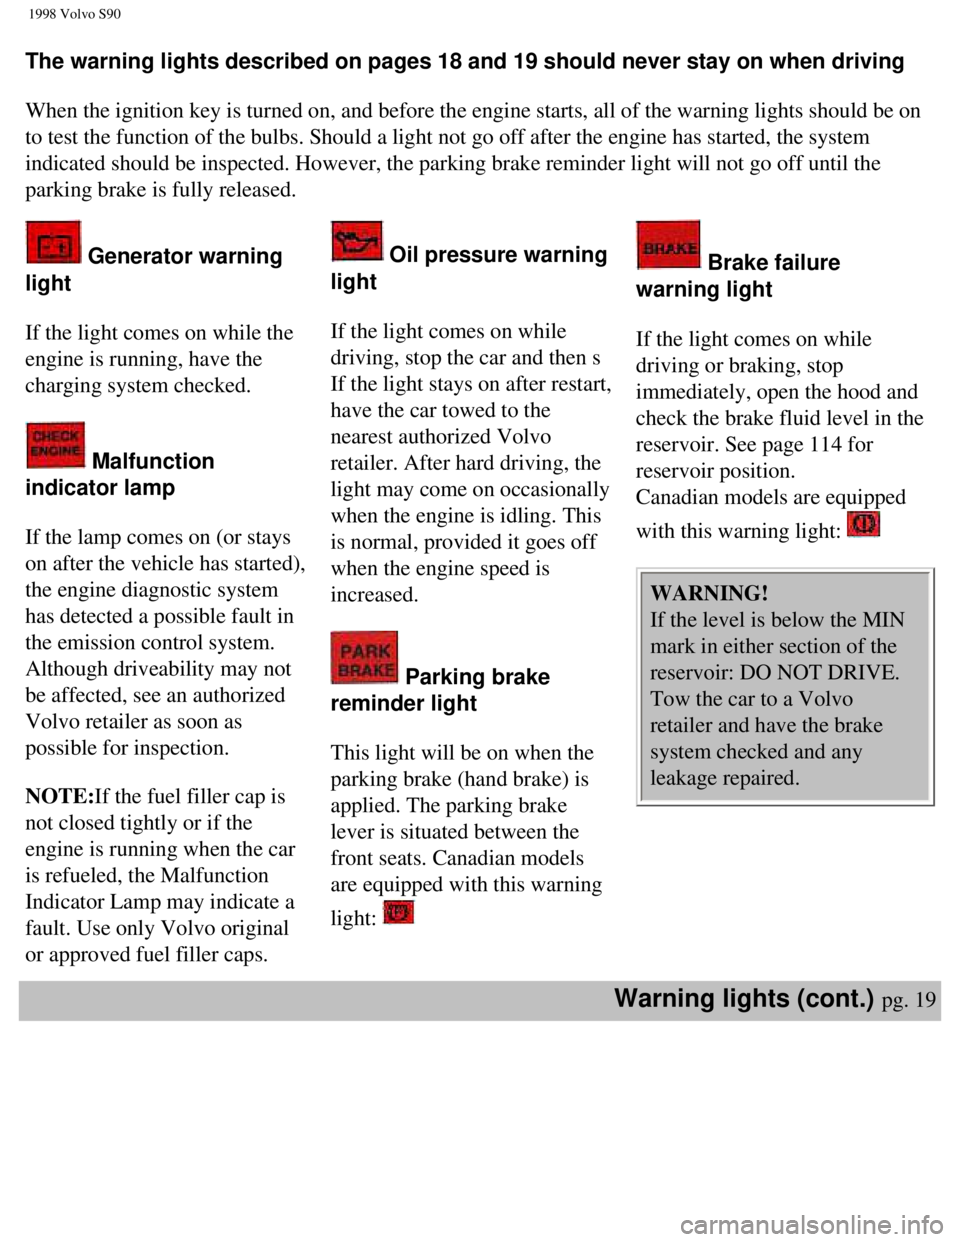
Generator warning
light
If the light comes on while the
engine is running, have the
charging system checked.
Malfunction
indicator lamp
If the lamp comes on (or stays
on after the vehicle has started),
the engine diagnostic system
has detected a possible fault in
the emission control system.
Although driveability may not
be affected, see an authorized
Volvo retailer as soon as
possible for inspection.
NOTE:If the fuel filler cap is
not closed tightly or if the
engine is running when the car
is refueled, the Malfunction
Indicator Lamp may indicate a
fault. Use only Volvo original
or approved fuel filler caps.
Oil pressure warning
light
If the light comes on while
driving, stop the car and then s
If the light stays on after restart,
have the car towed to the
nearest authorized Volvo
retailer. After hard driving, the
light may come on occasionally
when the engine is idling. This
is normal, provided it goes off
when the engine speed is
increased.
Parking brake
reminder light
This light will be on when the
parking brake (hand brake) is
applied. The parking brake
lever is situated between the
front seats. Canadian models
are equipped with this warning
light:
Brake failure
warning light
If the light comes on while
driving or braking, stop
immediately, open the hood and
check the brake fluid level in the
reservoir. See page 114 for
reservoir position.
Canadian models are equipped
with this warning light:
WARNING!
If the level is below the MIN
mark in either section of the
reservoir: DO NOT DRIVE.
Tow the car to a Volvo
retailer and have the brake
system checked and any
leakage repaired.
Warning lights (cont.) pg. 19
file:///K|/ownersdocs/1998/1998_SV90/98S90_017.htm (2 of 7)12/30/2006 \
1:52:36 PM
Page 49 of 175

1998 Volvo S90
Hood pg. 39
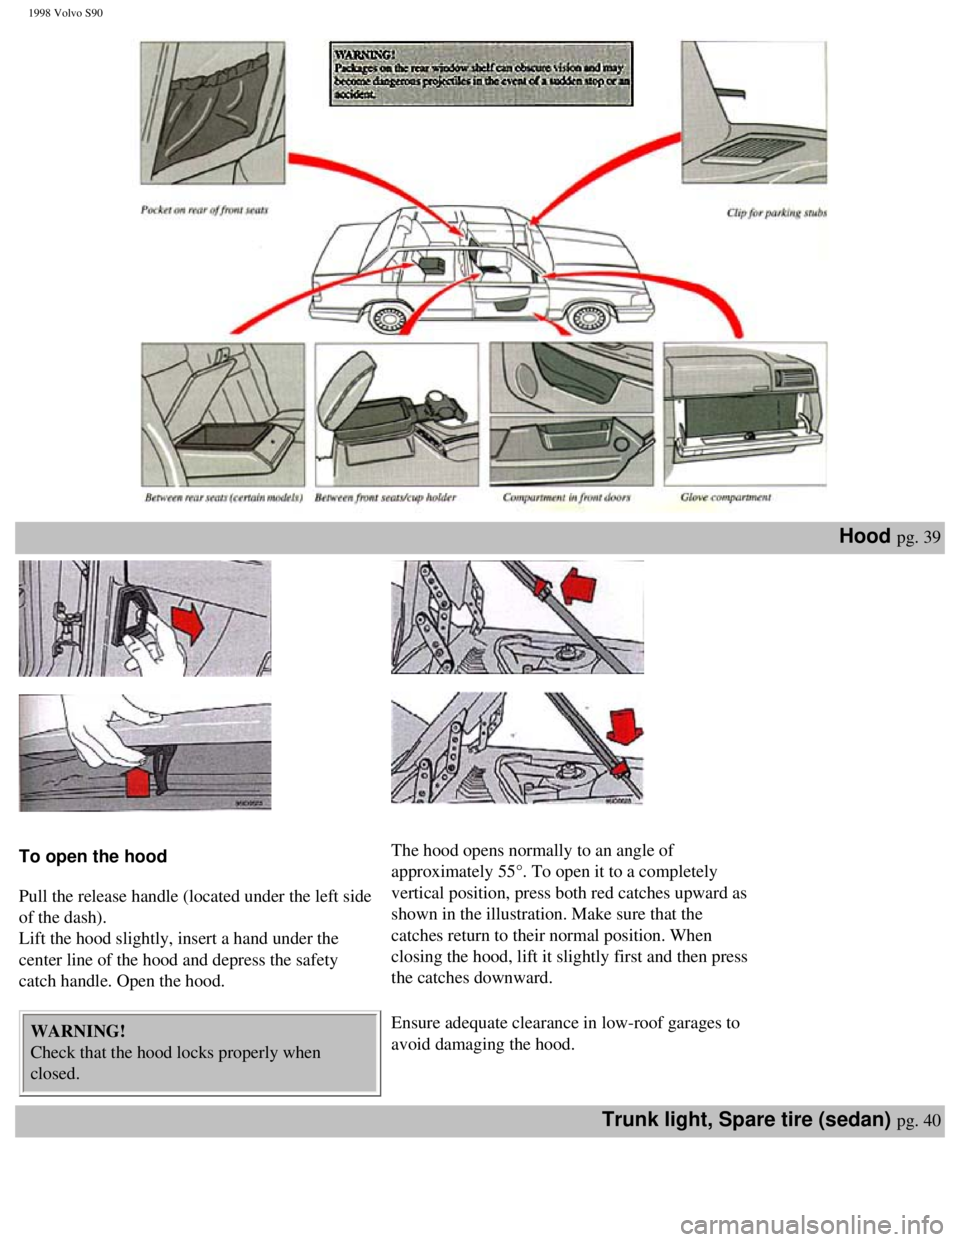
To open the hood
Pull the release handle (located under the left side
of the dash).
Lift the hood slightly, insert a hand under the
center line of the hood and depress the safety
catch handle. Open the hood.
WARNING!
Check that the hood locks properly when
closed.
The hood opens normally to an angle of
approximately 55°. To open it to a completely
vertical position, press both red catches upward as
shown in the illustration. Make sure that the
catches return to their normal position. When
closing the hood, lift it slightly first and then press
the catches downward.
Ensure adequate clearance in low-roof garages to
avoid damaging the hood.
Trunk light, Spare tire (sedan) pg. 40
file:///K|/ownersdocs/1998/1998_SV90/98S90_037.htm (2 of 4)12/30/2006 \
1:52:39 PM
Page 58 of 175

1998 Volvo S90
WARNING!
Always turn engine off and apply
parking brake when loading/
unloading the vehicle. Place
transmission selector in P (PARK)
position to help prevent
inadvertent movement of selector.
Alarm pg. 51
Alarm LED
Alarm
To lock: Press the lock/panic button
once to lock all doors and trunk/tailgate
and arm the security system. Lamps will
flash to acknowledge that the vehicle is
locked and the security system is armed.
To unlock: Press the unlock button once
to unlock the driver's door only and
disarm the security system.
Press the unlock button again (within 10
seconds) to unlock all doors and trunk/
tailgate.
Emergency function
To activate the " panic alarm
"function:
Press and hold lock/panic button for at
least 3 seconds. The car's lights will
flash and an alarm will sound for
approximately 30 seconds.
This function can be switched off at
any time by pressing either of the
buttons.
Programming a transmitter
New transmitters (max. 4) must be
programmed to function with your
alarm system. To do this:
l Make sure all doors, hood and
trunk/tailgate are closed.
l Turn the ignition on and off 5
times within 10 seconds. On the
fifth try, leave the ignition on.
l Press either button on the
transmitter. NOTE: The first transmitter must be
programmed within 15 seconds, the
others within 10 second intervals.
When the alarm system accepts the
codes from each transmitter, the
LED on the dash will glow steadily
for several seconds.
l Switch the ignition off and test the
transmitter(s).
Batteries
The remote transmitter is powered
by 2 three-volt batteries, type CR
1220. If three short signals are
audible from the transmitter each
time you lock/unlock the car, this
indicates that the batteries are weak.
Replacement: Remove the battery
cover on the back of the transmitter
with a coin. Replace the batteries.
Reinstall the cover, making sure it is
secured tightly to help protect the
transmitter.
NOTE: If only the driver's door is
unlocked, the lock will automatically
reengage (re-lock) and the alarm will
reset after 30 seconds unless the
door has been opened.
If all of the doors were unlocked (by
pushing button 2 twice within 10
seconds) and no door/trunk/tailgate
was opened within two minutes, all
locks will reengage and the alarm
will reset. This is to prevent the
vehicle from being left unlocked if
the unlock button is inadvertently
pressed.
The lock/unlock and alarm features
file:///K|/ownersdocs/1998/1998_SV90/98S90_048.htm (3 of 4)12/30/2006 \
1:52:40 PM
Page 91 of 175

1998 Volvo S90
Chapter 6 - (cont.)
Replacing bulbs
pg. 81
Replacing bulbs
The method for replacement of bulbs in
the various lighting units is shown on the
following pages. Make sure when
installing bulbs, that the guide pin on the
socket fits into its corresponding recess.
When installing Halogen bulbs, do not
touch the glass with your fingers because
grease, oil or any other impurities can be
carbonized onto the bulb and damage the
reflector.
Use bulbs of correct type and voltage.
Failure to do so could cause the bulb
failure warning light to activate.
NOTE: Turn the ignition and light
switch off before replacing any bulbs.
Headlights (high/low beams)
1. Press the protruding tabs on the plastic
cover and pull out towards the fender.
2. Turn the bulb and connector 1/4 turn
counterclockwise and remove.
3. Remove the connector from the bulb.
4. Press a new bulb into the connector
without touching the bulb itself.
5. Reinsert the bulb into the headlight
housing and turn 1/4 turn clockwise until
the unit seats properly.
6. Reinstall the plastic cover.
Bulb Power US Bulb No.
High beam 70W HB3/9005
Low beam 60W HB4/9006
Headlight adjustment
The height of the headlight beams can be
adjusted according to vehicle load. The
headlights should be re-aimed if heavy
loads are carried in the trunk/cargo area or
rear seat, or when towing a trailer.
To adjust the headlights:
Park the car on a level surface and open
the hood.
The headlights are equipped with a level
which can be seen by looking through the
clear "window" on the top of the headlight
lens.
Turn the height adjustment knob (A) until
the bubble in the level aligns with within
the marking lines on the level.
Lateral headlight adjustment (B) should
only be carried out by an authorized
Volvo retailer. This setting should be
preset to "0".
Replacing bulbs pg. 82
file:///K|/ownersdocs/1998/1998_SV90/98S90_081.htm (1 of 6)12/30/2006 \
1:52:45 PM