Page 149 of 261
name. SIENNA (U)
149
Defrosting
The outside of the windshield
For best results, set controls to:
Fan speed —Any setting except ”OFF”
Temperature —Towards WA R M
(red zone)
Air intake —FRESH (outside air)
Air flow —WINDSHIELD
Turning the air flow control knob to wind-
shield position turns on the defroster−
linked air conditioning. At this time, the
”A/C” button indicator comes on regard-
less of whether or not the ”A/C” button is
pressed in. This is to clean up the front
view more quickly.
When the ”A/C” button is not pressed in,
turning the air flow control knob to anoth-
er position turns off the air conditioning.
�To heat the vehicle interior while de-
frosting the windshield, choose
floor/windshield air flow.
—Instrument panel vents
Driver’s side
Passenger’s side
If air flow control is not satisfactory, check
the instrument panel vents. The instrument
panel vents may be opened or closed as
shown.
ProCarManuals.com
Page 155 of 261
name. SIENNA (U)
155
Part 1
OPERATION OF
INSTRUMENTS
AND CONTROLS—
Chapter 1−8
Other equipment
�Clock
�Cigarette lighter and ashtray
�P ower out let s
�Glovebox
�Garage door opener box
�Auxiliary boxes
�Cup holder
�First−aid kit and warning reflector
holder
�Tire pressure warning system
�Floor mat
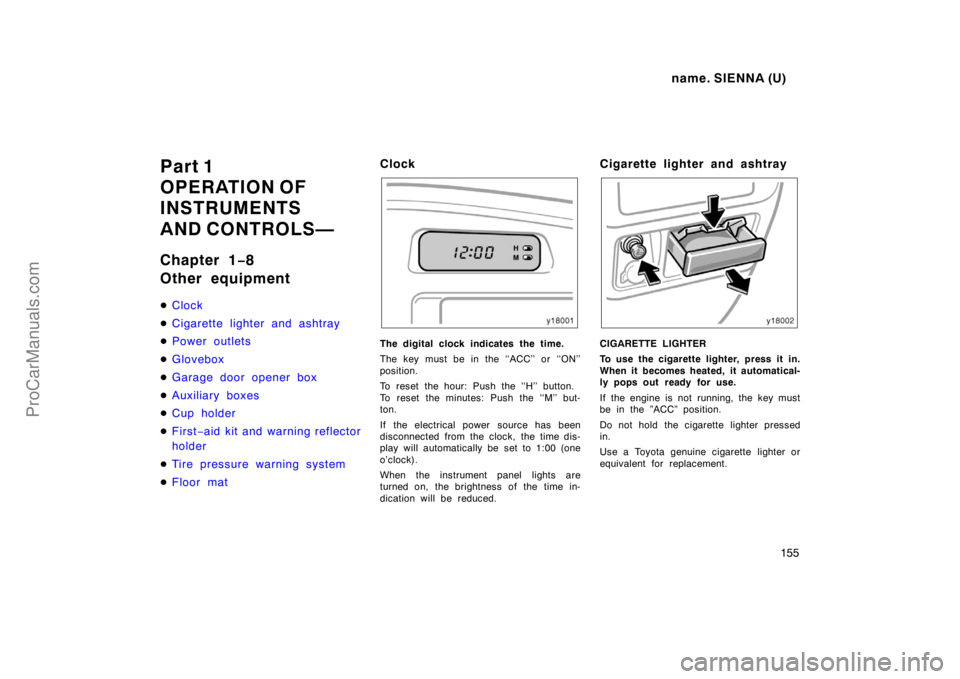
Clock
The digital clock indicates the time.
The key must be in the ‘‘ACC’’ or ‘‘ON’’
position.
To reset the hour: Push the ‘‘H’’ button.
To reset the minutes: Push the ‘‘M’’ but-
ton.
If the electrical power source has been
disconnected from the clock, the time dis-
play will automatically be set to 1:00 (one
o’clock).
When the instrument panel lights are
turned on, the brightness of the time in-
dication will be reduced.
Cigarette lighter and ashtray
CIGARETTE LIGHTER
To use the cigarette lighter, press it in.
When it becomes heated, it automatical-
ly pops out ready for use.
If the engine is not running, the key must
be in the ”ACC” position.
Do not hold the cigarette lighter pressed
in.
Use a Toyota genuine cigarette lighter or
equivalent for replacement.
ProCarManuals.com
Page 161 of 261
name. SIENNA (U)
161
Type A (front roof)
Type B (instrument panel)
Type C (front console)
Type D (front passenger’s seat)
Type E (rear lateral side)
Type F (rear right side)
ProCarManuals.com
Page 165 of 261
name. SIENNA (U)
165
4. With the vehicle stopped, push the re-
set switch on the left lower instrument
panel and hold it until the low tire
pressure warning light blinks for three
times.
5. The initial adjustment is completed af-
ter driving at the speeds of 30 km/h
(19 mph) or over for about total 8
hours, when the tire pressure warning
system detects the normal tire pressur-
es.
Do not push the reset switch without ad-
justing the tire pressure to the specified
level. Otherwise, the low tire pressure
warning light may not come on even if the
tire pressure is low, or it may come on
when the tire pressure is actually normal.
If you push the reset switch while the
vehicle is moving, the initial adjustment is
not performed.
If the low tire pressure warning light does
not blink when you push and hold the
reset switch, have the low pressure warn-
ing system checked at your Toyota dealer.
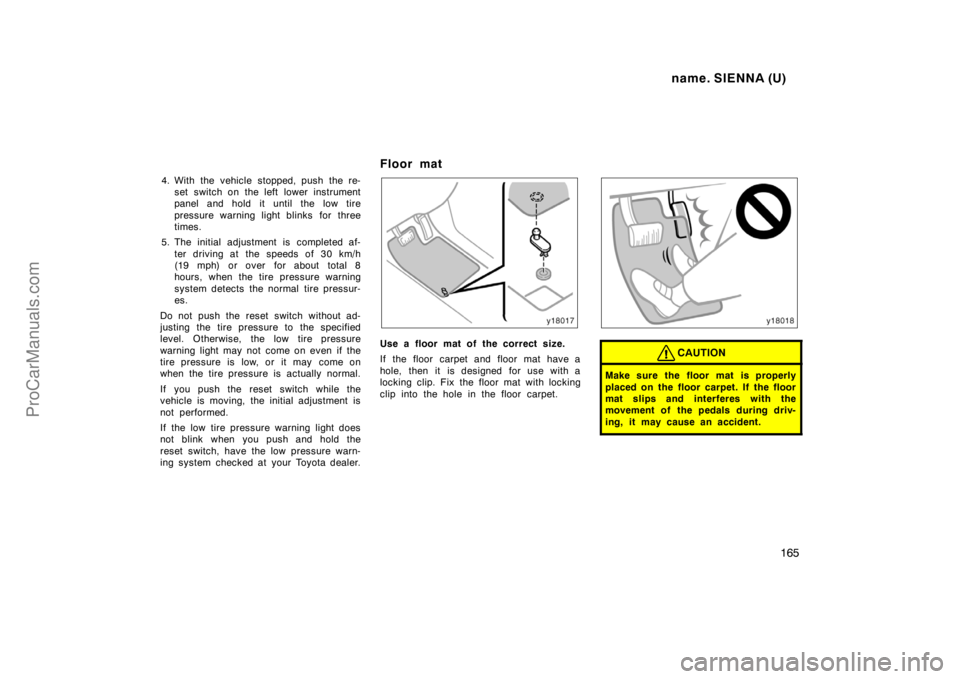
Floor mat
Use a floor mat of the correct size.
If the floor carpet and floor mat have a
hole, then it is designed for use with a
locking clip. Fix the floor mat with locking
clip into the hole in the floor carpet.CAUTION
Make sure the floor mat is properly
placed on the floor carpet. If the floor
mat slips and interferes with the
movement of the pedals during driv-
ing, it may cause an accident.
ProCarManuals.com
Page 175 of 261
name. SIENNA (U)
175
Luggage stowage precautions
When stowing luggage or cargo in the
vehicle, observe the following:
�Put luggage or cargo in the luggage
compartment when at all possible. Be
sure all items are secured in place.
�Be careful to keep the vehicle bal-
anced. Locating the weight as far for-
ward as possible helps maintain bal-
ance.
�For better fuel economy, do not carry
unneeded weight.
CAUTION
�To prevent luggage or packages
from sliding forward during braking,
do not stack anything in the lug-
gage compartment higher than the
seatbacks. Keep luggage or pack-
ages low, as close to the floor as
possible.
�Never allow anyone to ride in the
luggage compartment. It is not de-
signed for passengers. They should
ride in their seats with their seat
belts properly fastened. Otherwise,
they are much more likely to suffer
serious bodily injury, in the event
of sudden braking or a collision.
�Do not drive with objects left on
top of the instrument panel. They
may interfere with the driver’s field
of view. Or they may move during
sharp vehicle acceleration or turn-
ing, and impair the driver’s control
of the vehicle. In an accident they
may injure the vehicle occupants.
NOTICE
Do not load the vehicle beyond the
vehicle capacity weight specified in
Part 8.
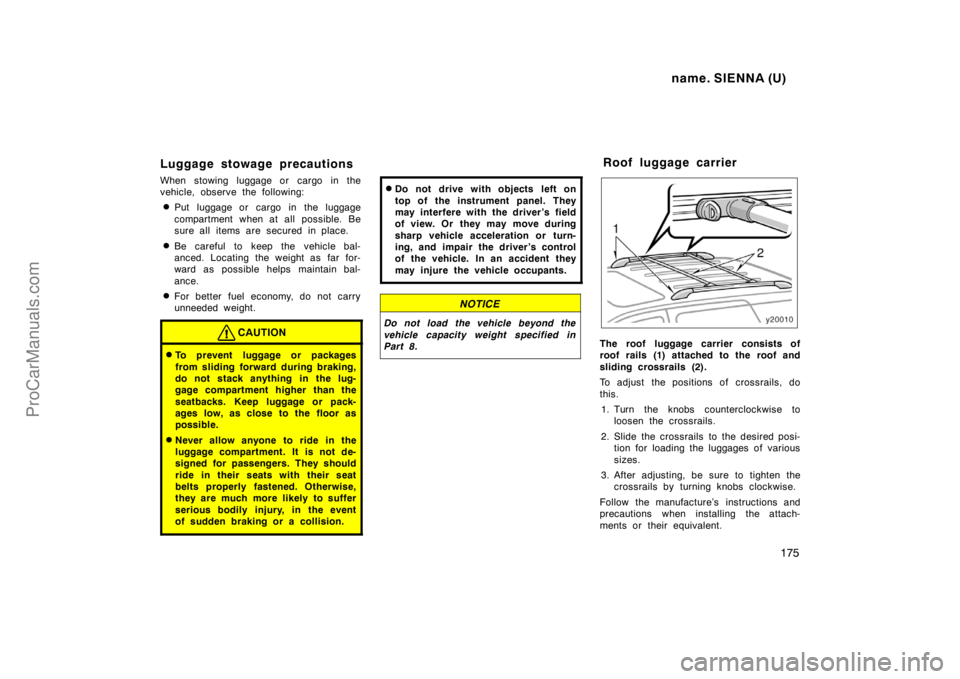
The roof luggage carrier consists of
roof rails (1) attached to the roof and
sliding crossrails (2).
To adjust the positions of crossrails, do
this.
1. Turn the knobs counterclockwise to
loosen the crossrails.
2. Slide the crossrails to the desired posi-
tion for loading the luggages of various
sizes.
3. After adjusting, be sure to tighten the
crossrails by turning knobs clockwise.
Follow the manufacture’s instructions and
precautions when installing the attach-
ments or their equivalent.
Roof luggage carrier
ProCarManuals.com
Page 176 of 261
name. SIENNA (U)
176
CAUTION
When you load cargo on the roof lug-
gage carrier, observe the following:
�Place the cargo so that its weight
is distributed evenly between the
front and rear axles.
�If loading long or wide cargo, never
exceed the vehicle overall length or
width. (See ”Dimensions” in Part 8
for information on your vehicle
overall length and width.)
�Before driving, make sure the cargo
is securely fastened on the roof
luggage carrier.
�Avoid sudden starts, sharp turns or
sudden braking.
�If driving for a long distance, on
rough roads, or at high speeds,
stop the vehicle now and then dur-
ing the trip to make sure the cargo
remains in its place.
�Do not exceed 50 kg (110 lb.) cargo
weight on the roof rails. However,
if the allowable cargo weight of the
cross rails is under 50 kg (110 lb.)
observe the load limit.
NOTICE
When loading the luggages, be careful
not to scratch the surface of the
moon roof.
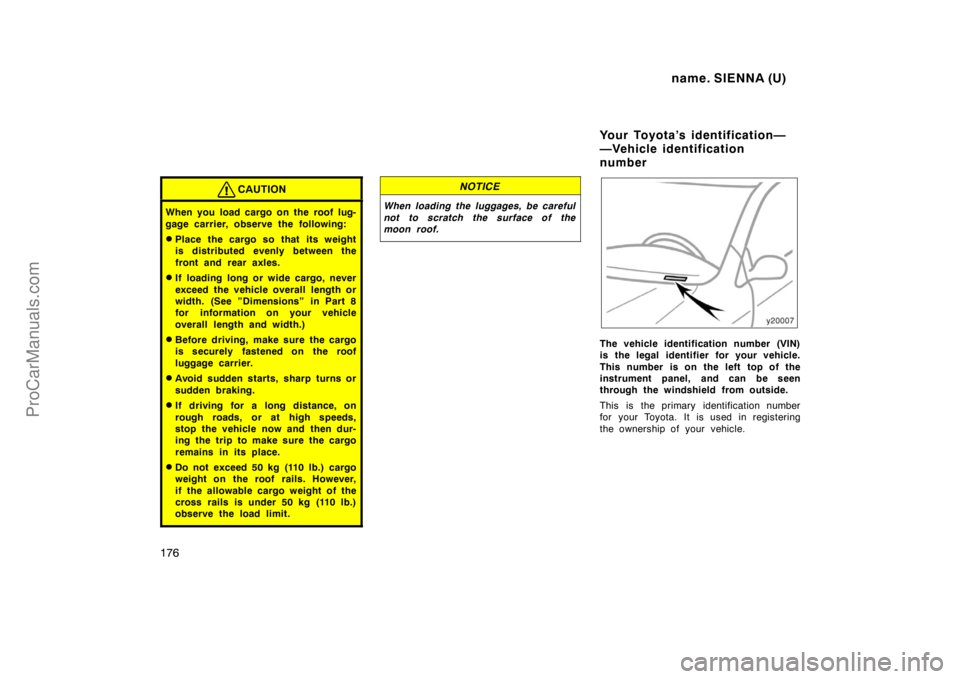
The vehicle identification number (VIN)
is the legal identifier for your vehicle.
This number is on the left top of the
instrument panel, and can be seen
through the windshield from outside.
This is the primary identification number
for your Toyota. It is used in registering
the ownership of your vehicle.
Your Toyota’s identification—
—Vehicle identification
number
ProCarManuals.com
Page 210 of 261
name. SIENNA (U)
210
Cleaning the interior
CAUTION
Do not wash the vehicle floor with
water, or allow water to get onto the
floor when cleaning the vehicle interi-
or or exterior. Water may get into
audio components or other electrical
components above or under the floor
carpet (or mat) and cause a malfunc-
tion; and it may cause body corro-
sion.
Vinyl interior
The vinyl upholstery may be easily
cleaned with a mild soap or detergent
and water.
First vacuum over the upholstery to re-
move loose dirt. Then, using a sponge or
soft cloth, apply the soap solution to the
vinyl. After allowing it to soak in for a few
minutes to loosen the dirt, remove the dirt
and wipe off the soap with a clean damp
cloth. If all the dirt do not come off, re-
peat the procedure. Commercial foaming−
type vinyl cleaners are also available
which work well. Follow the manufacturer ’s
instructions.
NOTICE
Do not use solvent, thinner, gasoline
or window cleaner on the interior.
Carpets
Use a good foam−type shampoo to
clean the carpets.
Begin by vacuuming thoroughly to remove
as much dirt as possible. Several types of
foam cleaners are available; some are in
aerosol can sand others are powders or
liquids which you mix with water to pro-
duce a foam. To shampoo the carpets,
use a sponge or brush to apply the foam.
Rub in overlapping circles.
Do not apply water—the best results are
obtained by keeping the carpet as dry as
possible. Read the shampoo instructions
and follow them closely.
Seat belts
The seat belts may be cleaned with
mild soap and water or with
l ukewarm
water.
Use a cloth or sponge. As you are clean-
ing, check the belts for excessive wear,
fraying, or cuts.
NOTICE
�Do not use dye or bleach on the
belts—it may weaken them.
�Do not use the belts until they be-
come dry.
Windows
The windows may be cleaned with any
household window cleaner.
NOTICE
When cleaning the inside of the win-
dows, be careful not to scratch or
damage the heater wires on the rear
window.
Air conditioning control panel, car au-
dio, instrument panel,
c onsole panel,
and switches
Use a soft damp cloth for cleaning.
Soak a clean soft cloth in water or luke-
warm water then lightly
wipe off dirt.
ProCarManuals.com
Page 250 of 261
name. SIENNA (U)
250
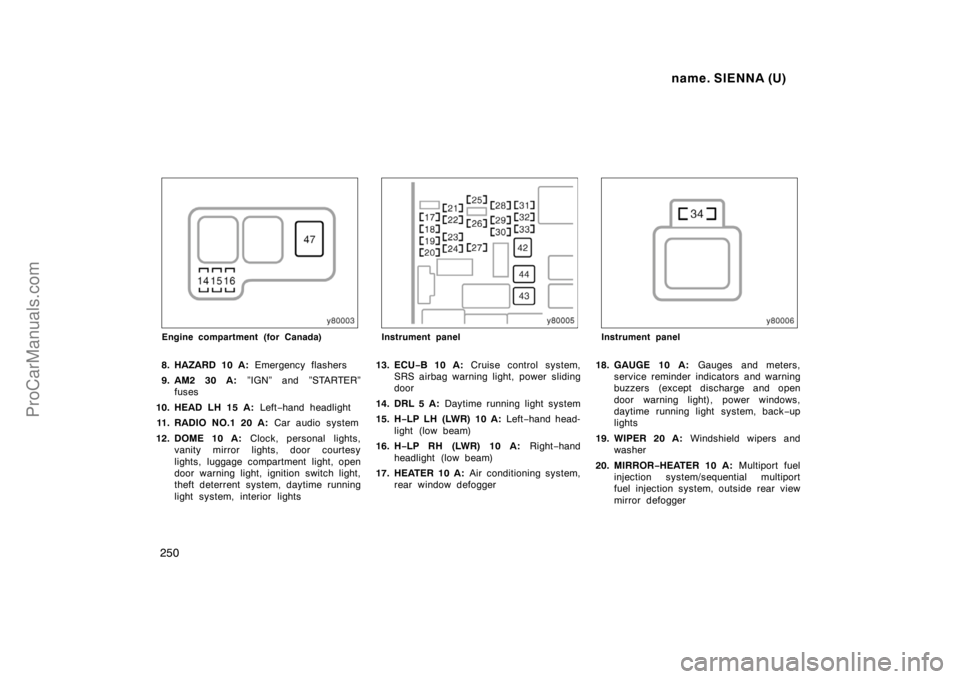
Engine compartment (for Canada)
8. HAZARD 10 A: Emergency flashers
9. AM2 30 A: ”IGN” and ”STARTER”
fuses
10. HEAD LH 15 A: Left−hand headlight
11. RADIO NO.1 20 A: Car audio system
12. DOME 10 A: Clock, personal lights,
vanity mirror lights, door courtesy
lights, luggage compartment light, open
door warning light, ignition switch light,
theft deterrent system, daytime running
light system, interior lights
Instrument panel
13. ECU−B 10 A: Cruise control system,
SRS airbag warning light, power sliding
door
14. DRL 5 A: Daytime running light system
15. H−LP LH (LWR) 10 A: Left−hand head-
light (low beam)
16. H−LP RH (LWR) 10 A: Right−hand
headlight (low beam)
17. HEATER 10 A: Air conditioning system,
rear window defogger
Instrument panel
18. GAUGE 10 A: Gauges and meters,
service reminder indicators and warning
buzzers (except discharge and open
door warning light), power windows,
daytime running light system, back−up
lights
19. WIPER 20 A: Windshield wipers and
washer
20. MIRROR−HEATER 10 A: Multiport fuel
injection system/sequential multiport
fuel injection system, outside rear view
mirror defogger
ProCarManuals.com