1998 PONTIAC GRAND PRIX torque
[x] Cancel search: torquePage 105 of 402
If you have to leave your vehicle with the engine running,
be sure your vehicle is in
PARK (P) and your parking
brake is
firmy set before you leave it. After you’ve moved
the
shift lever into PARK (P) position, hold the regular
brake
pedal down. Then, see if you can move the shift
lever away from PARK (P) without first pulling it toward
you (or,
if you have a console shift lever, without first
pushing the button).
If you can, it means that the shift
lever wasn’t fully locked into PARK (P).
Torque Lock
If you are parking on a hill and you don’t shift your
transaxle into
PARK (P) properly, the weight of the
vehicle may put too much force on the parking pawl
in
the transaxle. You may find it difficult to pull the shift
lever out of
PARK (P). This is called “torque lock.” To
prevent torque lock, set the parking brake and then shift
into
PARK (P) properly before you leave the driver’s
seat.
To find out how, see “Shifting Into PARK (P)” in
the Index.
When you are ready to drive, move the shift lever out
of
PARK (P) before you release the parking brake.
If torque lock does occur, you may need to have another
vehicle push yours a little uphill to take some of the
pressure from the parking pawl in the transaxle,
so you
can pull the shift lever out
of PARK (P).
Shifting Out of PARK (P)
Your vehicle has a Brake-Transaxle Shift Interlock. You
must fully apply your regular brakes before you can
shift from PARK (P) when the ignition is in RUN. See
“Automatic Transaxle Operation” in the Index.
If you cannot shift out
of PARK (P), ease pressure on
the shift lever by pushing it all the way into PARK (P)
while keeping the brake pedal pushed down. Release the
shift lever button if you have a console shift. Then move
the shift lever out of
PARK (P), being sure to press the
shift lever button if you have a console shift.
If you ever hold the brake pedal down but still can’t
shift out of
PARK (P) with column shift, try this:
1. Turn the key to OFF.
2. Apply and hold the brake until the end of Step 4.
3. Shift to NEUTRAL (N).
4. Start the engine and shift to the drive gear you want.
5. Have the vehicle fixed as soon as you can.
With the console shift lever, see “Shift Lock Release”
earlier
in this section.
2-30
Page 269 of 402
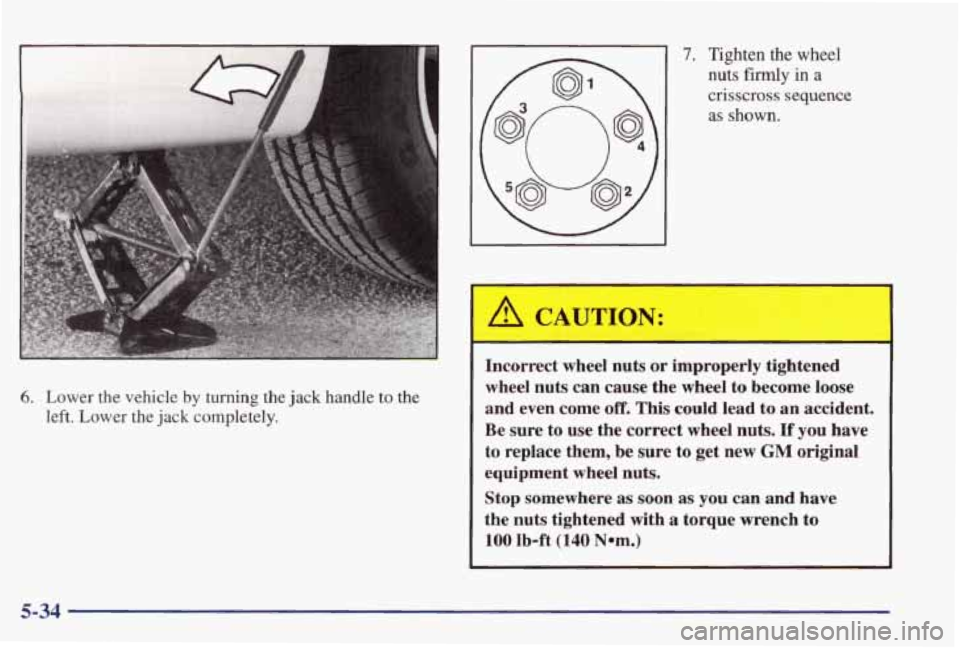
6. Lower the vehicle by turning the jack handle to the
left. Lower the
jack completely.
7. Tighten the wheel
nuts
firmly in a
crisscross sequence
as shown.
Incorrect wheel nuts or improperly tightened
wheel nuts can cause the wheel to become loose
and even come
off. This could lead to an accident.
Be sure to use the correct wheel nuts.
If you have
to replace them, be sure to get new GM original
equipment wheel nuts.
Stop somewhere
as soon as you can and have
the nuts tightened with a torque wrench to
100 lb-ft (140 Nom.)
5-34
Page 270 of 402

NOTICE:
Improperly tightened wheel nuts can lead to
brake pulsation and rotor damage.
To avoid
expensive brake repairs, evenly tighten the wheel
nuts
in the proper sequence and to the proper
torque specification.
Don’t
try to put the wheel cover on your compact
spare tire.
It won’t fit. Store the wheel cover in the
trunk until you have the flat tire repaired or replaced.
I NOTICE:
Wheel covers won’t fit on your compact spare. If
you try to put a wheel cover on your compact
spare, you could damage the cover
or the spare.
Storing the Flat Tire and Tools
A CAUTION:
Storing a jack, a tire or other equipment in the
passenger compartment
of the vehicle could
cause iqjury.
In a sudden stop or collision, loose
equipment could strike someone. Store all these
in the proper place.
After you’ve put the compact spare tire on
your vehicle,
you’ll need to store the flat tire in
your trunk. Use the
following procedure to secure the flat tire
in the trunk.
5-35
Page 296 of 402
Supercharger Oil
Unless you are technically qualified and have the proper
tools,
you should let your dealer or a qualified service
center perform this maintenance.
When to Check
Check oil level every 30,000 miles (50 000 km) or every
36 months, whichever occurs first.
What Kind of Oil to Use
See “Recommended Fluids and Lubricants” in the Index
and use only the recommended oil,
How to Check and Add Oil
Check oil only when the engine is cold. Allow the
engine to cool two to
three hours after running.
A CAUTION:
If you remove the supercharger oil fill plug while
the engine is hot, pressure may cause hot
oil to
blow out
of the oil fill hole. You may be burned.
Do not remove the plug until the engine cools.
1. Clean the area around the oil fill plug before
2. Remove the oil fill plug using a 3/16 inch
3. The oil level is correct when it just reaches the
bottom
of the threads of the inspection hole.
removing
it.
Allen wrench.
4. Replace the oil plug with the O-ring in place. Torque
to
88 lb-in (10 N-m).
6-21
Page 311 of 402
Some driving conditions or climates may cause a brake
squeal when the brakes are first applied or lightly
applied.
This does not mean something is wrong with
your brakes.
Properly torqued wheel nuts are necessary to help
prevent brake pulsation. When tires are rotated, inspect
brake pads for wear and evenly torque wheel nuts in the
proper sequence to GM specifications.
Brake linings should always be replaced as complete
axle sets.
See “Brake System Inspection” in Section
7 of
this manual under Part C “Periodic
Maintenance Inspections.”
Brake Pedal Travel
See your dealer if the brake pedal does not return to
normal height, or
if there is a rapid increase in pedal
travel.
This could be a sign of brake trouble.
Brake Adjustment
Every time you apply the brakes, with or without the
vehicle moving, your brakes adjust for wear.
Replacing Brake System Parts
The braking system on a modem vehicle is complex. Its
many parts have to
be of top quality and work well
together
if the vehicle is to have really good braking.
Your vehicle was designed and tested with top-quality
GM brake parts.
When you replace parts of your braking
system
-- for example, when your brake linings wear
down and you have to have new ones put in
-- be sure
you get new approved GM replacement parts. If you
don’t, your brakes
may no longer work properly. For
example, if someone puts in brake linings that are wrong
for your vehicle, the balance between your front and
rear brakes can change
-- for the worse. The braking
performance you’ve
come to expect can change in many
other ways if someone puts in the wrong replacement
brake parts.
Battery
Every new Pontiac has an ACDelco Freedom@ battery.
You never have to add water to one of these. When it’s
time for a
new battery, we recommend an ACDelco
Freedom battery. Get one that has the replacement
number shown on the original battery’s label.
6-36
Page 322 of 402
After the tires have been rotated, adjust the front and rear inflation pressures as shown on
the Tire-Loading
Information label. Make certain that all wheel nuts are properly tightened. See “Wheel
Nut Torque” in
the Index.
L
Rust or dirt on a wheel, or on the parts to which
it is fastened, can make wheel nuts become loose
after a time. The wheel could come
off and cause
an accident. When you change a wheel, remove
any rust or
dirt from places where the wheel
attaches to the vehicle. In an emergency, you can
use a cloth or a paper towel to do this; but be
sure to use
a scraper or wire brush later, if you
need to, to get all the rust or dirt
off. (See
“Changing
a Flat Tire” in the Index.)
I I
When It’s Time for New Tires
.. I
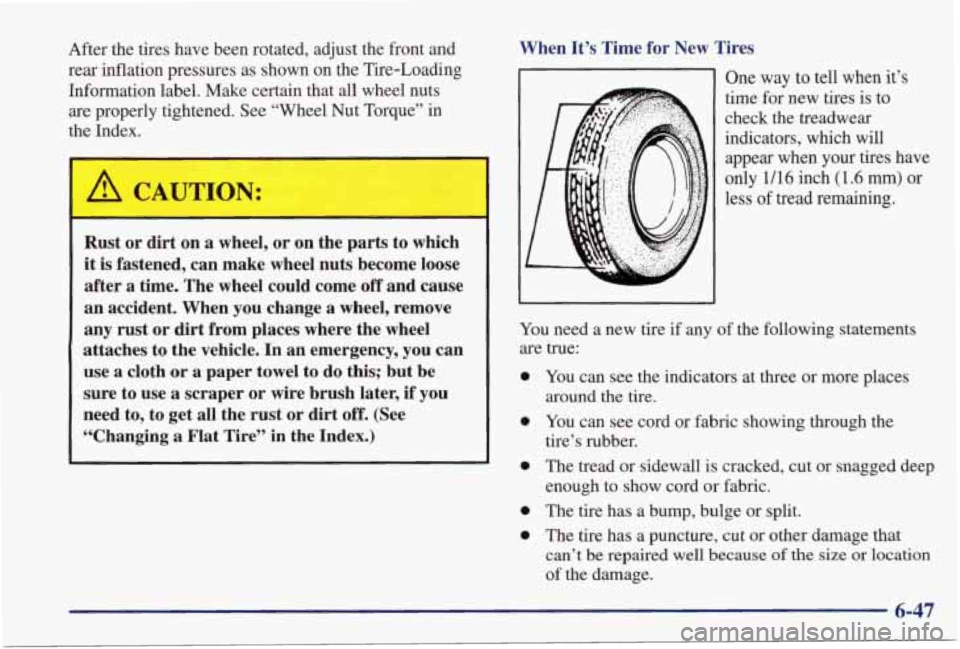
One way to tell when it’s
time for
new tires is to
check the treadwear
indicators, which will appear when your tires have
only 1/16 inch (1.6 mm) or
less
of tread remaining.
YOU need a new tire if any of the following statements
are true:
0
0
0
0
0
You can see the indicators at three or more places
around the tire.
You can see cord or fabric showing through the
tire’s rubber.
The tread or sidewall is cracked, cut or snagged deep
enough to show cord or fabric.
The tire has a bump, bulge or split.
The tire has a puncture, cut or other damage that can’t be repaired well
because of the size or location
of the damage.
6-47
Page 392 of 402
Tachometer ................................ 2-63
Taillamp Bulb Replacement
....................... 6-42
TapePlayerCare
............................... 3-31
Theft
......................................... 2-13
Theft-Deterrent Feature. CD Player
................ 3-27
THEFTLOCK”
................................ 3-27
Themostat .................................. 6-30
Tilt Steering Wheel
. . .................... 2-34
Time. Setting the
............................... 3-10
Tire Chains
.................................... 6-51
TireLoading ................................... 4-31
Tire-Loading Information Label
................... 4-3 1
Tires ......................................... 6-44
Alignment and Balance
........................ 6-50
BuyingNew
................................. 6-48
Chains
..................................... 6-51
Changing a Flat
.............................. 5-27
Cleaning .................................... 6-58
Compact Spare ............................... 5-37
Inflation
.................................... 6-45
Inflation Check
............................... 7-14
Inspection and Rotation
........................ 6-46
Loading
.................................... 4-31
Pressure
.................................... 6-45
Temperature
................................. 6-50
Traction
........................ ........ 6-49
Treadwear
................................... 6-49
Uniform Quality Grading
....................... 6-49
Used Replacement Wheels
...................... 6-51
Wear Indicators .............................. 6-47
Wheel Replacement ........................... 6-50
When It’s Time for New
....................... 6-47 When to Check
............................... 6-46
TopStrap
..................................... 1-58
Torque Lock ................................... 2-30
Torque. Wheel Nut
.............................. 5-34
Towing a Trailer
................................ 4-33
Towing Your Vehicle
............................. 5-8
Traction Control System
.......................... 4-9
Traction Control System Warning Light
............. 2-67
Trailer
Brakes
..................................... 4-37
Driving on Grades
............................ 4-39
Driving With
................................ 4-37
Engine Cooling When Towing
................... 4-40
Following Distance
........................... 4-37
Hitches
..................................... 4-36
Maintenance When Towing
..................... 4-40
MakingTurns
................................ 4-38
Parking on Hills .............................. 4-39
Safety Chains ................................ 4-36
Tongueweight
............................... 4-35
Total Weight on Your Vehicle’s Tires
.............. 4-36
Towing
..................................... 4-33
Turnsignals
................................. 4-38
Weight
..................................... 4-35
Automatic
............................... 6-22
HowtoAdd
................................. 6-26
How to Check
............................... 6-22
When to Check and Change ..................... 6-22
Transportation Error Courtesy ...................... 8-8
Trip Computer ............................ 2.78. 2.79
Trip Odometer
................................. 2-63
Transaxle Fluid
9-11
Page 393 of 402

Tr~nk ...................................... 2-12
Lock
....................................... 2-12
Release. Remote .......................... 2.9. 2. 12
Trunk Access Panel ............................. 2-57
Trunk Ajar Warning Light ........................ 2-74
Trunk Mounted CD Changer ...................... 3-24
"Y Users ..................................... 8-5
Turn Signal and Lane Change Indicator ............. 2-35
Turn Signal On Chime ........................... 2-35
Turn SignaVMultifunction Lever ................... 2-34
Turn Signals When Towing a Trailer ................ 4-38
Two-way Manual Front Seat ....................... 1-2
Underbody Flushing Service ..................... 7- 18
Underbody Maintenance ......................... 6-59
Underhood Electrical Center ...................... 6-65
Vehicle
Control
............. .................... 4-6
Damagewarnings .............................. iv
Dimensions ................................. 6-69
Identification Number ......................... 6-61
Loading .................................... 4-31
Storage ..................................... 6-37
Symbols ....................................... v
Ventilation System ............................... 3-8
Visor Vanity Mirrors ............................ 2-58
Visors. Sun .................................... 2-58
warning Devices ............................... 5-2
Warning Lights. Gages and Indicators ............... 2-64
WarrantyInformation ............................ 8-10
Washer Fluid. Adding ........................... 6-32
Weatherstrips .................................. 6-56
Alignment .................................. 6-50
Nut Torque .................................. 5-34
Replacement ................................. 6-50
Wrench ..................................... 5-29
Windows. Power ............................... 2-33
Windshield Washer ............................. 2-37
Fluid Level Check ............................ 7-14
Windshield Wiper .............................. 2-36
Blade Replacement ........................... 6-44
Winter Driving ............................... 4-27
WiperBladeCheck ............................. 7-15
Wiring. Headlamp .............................. 6-62
Wrench. Wheel ................................. 5-29
Washer Fluid. Windshield ........................ 6-32
Washing Your Vehicle ........................... 6-56
Wheel
Fluid .................................. 2-37. 6-32
Fuses ........... .................... 6-63
9-12