1998 NISSAN QUEST ECO mode
[x] Cancel search: ECO modePage 69 of 260
child safety seat, allow the right shoul-
der harness to retract over the right
shoulder and securely restrain the child.
A clicking sound is heard as the har-
ness retracts, indicating that the retrac-
tor is in the automatic locking mode. Be
sure the left shoulder harness is also
properly positioned over the child's left
shoulder.
11. Check that the shoulder harness is in
the automatic locking mode by trying to
pull the shoulder harness out of the
retractor. If you cannot pull any of the
shoulder harness webbing out of the
retractor, the shoulder harness is in the
automatic locking mode. If the shoulder
harness is not locked, repeat step 10. If,
after repeated attempts, the integrated
child safety seat shoulder harness can-
not be placed in the automatic locking
mode, do not use the integrated child
safety seat and have it inspected by an
authorized NISSAN dealer.
To cancel the automatic locking mode, un-
buckle the chest clip and both shoulder
harness tongues. Allow the shoulder har-
nesses to retract completely. The automatic
locking mode is now canceled and theshoulder harness retractor is in the emer-
gency locking mode.
WARNING
The automatic locking mode (child re-
straint mode) must be reactivated each
time you place a child in the integrated
child safety seats.
In addition to the automatic locking retrac-
tors, the integrated child safety seat shoul-
der harnesses are equipped with emer-
gency locking retractors. The automatic
locking mode is best to use, especially for
children who need help staying properly
positioned in the seat and its harnesses (for
example, children who are younger and
smaller), because the belts are always
locked. In the emergency locking mode, the
shoulder belts only lock in a sudden stop or
accident, allowing a child more freedom of
movement. Use the emergency locking
mode only if you judge your child able to
remain properly positioned in the integrated
child safety seat.
Removing the child
1. Release the chest clip.
2. Release the left and right shoulder har-ness tongues from the belt buckle by
pressing the red belt buckle button.
3. Move the left and right shoulder har-
nesses aside and assist the child from
the integrated child safety seat.
Storing the Integrated Child Safety
Seat
1. Be sure the shoulder harnesses are fully
retracted and resting inside the inte-
grated child safety seat recess. It is not
necessary to reconnect the shoulder har-
nesses and belt buckle prior to storing
the integrated child safety seat.
2. While holding onto, but not pulling, the
cushion release strap, rotate the cushion
upward until it fits flush with the second
row seat back cushion and locks into
position.
3. Be sure the integrated child safety seat is
locked in the stowed position by grasping
the safety seat cushion and attempting to
lower it without pulling the cushion re-
lease strap. If the integrated child safety
seat is not locked in the stowed position,
repeat steps one through three.
1-62Seats, restraints and supplemental air bag systems
ZX
Page 89 of 260
1.Check the brake fluid level. Add brake fluid
as necessary. See ``Brake fluid'' in the
``Do-it-yourself'' section of this manual.
2. If the brake fluid level is correct, have the
warning system checked by an autho-
rized NISSAN dealer.
WARNING
cYour brake system may not be work-
ing properly if the warning light is
on. Driving could be dangerous. If
you judge it to be safe, drive care-
fully to the nearest service station
for repairs. Otherwise, have your ve-
hicle towed.
cPressing the brake pedal with the
engine stopped and/or low brake
fluid level may increase your stop-
ping distance and braking will re-
quire greater pedal effort as well as
pedal travel.
cIf the brake fluid level is below the
minimum mark on the brake fluid
reservoir, do not drive until the brake
system has been checked at an au-
thorized NISSAN dealer.
ABSorAnti-lock brake
warning light
If the light comes on while the engine is
running, it may indicate something is wrong
with the anti-lock portion of the brake sys-
tem. Have the system checked by an autho-
rized NISSAN dealer.
If a malfunction occurs in the system, the
anti-lock function turns off, but the brakes
continue to operate normally.
If the light comes on while you are driv-
ing, contact an authorized NISSAN
dealer for repair.
Overdrive off indicator light
This light comes on during driving when the
overdrive switch is pressed to prevent over-
drive operation.
The O/D OFF indicator light comes on for
two seconds each time the ignition key is
turned ON. This shows the light is function-
ing properly.
If the O/D OFF indicator light blinks for
approximately 8 seconds after coming on for
2 seconds, have an authorized NISSANdealer check the transmission and repair it if
necessary.
The automatic transmission is equipped
with an electronic Fail-Safe mode. This sys-
tem allows the vehicle to be driven even in
the event of damage to the electrical cir-
cuits. If this occurs, the gears automatically
engage and lock into third gear.
NOTE: See ``Fail-safe'' in the ``Starting and
driving'' section of this manual before visit-
ing an authorized NISSAN dealer.
Turn signal/hazard indicator
lights
The appropriate light flashes when the turn
signal lever is activated.
Both lights flash when the hazard switch is
turned on.
High beam indicator light
This light comes on when the headlight high
beam is on and goes out when the low
beam is selected.
Cruise indicator light
The light comes on while the vehicle speed is
controlled by the cruise control system. If the
2-8Instruments and controls
ZX
Page 105 of 260
approximately ten seconds before changing
back to the clock mode.
How to set the clock
1. Turn the radio on. (Time is displayed
while the radio is off.)
2. Push and hold the CLK button; then,
press the SEEK button either
orto adjust the hours, and press the
TUNE button eitherorto
adjust the minutes.
NOTE: The clock displays 12-hour time with
no A.M./P.M. indications.
The interior lights operate regardless of
ignition key position.
One interior light is located overhead near
the front seats and one is overhead near the
rear seat.
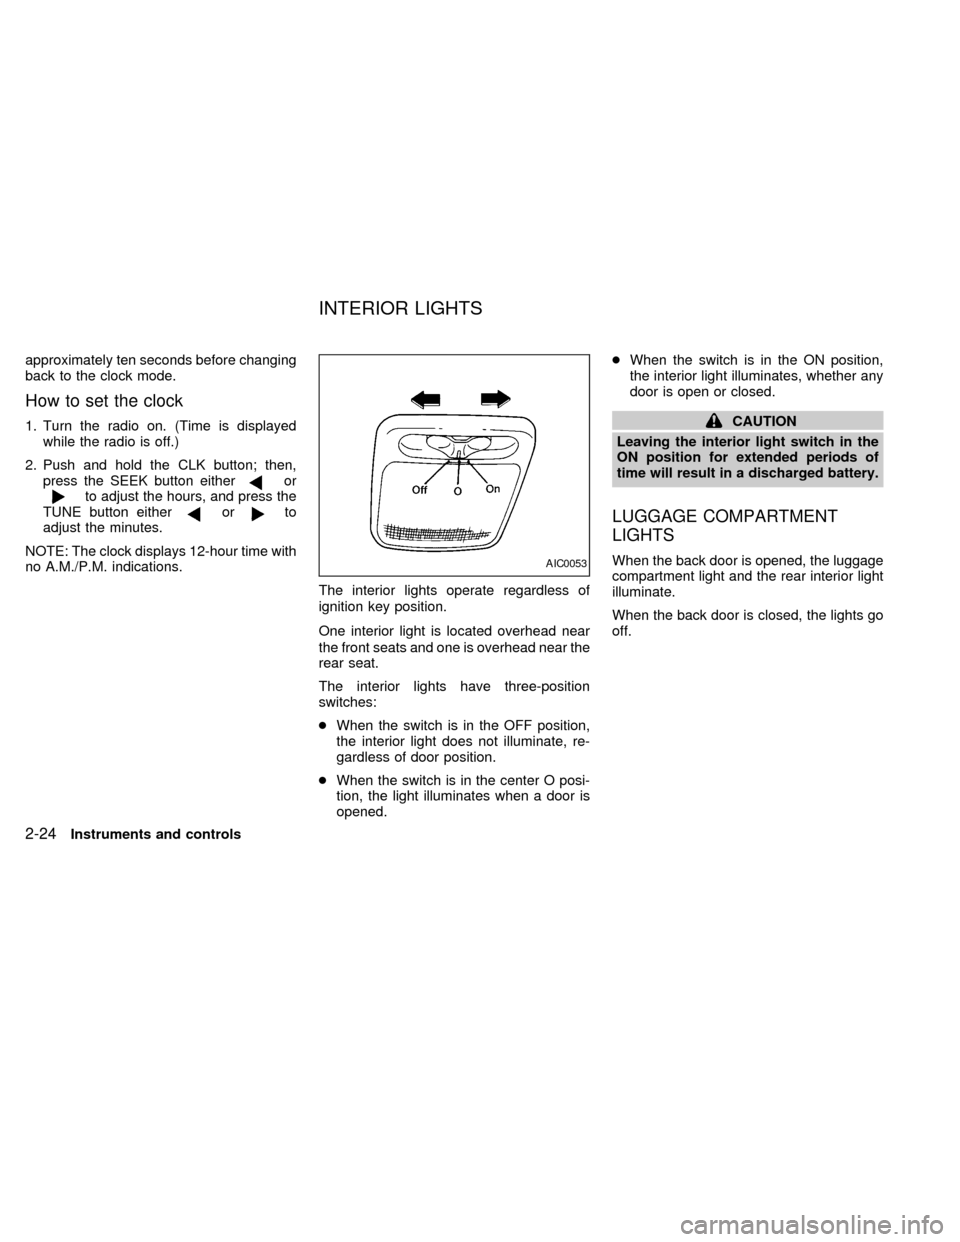
The interior lights have three-position
switches:
cWhen the switch is in the OFF position,
the interior light does not illuminate, re-
gardless of door position.
cWhen the switch is in the center O posi-
tion, the light illuminates when a door is
opened.cWhen the switch is in the ON position,
the interior light illuminates, whether any
door is open or closed.
CAUTION
Leaving the interior light switch in the
ON position for extended periods of
time will result in a discharged battery.
LUGGAGE COMPARTMENT
LIGHTS
When the back door is opened, the luggage
compartment light and the rear interior light
illuminate.
When the back door is closed, the lights go
off.AIC0053
INTERIOR LIGHTS
2-24Instruments and controls
ZX
Page 130 of 260
WARNING
cThe air conditioner cooling function
operates only when the engine is
running.
cDo not leave children, unreliable
adults, or pets alone in your vehicle.
On hot, sunny days, temperatures in
a closed vehicle could quickly be-
come high enough to cause severe
or possibly fatal injuries to people or
animals.
cDo not use the recirculation mode
for long periods as it may cause the
interior air to become stale and the
windows to fog up.
cPositioning of the heater and air con-
ditioner controls should not be done
while driving, in order that full atten-
tion may be given to the driving
operation.
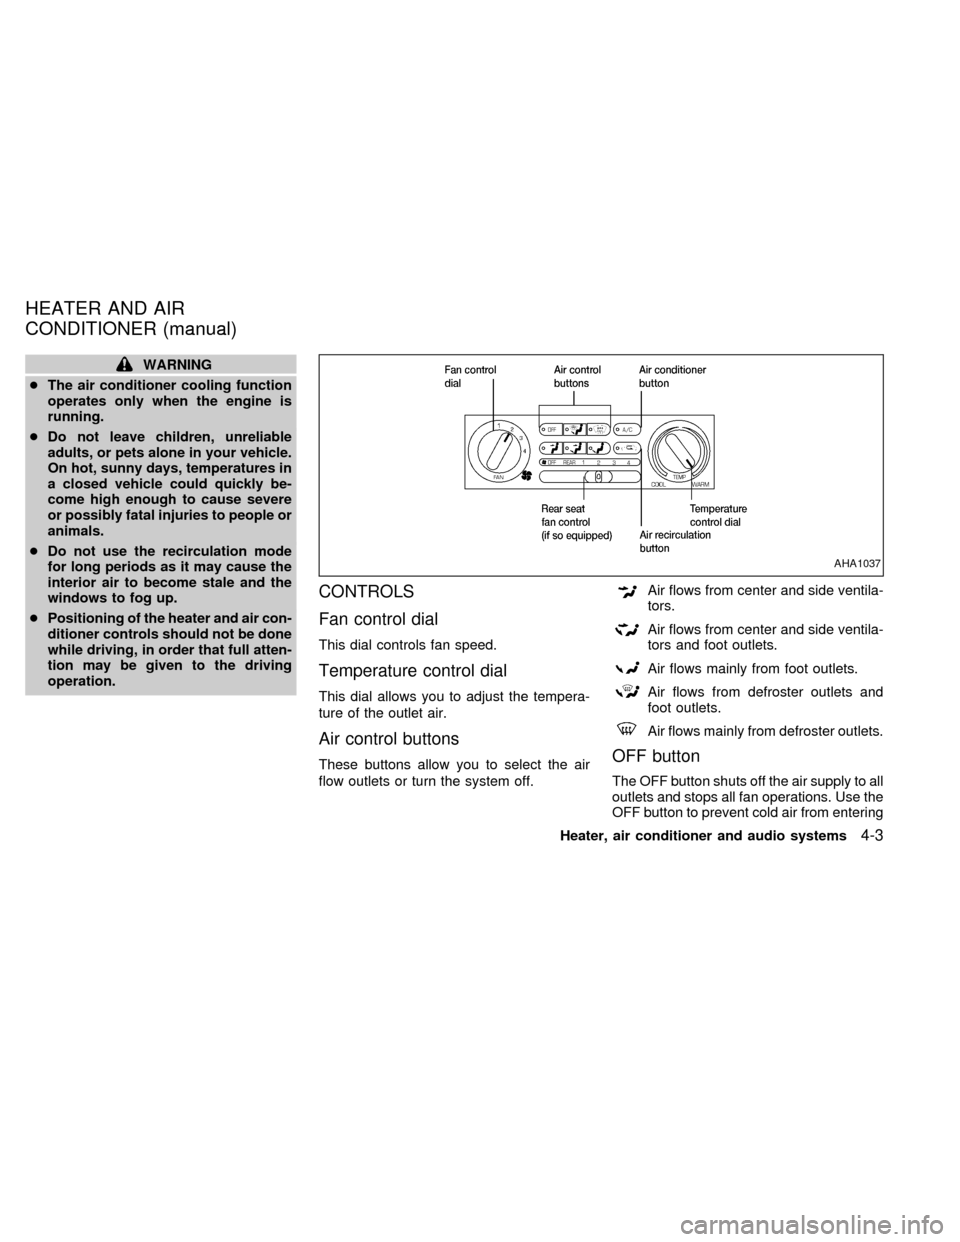
CONTROLS
Fan control dial
This dial controls fan speed.
Temperature control dial
This dial allows you to adjust the tempera-
ture of the outlet air.
Air control buttons
These buttons allow you to select the air
flow outlets or turn the system off.
Air flows from center and side ventila-
tors.
Air flows from center and side ventila-
tors and foot outlets.
Air flows mainly from foot outlets.
Air flows from defroster outlets and
foot outlets.
Air flows mainly from defroster outlets.
OFF button
The OFF button shuts off the air supply to all
outlets and stops all fan operations. Use the
OFF button to prevent cold air from entering
AHA1037
HEATER AND AIR
CONDITIONER (manual)
Heater, air conditioner and audio systems4-3
ZX
Page 131 of 260
the passenger compartment under cold out-
side conditions before the engine is warmed
up.
Air recirculation button
Fresh position (indicator light off):
Outside air is drawn into the passenger
compartment.
Use this position for normal heater or air
conditioner operation.
Recirculate position (indicator light on):
Interior air is recirculated inside the vehicle.
Activate the air recirculation button when
driving on a dusty road or to help keep out
traffic fumes.
Activate the air recirculation button for im-
proved air conditioner performance under high
temperature and high humidity conditions.
If the system is operating in theormode, the system does not allow the
air recirculate mode to be selected.
CAUTION
Do not use the recirculation mode for
long periods as it may cause the inte-
rior air to become stale and the win-
dows to fog up.
Air conditioner button
Start the engine, move the fan control dial to
the desired (one to four) position, select an
air control button and push the air conditioner
button to turn on the air conditioner. The
indicator light comes on when the air condi-
tioner is on. To stop the air conditioner, push
the button again; the indicator light goes off.
The air conditioner cooling function op-
erates only when the engine is running.
HEATER OPERATION
Heating
This mode is used to direct most of the hot
air to the floor outlets.
Push the air recirculation button to the off
position for normal heating.
1. Push the
button in.
2. Turn the fan control dial to select speed.3. Move the temperature control dial to the
desired position.
Ventilation
This mode directs air to the side and center
vents.
1. Push the
button in.
2. Turn the fan control dial to select speed.
3. Move the temperature control dial to the
desired position.
Defrosting or defogging
This mode is used to defrost/defog the
windows.
1. Push the
button in.
2. Turn the fan control dial to select speed.
3. Move the temperature control dial to the
desired position.
When the
button is pushed, the air
conditioner automatically turns on to de-
fog the windshield. The air recirculation
mode automatically turns off to reduce
window fogging.
When
is selected, the air condi-
tioner indicator light does not illuminate
4-4Heater, air conditioner and audio systems
ZX
Page 137 of 260
WARNING
cThe air conditioner cooling function
operates only when the engine is
running.
cDo not leave children, unreliable
adults, or pets alone in your vehicle.
On hot, sunny days, temperatures in
a closed vehicle could quickly be-
come high enough to cause severe
or possibly fatal injuries to people or
animals.cDo not use the recirculation mode
for long periods as it may cause the
interior air to become stale and the
windows to fog up.
cPositioning of the heater and air con-
ditioner controls should not be done
while driving, in order that full atten-
tion may be given to the driving
operation.
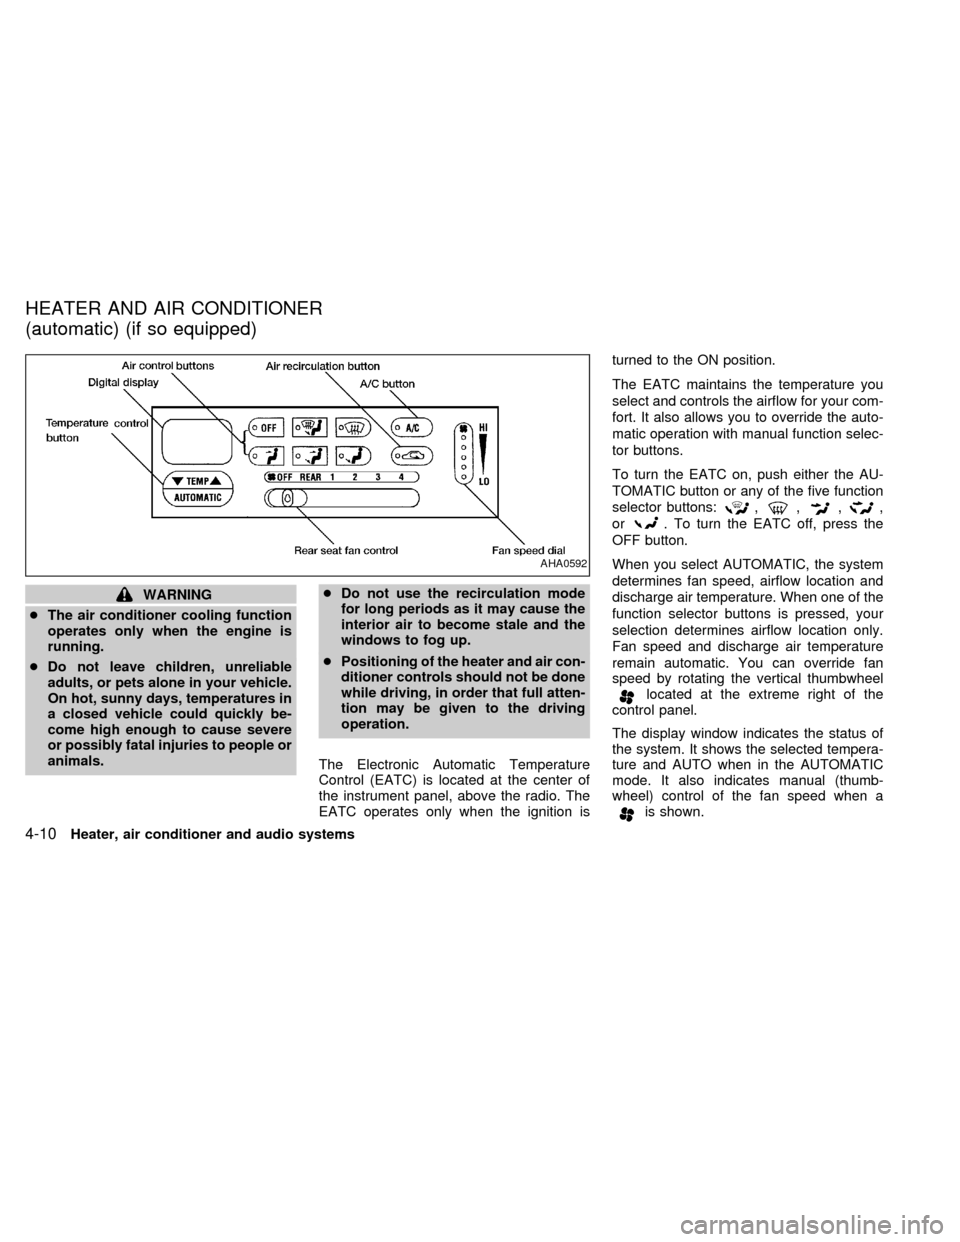
The Electronic Automatic Temperature
Control (EATC) is located at the center of
the instrument panel, above the radio. The
EATC operates only when the ignition isturned to the ON position.
The EATC maintains the temperature you
select and controls the airflow for your com-
fort. It also allows you to override the auto-
matic operation with manual function selec-
tor buttons.
To turn the EATC on, push either the AU-
TOMATIC button or any of the five function
selector buttons:
,,,,
or
. To turn the EATC off, press the
OFF button.
When you select AUTOMATIC, the system
determines fan speed, airflow location and
discharge air temperature. When one of the
function selector buttons is pressed, your
selection determines airflow location only.
Fan speed and discharge air temperature
remain automatic. You can override fan
speed by rotating the vertical thumbwheel
located at the extreme right of the
control panel.
The display window indicates the status of
the system. It shows the selected tempera-
ture and AUTO when in the AUTOMATIC
mode. It also indicates manual (thumb-
wheel) control of the fan speed when a
is shown.
AHA0592
HEATER AND AIR CONDITIONER
(automatic) (if so equipped)
4-10Heater, air conditioner and audio systems
ZX
Page 139 of 260

indicator light comes on, and the
display window shows the set temperature.
The EATC heats the air if the selected
temperature is warmer than the outside air
coming into the vehicle. However, the air is
not cooled regardless of the temperature
setting.
Push this button to get air from the floor and
instrument panel registers at the same time.
The
indicator light comes on and the
display window shows the set temperature.
Depending on the selected temperature, the
air is automatically heated or cooled.
Push this button to direct airflow to the floor.
Theindicator light comes on, and the
display window shows the set temperature.
The air cannot be cooled in the
mode,
only heated.
AIR CONDITIONER AND AIR RE-
CIRCULATION
Activate the air conditioner in any of the
override modes listed above by pressing the
A/C button. The A/C indicator light comeson to verify activation, and cooled air flows
from the vents. Fan speed continues to be
controlled by the EATC unless the fan
speed thumbwheel is used to override.
Press the
button to choose air recir-
culation. In this mode the EATC system
recirculates the air inside the vehicle rather
than drawing air from outside. Use this
mode together with the air conditioner to
rapidly cool the inside of the vehicle, or to
dehumidify the air inside the vehicle.
ENGLISH/METRIC MODE
Switch from English to metric temperature
display by simultaneously pressing the
and A/C buttons and holding the
thumbwheel in upper position (HI) for one
second.
AHA762
4-12Heater, air conditioner and audio systems
ZX
Page 144 of 260

SEEK tuning
This feature on your radio allows you to
automatically select strong frequency sta-
tions up or down the frequency band. Press
SEEK
to select the next strong sta-
tion up the frequency band. Press SEEK
to select the next strong station down
the frequency band. To change frequencies
quickly, press and hold either side of the
SEEK button.
SCAN tuning
Push SCAN to enter the scan tuning mode.
The radio searches up the frequency band,
stopping and playing each strong frequency
station for five seconds. This continues until
the SCAN button is pushed a second time
or a different tuning function is selected.
The AM or FM1 or FM2 symbol in the
display window flashes while each station is
being played.
AM/FM
Press the AM/FM button to select the de-
sired band: AM, FM1, or FM2. The stereo
indicator shows in the display window dur-
ing FM stereo reception. When the stereo
broadcast signal is weak, the radio auto-matically changes from stereo to monaural
reception.
Station memory operations
Your radio comes equipped with six
memory buttons, which are used to preset
up to six AM stations and 12 FM stations.
NOTE: If the vehicle's battery is discon-
nected, the memory buttons need to be
reset.
To set the memory buttons:
1. Select the desired band (AM, FM1, or
FM2) by pressing the AM/FM button.
2. Tune to the desired frequency.
3. Press one of the memory buttons and
hold the button in. The sound mutes out
for about two seconds, then returns. That
station is now held in memory on that
button.
Repeat the three steps above for each
memory button you want to set.
The memory buttons also control the rear
audio controls. Push memory buttons three
and five simultaneously to turn the rear
audio controls on. Push them again to turn
the rear audio controls off. A headphonesymbol appears in the display window when
the rear controls are activated.
ADJUSTING TONE QUALITY
BASS
Bass control allows you to adjust the lower,
bass frequencies to your preference.
Push the BASS button either
or; BASS and the setting indicator bar
appear in the display window. Pressing the
BASS button either
orin-
creases or decreases the level of bass, as
indicated by the number of bar segments
showing in the display window.
Following bass adjustment, the display win-
dow shows the current setting for three
seconds, then returns to the display prior to
adjustment.
TREB
Treble control allows you to adjust the
higher, treble frequencies to your prefer-
ence.
Push the TREB button either
or; TREB and the setting indicator bar
appear in the display window. Pressing the
TREB button either
orin-
Heater, air conditioner and audio systems
4-17
ZX