1998 NISSAN FRONTIER transmission
[x] Cancel search: transmissionPage 111 of 224
Allowable maximum speed in each gear:
2-wheel drive models MPH (km/h)
1st 30 (48)
2nd 55 (88)
3rd 80 (129)
4th & 5th þ (þ)
4-wheel drive models MPH (km/h)
2H/4H position
1st 25 (40)
2nd 43 (69)
3rd 68 (109)
4th & 5th þ (þ)
4L position
1st 12 (19)
2nd 22 (35)
3rd 30 (48)
4th & 5th þ (þ)1. Apply the parking brake.
2.Automatic transmission:
Move the selector lever to P (Park) or N
(Neutral). P (Park) is preferred.
The shift lever cannot be moved out of
P (Park) and into any of the other gear
positions if the ignition key is turned
to OFF or if the key is removed from
the switch.
The starter is designed not to operate
if the selector lever is in one of the
driving positions.
Manual transmission:
Move the gearshift lever to N (Neutral),
and depress the clutch pedal to the floor
while starting the engine.
The starter is designed not to operate
unless the clutch pedal is depressed.
3.With your foot off the accelerator
pedal,turn the ignition key to START.
Release the key when the engine starts.
If the engine starts, but fails to run, repeat
the above procedure.
c
If the engine is very hard to start in
extremely cold or hot weather, depressthe accelerator pedal fully and hold it
to help start the engine.
cIn the summer, when restarting the
engine within 30 minutes after it has
been stopped, keep the accelerator
pedal fully depressed while starting.
CAUTION
Do not operate the starter for more than
15 seconds at a time. If the engine does
not start, turn the key off and wait 10
seconds before cranking again, other-
wise the starter could be damaged.
4.Warm-up
Always allow the engine to idle for at
least 30 seconds after starting. Drive at a
moderate speed for a short distance first,
especially in cold weather.
STARTING THE ENGINE
5-10Starting and driving
ZX
Page 112 of 224
WARNING
cBe sure the parking brake is fully
released before driving. Failure to do
so can cause brake failure and lead
to an accident.
cDo not release the parking brake
from outside the vehicle.
cDo not use the gear shift in place of
the parking brake. When parking, be
sure the parking brake is fully en-
gaged.
c
Do not leave children unattended in a
vehicle. They could release the park-
ing brake and cause an accident.
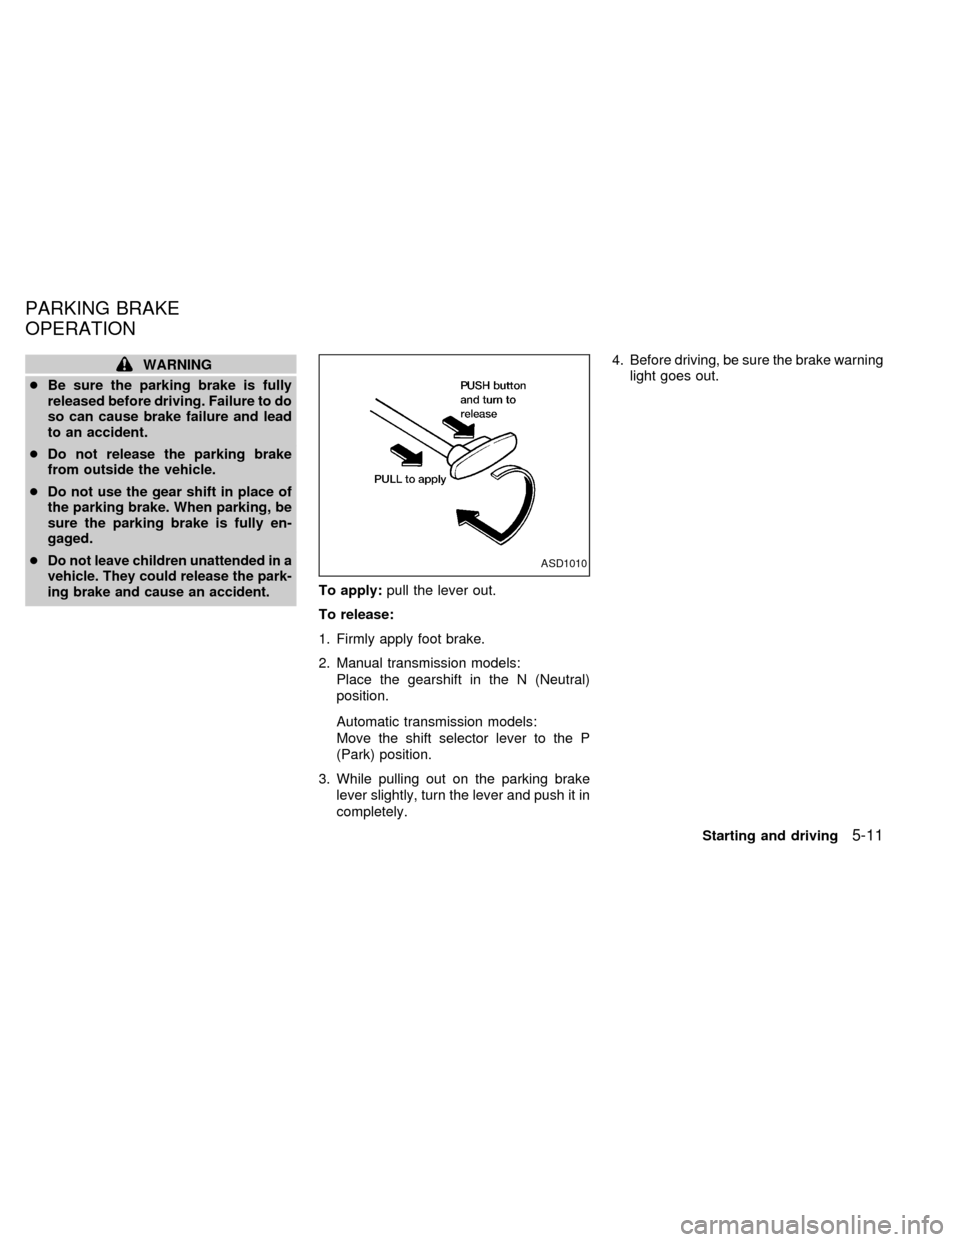
To apply:pull the lever out.
To release:
1. Firmly apply foot brake.
2. Manual transmission models:
Place the gearshift in the N (Neutral)
position.
Automatic transmission models:
Move the shift selector lever to the P
(Park) position.
3. While pulling out on the parking brake
lever slightly, turn the lever and push it in
completely.4. Before driving, be sure the brake warning
light goes out.
ASD1010
PARKING BRAKE
OPERATION
Starting and driving5-11
ZX
Page 113 of 224
Precautions
cThe cruise indicator light in the instru-
ment panel may blink when the cruise
control main switch is turned ON while
pushing the RES/ACCEL, COAST/SET,
or CANCEL switch. To properly set the
cruise control system, perform the pre-
ceding steps in the order indicated.
cIf the cruise control system malfunctions,
it cancels automatically. The CRUISE
light in the instrument panel then blinks to
warn the driver.
cIf the cruise light blinks, turn the cruisecontrol main switch off and have the
system checked by an authorized NIS-
SAN dealer.
WARNING
Don't use the cruise control when driv-
ing under the following conditions:
cit is not possible to keep the vehicle
at a set speed.
cin heavy traffic or in traffic that var-
ies in speed.
con winding or hilly roads.con slippery roads (rain, snow, ice,
etc.).
cin very windy areas.
Doing so could cause a loss of vehicle
control and result in an accident.
CAUTION
On manual transmission models, do
not shift into neutral without depress-
ing the clutch pedal when the cruise
control is on. Should this occur, de-
press the clutch pedal and turn the
main switch off immediately. Failure to
do so may cause engine damage.
The cruise control allows driving at a fixed
speed between 30 and 90 MPH (48 and 145
km/h) without keeping your foot on the
accelerator pedal.
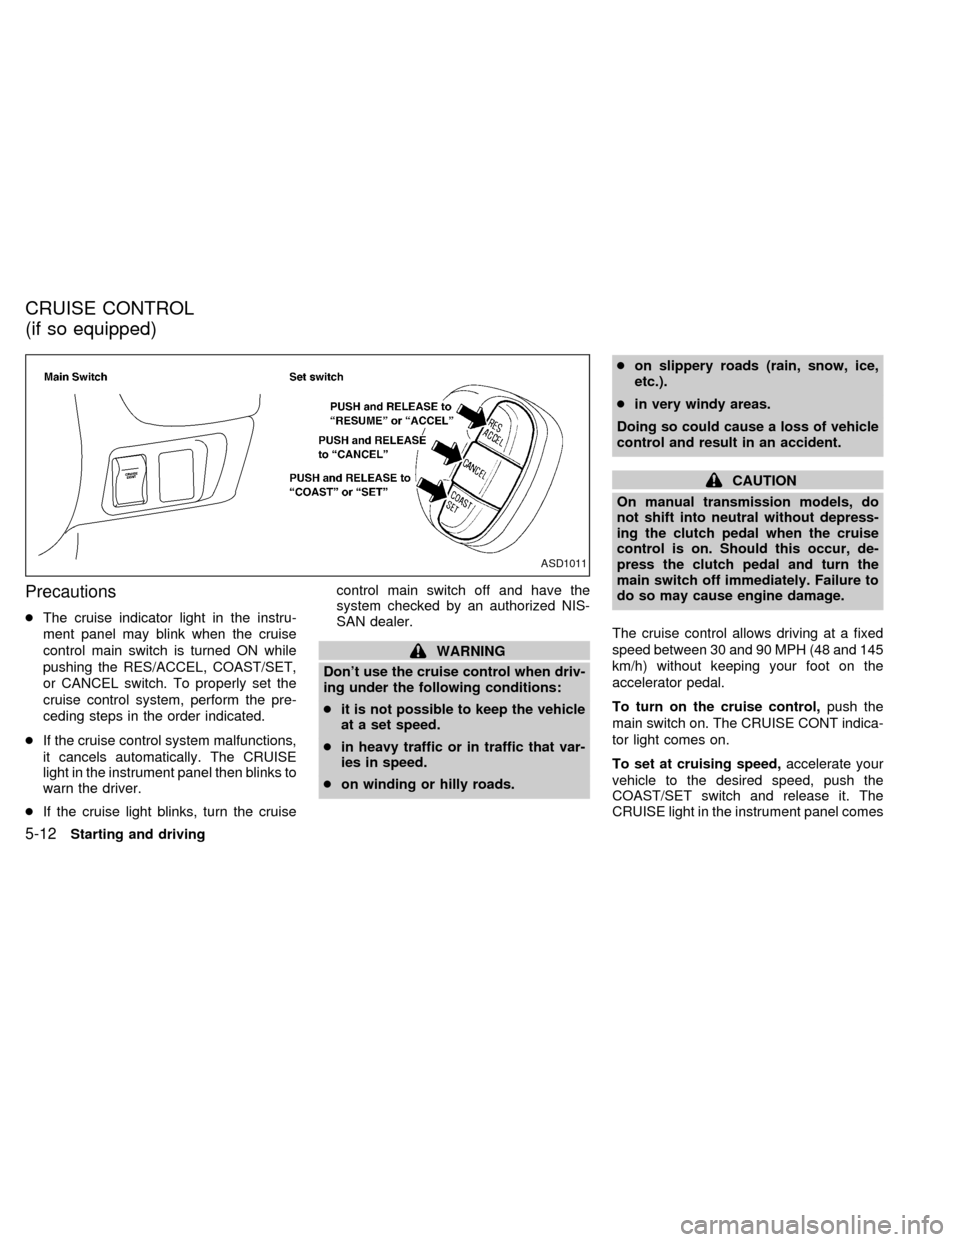
To turn on the cruise control,push the
main switch on. The CRUISE CONT indica-
tor light comes on.
To set at cruising speed,accelerate your
vehicle to the desired speed, push the
COAST/SET switch and release it. The
CRUISE light in the instrument panel comes
ASD1011
CRUISE CONTROL
(if so equipped)
5-12Starting and driving
ZX
Page 114 of 224
on. Take your foot off the accelerator pedal.
Your vehicle maintains the set speed.
To pass another vehicle,depress the ac-
celerator pedal. When you release the
pedal, the vehicle returns to the previously
set speed.
cThe vehicle may not maintain the set
speed when going up or down steep hills.
If this happens, drive without the cruise
control.
To cancel the preset speed,use one of
the following three methods:
a) Push the CANCEL button; the CRUISE
light in the instrument panel goes out.
b) Tap the brake pedal; the CRUISE light
goes out.
c)
Turn the main switch off. Both the CRUISE
CONT and CRUISE lights go out.
The cruise control is automatically can-
celled and the CRUISE light goes out if:
cyou depress the brake pedal while push-
ing the RES/ACCEL set switch.
cthe vehicle slows down more than 8 MPH
(13 km/h) below the set speed.cyou depress the clutch pedal (manual
transmission), or move the shift lever to
the N (Neutral) position (automatic trans-
mission).
To reset at a faster cruising speed,use
one of the following three methods:
a) Depress the accelerator pedal. When the
vehicle attains the desired speed, push
and release the COAST/SET switch.
b) Push and hold the RES/ACCEL set
switch. When the vehicle attains the
speed you desire, release the switch.
c)
Push, and release the RES/ACCEL set
switch. Each time you do this, the set
speed increases by about 1 MPH (1.6
km/h).
To reset at a slower cruising speed,use
one of the following three methods:
a) Lightly tap the brake pedal. When the
vehicle attains the desired speed, push
the COAST/SET switch and release it.
b) Push and hold the COAST/SET switch.
Release the switch when the vehicle
slows down to the desired speed.
c) Push, and release the COAST/SETswitch. Each time you do this, the set
speed decreases by about 1 MPH (1.6
km/h).
To resume the preset speed,push and
release the RES/ACCEL switch. The ve-
hicle returns to the last set cruising speed
when the vehicle speed is over 30 MPH (48
km/h).
Starting and driving
5-13
ZX
Page 116 of 224
cKeep your engine tuned up.
cFollow the recommended periodic main-
tenance schedule.
cKeep the tires inflated to the correct
pressure. Low tire pressure increases
tire wear and wastes fuel.
cKeep the front wheels in correct align-
ment. Improper alignment increases tire
wear and lowers fuel economy.
cAir conditioner operation lowers fuel
economy. Use the air conditioner only
when necessary.
cWhen cruising at highway speeds, it is
more economical to use the air condi-
tioner and leave the windows closed to
reduce drag.
c
Use 4H or 4L position only when neces-
sary. Four-wheel drive operation lowers
fuel economy.
CAUTION
cDo not drive on dry hard surface
roads in four-wheel drive.
cDriving on dry hard surfaces in 4H or
4L may cause unnecessary noise
and tire wear. We recommend driv-
ing in the 2H position under these
conditions.
WARNING
cWhen parking the vehicle, apply the
parking brake and shift the transfercontrol lever into the 2H, 4H or 4L
position.
cDo not leave the transfer control le-
ver in the N (Neutral) position. Oth-
erwise, the vehicle could roll unex-
pectedly even if the manual
transmission is in gear or the auto-
matic transmission is in the P (Park)
position.
cFailure to engage the transfer con-
trol lever in 2H, 4H, or 4L could result
in the vehicle moving unexpectedly,
which in turn could result in serious
personal injury or property damage.
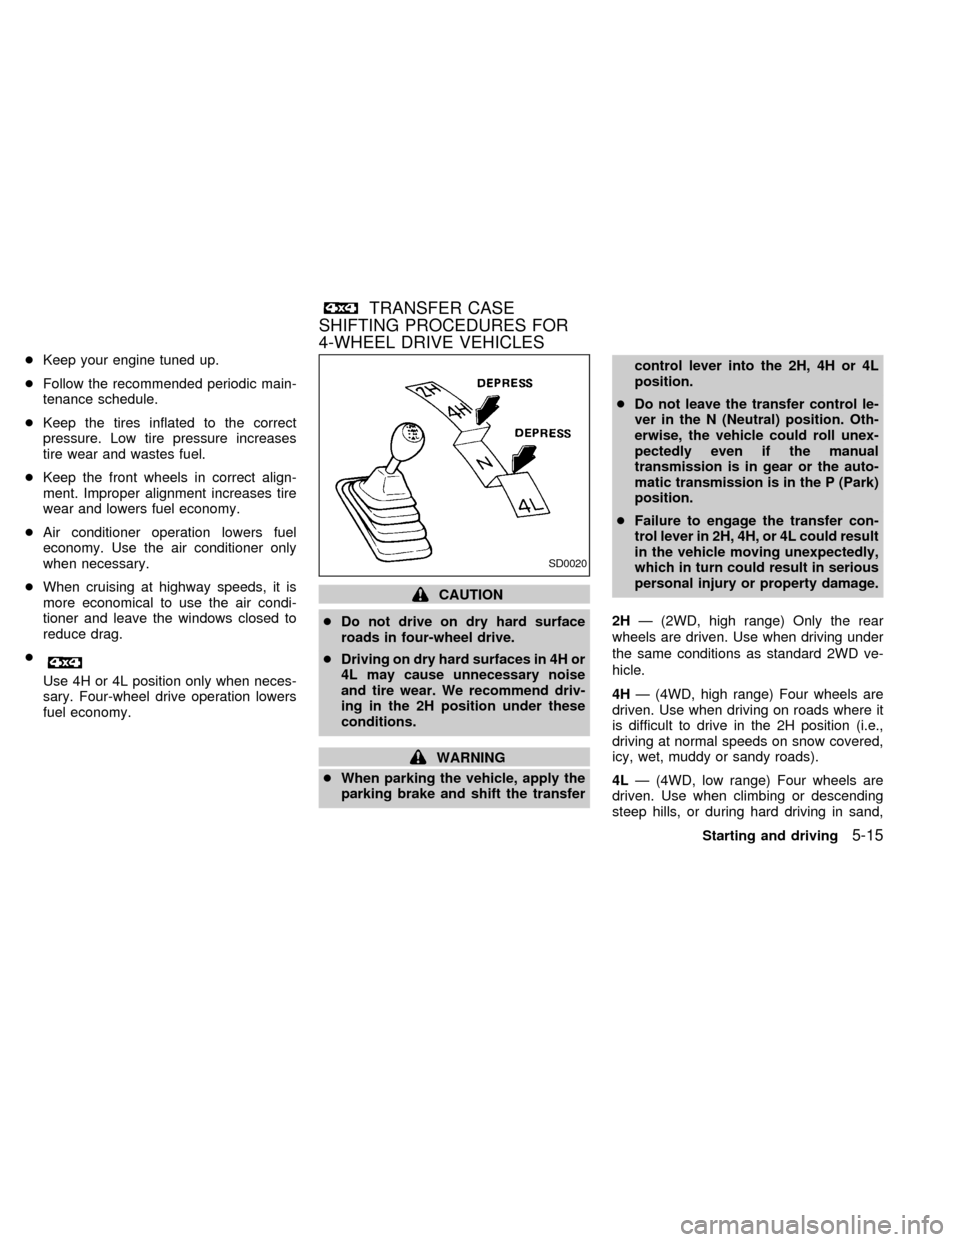
2HÐ (2WD, high range) Only the rear
wheels are driven. Use when driving under
the same conditions as standard 2WD ve-
hicle.
4HÐ (4WD, high range) Four wheels are
driven. Use when driving on roads where it
is difficult to drive in the 2H position (i.e.,
driving at normal speeds on snow covered,
icy, wet, muddy or sandy roads).
4LÐ (4WD, low range) Four wheels are
driven. Use when climbing or descending
steep hills, or during hard driving in sand,
SD0020
TRANSFER CASE
SHIFTING PROCEDURES FOR
4-WHEEL DRIVE VEHICLES
Starting and driving5-15
ZX
Page 123 of 224
cBefore operating the vehicle, ensure
that the driver and all passengers
have their seat belts fastened.
cAlways drive with the floor mats in
place as the floor may become very
hot. Particular care should be taken
if you are barefoot.
cLower your speed when encounter-
ing strong crosswinds. With its
higher center of gravity, your
NISSAN is more affected by gusty
side winds. Slower speeds ensure
better vehicle control.
cDo not drive beyond the perfor-
mance of the tires even with 4WD.
cAccelerating quickly, steering or
braking may cause loss of control.
cInstall the same size of winter tires
on all four (four) wheels (such as
studless tires) or install tire chains
to the rear wheels when driving on
slippery roads (e.g., after a snow)
and drive carefully using 4WD.
cBe sure to check the brakes immedi-
ately after driving in mud or water asspecified in ``Wet brakes'' under the
heading ``Brake system,'' later in this
section.
cAvoid parking your vehicle on steep
hills. If you get out of the vehicle and
it rolls forward, backward or side-
ways, you could be injured.
cWhenever you drive off-road
through sand, mud or water as deep
as the wheel hub, more frequent
maintenance may be required. For
details, refer to ``Maintenance for off-
road driving'' in the ``Maintenance''
section of this manual.CAUTION
Always use tires of the same size,
brand, construction (bias, bias-belted
or radial), and tread pattern on all four
wheels. Failure to do so may result in a
circumference difference between tires
on the front and rear axles which will
cause excessive tire wear and may
damage the transmission, transfer
case and differential gears.
If excessive tire wear is found, it is recom-
mended that all four tires be replaced with
tires of the same size, brand, construction
and tread pattern. The tire pressure and
wheel alignment should also be checked
and corrected as necessary. Contact an
authorized NISSAN dealer.
Snow tires
CAUTION
ONLY use spare tires specified for each
four-wheel drive model.
If you install snow tires, they must also be
the same size, brand, construction and
tread pattern on all four wheels.
TIRES OF FOUR-WHEEL
DRIVE
5-22Starting and driving
ZX
Page 124 of 224
Tire inflation pressure
Periodically check the pressure in all tires,
including the spare, with a gauge. Adjust to
the specified pressure if necessary. Tire
pressures are shown on the tire placard
affixed to the glove box.
Tire chain
Tire chains must be installed only on the
rear wheels and not on the front wheels.
Do not drive with tire chains on paved roads
which are clear of snow. Driving with chains
in such conditions can cause damage to the
various mechanisms of the vehicle due to
some overstress. When driving on clear
paved roads, be sure to change to 2WD.
WARNING
cDo not park the vehicle over flam-
mable materials such as dry grass,
waste paper or rags. They may ignite
and cause a fire.
c
The transfer control lever
must be in the 2H, 4H or 4L position
and the parking brake set to prevent
the vehicle from rolling.
cNever place the transfer control le-
ver in the N (Neutral) position. Oth-
erwise, the vehicle could roll unex-pectedly even if the manual trans-
mission is in gear or the automatic
transmission is in the P (Park) posi-
tion. This could result in serious per-
sonal injury or property damage.
cSafe parking procedures require that
both the parking brake be set and
the transmission placed into P (Park)
position (automatic) or in the appro-
priate gear (manual). Failure to do so
could cause the vehicle to move un-
expectedly or roll away and result in
an accident. Make sure the gear
MSD0002
PARKING/PARKING ON HILLS
Starting and driving5-23
ZX
Page 125 of 224
lever has been pushed as far forward
as it can go and cannot be moved
without depressing the button at the
end of the lever.
cNever leave children unattended in
the vehicle.
c
Do not leave children unattended in-
side the vehicle. They could unknow-
ingly activate switches or controls.
Unattended children could become
involved in serious accidents.
1. Firmly apply the parking brake.
2.Manual transmission models:
Place the gearshift lever in the R (Re-
verse) position. When parking on an up-
hill grade, place the gearshift lever in the
1st position.
Automatic transmission models:
Move the gearshift lever to the P (Park)
position.
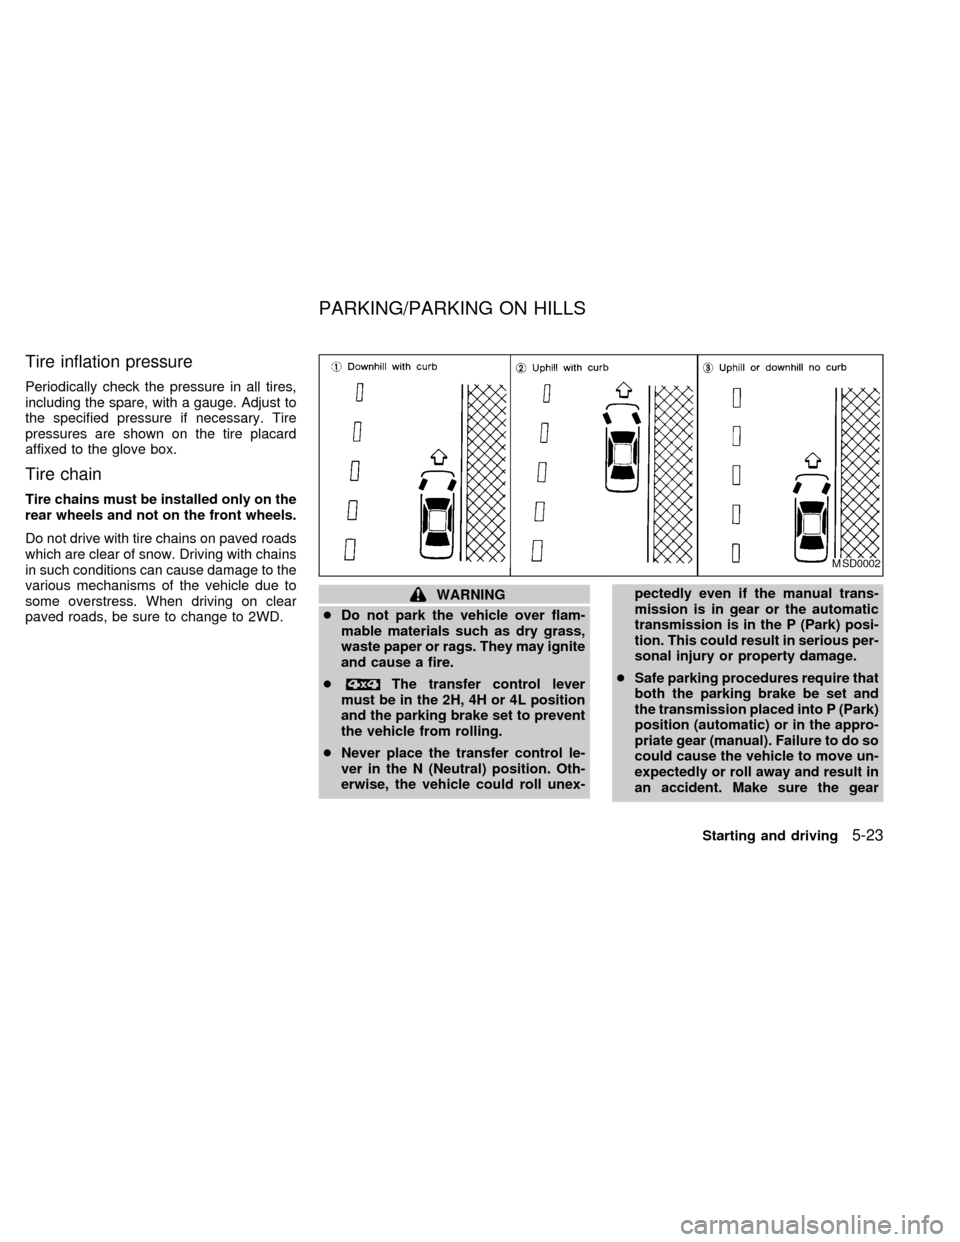
3. To help prevent the vehicle from rolling
into the street when parked on an incline,
it is a good practice to turn the wheels as
illustrated.cHEADED DOWNHILL WITH CURB:
s1
Turn the wheels into the curb and move
the vehicle forward until the curb side
wheel gently touches the curb.
cHEADED UPHILL WITH CURB:
s2
Turn the wheels away from the curb and
move the vehicle back until the curb side
wheel gently touches the curb.
cHEADED UPHILL OR DOWNHILL, NO
CURB:
s3
Turn the wheels toward the side of the
road so the vehicle will move away from
the center of the road if it moves.
4. Turn the ignition key to the LOCK posi-
tion and remove the key.The power assisted steering is designed to
use a hydraulic pump, driven by the engine,
to assist steering.
If the engine stops or drive belt breaks, you
will still have control of the vehicle. How-
ever, much greater steering effort is
needed, especially in sharp turns and at low
speeds.
WARNING
If the engine is not running or is turned
off while driving, the power assist for
the steering will not work. Steering will
be much harder to operate.
POWER STEERING SYSTEM
5-24Starting and driving
ZX