1998 NISSAN FRONTIER ECO mode
[x] Cancel search: ECO modePage 3 of 224

Welcome To The World Of NISSAN
Your new Nissan is the result of our dedication to
produce the finest in safe, reliable and economi-
cal transportation. Your vehicle is the product of
a successful worldwide company that manufac-
tures cars and trucks in over 17 countries and
distributes them in 170 nations.
Nissan vehicles are designed and manufactured
by Nissan Motor Co., Ltd. which was founded in
Tokyo, Japan in 1933, and Nissan affiliates world
wide, collectively growing to become the fifth
largest automaker in the world. In addition to cars
and trucks, Nissan also makes textile machinery,
fork-lift trucks, marine engines, boats and other
products.
Nissan has made a substantial and growing
investment in North America, starting with the
opening of Nissan Motor Corporation U.S.A. in
1960, and continuing with the production of some
cars and trucks at one of the world's mostmodern manufacturing facilities, Nissan Motor
Manufacturing Corporation U.S.A. in Smyrna,
Tennessee, vehicle styling at Nissan Design
International in San Diego, California, and engi-
neering at Nissan Research and Development in
Farmington Hills, Michigan.
Nissan Motor Corporation U.S.A. and its dealers
indirectly employ about 60,000 Americans.
Nissan is also a substantial contributor to the
Canadian economy. Nissan Canada Inc., its sup-
pliers and over 170 dealers employ approxi-
mately 4,500 people. These include company
employees and the staffs of Nissan dealers all
across Canada. In addition, many Canadians
work for companies that supply Nissan and Nis-
san dealers with materials and services ranging
from operation of port facilities and transportation
services to the supply of lubricants, parts and
accessories.Nissan pioneered the use of electronics and
computers in automobiles, and has led the indus-
try in improving both performance and fuel effi-
ciency through new engine designs and the use
of synthetic materials to reduce vehicle weight.
The company has also developed ways to build
quality into its vehicles at each stage of the
production process, both through extensive use
of automation and Ð most importantly Ð
through an awareness thatpeopleare the cen-
tral element in quality control.
From the time the parts arrived from our suppli-
ers until you took delivery of your new Nissan,
dozens of checks were made to ensure that only
the best job was being done in producing and
delivering your vehicle. Nissan also takes great
care to ensure that when you take your Nissan to
your dealer for maintenance, the service techni-
cian will perform his work according to the quality
standards that have been established by the
factory.
Safety has also been built into your Nissan. As
you know, seat belts are an integral part of the
safety systems that will help protect you and your
passengers in the event of a sudden stop or an
accident. We urge you to use the belts every time
you drive the vehicle.
The Nissan story of growth and achievement
reflects our major goal: to provide you, our
customer, with a vehicle that is built with quality
and craftsmanship Ð a product that we can be
proud to build and you can be proud to own.
AFW0001
The inside pages of this manual contain
a minimum of 50% recycled fibers,
including 10% post-consumer fibers.
ZX
Page 25 of 224
cBe sure the seat belt tongue is se-
curely fastened to the proper buckle.
cDo not wear the belt inside out or
twisted. Doing so may reduce its
effectiveness.
cDo not allow more than one person
to use the same belt.
cNever carry more people in the ve-
hicle than there are seat belts.
c
Never allow anyone to ride in the cargo
area or in a slide-in camper or other
type cargo area cover while the vehicle
is in motion. These areas do not con-
tain seat belts. It is not designed for
passengers. They could be injured in
sudden braking or a collision.
cIf the seat belt warning lamp glows
continuously while the ignition is
turned ON with all doors closed and
all seat belts fastened, it may indi-
cate a malfunction in the system.
Have the system checked by an au-
thorized NISSAN dealer.
c
All seat belt assemblies including
retractors and attaching hardware
should be inspected after any colli-
sion at an authorized NISSAN dealer.NISSAN recommends that all seat-
belt assemblies in use during a colli-
sion be replaced unless the collision
was minor and the belts show no
damage and continue to operate
properly. Seat belt assemblies not in
use during a collision should also be
inspected and replaced if either dam-
age or improper operation is noted.
CHILD SAFETY
Children need adults to help protect them.
They need to be properly restrained.
The proper restraint depends on the
child's size. Generally, infants (up to
about 1 year and less than 20 pounds)
should be placed in rear facing child
restraints. Front facing child restraints
are available for children who outgrow
rear facing child restraints.
WARNING
cBe sure to turn the passenger
supplemental air bag ON/OFF switch
OFF when using a rear facing child
restraint in the front passenger seat.
If it is not OFF, the air bag may inflatein a collision. The force of the rapidly
inflating air bag could cause serious
injury or kill the child in the child
restraint.
cDo not install a child restraint in the
jump seats (King Cab model). These
seats are not suitable for child re-
straint installation.
cDo not install a child restraint in the
center position of the front bench
seat. This position is not suitable for
child restraint installation.
c
Infants and children need special pro-
tection. The vehicle's seat belts may
not fit them properly. The shoulder
belt may come too close to the face or
neck. The lap belt may not fit over
their small hip bones. In an accident,
an improperly fitting seat belt could
cause serious or fatal injury. Always
use appropriate child restraints.
All U.S. states and Canadian provinces
require the use of approved child restraints
for infants and small children. See ``Child
restraints'' later in this section for more
information.
In addition, there are many types of child
1-18Seats, restraints and supplemental air bag systems
ZX
Page 33 of 224
cNever install a rear-facing child re-
straint in the front seat, unless the
passenger supplemental air bag is
OFF. Be sure to turn the passenger
supplemental air bag ON/OFF switch
OFF. An inflating air bag could seri-
ously injure or kill your child. See
``Passenger air bag ON/OFF switch
and light'' earlier in this section.
cAn improperly installed child re-
straint could lead to serious injury or
death in an accident.
cIn general, child restraints are de-
signed to be installed with a lap belt
or the lap portion of a three-point
type seat belt.
Child restraints for infants and small chil-
dren of various sizes are offered by several
manufacturers. When selecting any child
restraint, keep the following points in mind:
1) Choose only a restraint with a label cer-
tifying that it complies with Federal Motor
Vehicle Safety Standard 213 or Cana-
dian Motor Vehicle Safety Standard 213.
2) Check the child restraint in your vehicle
to be sure it is compatible with the vehi-
cle's seat and seat belt system. Choose
a child restraint that meets the guidelinesof the Society of Automotive Engineers
recommended practice J1819 for child
restraint installation.
3) If the child restraint is compatible with
your vehicle, place your child in the child
restraint and check the various adjust-
ments to be sure the child restraint is
compatible with your child. Always follow
all of the recommended procedures.
All U.S. states and provinces of Canada
require that infants and small children be
restrained in an approved child restraint
at all times while the vehicle is being
operated.
WARNING
cDo not install a child restraint in the
jump seats (King Cab model). These
seats are not suitable for child re-
straint installation.
cDo not install a child restraint in the
center position of the front bench
seat. This position is not suitable for
child restraint installation.cImproper use of a child restraint can
result in increased injuries for both
the infant or child and other occu-
pants in the vehicle.
cFollow all of the child restraint
manufacturer's instructions for in-
stallation and use. When purchasing
a child restraint, be sure to select
one which will fit your child and
vehicle as it may not be possible to
properly install some types of child
restraints in your vehicle.
cIf the child restraint is not anchored
properly, the risk of a child being
injured in a collision or a sudden
stop greatly increases.
cAdjustable seatbacks should be po-
sitioned to fit the child restraint, but
as upright as possible.
c
After attaching the child restraint,
test it before you place the child in it.
Tilt it from side to side. Try to tug it
forward and check to see if the belt
holds the restraint in place. If the
restraint is not secure, tighten the
belt as necessary.
1-26Seats, restraints and supplemental air bag systems
ZX
Page 34 of 224
cFor a front facing child restraint,
check to make sure the shoulder belt
does not go in front of the child's
face or neck. If it does, put the shoul-
der belt behind the child restraint.
cWhen your child restraint is not in
use, keep it secured with a seat belt
to prevent it from being thrown
around in case of a sudden stop or
accident.
CAUTION
Remember that a child restraint left in a
closed vehicle can become very hot.
Check the seating surface and buckles
before placing your child in the child
restraint.
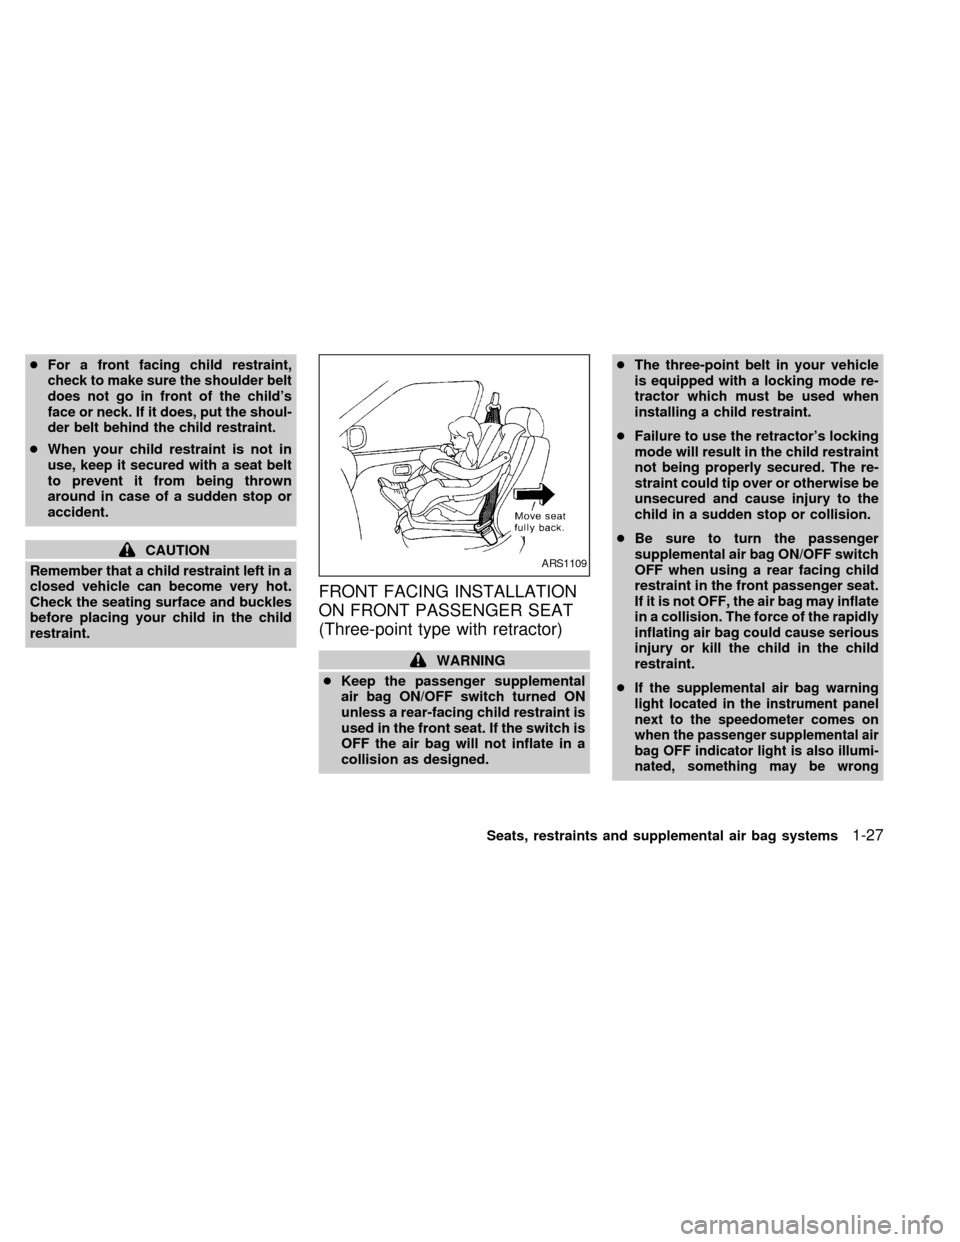
FRONT FACING INSTALLATION
ON FRONT PASSENGER SEAT
(Three-point type with retractor)
WARNING
cKeep the passenger supplemental
air bag ON/OFF switch turned ON
unless a rear-facing child restraint is
used in the front seat. If the switch is
OFF the air bag will not inflate in a
collision as designed.cThe three-point belt in your vehicle
is equipped with a locking mode re-
tractor which must be used when
installing a child restraint.
cFailure to use the retractor's locking
mode will result in the child restraint
not being properly secured. The re-
straint could tip over or otherwise be
unsecured and cause injury to the
child in a sudden stop or collision.
cBe sure to turn the passenger
supplemental air bag ON/OFF switch
OFF when using a rear facing child
restraint in the front passenger seat.
If it is not OFF, the air bag may inflate
in a collision. The force of the rapidly
inflating air bag could cause serious
injury or kill the child in the child
restraint.
c
If the supplemental air bag warning
light located in the instrument panel
next to the speedometer comes on
when the passenger supplemental air
bag OFF indicator light is also illumi-
nated, something may be wrong
ARS1109
Seats, restraints and supplemental air bag systems1-27
ZX
Page 67 of 224
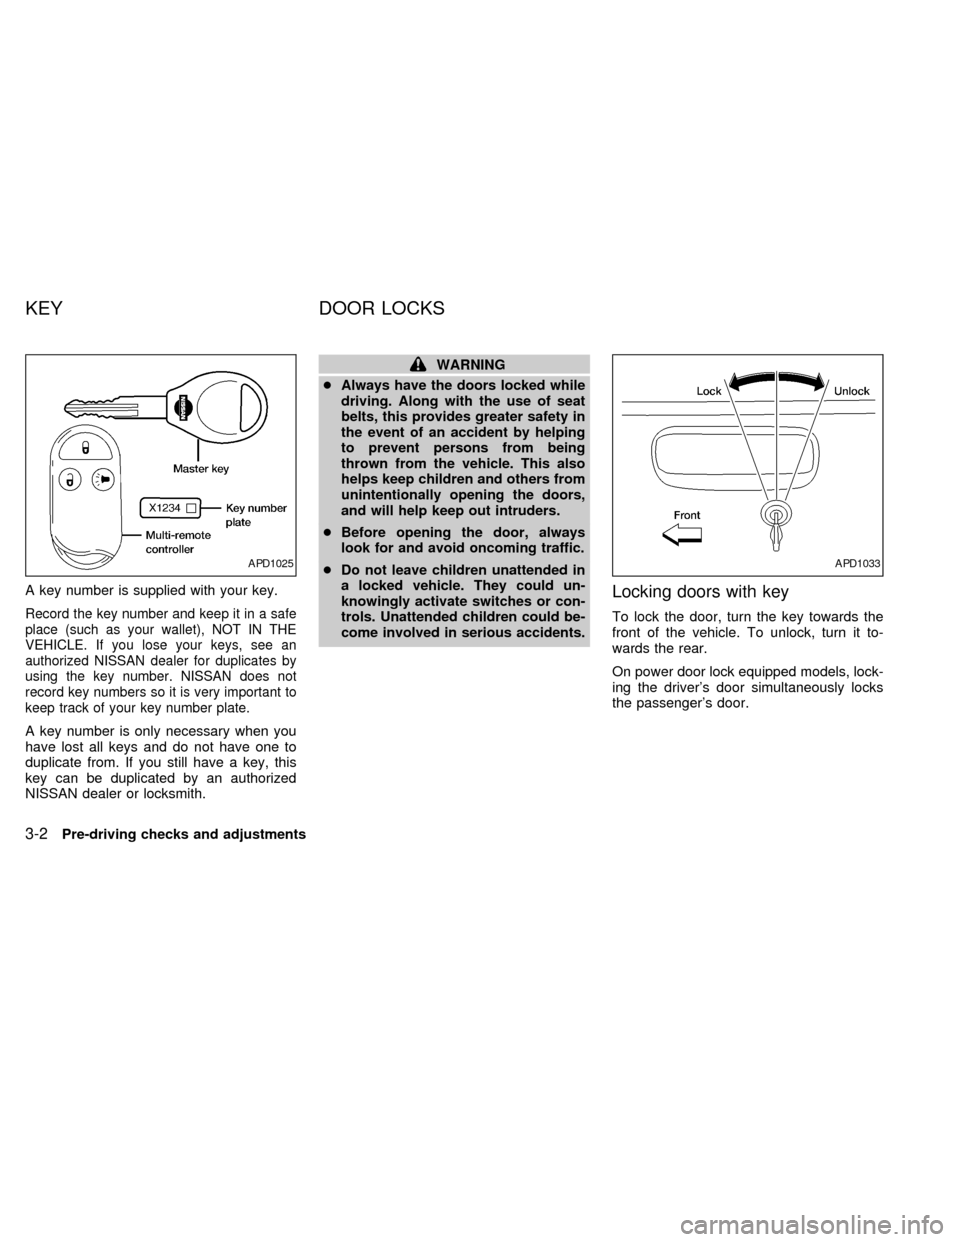
A key number is supplied with your key.
Record the key number and keep it in a safe
place (such as your wallet), NOT IN THE
VEHICLE. If you lose your keys, see an
authorized NISSAN dealer for duplicates by
using the key number. NISSAN does not
record key numbers so it is very important to
keep track of your key number plate.
A key number is only necessary when you
have lost all keys and do not have one to
duplicate from. If you still have a key, this
key can be duplicated by an authorized
NISSAN dealer or locksmith.
WARNING
cAlways have the doors locked while
driving. Along with the use of seat
belts, this provides greater safety in
the event of an accident by helping
to prevent persons from being
thrown from the vehicle. This also
helps keep children and others from
unintentionally opening the doors,
and will help keep out intruders.
cBefore opening the door, always
look for and avoid oncoming traffic.
cDo not leave children unattended in
a locked vehicle. They could un-
knowingly activate switches or con-
trols. Unattended children could be-
come involved in serious accidents.
Locking doors with key
To lock the door, turn the key towards the
front of the vehicle. To unlock, turn it to-
wards the rear.
On power door lock equipped models, lock-
ing the driver's door simultaneously locks
the passenger's door.
APD1025APD1033
KEY DOOR LOCKS
3-2Pre-driving checks and adjustments
ZX
Page 82 of 224
WARNING
cThe air conditioner cooling function
operates only when the engine is
running.
cDo not leave children, unreliable
adults, or pets alone in your vehicle.
On hot sunny days, temperatures in
a closed vehicle could quickly be-
come high enough to cause severe
or possibly fatal injuries to people or
animals.
cDo not use the recirculation mode
for long periods as it may cause theinterior air to become stale and the
windows to fog up.
cPositioning of the heating or air con-
ditioning controls should not be
done while driving, so that full atten-
tion may be given to the driving
operation.
CONTROLS
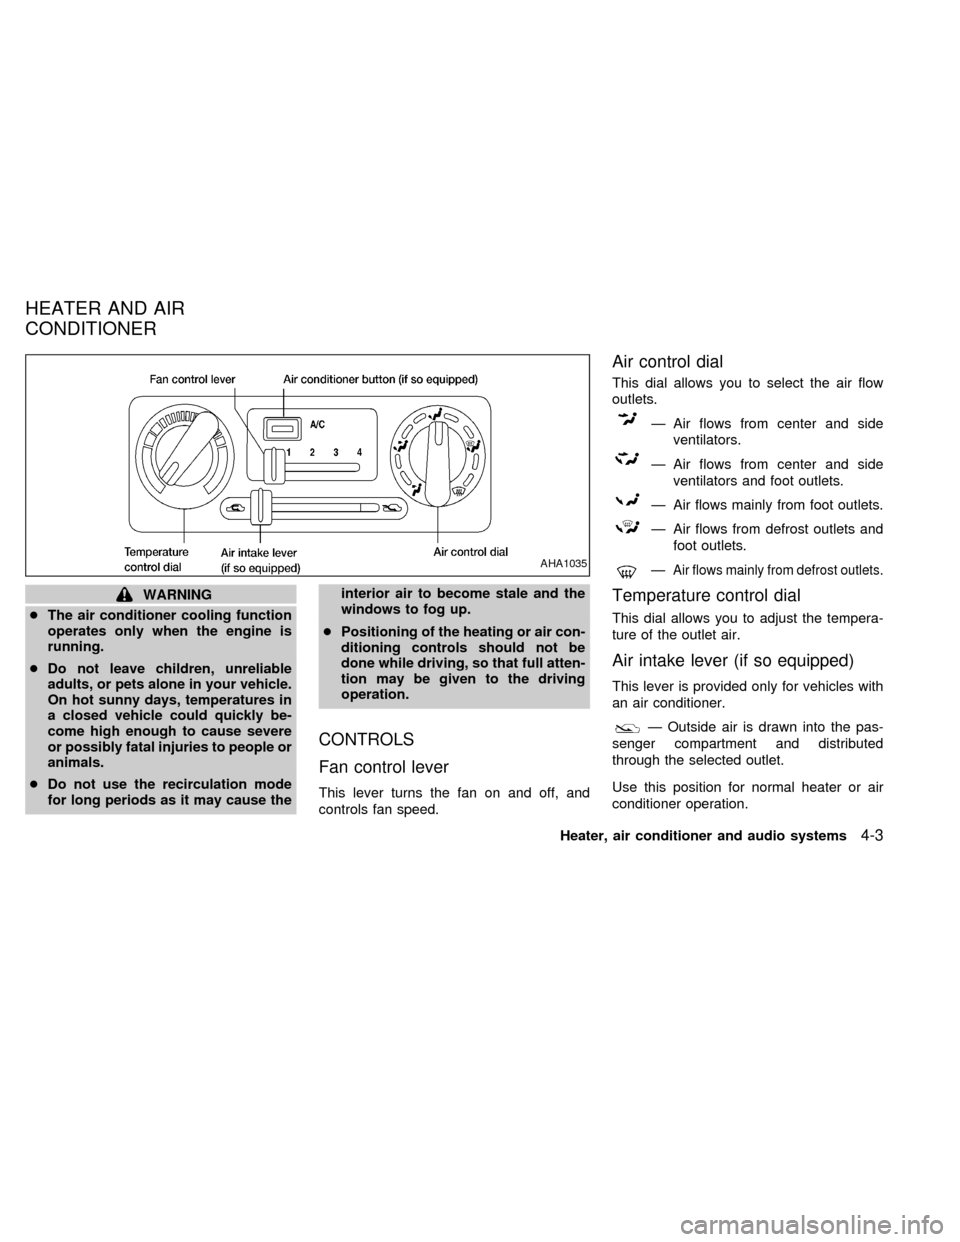
Fan control lever
This lever turns the fan on and off, and
controls fan speed.
Air control dial
This dial allows you to select the air flow
outlets.
Ð Air flows from center and side
ventilators.
Ð Air flows from center and side
ventilators and foot outlets.
Ð Air flows mainly from foot outlets.
Ð Air flows from defrost outlets and
foot outlets.
ÐAir flows mainly from defrost outlets.
Temperature control dial
This dial allows you to adjust the tempera-
ture of the outlet air.
Air intake lever (if so equipped)
This lever is provided only for vehicles with
an air conditioner.
Ð Outside air is drawn into the pas-
senger compartment and distributed
through the selected outlet.
Use this position for normal heater or air
conditioner operation.
AHA1035
HEATER AND AIR
CONDITIONER
Heater, air conditioner and audio systems4-3
ZX
Page 90 of 224
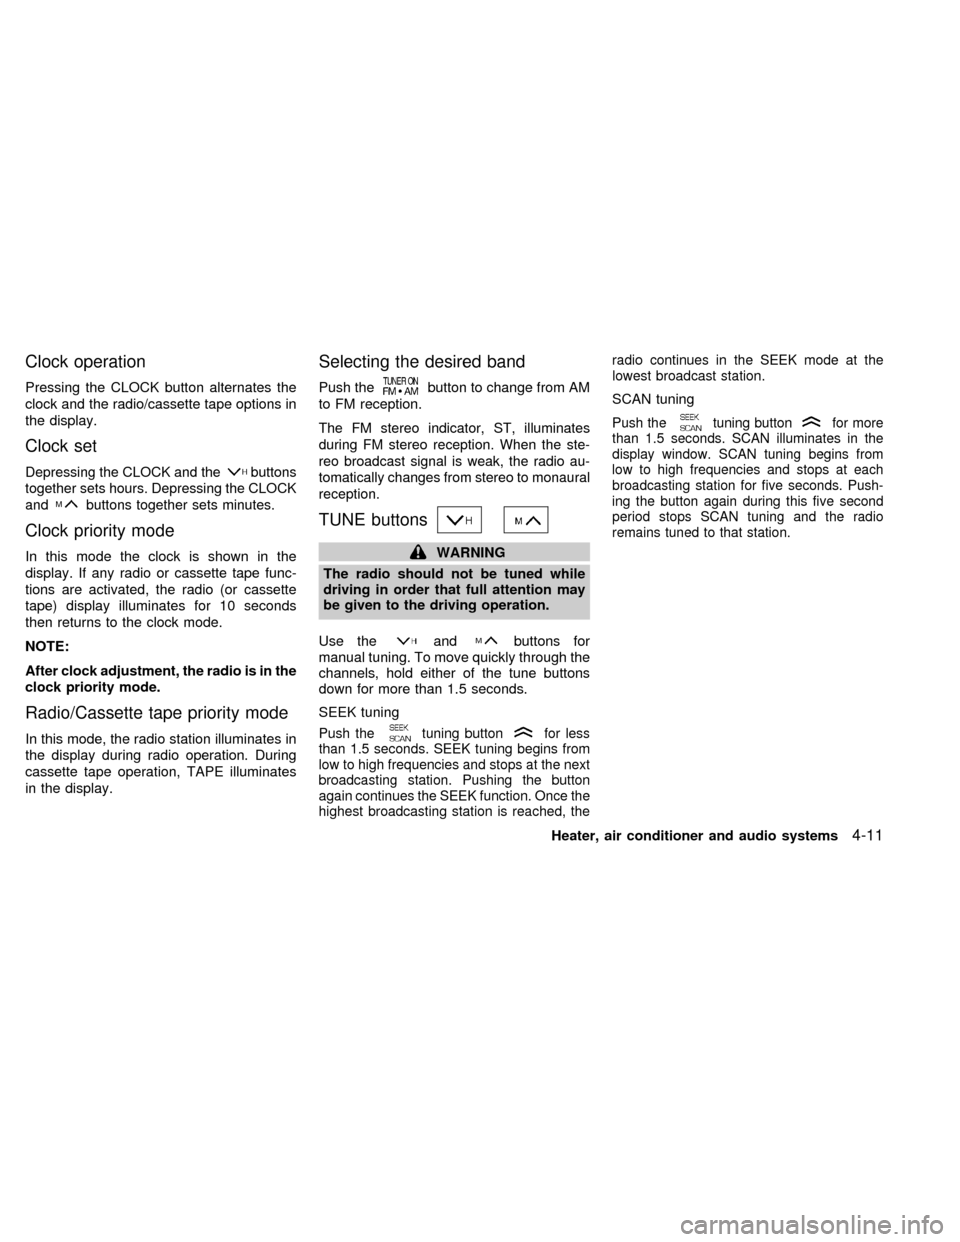
Clock operation
Pressing the CLOCK button alternates the
clock and the radio/cassette tape options in
the display.
Clock set
Depressing the CLOCK and thebuttons
together sets hours. Depressing the CLOCK
and
buttons together sets minutes.
Clock priority mode
In this mode the clock is shown in the
display. If any radio or cassette tape func-
tions are activated, the radio (or cassette
tape) display illuminates for 10 seconds
then returns to the clock mode.
NOTE:
After clock adjustment, the radio is in the
clock priority mode.
Radio/Cassette tape priority mode
In this mode, the radio station illuminates in
the display during radio operation. During
cassette tape operation, TAPE illuminates
in the display.
Selecting the desired band
Push thebutton to change from AM
to FM reception.
The FM stereo indicator, ST, illuminates
during FM stereo reception. When the ste-
reo broadcast signal is weak, the radio au-
tomatically changes from stereo to monaural
reception.
TUNE buttons
WARNING
The radio should not be tuned while
driving in order that full attention may
be given to the driving operation.
Use the
andbuttons for
manual tuning. To move quickly through the
channels, hold either of the tune buttons
down for more than 1.5 seconds.
SEEK tuning
Push thetuning buttonfor less
than 1.5 seconds. SEEK tuning begins from
low to high frequencies and stops at the next
broadcasting station. Pushing the button
again continues the SEEK function. Once the
highest broadcasting station is reached, theradio continues in the SEEK mode at the
lowest broadcast station.
SCAN tuning
Push thetuning buttonfor more
than 1.5 seconds. SCAN illuminates in the
display window. SCAN tuning begins from
low to high frequencies and stops at each
broadcasting station for five seconds. Push-
ing the button again during this five second
period stops SCAN tuning and the radio
remains tuned to that station.
Heater, air conditioner and audio systems4-11
ZX
Page 91 of 224

Station memory operations
Six stations can be set for the AM band. 12
stations can be set for the FM band (six for
FM1, six for FM2).
1. Push
to select AM, FM1, orFM2. The selected band illuminates in
the display.
2. Tune to the desired station.
3. Push the desired station select button for
more than 2 seconds. For example, in
the illustrations, ch2 is to be memorized.
The radio mutes when the select button
is pushed.
4. When the sound resumes, memorizing is
complete.
5. Other station select buttons can be set in
the same manner.
If the battery cable is disconnected, or if the
radio fuse opens, the radio memory is can-
celled. In that case, reset the desired sta-
tions.
Adjusting tone quality and speaker
balance
To adjust BASSzTREBzBAL (Bass, Treble,
Balance), press the AUDIO button until the
desired mode (BAS, TRE, or BAL) appears
in the display.
Press theorbutton to adjust
Bass (BAS) and Treble (TRE) to the desired
level. Use the
orbutton to ad-
just Balance modes. Balance (BAL) adjusts
the sound level between the right and left
speakers.
After 10 seconds, the radio or cassette tape
AHA1045
AHA1052
4-12Heater, air conditioner and audio systems
ZX