1998 NISSAN ALTIMA instrument panel
[x] Cancel search: instrument panelPage 14 of 217
This Supplemental Restraint System section
contains important information concerning
the driver and passenger supplemental air
bags. The Supplemental Restraint System
Air Bag can help reduce impact force to the
driver and to the front passenger in certain
frontal collisions. The supplemental air bags
are designed tosupplementthe crash pro-
tection provided by the driver and front pas-
senger seat belts and arenot a substitute
for them. The seat belts should always be
correctly worn and the driver and front pas-
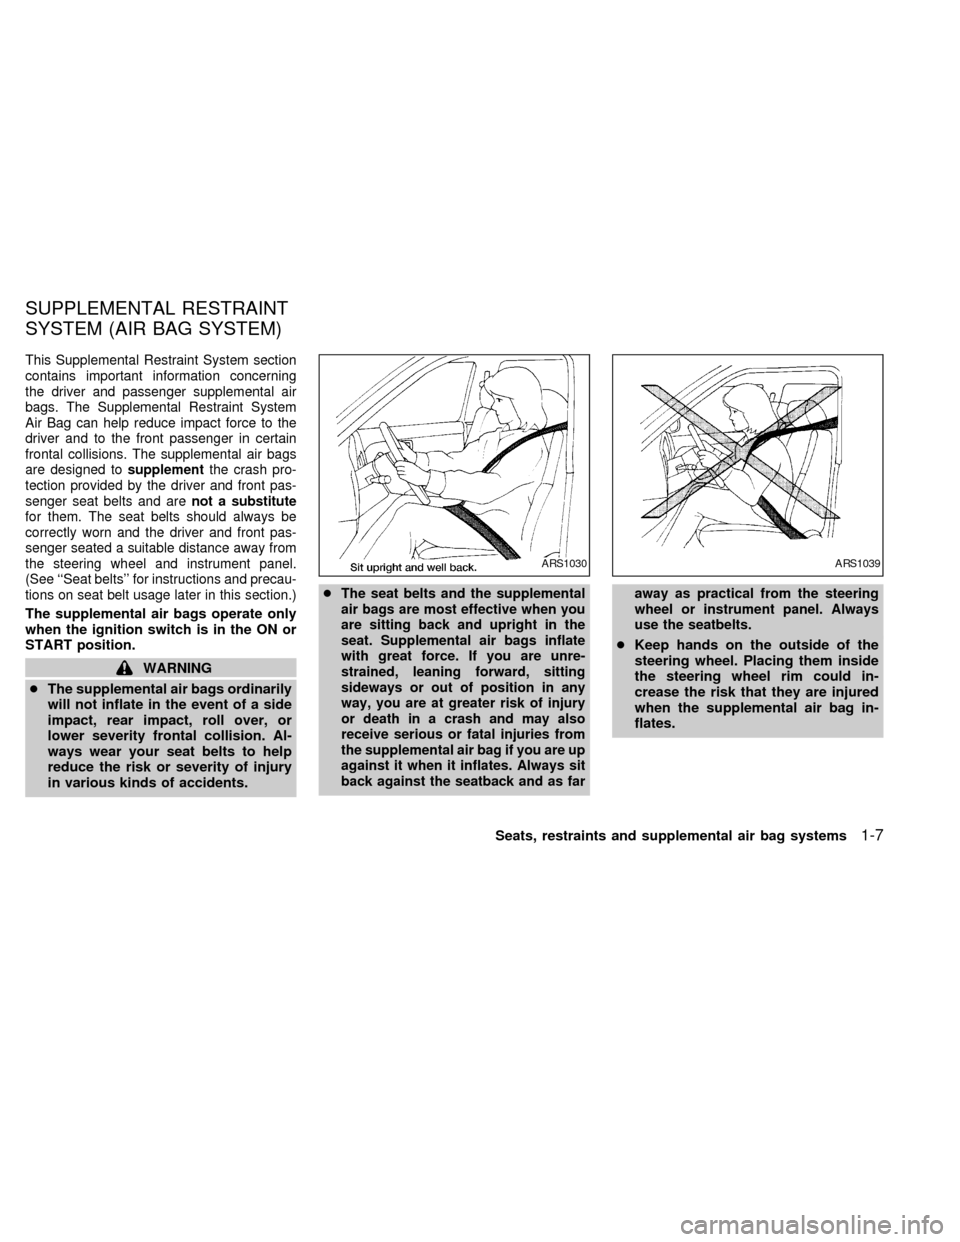
senger seated a suitable distance away from
the steering wheel and instrument panel.
(See ``Seat belts'' for instructions and precau-
tions on seat belt usage later in this section.)
The supplemental air bags operate only
when the ignition switch is in the ON or
START position.
WARNING
cThe supplemental air bags ordinarily
will not inflate in the event of a side
impact, rear impact, roll over, or
lower severity frontal collision. Al-
ways wear your seat belts to help
reduce the risk or severity of injury
in various kinds of accidents.c
The seat belts and the supplemental
air bags are most effective when you
are sitting back and upright in the
seat. Supplemental air bags inflate
with great force. If you are unre-
strained, leaning forward, sitting
sideways or out of position in any
way, you are at greater risk of injury
or death in a crash and may also
receive serious or fatal injuries from
the supplemental air bag if you are up
against it when it inflates. Always sit
back against the seatback and as faraway as practical from the steering
wheel or instrument panel. Always
use the seatbelts.
cKeep hands on the outside of the
steering wheel. Placing them inside
the steering wheel rim could in-
crease the risk that they are injured
when the supplemental air bag in-
flates.
ARS1030ARS1039
SUPPLEMENTAL RESTRAINT
SYSTEM (AIR BAG SYSTEM)
Seats, restraints and supplemental air bag systems1-7
ZX
Page 18 of 217
WARNING
c
Do not place any objects on the steer-
ing wheel pad or on the instrument
panel. Also, do not place any objects
between any occupant and the steer-
ing wheel or instrument panel. Such
objects may become dangerous pro-
jectiles and cause injury if the supple-
mental air bag inflates.
cRight after inflation, several supple-
mental air bag system components
will be hot. Do not touch them; you
may severely burn yourself.
c
No unauthorized changes should be
made to any components or wiring of
the supplemental air bag system. This
is to prevent accidental inflation of
the supplemental air bag or damage
to the supplemental air bag system.
cDo not make unauthorized changes
to your vehicle's electrical system,
suspension system or front end
structure. This could affect proper
operation of the supplemental air
bag system.c
Tampering with the supplemental air
bag system may result in serious per-
sonal injury. Tampering includes
changes to the steering wheel and the
instrument panel assembly by placing
material over the steering wheel pad
and above the dashboard, or by install-
ing additional trim material around the
supplemental air bag system.
cWork around and on the supplemen-
tal air bag system should be done by
an authorized NISSAN dealer. Instal-
lation of electrical equipment should
also be done by an authorized NIS-
SAN dealer. The yellow SRS wiring
should not be modified or discon-
nected. Unauthorized electrical test
equipment and probing devices
should not be used on the supple-
mental air bag system.
cThe SRS wiring harnesses are cov-
ered with yellow insulation either
just before the harness connectors
or over the complete harness for
easy identification.When selling your vehicle, we request that
you inform the buyer about the supple-
mental air bag system and guide the buyer
to the appropriate sections in this Owner's
Manual.
Seats, restraints and supplemental air bag systems
1-11
ZX
Page 19 of 217

Warning labels about the supplemental air
bag system are placed in the vehicle as
shown in the illustration.The supplemental air bag warning light,
displayingin the instrument panel,
monitors the circuits of the supplemental air
bag. The circuits monitored by the supple-
mental air bag light are the diagnosis sensor
unit, supplemental air bag modules and all
related wiring.
When the ignition key is in the ON or START
position, the supplemental air bag warning
light illuminates for about 7 seconds and
then turns off. This means the system is
operational.
APD0513APD0523
WARNING LABELS SUPPLEMENTAL AIR BAG
WARNING LIGHT
1-12Seats, restraints and supplemental air bag systems
ZX
Page 55 of 217

NOTE: On some vehicles, the top few rows
of wires on the rear window are not part of
the rear window defogging system. These
wires, if so equipped, make up the diversity
antenna for the audio system.
Lighting
Turn the switch to theposition: The
front turn signal/parking, rear combination,
side marker, license plate and instrument
panel lights come on.
Turn the switch to the
position:The headlights come on and all the other
lights remain on.
To select the high beam function, push the
lever forward. The high beam lights come
on and the indicator light illuminates. Pull it
back to select the low beam.
AIC0505
HEADLIGHT AND TURN
SIGNAL SWITCH
2-12Instruments and controls
ZX
Page 56 of 217
DAYTIME RUNNING LIGHT SYS-
TEM (Canada only)
The headlights automatically illuminate at a
reduced intensity when the engine is started
with the parking brake released. The day-
time running lights operate with the head-
light switch in the OFF position or in the
position. Turn the headlight switch to
the
position for full illumination when
driving at night.
If the parking brake is applied before the
engine is started, the daytime running lights
do not illuminate. The daytime running lights
illuminate once the parking brake is re-
leased. The daytime running lights will re-
main on until the ignition switch is turned off.
WARNING
When the daytime running light system
is active, tail lights on your vehicle are
not on. It is necessary at dusk to turn
on your headlights. Failure to do so
could cause an accident injuring your-
self and others.
Passing signal
Pulling and releasing the lever flashes the
headlight high beams on and off.
Turn signal
Move the lever up or down to signal the
turning direction. When the turn is com-
pleted, the turn signals cancel automati-
cally.
Lane change signal
To signal a lane change, move the lever up
or down to the point where the indicator light
begins to flash, but the lever does not latch.
The instrument brightness control operates
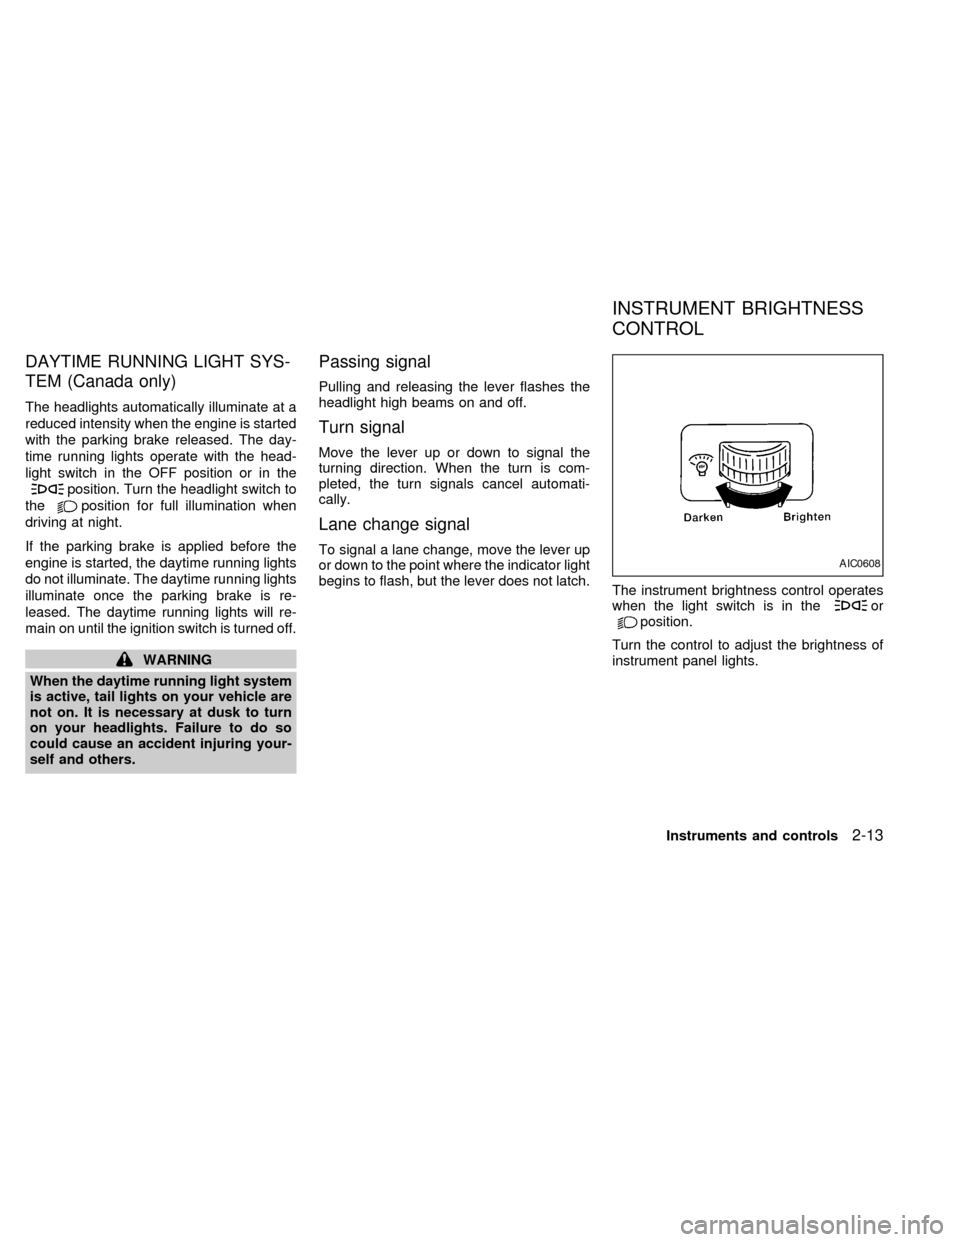
when the light switch is in the
orposition.
Turn the control to adjust the brightness of
instrument panel lights.
AIC0608
INSTRUMENT BRIGHTNESS
CONTROL
Instruments and controls2-13
ZX
Page 60 of 217
WARNING
cMake sure that all passengers have
their hands, etc. inside the vehicle
before closing the windows. Use the
window lock switch to prevent unex-
pected use of the power windows.
cDo not leave children unattended in-
side the vehicle. They could un-
knowingly activate switches or con-
trols and become trapped in a
window. Unattended children could
become involved in serious acci-
dents.
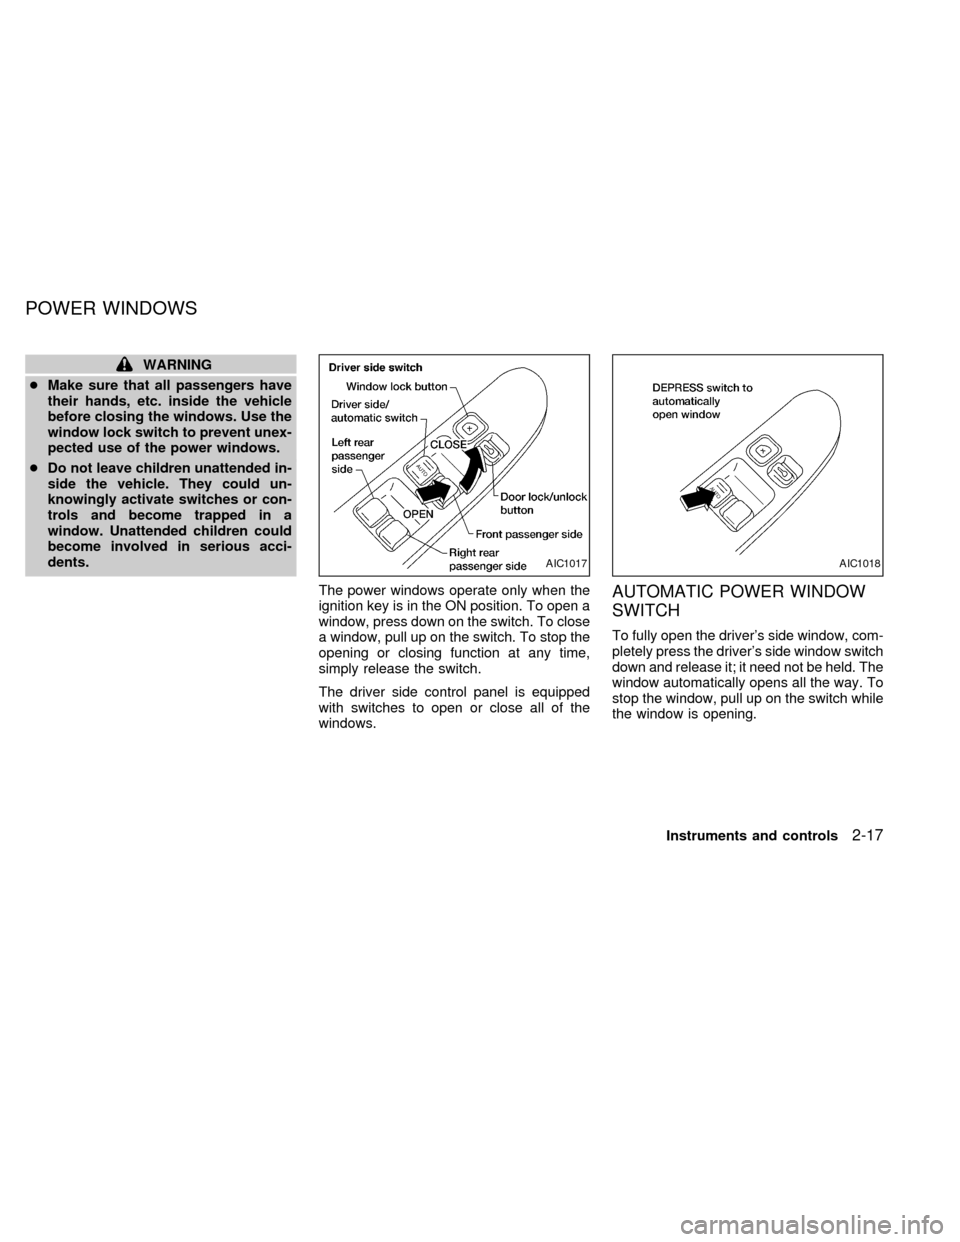
The power windows operate only when the
ignition key is in the ON position. To open a
window, press down on the switch. To close
a window, pull up on the switch. To stop the
opening or closing function at any time,
simply release the switch.
The driver side control panel is equipped
with switches to open or close all of the
windows.
AUTOMATIC POWER WINDOW
SWITCH
To fully open the driver's side window, com-
pletely press the driver's side window switch
down and release it; it need not be held. The
window automatically opens all the way. To
stop the window, pull up on the switch while
the window is opening.
AIC1017AIC1018
POWER WINDOWS
Instruments and controls2-17
ZX
Page 61 of 217
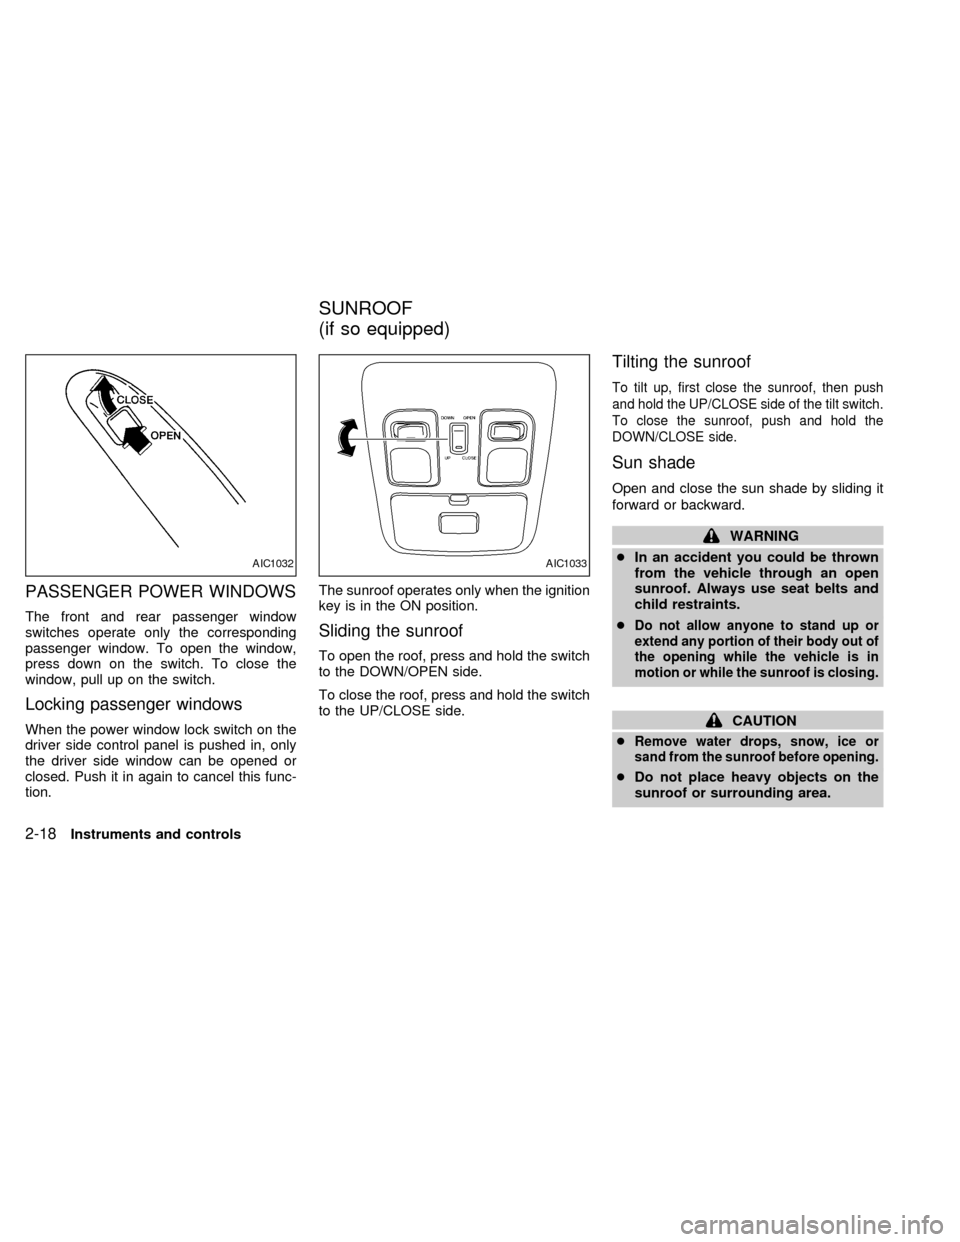
PASSENGER POWER WINDOWS
The front and rear passenger window
switches operate only the corresponding
passenger window. To open the window,
press down on the switch. To close the
window, pull up on the switch.
Locking passenger windows
When the power window lock switch on the
driver side control panel is pushed in, only
the driver side window can be opened or
closed. Push it in again to cancel this func-
tion.The sunroof operates only when the ignition
key is in the ON position.
Sliding the sunroof
To open the roof, press and hold the switch
to the DOWN/OPEN side.
To close the roof, press and hold the switch
to the UP/CLOSE side.
Tilting the sunroof
To tilt up, first close the sunroof, then push
and hold the UP/CLOSE side of the tilt switch.
To close the sunroof, push and hold the
DOWN/CLOSE side.
Sun shade
Open and close the sun shade by sliding it
forward or backward.
WARNING
cIn an accident you could be thrown
from the vehicle through an open
sunroof. Always use seat belts and
child restraints.
c
Do not allow anyone to stand up or
extend any portion of their body out of
the opening while the vehicle is in
motion or while the sunroof is closing.
CAUTION
c
Remove water drops, snow, ice or
sand from the sunroof before opening.
cDo not place heavy objects on the
sunroof or surrounding area.
AIC1032AIC1033
SUNROOF
(if so equipped)
2-18Instruments and controls
ZX
Page 73 of 217
Operation is subject to the following two
conditions: (1) This device may not
cause harmful interference, and (2) this
device must accept any interference re-
ceived including interference that may
cause undesired operation of the device.
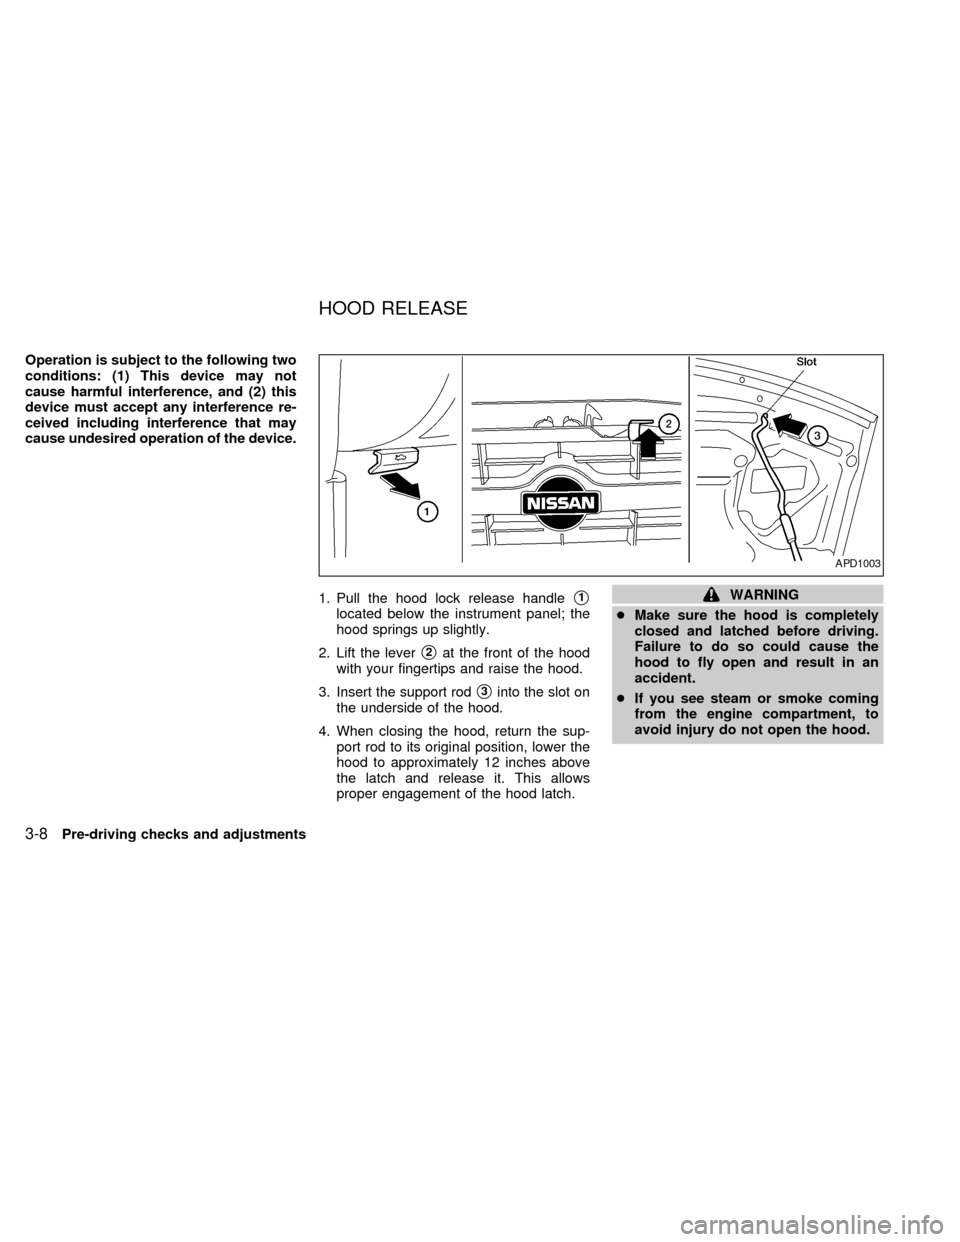
1. Pull the hood lock release handle
s1
located below the instrument panel; the
hood springs up slightly.
2. Lift the lever
s2at the front of the hood
with your fingertips and raise the hood.
3. Insert the support rod
s3into the slot on
the underside of the hood.
4. When closing the hood, return the sup-
port rod to its original position, lower the
hood to approximately 12 inches above
the latch and release it. This allows
proper engagement of the hood latch.
WARNING
cMake sure the hood is completely
closed and latched before driving.
Failure to do so could cause the
hood to fly open and result in an
accident.
cIf you see steam or smoke coming
from the engine compartment, to
avoid injury do not open the hood.
APD1003
HOOD RELEASE
3-8Pre-driving checks and adjustments
ZX