Page 10 of 217
SEAT ADJUSTMENT
Manual
WARNING
cDo not adjust the driver's seat while
driving. The seat may move sud-
denly and could cause loss of con-
trol of the vehicle.
cAfter adjustment, gently rock in the
seat to make sure it is securely
locked.
Forward and backward
Pull the lever up while you slide the seat
forward or backward to the desired position.
Release the lever to lock the seat in posi-
tion.
Reclining
To recline the seatback, pull the lever up
and lean back. To bring the seatback for-
ward again, pull the lever and move your-
body forward. The seatback moves forward.
APD0532APD0531
Seats, restraints and supplemental air bag systems1-3
ZX
Page 11 of 217

Power (if so equipped)
WARNING
c
Do not adjust the driver's seat while
driving in order that full attention may
be given to the driving operation.
cDo not leave children unattended in-
side the vehicle. They could unknow-
ingly activate switches or controls.
Unattended children could become
involved in serious accidents.
Operating Tips
cThe motor has an auto-reset overload
protection circuit. If the motor stops dur-
ing operation, wait 30 seconds, then re-
activate the switch.
cDo not operate the power support seat
for a long period of time when the engine
is off. This will discharge the battery.
Forward and backward adjustment
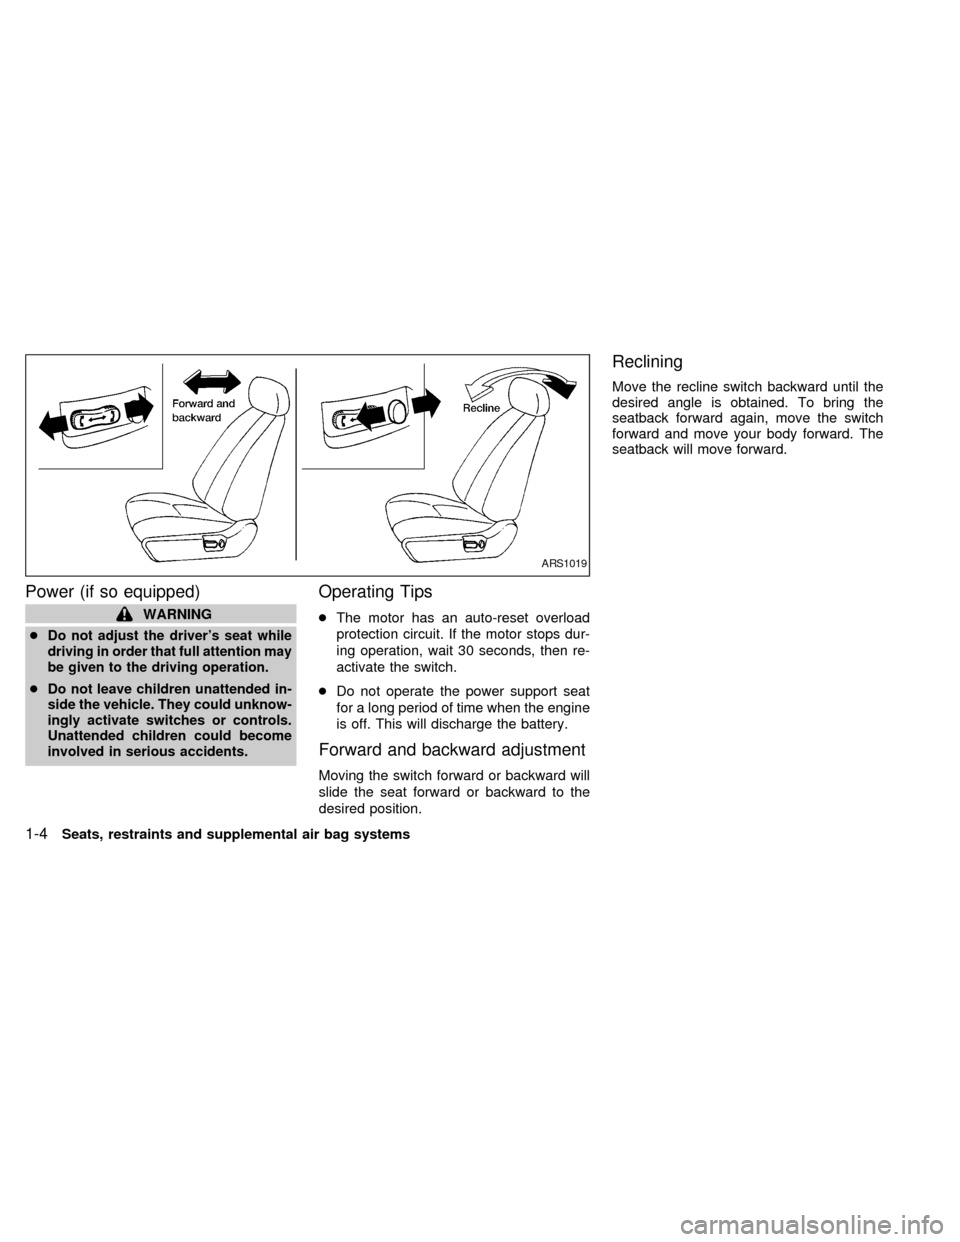
Moving the switch forward or backward will
slide the seat forward or backward to the
desired position.
Reclining
Move the recline switch backward until the
desired angle is obtained. To bring the
seatback forward again, move the switch
forward and move your body forward. The
seatback will move forward.
ARS1019
1-4Seats, restraints and supplemental air bag systems
ZX
Page 74 of 217
The glove box opens by pulling the handle.
The glove box with key lock (if so equipped)
can be locked or unlocked with the master
key.
To illuminate the glove box light (if so
equipped), the headlight switch must be
turned to the
orposition.
CAUTION
Keep glove box lid closed while driving
to help prevent injury in an accident or
a sudden stop.
Opener lever operation
The trunk lid opener lever is located on the
outside of the driver's seat. To open the
trunk lid, pull the opener lever up.
To close the trunk lid, lower and push the
trunk lid down securely.
APD1001APD1008
GLOVE BOX TRUNK LID LOCK
OPERATION
Pre-driving checks and adjustments3-9
ZX
Page 76 of 217
Opener lever operation
The fuel filler lid opener lever is located on
the outside of the driver's seat. To open the
fuel filler lid, push the opener lever down. To
lock, close the fuel filler lid securely.
FUEL FILLER CAP
The fuel filler cap is a screw-on ratcheting
type. Tighten the cap clockwise until ratch-
eting clicks are heard.
APD1009APD1007
FUEL FILLER LID LOCK
OPERATION
Pre-driving checks and adjustments3-11
ZX
Page 168 of 217

a. Keep all of the tires inflated to the correct
pressure.
b. Place the vehicle on level ground.
c. See that the vehicle is unloaded (except
for full levels of coolant, engine oil and
fuel, and spare tire, jack, and tools).
Have the driver or an equivalent weight
placed in the driver's seat.
Low beam
1. Open the hood.
2. Adjust the vertical aim by turning the
adjusting screw with a Phillips screw-
driver.
3. Adjust the horizontal aim by turning the
adjusting screw with a Phillips screw-
driver.
ADJUSTMENT AFTER
HEADLIGHT ASSEMBLY
REPLACEMENT
If the vehicle front body has been repaired
and/or the headlight assembly has been
replaced, check aiming. Use the aiming
chart shown in the illustration.
cUpper edge and left edge of high in-
tensity zone should be within the
range shown at left. Adjust headlights
accordingly.
cDotted lines in the illustration show
center of headlights.
``H'' : Horizontial center line of headlights
``W
L'': Distance between each headlight
center
ADI1039
Do-it-yourself8-23
ZX