Page 6 of 217
Table of
ContentsSeats, restraints and supplemental air bag systems
Instruments and controls
Pre-driving checks and adjustments
Heater, air conditioner and audio systems
Starting and driving
In case of emergency
Appearance and care
Do-it-yourself
Maintenance
Technical and consumer information
Index
1
2
3
4
5
6
7
8
9
10
11
Page 8 of 217

1 Seats, restraints and supplemental air
bag systems
Front seats .............................................................1-2
Seat adjustment .....................................................1-3
Head restraints .......................................................1-5
Rear seat ................................................................1-6
Supplemental restraint system (air bag
system) ...................................................................1-7
Supplemental air bag system...............................1-10
Warning labels......................................................1-12
Supplemental air bag warning light......................1-12
Seat belts .............................................................1-14
Precautions on seat belt usage ...........................1-14Child safety...........................................................1-16
Pregnant women ..................................................1-16
Injured persons ....................................................1-16
Three-point type with retractor .............................1-17
2-point type without retractor (rear center lap
belt).......................................................................1-20
Seat belt extenders ..............................................1-22
Seat belt maintenance .........................................1-22
Child restraints .....................................................1-22
Top strap child restraint .......................................1-31
ZX
Page 10 of 217
SEAT ADJUSTMENT
Manual
WARNING
cDo not adjust the driver's seat while
driving. The seat may move sud-
denly and could cause loss of con-
trol of the vehicle.
cAfter adjustment, gently rock in the
seat to make sure it is securely
locked.
Forward and backward
Pull the lever up while you slide the seat
forward or backward to the desired position.
Release the lever to lock the seat in posi-
tion.
Reclining
To recline the seatback, pull the lever up
and lean back. To bring the seatback for-
ward again, pull the lever and move your-
body forward. The seatback moves forward.
APD0532APD0531
Seats, restraints and supplemental air bag systems1-3
ZX
Page 11 of 217

Power (if so equipped)
WARNING
c
Do not adjust the driver's seat while
driving in order that full attention may
be given to the driving operation.
cDo not leave children unattended in-
side the vehicle. They could unknow-
ingly activate switches or controls.
Unattended children could become
involved in serious accidents.
Operating Tips
cThe motor has an auto-reset overload
protection circuit. If the motor stops dur-
ing operation, wait 30 seconds, then re-
activate the switch.
cDo not operate the power support seat
for a long period of time when the engine
is off. This will discharge the battery.
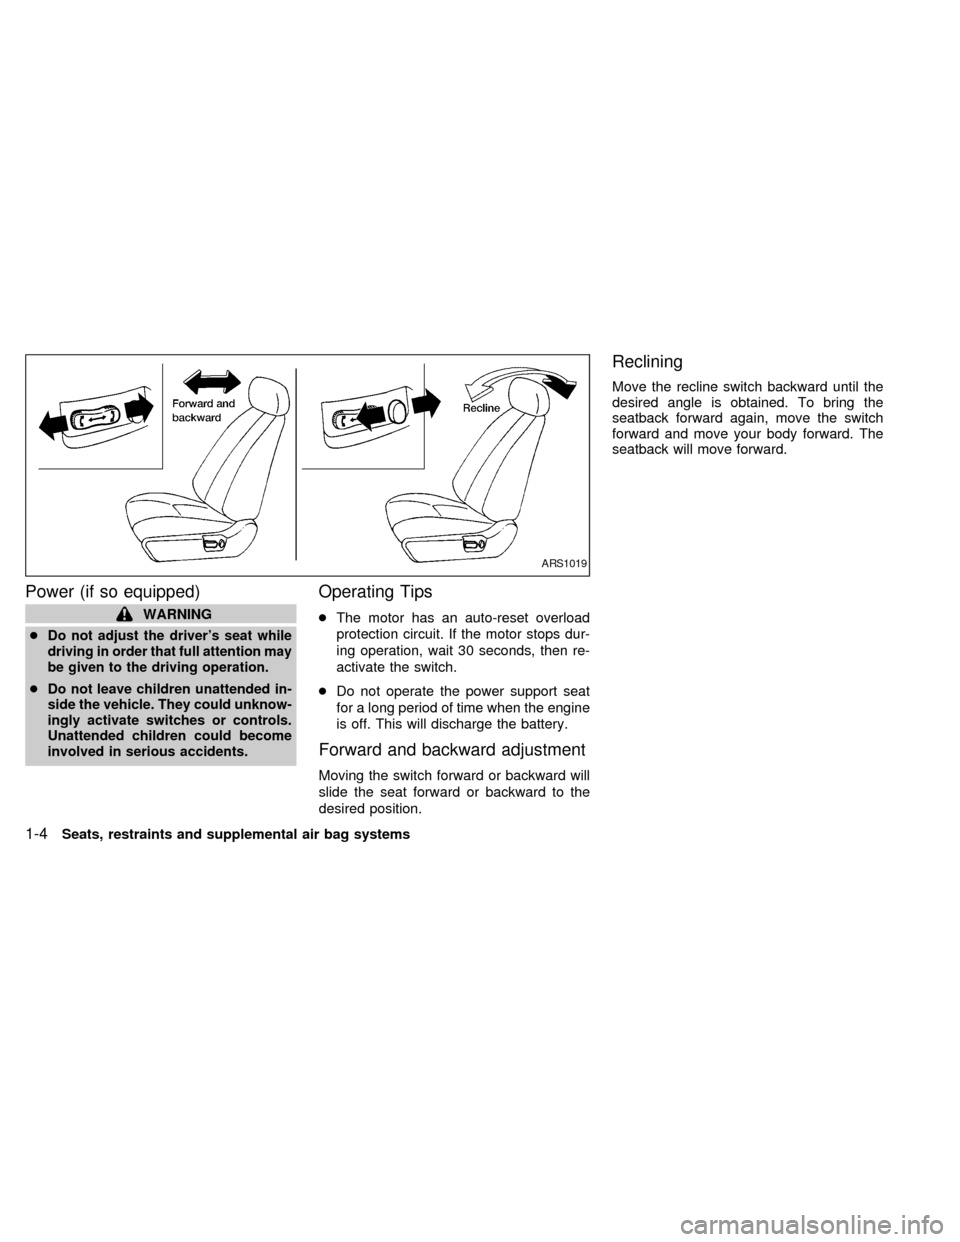
Forward and backward adjustment
Moving the switch forward or backward will
slide the seat forward or backward to the
desired position.
Reclining
Move the recline switch backward until the
desired angle is obtained. To bring the
seatback forward again, move the switch
forward and move your body forward. The
seatback will move forward.
ARS1019
1-4Seats, restraints and supplemental air bag systems
ZX
Page 26 of 217

Checking seat belt operation
(Three-point type seat belt with re-
tractor)
Seat belt retractors are designed to lock belt
movement using two separate methods:
1) When the belt is pulled quickly from the
retractor.
2) When the vehicle slows down rapidly.
To increase your confidence in the belts,
check their operation as follows:
cGrasp the shoulder belt and pull quickly
forward. The retractor should lock and
restrict further belt movement.
If the retractor does not lock during this
check or if you have any questions about
belt operation, see an authorized NISSAN
dealer.
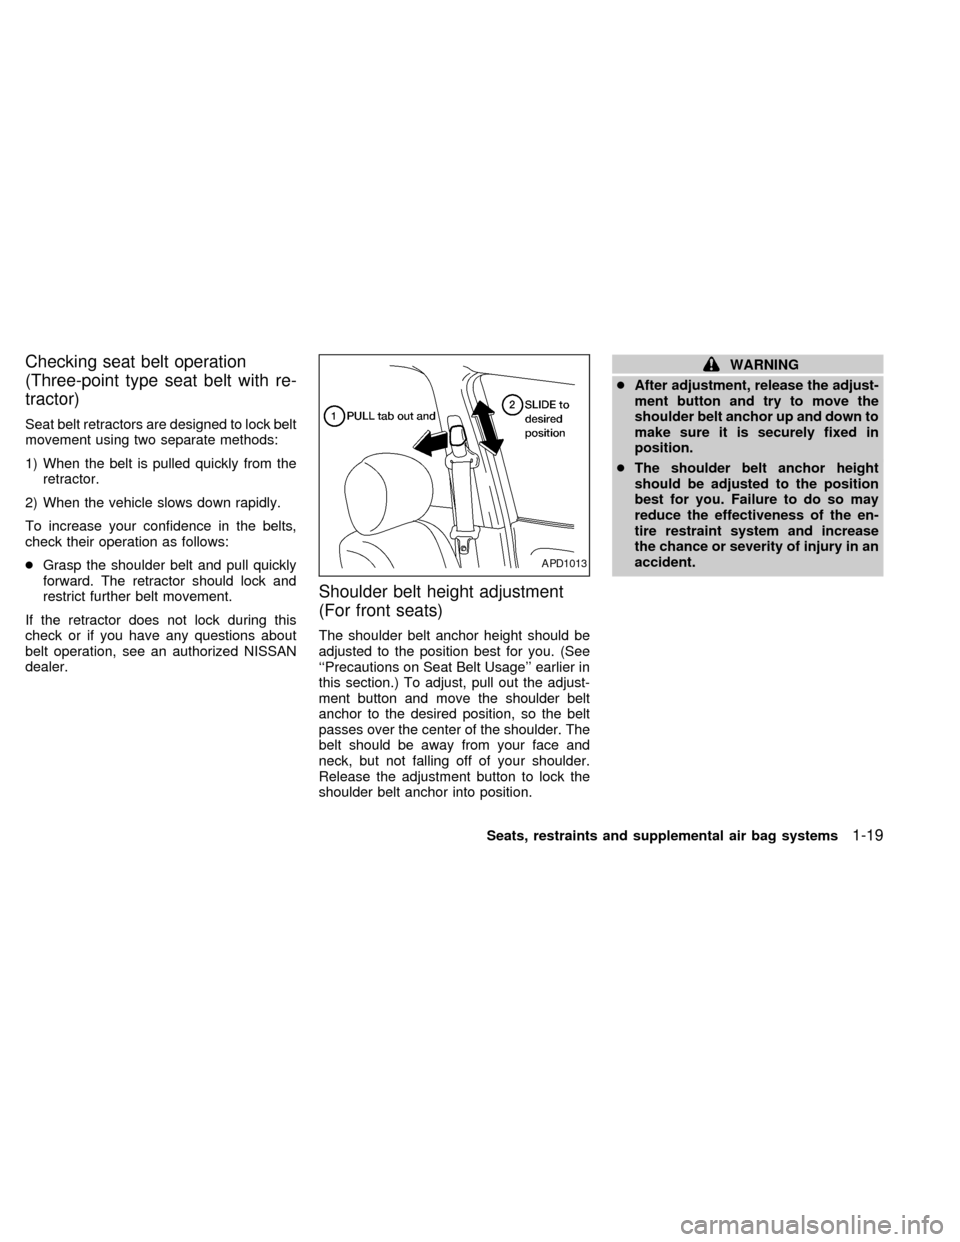
Shoulder belt height adjustment
(For front seats)
The shoulder belt anchor height should be
adjusted to the position best for you. (See
``Precautions on Seat Belt Usage'' earlier in
this section.) To adjust, pull out the adjust-
ment button and move the shoulder belt
anchor to the desired position, so the belt
passes over the center of the shoulder. The
belt should be away from your face and
neck, but not falling off of your shoulder.
Release the adjustment button to lock the
shoulder belt anchor into position.
WARNING
cAfter adjustment, release the adjust-
ment button and try to move the
shoulder belt anchor up and down to
make sure it is securely fixed in
position.
cThe shoulder belt anchor height
should be adjusted to the position
best for you. Failure to do so may
reduce the effectiveness of the en-
tire restraint system and increase
the chance or severity of injury in an
accident.
APD1013
Seats, restraints and supplemental air bag systems1-19
ZX
Page 32 of 217
3. Remove all slack in the lap belt for a very
tight fit by pulling forcefully on the lap belt
adjustment.4. Before placing the child in the child re-
straint, use force to tilt the child restraint
from side to side, and tug it forward to
make sure it is securely held in place.
5. If it is not secure, try to tighten the belt
again, or put the restraint in another seat.
6. Check to make sure the child restraint is
properly secured prior to each use.Rear facing installation on rear seat
Center lap belt
When you install a child restraint in a rear
center seat, follow these steps:
1. Position the child restraint on the seat as
illustrated. Always follow the restraint
manufacturer's instructions.
ARS1061ARS1062ARS1063
Seats, restraints and supplemental air bag systems1-25
ZX
Page 33 of 217
2. Route the seat belt tongue through the
child restraint and insert it into the buckle
until you hear and feel the latch engage.
Be sure to follow the child restraint manu-
facturer's instructions for belt routing.3. Remove all slack in the lap belt for a very
tight fit by pulling forcefully on the lap belt
adjustment.4. Before placing the child in the child re-
straint, use force to tilt the child restraint
from side to side, and tug it forward to
make sure it is securely held in place.
5. If it is not secure, try to tighten the belt
again, or put the restraint in another seat.
6. Check to make sure the child restraint is
properly secured prior to each use.
ARS1064ARS1065ARS1066
1-26Seats, restraints and supplemental air bag systems
ZX
Page 67 of 217

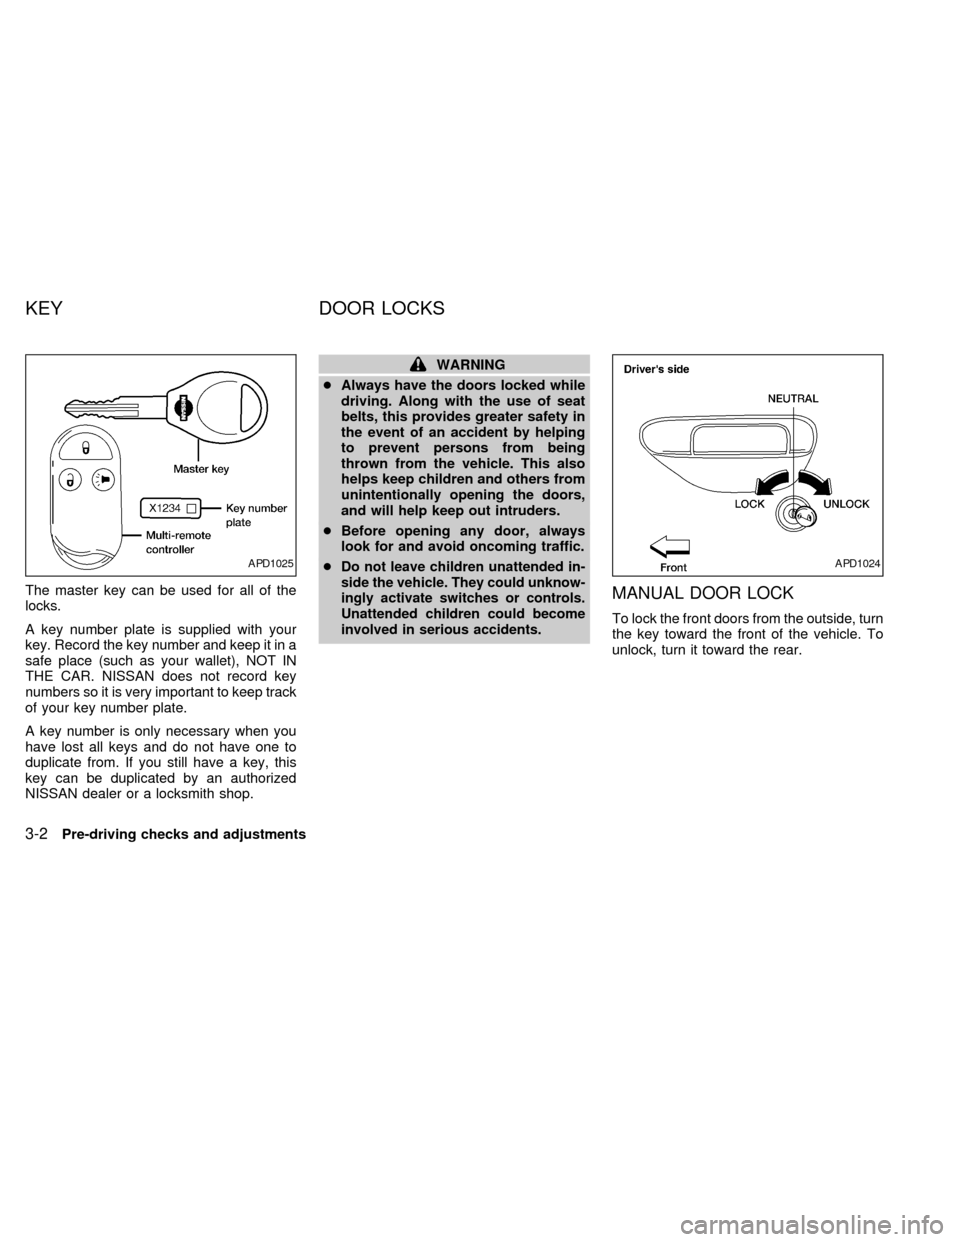
The master key can be used for all of the
locks.
A key number plate is supplied with your
key. Record the key number and keep it in a
safe place (such as your wallet), NOT IN
THE CAR. NISSAN does not record key
numbers so it is very important to keep track
of your key number plate.
A key number is only necessary when you
have lost all keys and do not have one to
duplicate from. If you still have a key, this
key can be duplicated by an authorized
NISSAN dealer or a locksmith shop.
WARNING
cAlways have the doors locked while
driving. Along with the use of seat
belts, this provides greater safety in
the event of an accident by helping
to prevent persons from being
thrown from the vehicle. This also
helps keep children and others from
unintentionally opening the doors,
and will help keep out intruders.
cBefore opening any door, always
look for and avoid oncoming traffic.
c
Do not leave children unattended in-
side the vehicle. They could unknow-
ingly activate switches or controls.
Unattended children could become
involved in serious accidents.
MANUAL DOOR LOCK
To lock the front doors from the outside, turn
the key toward the front of the vehicle. To
unlock, turn it toward the rear.
APD1025APD1024
KEY DOOR LOCKS
3-2Pre-driving checks and adjustments
ZX