1998 NISSAN ALTIMA parking brake
[x] Cancel search: parking brakePage 48 of 217
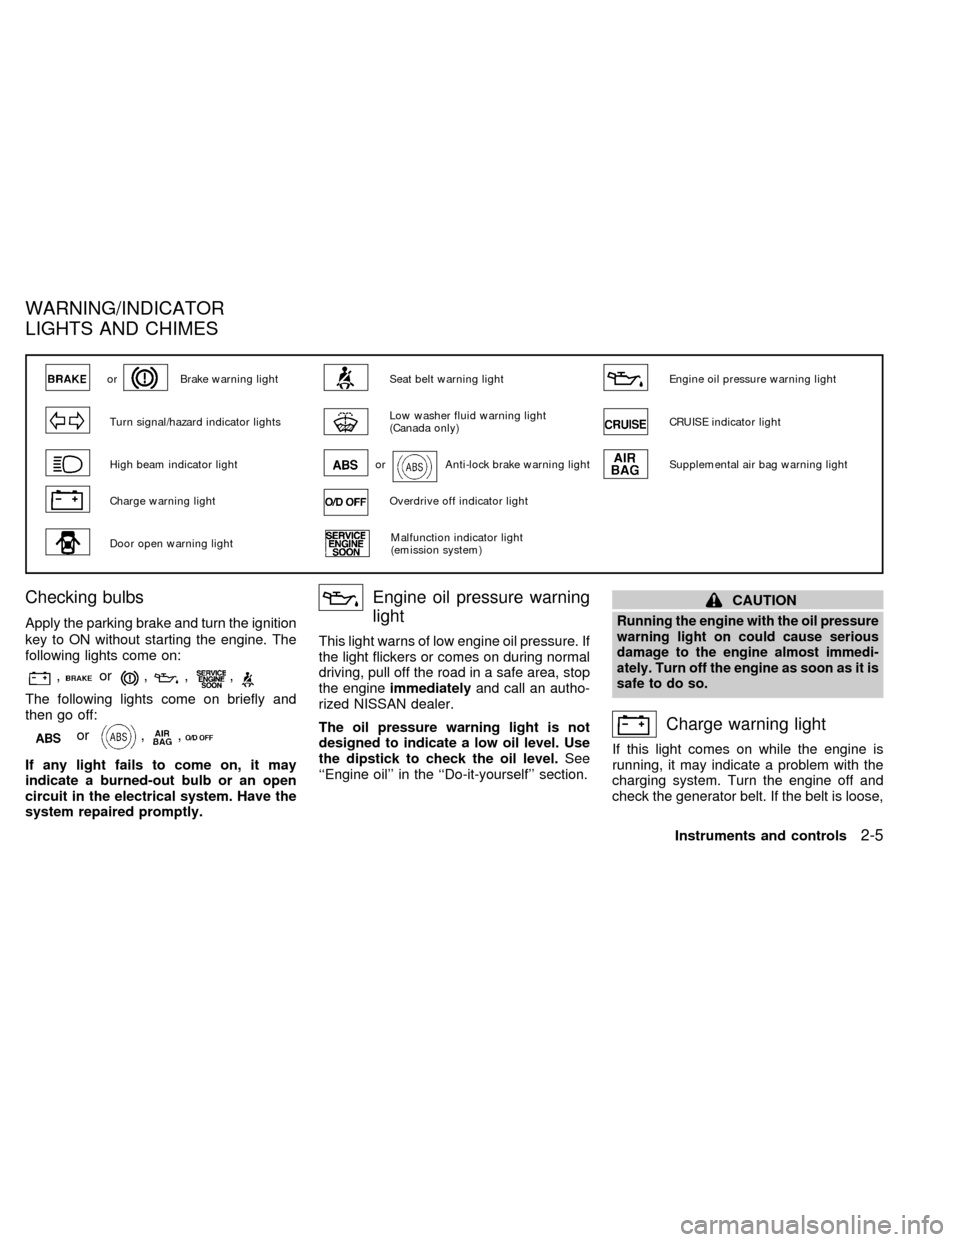
Checking bulbs
Apply the parking brake and turn the ignition
key to ON without starting the engine. The
following lights come on:
,or,,,
The following lights come on briefly and
then go off:
or,,
If any light fails to come on, it may
indicate a burned-out bulb or an open
circuit in the electrical system. Have the
system repaired promptly.
Engine oil pressure warning
light
This light warns of low engine oil pressure. If
the light flickers or comes on during normal
driving, pull off the road in a safe area, stop
the engineimmediatelyand call an autho-
rized NISSAN dealer.
The oil pressure warning light is not
designed to indicate a low oil level. Use
the dipstick to check the oil level.See
``Engine oil'' in the ``Do-it-yourself'' section.
CAUTION
Running the engine with the oil pressure
warning light on could cause serious
damage to the engine almost immedi-
ately. Turn off the engine as soon as it is
safe to do so.
Charge warning light
If this light comes on while the engine is
running, it may indicate a problem with the
charging system. Turn the engine off and
check the generator belt. If the belt is loose,
orBrake warning lightSeat belt warning lightEngine oil pressure warning light
Turn signal/hazard indicator lightsLow washer fluid warning light
(Canada only)CRUISE indicator light
High beam indicator lightorAnti-lock brake warning lightSupplemental air bag warning light
Charge warning lightOverdrive off indicator light
Door open warning lightMalfunction indicator light
(emission system)
WARNING/INDICATOR
LIGHTS AND CHIMES
Instruments and controls2-5
ZX
Page 49 of 217
broken, or missing, or if the light remains on,
see an authorized NISSAN dealer immedi-
ately.
CAUTION
Do not continue driving if the belt is
loose, broken or missing.
Door open warning light
This light comes on when any of the doors
are not closed securely while the ignition
key is ON.
Seat belt warning light and
chime
The light and chime remind you to fasten
seat belts. The light illuminates whenever
the ignition key is turned to ON, and re-
mains illuminated until the driver's seat belt
is fastened. At the same time, the chime
sounds for about seven seconds unless the
driver's seat belt is securely fastened.
Refer to ``Seat belts'' in the ``Seats, re-
straints and supplemental air bag systems''
section for precautions on seat belt usage.
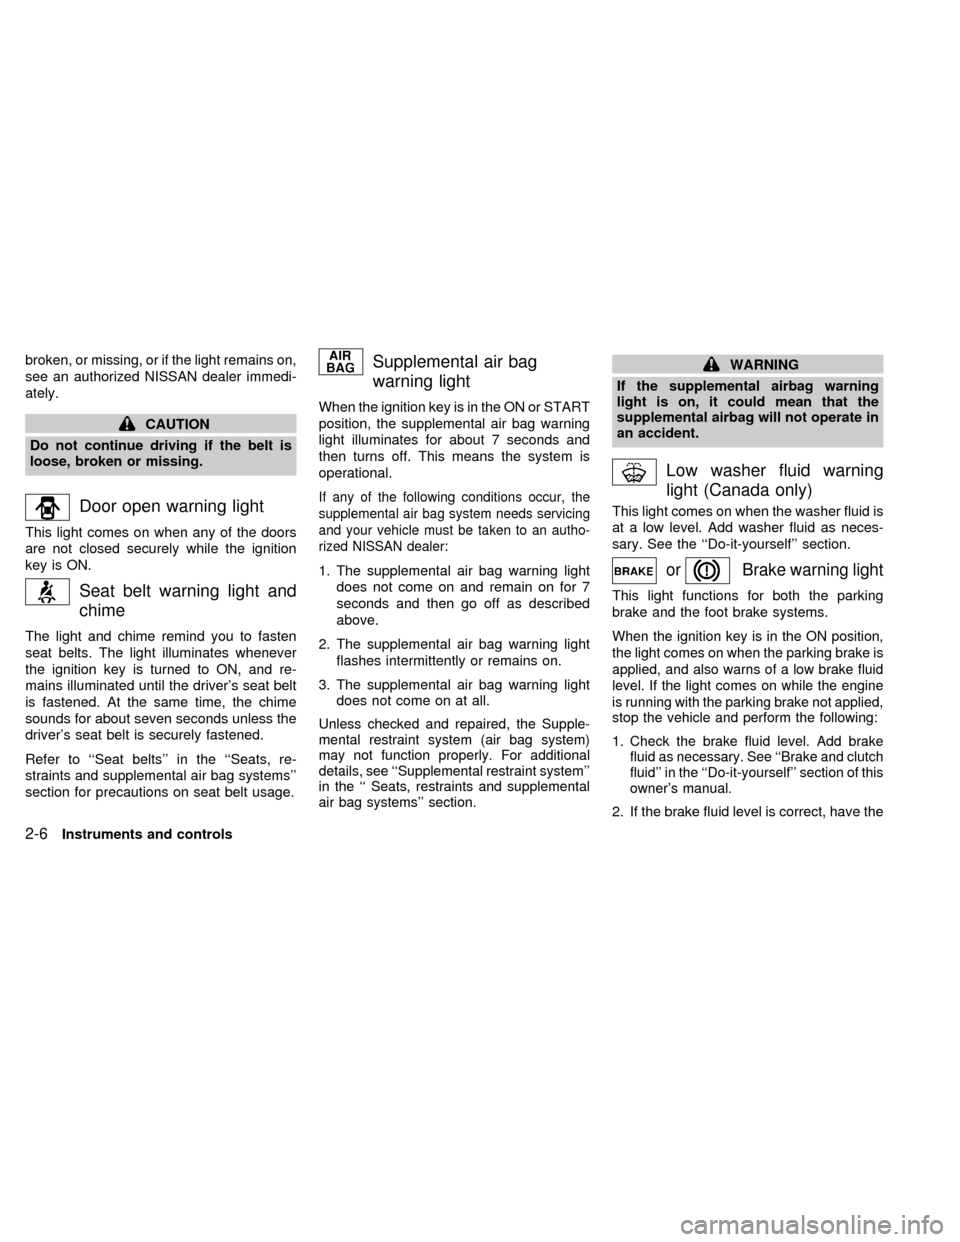
Supplemental air bag
warning light
When the ignition key is in the ON or START
position, the supplemental air bag warning
light illuminates for about 7 seconds and
then turns off. This means the system is
operational.
If any of the following conditions occur, the
supplemental air bag system needs servicing
and your vehicle must be taken to an autho-
rized NISSAN dealer:
1. The supplemental air bag warning light
does not come on and remain on for 7
seconds and then go off as described
above.
2. The supplemental air bag warning light
flashes intermittently or remains on.
3. The supplemental air bag warning light
does not come on at all.
Unless checked and repaired, the Supple-
mental restraint system (air bag system)
may not function properly. For additional
details, see ``Supplemental restraint system''
in the `` Seats, restraints and supplemental
air bag systems'' section.
WARNING
If the supplemental airbag warning
light is on, it could mean that the
supplemental airbag will not operate in
an accident.
Low washer fluid warning
light (Canada only)
This light comes on when the washer fluid is
at a low level. Add washer fluid as neces-
sary. See the ``Do-it-yourself'' section.
orBrake warning light
This light functions for both the parking
brake and the foot brake systems.
When the ignition key is in the ON position,
the light comes on when the parking brake is
applied, and also warns of a low brake fluid
level. If the light comes on while the engine
is running with the parking brake not applied,
stop the vehicle and perform the following:
1.Check the brake fluid level. Add brake
fluid as necessary. See ``Brake and clutch
fluid'' in the ``Do-it-yourself'' section of this
owner's manual.
2. If the brake fluid level is correct, have the
2-6Instruments and controls
ZX
Page 56 of 217
DAYTIME RUNNING LIGHT SYS-
TEM (Canada only)
The headlights automatically illuminate at a
reduced intensity when the engine is started
with the parking brake released. The day-
time running lights operate with the head-
light switch in the OFF position or in the
position. Turn the headlight switch to
the
position for full illumination when
driving at night.
If the parking brake is applied before the
engine is started, the daytime running lights
do not illuminate. The daytime running lights
illuminate once the parking brake is re-
leased. The daytime running lights will re-
main on until the ignition switch is turned off.
WARNING
When the daytime running light system
is active, tail lights on your vehicle are
not on. It is necessary at dusk to turn
on your headlights. Failure to do so
could cause an accident injuring your-
self and others.
Passing signal
Pulling and releasing the lever flashes the
headlight high beams on and off.
Turn signal
Move the lever up or down to signal the
turning direction. When the turn is com-
pleted, the turn signals cancel automati-
cally.
Lane change signal
To signal a lane change, move the lever up
or down to the point where the indicator light
begins to flash, but the lever does not latch.
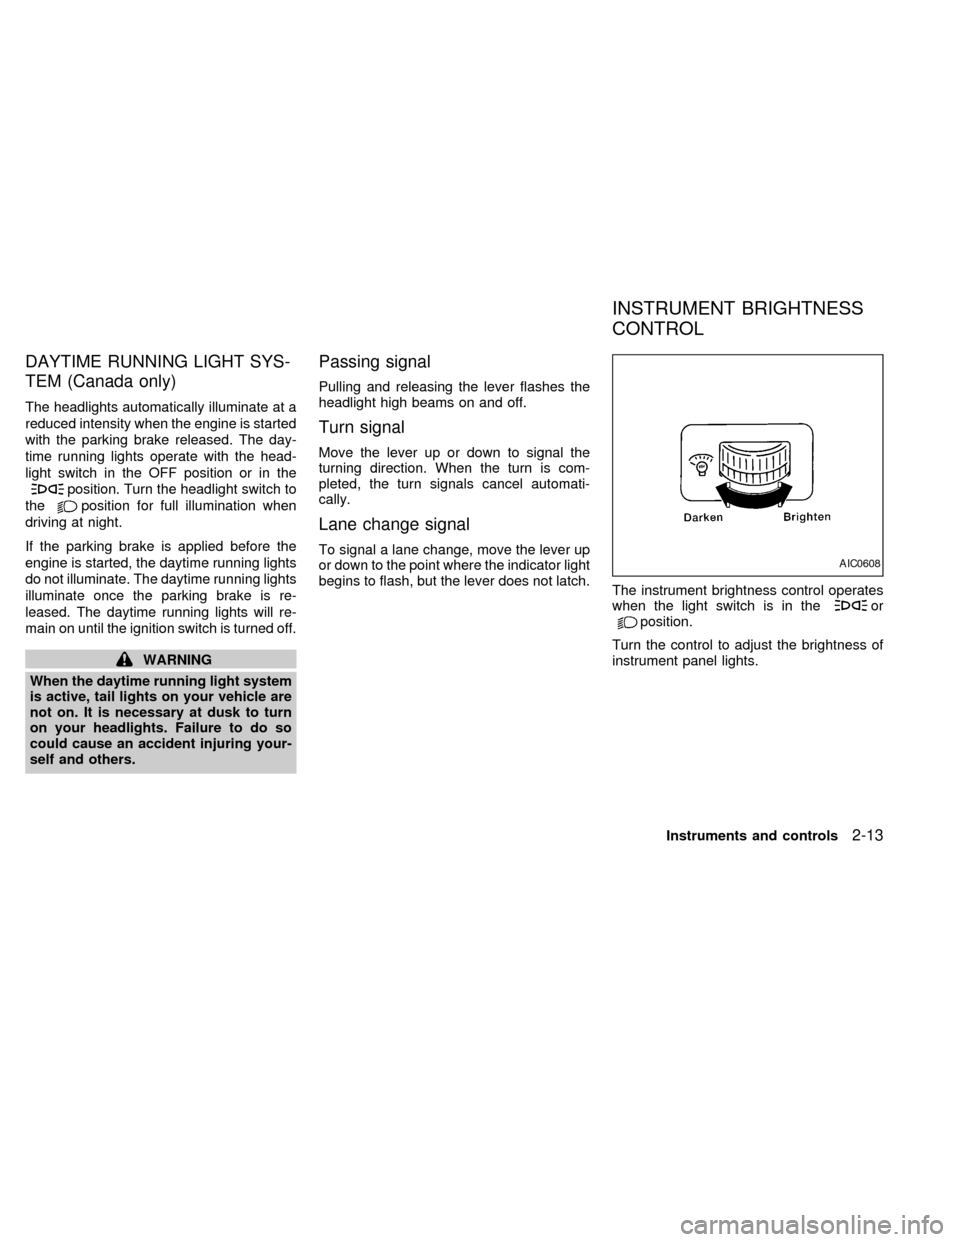
The instrument brightness control operates
when the light switch is in the
orposition.
Turn the control to adjust the brightness of
instrument panel lights.
AIC0608
INSTRUMENT BRIGHTNESS
CONTROL
Instruments and controls2-13
ZX
Page 108 of 217

5 Starting and driving
Precautions when starting and driving ...................5-2
Exhaust gas (carbon monoxide) ............................5-2
Three way catalyst .................................................5-2
Avoiding collision and rollover................................5-3
Drinking alcohol/drugs and driving .........................5-3
Ignition switch .........................................................5-4
Manual transmission ..............................................5-4
Automatic transmission ..........................................5-4
Before starting the engine ......................................5-5
Driving with automatic transmission (if so
equipped) ...............................................................5-6
Overdrive switch .....................................................5-8Driving with manual transmission ..........................5-9
Starting the engine ...............................................5-10
Parking brake operation .......................................5-11
Cruise control .......................................................5-12
Break-in schedule ................................................5-14
Increasing fuel economy ......................................5-14
Parking/parking on hills ........................................5-15
Power steering system .........................................5-16
Brake system........................................................5-16
Anti-lock brake system (ABS) (if so
equipped) .............................................................5-17
Cold weather driving ............................................5-18
ZX
Page 112 of 217
1) Move the shift selector lever into the P
(Park) position.
2) Turn the ignition key slightly toward the
ON position.
3) Turn the key to the LOCK position.
4) Remove the key.
If the key is removed from the ignition
switch, the shift selector lever cannot be
moved from P (Park).The shift selector
lever can be moved if the ignition switch
is in the ACC position. The shift selector
lever can also be moved if the ignition
switch is in the ON position and the foot
brake pedal is depressed.
There is an OFF position between the
LOCK and ACC positions. The OFF position
is indicated by a ``1'' on the key cylinder.
When the ignition is in OFF, the steering
wheel is not locked.
To lock the steering wheel, remove the
key. In order for the steering wheel to
be locked, it must be turned about 1/8 of
a turn clockwise from the straight up
position. To unlock the steering wheel,
insert the key and turn it gently while
rotating the steering wheel slightly right
and left.WARNING
Never remove the key while driving. If
the key is removed, the steering wheel
will lock. This may cause the driver to
lose control of the vehicle and could
result in serious vehicle damage or
personal injury.
Key positions
LOCK Normal parking position (0)
OFF (1)
The engine can be turned off without locking
the steering wheel.
ACC (Accessories) (2)
This position activates electrical accesso-
ries such as the radio when the engine is
not running.
ON Normal operating position (3)
This position turns on the ignition system
and the electrical accessories.
START (4)
This position activates the starter motor,
which starts the engine.cMake sure the area around the vehicle is
clear.
cMaintenance items listed here should be
checked periodically, for example, each
time you check engine oil.
cCheck that all windows and lights are
clean.
cVisually inspect tires for their appearance
and condition. Also check tires for proper
inflation.
cLock all doors.
cPosition seat and adjust head restraints.
cAdjust inside and outside mirrors.
cFasten seat belts and ask all passengers
to do likewise.
cCheck the operation of warning lights
when key is turned to the ON (3) position.
See ``Checking bulbs'' in the ``Instru-
ments and controls'' section.
BEFORE STARTING THE
ENGINE
Starting and driving5-5
ZX
Page 114 of 217

Shifting with automatic transmission
Push the button to shift into P (Park), R
(Reverse) or from D (Drive) to 2. All other
positions can be selected without pushing
the button.
P (Park):
Use this position when the vehicle is parked
or when starting the engine. Always be sure
the vehicle is at a complete stop. For maxi-
mum safety, depress the brake pedal, then
push in the selector lever button and move
the shift selector lever to the P (Park) posi-
tion. Apply the parking brake. When parkingon a hill, apply the parking brake first, then
move the shift selector lever into the P
(Park) position.
Shifting from P (Park)
If the ignition switch is in the ON position
and the foot brake pedal is depressed, but
the shift selector lever still cannot be moved
out of P (Park), follow these instructions.
1. Turn the ignition key to the lock position
and remove the key.
2. Apply the parking brake.3. Reinsert the key and turn it to the ACC
position.
4. Depress the foot brake pedal, and move
the gearshift selector lever to N (Neutral).
5. Start the engine.
These instructions for starting the vehicle in
N (Neutral) should only be used until service
can be obtained by an authorized NISSAN
dealer.
R (Reverse):
Use this position to back up. Always be sure
the vehicle is at a complete stop before
moving the shift selector lever to the R
(Reverse) position. Check to ensure the
area behind the vehicle is clear. With the
brake pedal depressed, push in the selector
lever button and move the shift selector
lever to the R (Reverse) position.
N (Neutral):
Neither forward nor reverse gear is en-
gaged. The engine can be started in this
position. You may shift to N (Neutral) and
restart a stalled engine while the vehicle is
moving.
ASD0510
Starting and driving5-7
ZX
Page 117 of 217
Suggested maximum speed in each
gear
Downshift to a lower gear if the engine is not
running smoothly, or if you need to accelerate.
Do not exceed the maximum suggested
speed (shown below) in any gear. For level
road driving, use the highest gear sug-
gested for that speed. Always observe
posted speed limits, and drive according to
the road conditions, which will ensure safe
operation. Do not over-rev the engine when
shifting to a lower gear as it may cause
engine damage or loss of vehicle control.
GEAR MPH (km/h)
1st 30 (50)
2nd 60 (95)
3rd 90 (145)
4th þ
5th þ1. Apply the parking brake.
2.Automatic transmission:
Move the shift selector lever to P (Park)
or N (Neutral). (P is recommended.)The shift selector lever cannot be
moved out of P (Park) and into any of
the other gear positions if the ignition
key is turned to OFF or if the key is
removed.
The starter is designed not to operate
if the shift selector lever is in any of
the driving positions.
Manual transmission:
Move the shift selector lever to N (Neu-
tral), and depress the clutch pedal to the
floor while cranking the engine.
The starter is designed not to operate
unless the clutch pedal is fully de-
pressed.
3. Crank the enginewith your foot off the
accelerator pedalby turning the ignition
key to START. Release the key when the
engine starts. If the engine starts, but
fails to run, repeat the above procedure.
Ð If the engine is very hard to start in
extremely cold or hot weather, de-
press and hold the accelerator pedalto help start the engine.
Ð In the summer, when restarting the
engine within 30 minutes after it has
been stopped, keep the accelerator
pedal fully depressed while starting.
CAUTION
Do not operate the starter for more than
15 seconds at a time. If the engine does
not
start, turn the key off and wait 10
seconds before cranking again, other-
wise the starter could be damaged.
4.Warm-up
Allow the engine to idle for at least 30
seconds after starting. Drive at moderate
speed for a short distance first, especially
in cold weather.
STARTING THE ENGINE
5-10Starting and driving
ZX
Page 118 of 217
WARNING
cBe sure the parking brake is fully
released before driving. Failure to do
so can cause brake failure and lead
to an accident.
cDo not release the parking brake
from outside the vehicle.
cDo not use the gear shift in place of
the parking brake. When parking, be
sure the parking brake is fully en-
gaged.
c
Do not leave children unattended in a
vehicle. They could release the park-
ing brake and cause an accident.
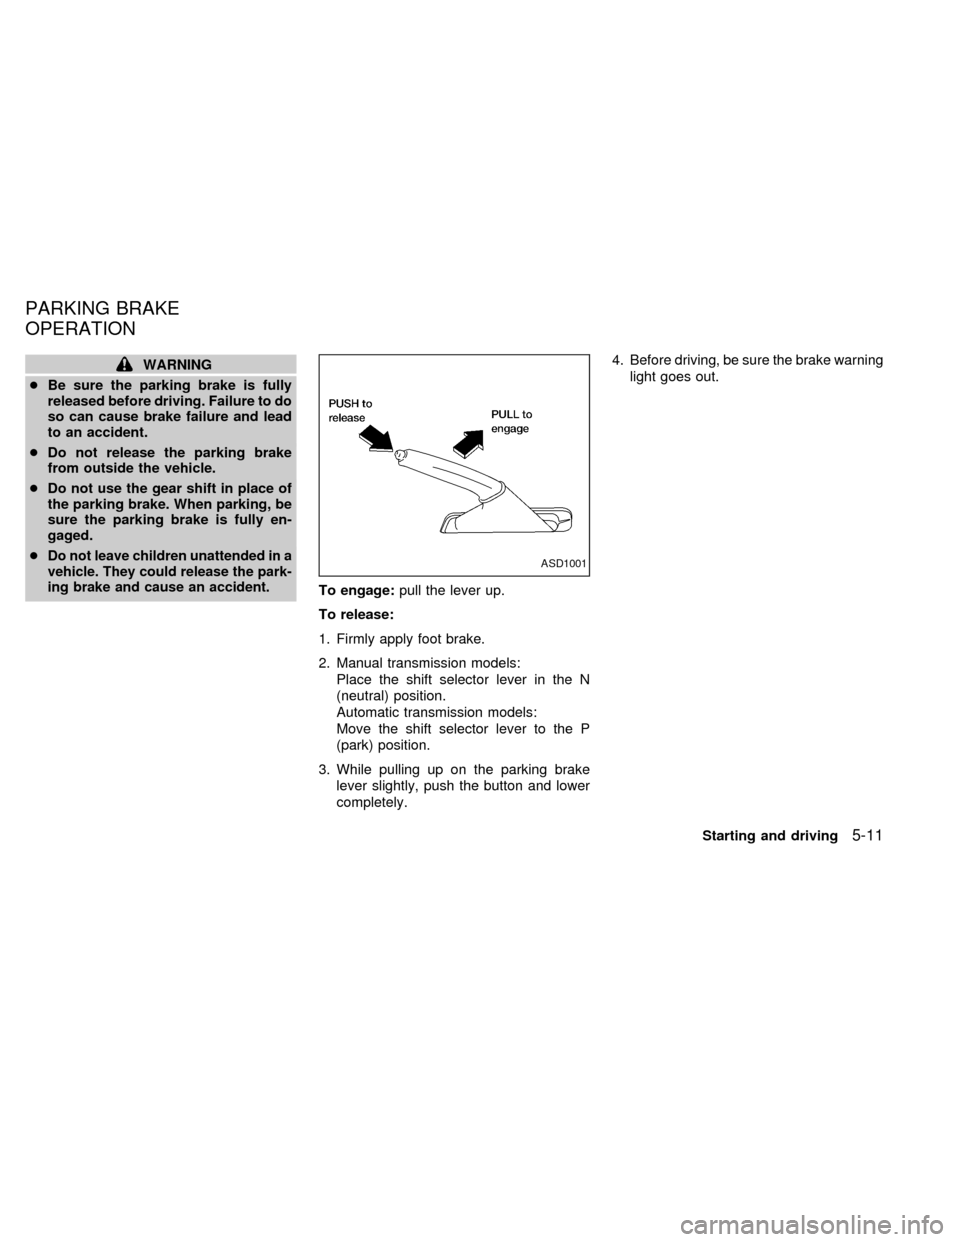
To engage:pull the lever up.
To release:
1. Firmly apply foot brake.
2. Manual transmission models:
Place the shift selector lever in the N
(neutral) position.
Automatic transmission models:
Move the shift selector lever to the P
(park) position.
3. While pulling up on the parking brake
lever slightly, push the button and lower
completely.4. Before driving, be sure the brake warning
light goes out.
ASD1001
PARKING BRAKE
OPERATION
Starting and driving5-11
ZX