Page 122 of 176

JUMP STARTING YOUR VEHICLE
The gases around the battery can explode if exposed to flames,
sparks, or lit cigarettes. An explosion could result in injury or
vehicle damage.
Do not push start your vehicle. You could damage the catalytic
converter.
Batteries contain sulfuric acid which burns skin, eyes, and
clothing.
Preparing your vehicle
Also see the label on the battery.
1. Use only a 12±volt supply to start your vehicle. If you connect your
battery to a 24±volt power supply you can damage your starter, ignition
system and other electrical components.
2. Do not disconnect the battery of the disabled vehicle as this could
damage the vehicle's electrical system.
3. Park the booster vehicle close to the hood of the disabled vehicle
making sure theydo nottouch. Set the parking brake on both vehicles
and stay clear of the engine cooling fan and other moving parts.
4. Check all battery terminals and remove any excessive corrosion before
you attach the battery cables.
5. Turn the heater fan on in both vehicles to protect any electrical
surges. Turn all other accessories off.
Roadside emergencies
122
Page 123 of 176

Connecting the jumper cables
1. Position the vehicles so that they
do not touch one another.
2. Switch off the engine. Switch off
any unnecessary electrical
equipment.
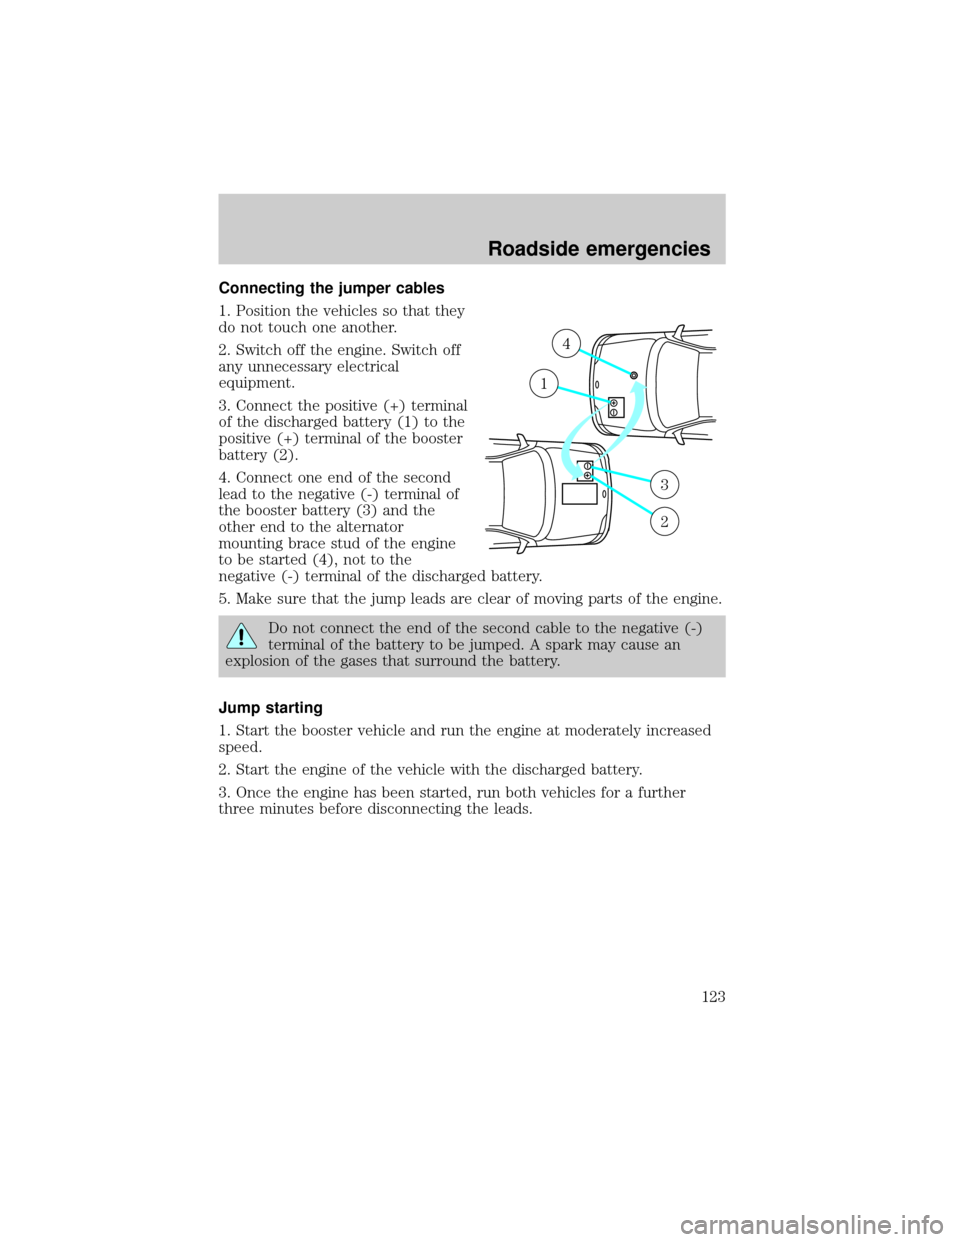
3. Connect the positive (+) terminal
of the discharged battery (1) to the
positive (+) terminal of the booster
battery (2).
4. Connect one end of the second
lead to the negative (-) terminal of
the booster battery (3) and the
other end to the alternator
mounting brace stud of the engine
to be started (4), not to the
negative (-) terminal of the discharged battery.
5. Make sure that the jump leads are clear of moving parts of the engine.
Do not connect the end of the second cable to the negative (-)
terminal of the battery to be jumped. A spark may cause an
explosion of the gases that surround the battery.
Jump starting
1. Start the booster vehicle and run the engine at moderately increased
speed.
2. Start the engine of the vehicle with the discharged battery.
3. Once the engine has been started, run both vehicles for a further
three minutes before disconnecting the leads.
+–
+–
4
1
3
2
Roadside emergencies
123
Page 124 of 176
Removing the jumper cables
1. Remove the jumper cables in
reverse order. Take the cable off the
alternator mounting brace stud (1)
first, followed by the cable on the
negative (-) booster battery terminal
(2).
2. Remove the cable from the
positive (+) terminal of the booster
battery (3) and then the discharged
battery (4).
3. After the disabled vehicle has
been started, allow it to idle for a
while so the engine can ªrelearnº its
idle conditions.
WRECKER TOWING
+–
+–
4
1
2
3
Roadside emergencies
124
Page 126 of 176

SERVICE RECOMMENDATIONS
To help you service your vehicle:
²We highlight do-it-yourself items in the engine compartment for easy
location.
²We provide a ªService Guideº which makes tracking routine service
easy.
If your vehicle requires professional service, your dealership can provide
necessary parts and service. Check your ªWarranty Guideº to find out
which parts and services are covered.
Use only recommended fuels, lubricants, fluids and service parts
conforming to specifications. Motorcraft parts are designed and built to
provide the best performance in your vehicle.
PRECAUTIONS WHEN SERVICING YOUR VEHICLE
Be especially careful when inspecting or servicing your vehicle.
²Do not work on a hot engine.
²When the engine is running, avoid wearing loose clothing, jewelry or
long hair that could get caught up in moving parts.
²Do not work on a vehicle with the engine running in an enclosed
space, unless you are sure you have enough ventilation.
²Keep all lit cigarettes, open flames and other lit material away from
the battery and all fuel related parts.
If you disconnect the battery, the engine must ªrelearnº its idle
conditions before your vehicle will drive properly, as explained in
theBatterysection in this chapter.
Working with the engine off
1. Set the parking brake, and ensure the gearshift is securely latched in
park.
2. Turn off the engine and remove the key.
3. Block the wheels to prevent the vehicle from moving unexpectedly.
Working with the engine on
1. Set the parking brake and
ensure the gearshift is securely latched in P (Park).
2. Block the wheels to prevent the vehicle from moving unexpectedly.
Maintenance and care
126
Page 128 of 176
3. Engine coolant reservoir
4. Passenger compartment air filter assembly
5. Transaxle fluid dipstick
6. Brake fluid reservoir
7. Battery
8. Air filter assembly
9. Engine oil dipstick
10. Engine oil fill cap
ENGINE OIL
Checking the engine oil
Check the engine oil each time you fuel your vehicle.
1. Make sure the vehicle is on level ground.
2. Turn the engine off and wait a few minutes for the oil to drain into the
oil pan.
3. Set the parking brake and ensure the gearshift is securely latched in P
(Park).
4. Open the hood. Protect yourself from engine heat.
5. Locate and carefully remove the
engine oil level indicator (dipstick).
6. Wipe the indicator clean. Insert the indicator fully, then remove it
again.
MAX MIN
Maintenance and care
128
Page 136 of 176

8. If an overfill occurs, excess fluid should be removed by a qualified
technician.An overfill condition of transmission fluid may cause
shift and/or engagement concerns and/or possible damage.
If the fluid level is above the crosshatch (hot operating range) area after
driving the vehicle for approximately 30 km (20 miles), excess
transmission fluid should be removed by a qualified technician.
BATTERY
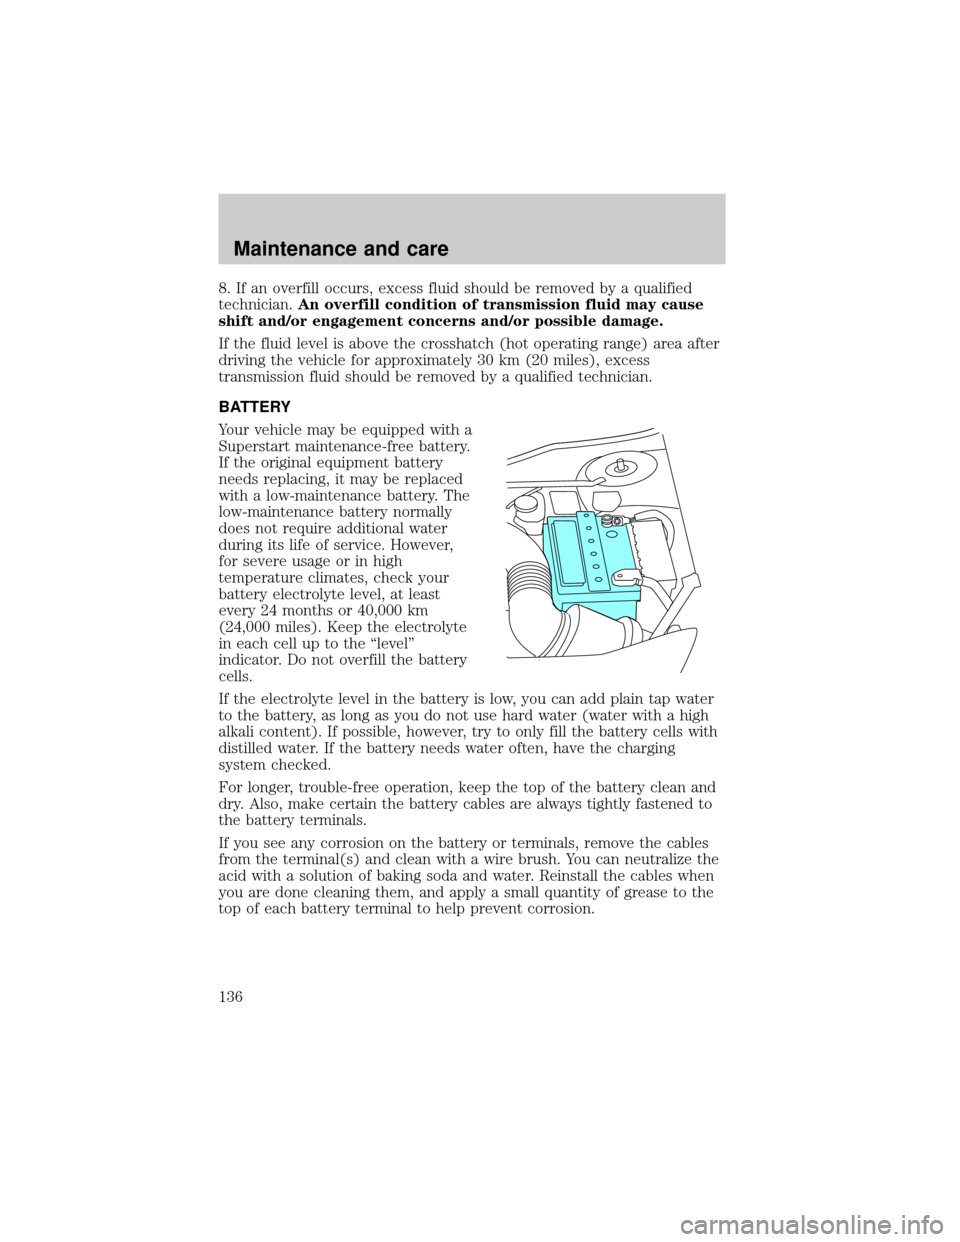
Your vehicle may be equipped with a
Superstart maintenance-free battery.
If the original equipment battery
needs replacing, it may be replaced
with a low-maintenance battery. The
low-maintenance battery normally
does not require additional water
during its life of service. However,
for severe usage or in high
temperature climates, check your
battery electrolyte level, at least
every 24 months or 40,000 km
(24,000 miles). Keep the electrolyte
in each cell up to the ªlevelº
indicator. Do not overfill the battery
cells.
If the electrolyte level in the battery is low, you can add plain tap water
to the battery, as long as you do not use hard water (water with a high
alkali content). If possible, however, try to only fill the battery cells with
distilled water. If the battery needs water often, have the charging
system checked.
For longer, trouble-free operation, keep the top of the battery clean and
dry. Also, make certain the battery cables are always tightly fastened to
the battery terminals.
If you see any corrosion on the battery or terminals, remove the cables
from the terminal(s) and clean with a wire brush. You can neutralize the
acid with a solution of baking soda and water. Reinstall the cables when
you are done cleaning them, and apply a small quantity of grease to the
top of each battery terminal to help prevent corrosion.
Maintenance and care
136
Page 137 of 176

If your battery has a cover/shield, make sure it is reinstalled
after the battery is replaced.
Because your vehicle's engine is electronically controlled by a computer,
some control conditions are maintained by power from the battery. When
the battery is disconnected or a new battery is installed, the engine must
relearn its idle conditions before your vehicle will drive properly. To
begin this process:
1. Put the gearshift in P (Park), turn off all accessories and start the
vehicle.
2. Let the engine idle for at least one minute.
3. The relearning process will automatically complete as you drive the
vehicle.
²If you do not allow the engine to relearn its idle, the idle quality of
your vehicle may be adversely affected until the idle is eventually
relearned.
²If the battery has been disconnected or a new battery has been
installed, the clock and the preset radio stations must be reset once
the battery is reconnected.
²Always dispose of automotive
batteries in a responsible manner.
Follow your community's
standards for disposal. Call your
local recycling center to find out
more about recycling automotive batteries.
Maintenance and care
137
Page 150 of 176

the Vehicle Emission Control Information Decal located on or near the
engine. This decal identifies engine displacement and gives some tune up
specifications.
Please consult your ªWarranty Guideº for complete emission warranty
information.
Readiness for inspection/maintenance (I/M) testing
In some localities, it may be a legal requirement to pass an I/M test of
the on-board diagnostic (OBD-II) system. If your ªcheck engine/service
engine soonº light is on, reference the applicable light description in the
Warning Lights and Chimessection of your owners guide. Your vehicle
may not pass the I/M test with the ªcheck engine/service engine soonº
light on.
If the vehicle's powertrain system or its battery has just been serviced,
the OBD-II system is reset to a ªnot ready for I/M testº condition. To
ready the OBD-II system for I/M testing, a minimum of 30 minutes of city
and highway driving is necessary as described below:
²First, at least 10 minutes of driving on an expressway or highway.
²Next, at least 20 minutes driving in stop and go, city type traffic with
at least four idle periods.
Allow the vehicle to sit for at least eight hours without starting the
engine. Then, start the engine and complete the above driving cycle. The
engine must warm up to its normal operating temperature. Once started,
do not turn off the engine until the above driving cycle is complete.
EXTERIOR BULBS
Replacing headlamp bulbs
Handle a halogen headlamp bulb carefully and keep out of
children's reach. Grasp the bulb only by its plastic base and do
not touch the glass. The oil from your hand could cause the bulb to
break the next time the headlamps are operated.
To remove the headlamp bulb:
1. Make sure headlamp switch is in OFF position.
2. Lift the hood and remove the plastic sight shield covering the back of
the headlamps by lifting up on the rear corners to release the velcro
attachments. Lift the shield and pull towards the windshield.
Maintenance and care
150