Page 2213 of 2490
7. Remove the windshield finisher.
8. Apply a suitable protective ta pe around windshield glass
aperture to protect paintwork.
9. NOTE: Left-hand shown, right-hand similar
Apply a suitable protec tive tape to leading edge of headlining.
10. Place a suitable prot ective sheet over fascia and place a
protecting boar d over sheet
11. Prepare the cheese wire and cutting handle.
Position cutting handle cent ral tube fully upwards in
handle.
Page 2214 of 2490

Cut a suitable length of cheese wire and pass one end
through handle tube and locating aperture.
Move cutting handle central tube downwards to secure
cheese wire.
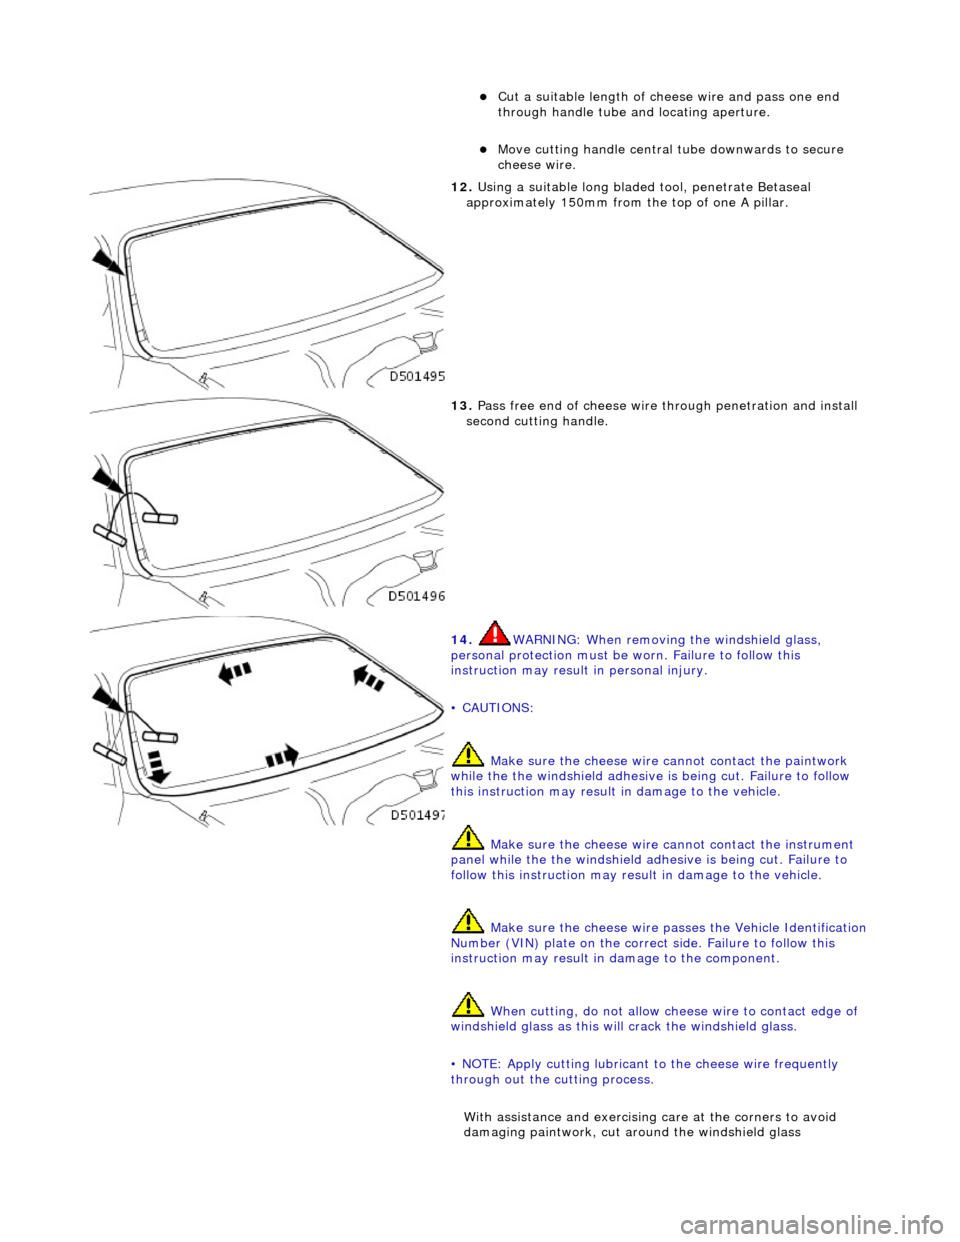
12. Using a suitable long bladed tool, penetrate Betaseal
approximately 150mm from the top of one A pillar.
13. Pass free end of cheese wire through penetration and install
second cutting handle.
14. WARNING: When removing the windshield glass,
personal protection must be worn. Failure to follow this
instruction may result in personal injury.
• CAUTIONS:
Make sure the ch eese wire cannot contact the paintwork
while the the windshield adhesive is being cut. Failure to follow
this instruction may result in damage to the vehicle.
Make sure the cheese wire cannot contact the instrument
panel while the the windshield adhesive is being cut. Failure to
follow this instruction may result in damage to the vehicle.
Make sure the cheese wire passes the Vehicle Identification
Number (VIN) plate on the correct side. Failure to follow this
instruction may result in damage to the component.
When cutting, do not allow ch eese wire to contact edge of
windshield glass as this will crack the windshield glass.
• NOTE: Apply cutting lubricant to the cheese wire frequently
through out the cutting process.
With assistance and exercising care at the corners to avoid
damaging paintwork, cut around the windshield glass
Page 2215 of 2490

Installation
commencing downwards and along the bottom.
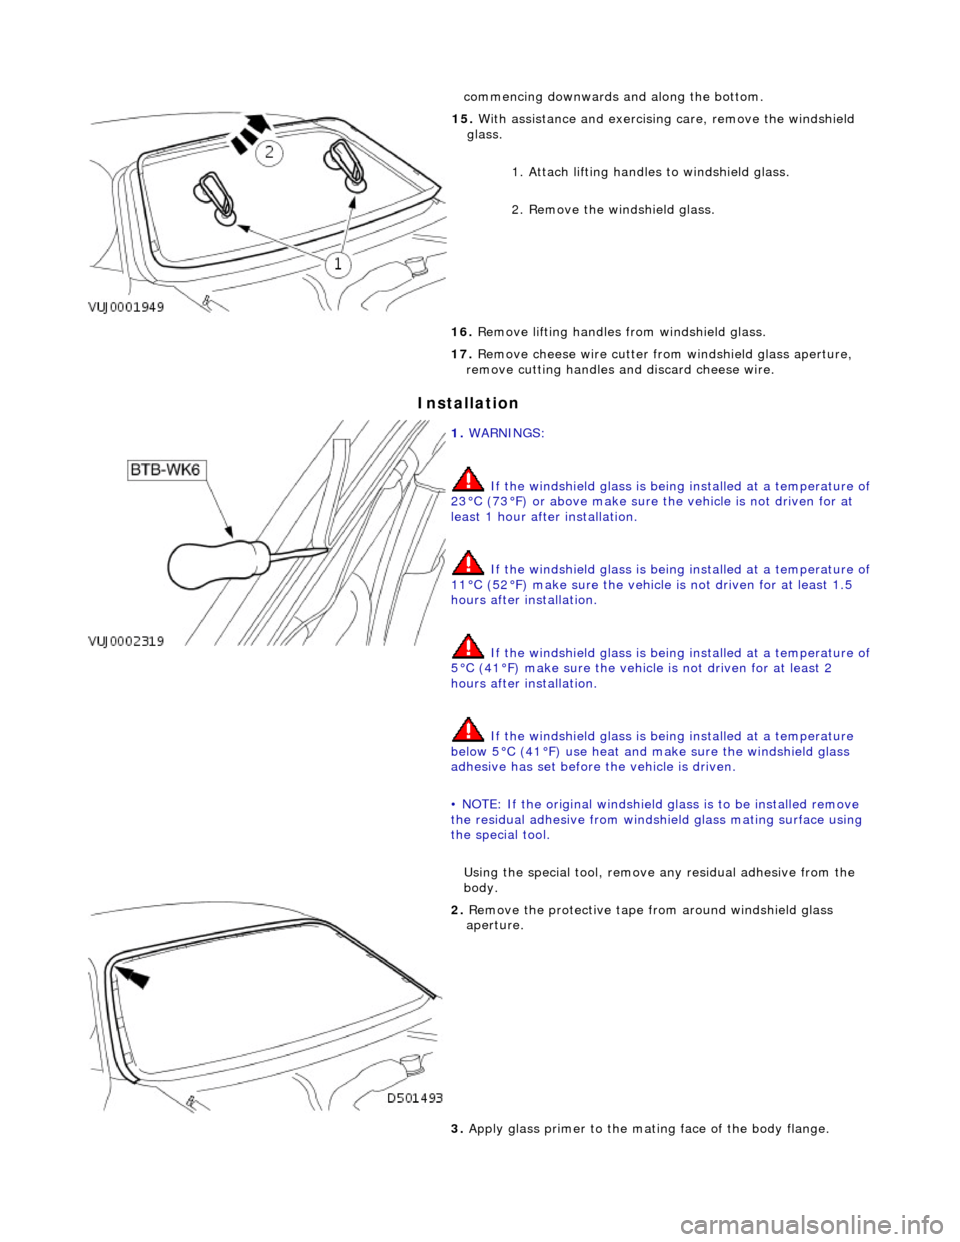
15. With assistance and exercising care, remove the windshield
glass.
1. Attach lifting handles to windshield glass.
2. Remove the windshield glass.
16. Remove lifting handles from windshield glass.
17. Remove cheese wire cutter fro m windshield glass aperture,
remove cutting handles and discard cheese wire.
1. WARNINGS:
If the windshield glass is being installed at a temperature of 23°C (73°F) or above make sure the vehicle is not driven for at
least 1 hour after installation.
If the windshield glass is being installed at a temperature of
11°C (52°F) make sure the vehicl e is not driven for at least 1.5
hours after installation.
If the windshield glass is being installed at a temperature of 5°C (41°F) make sure the vehicle is not driven for at least 2
hours after installation.
If the windshield glass is being installed at a temperature
below 5°C (41°F) use heat and ma ke sure the windshield glass
adhesive has set before the vehicle is driven.
• NOTE: If the original windshield glass is to be installed remove
the residual adhesive from windsh ield glass mating surface using
the special tool.
Using the special tool, remove any residual adhe sive from the
body.
2. Remove the protective tape from around windshield glass
aperture.
3. Apply glass primer to the mating face of the body flange.
Page 2216 of 2490
4. Thoroughly clean windshield glass surface using Betawipe
spirit.
5. Apply primer to mating fa ce of windshield glass.
6. CAUTION: Make sure the front windshield finisher insert
is not bent on installation. Failure to follow this instruction may
result in damage to the component.
Install the insert to the windshield finisher.
7. CAUTION: Make sure the front windshield finisher insert
is not bent on installation. Failure to follow this instruction may
result in damage to the component.
Install the windshield finisher to the windshield.
8. Cut the nozzle of the JLM20452 glass bonding adhesive to
achieve a triangular section bead 8mm ( 0.32 in) wide by
10mm (0.4 in) high.
Page 2217 of 2490

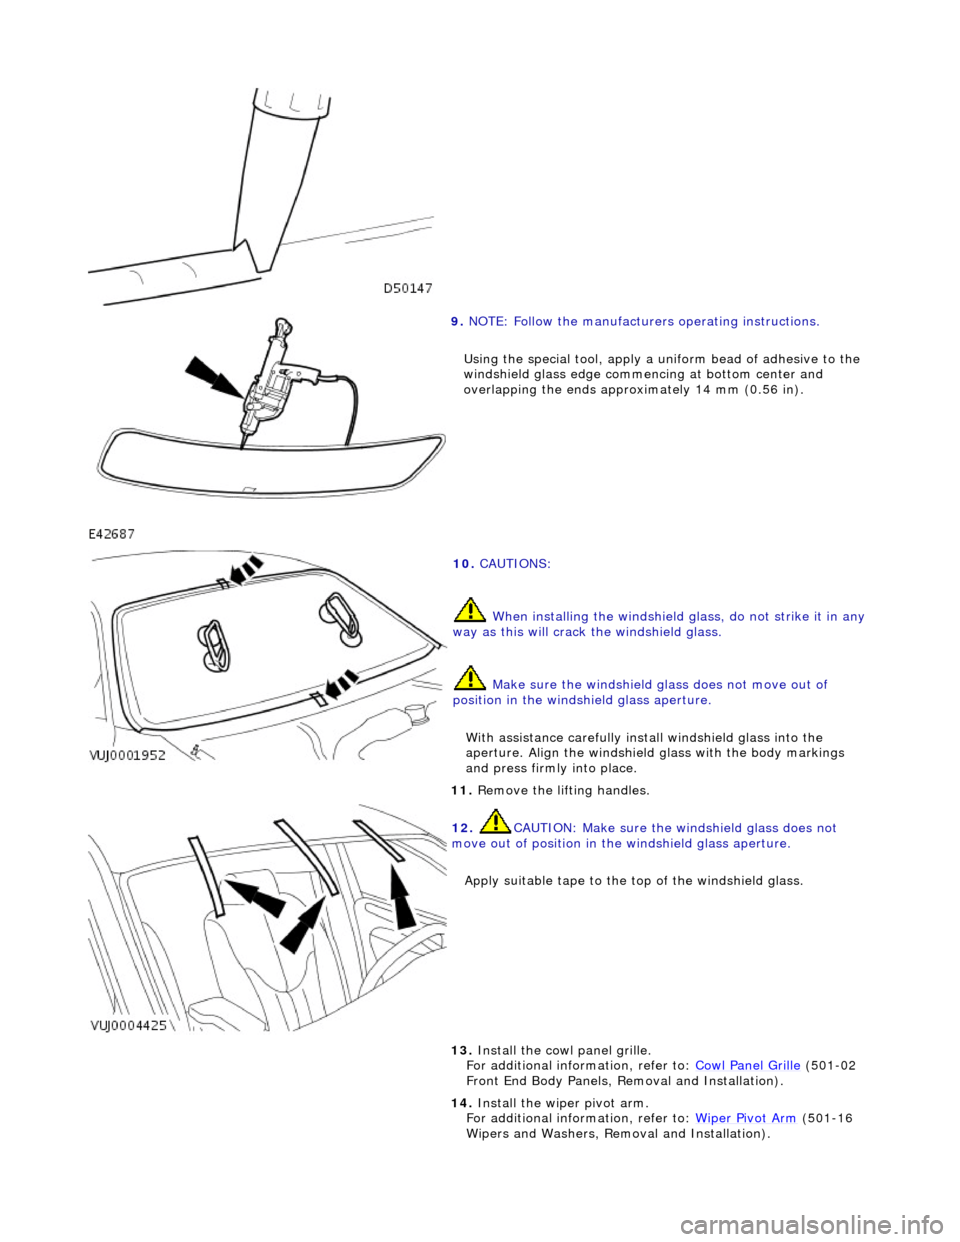
9. NOTE: Follow the manufacturers operating instructions.
Using the special tool, apply a uni form bead of adhesive to the
windshield glass edge commenc ing at bottom center and
overlapping the ends approximately 14 mm (0.56 in).
10. CAUTIONS:
When installing the windshield glass, do not strike it in any
way as this will crack the windshield glass.
Make sure the windshield glass does not move out of
position in the windshield glass aperture.
With assistance carefully install windshield glass into the
aperture. Align the windshield glass with the body markings
and press firmly into place.
11. Remove the lifting handles.
12. CAUTION: Make sure the windshield glass does not
move out of position in the windshield glass aperture.
Apply suitable tape to the to p of the windshield glass.
13. Install the cowl panel grille.
For additional information, refer to: Cowl Panel Grille (501-02
Front End Body Panels, Removal and Installation).
14. Install the wiper pivot arm.
For additional information, refer to: Wiper Pivot Arm
(501-16
Wipers and Washers, Remo val and Installation).
Page 2242 of 2490

Instrument Panel and Console - Instrument Panel
Removal and Installation
Removal
1. Turn ignition switch to position II.
2. Motor driver and front passenger seats rearward.
3. Position steering wheel in stra ight ahead position and fully
lower and extend steering column.
4. Turn ignition switch to position O.
5. Remove battery cover and disc onnect ground cable from
battery terminal. Refer to 86.15.19.
6. Remove 'J' gate finish er. Refer to 76.25.24.
7. Remove 'J' gate finisher retain ing panel. Refer to 76.25.26.
8. Remove centre console veneer panel. Refer to 76.47.26.
9. Disconnect and remove radio.
10. Remove centre console switch module. Refer to 86.80.32.
11. Remove centre console. Refer to 76.25.01.
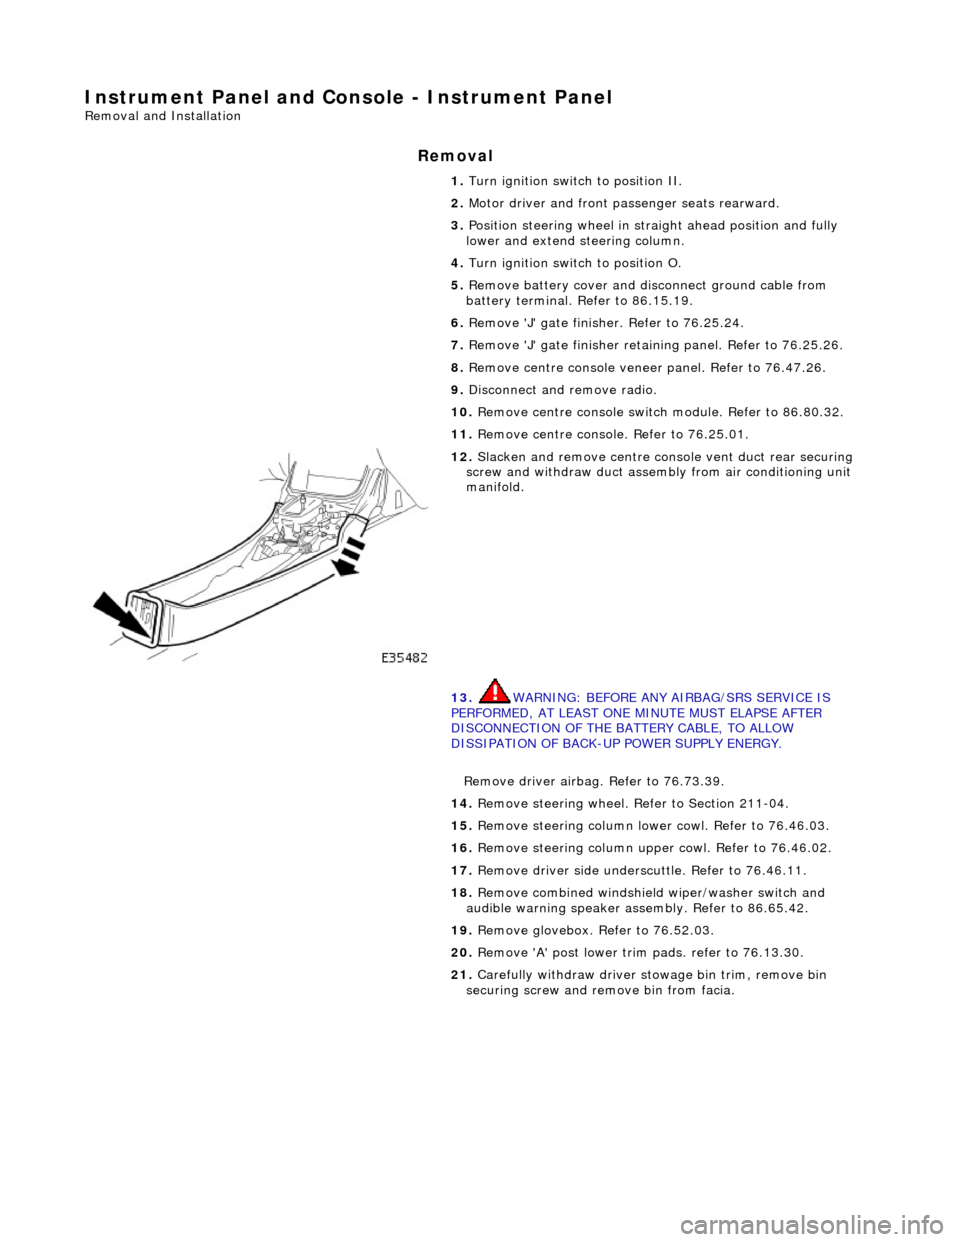
12. Slacken and remove centre cons ole vent duct rear securing
screw and withdraw duct assemb ly from air conditioning unit
manifold.
13. WARNING: BEFORE ANY AIRBAG/SRS SERVICE IS
PERFORMED, AT LEAST ONE MINUTE MUST ELAPSE AFTER
DISCONNECTION OF THE BATTERY CABLE, TO ALLOW
DISSIPATION OF BACK-UP POWER SUPPLY ENERGY.
Remove driver airbag. Refer to 76.73.39.
14. Remove steering wheel. Refer to Section 211-04.
15. Remove steering column lo wer cowl. Refer to 76.46.03.
16. Remove steering column u pper cowl. Refer to 76.46.02.
17. Remove driver side unders cuttle. Refer to 76.46.11.
18. Remove combined windshield wiper/washer switch and
audible warning speaker assembly. Refer to 86.65.42.
19. Remove glovebox. Refer to 76.52.03.
20. Remove 'A' post lower trim pads. refer to 76.13.30.
21. Carefully withdraw driver stowage bin trim, remove bin
securing screw and remove bin from facia.
Page 2255 of 2490
9. Fully seat air distribution bo x and install securing nuts.
10. Install LH and RH air distributi on box/facia side vent ducts
and install securing screws.
11. Install LH and RH top vents on facia.
12. Install all defrost vent retaining clips to facia.
13. Install LH and RH windshield defrost vents to facia
14. Position centre defro st vent/solar sensor assembly, connect
sensor harness multiplug to facia harness, install multiplug on
retaining clip and fully seat assembly in facia.
15. Reposition facia right way up on bench.
16. Position face level air ducts in facia and install securing
screws.
Page 2263 of 2490
64.
Position driver stowage bin in facia, install securing screw and fully seat trim.
65. Install trim pad on driver si de lower 'A' post. Refer to
76.13.30.
66. Install driver side unders cuttle. Refer to 76.46.11.
67. Install combined windshield wi per/washer switch and audible
warning speaker assembly. Refer to 86.65.42.
68. Install steering column upper cowl. Refer to 76.46.02.
69. Install steering column lower cowl. Refer to 76.46.03.
70. Install steering wheel. Refer to 211-04.
71. Install driver side airbag. Refer to 76.73.39.