Page 125 of 272
Audio System
CD Changer Error Indications
If you see an error indication in the display while operating the CD
changer, find the cause in the chart
to the right. If you cannot clear the error indication, take the vehicle to
your Honda dealer.
Comfort and Convenience FeaturesProCarManuals.comMain Menu Table of Contents s t
Page 126 of 272

Audio System
Theft Protection
On U.S. EX model
Your vehicle's audio system will disable itself if it is disconnected
from electrical power for any reason.
To make it work again, the user must enter a specific five-digit code
in the Preset buttons. Because thereare hundreds of number
combinations possible from five digits, making the system work
without knowing the exact code is nearly impossible.
You should have received a card that lists your audio system's code
number and serial number. It is best
to store this card in a safe place at
home. In addition, you should write
the audio system's serial number in
this Owner's Manual. If you should
happen to lose the card, you must obtain the code number from your
Honda dealer. To do this, you will
need the system's serial number. If your vehicle's battery is discon-
nected or goes dead, the audio
system will disable itself. If this
happens, you will see "Code" in the
frequency display the next time you
turn on the system. Use the Preset
buttons to enter the five-digit code. If it is entered correctly, the radio willstart playing.
If you make a mistake entering the
code, do not start over or try to
correct your mistake. Complete the
five-digit sequence, then enter the correct code. You have three tries toenter the correct code. If you are
unsuccessful in three attempts, you
must then leave the system on for
one hour before trying again. You will have to store your favorite
stations in the Preset buttons after
the system begins working. Your original settings were lost when
power was disconnected.
Comfort and Convenience FeaturesProCarManuals.comMain Menu Table of Contents s t
Page 150 of 272

The Braking System, Driving in Bad Weather
If anything goes wrong, the ABS
indicator on the instrument panel
comes on (see page 53). This means
the anti-lock function of the braking system has shut down. The brakes
still work like a conventional system
without anti-lock, providing normal stopping ability. You should have the
dealer inspect your vehicle as soon
as possible if this light stays on after
you start the engine, or comes on
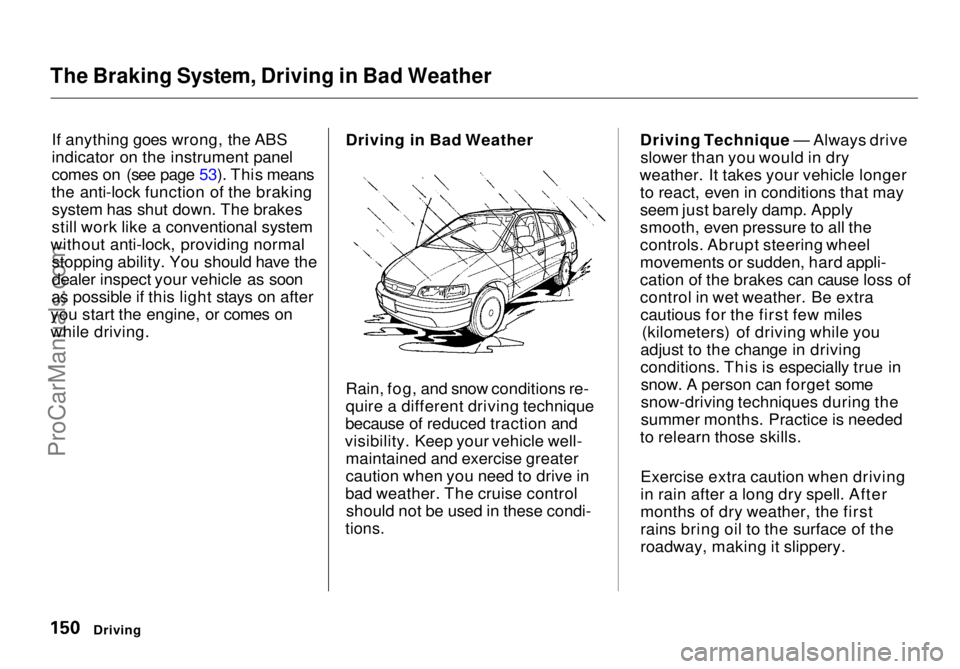
while driving. Driving in Bad Weather
Rain, fog, and snow conditions re-
quire a different driving technique
because of reduced traction and
visibility. Keep your vehicle well- maintained and exercise greater
caution when you need to drive in
bad weather. The cruise control should not be used in these condi-
tions.
Driving Technique — Always drive
slower than you would in dry
weather. It takes your vehicle longer to react, even in conditions that may
seem just barely damp. Apply
smooth, even pressure to all the
controls. Abrupt steering wheel
movements or sudden, hard appli-
cation of the brakes can cause loss of
control in wet weather. Be extracautious for the first few miles (kilometers) of driving while you
adjust to the change in driving
conditions. This is especially true in snow. A person can forget some
snow-driving techniques during the
summer months. Practice is needed
to relearn those skills.
Exercise extra caution when driving
in rain after a long dry spell. After
months of dry weather, the first
rains bring oil to the surface of the
roadway, making it slippery.
DrivingProCarManuals.comMain Menu Table of Contents s t
Page 153 of 272

Towing a Trailer
The best way to confirm that your total towing package is within thesespecifications is to get it weighed.
Load the vehicle and trailer as you
normally would while towing, and
take them to a public scale. Have
them check the total weight and the
weight at each axle, then compare
the weights to the specifications.
Trailer Hitches
The trailer hitch must be the proper size and construction for your
vehicle and the trailer you intend to tow. Consult with an expert before
you purchase a trailer hitch, andhave it installed by a qualified
mechanic.
The hitch should bolt to the underbody of the vehicle, anddistribute the load over a wide area.
Never use a hitch that mounts only
to the rear bumper. The bumper is
not designed to handle that type of
load.
A trailer hitch that is not adequate for the size of the trailer, or a hitch that is
improperly installed, can cause damage
to the underside of your vehicle.
Driving
NOTICE
Improperly loading your vehicle
and trailer can seriously affect
its steering and braking
performance, causing a crash
in which you can be seriously
injured.
Check the loading of your
vehicle and trailer carefully before starting to drive.ProCarManuals.comMain Menu Table of Contents s t
Page 157 of 272
Towing a Trailer
If you have to stop while going uphill,
do not hold the vehicle in place by
pressing on the accelerator. This can cause the automatic transmission tooverheat. Use the parking brake or
footbrake.
When parking your vehicle and trailer, especially on a hill, be sure to
follow all the normal precautions.
Turn your front wheels into the curb, set the parking brake firmly, and put
the transmission in Park. In addition,
place wheel chocks at each of the
trailer's tires. Backing up with a trailer is difficult
and takes practice. Drive slowly,
make small movements with the steering wheel, and have someonestand outside to guide you. Grip the
steering wheel on the bottom (rather
than the usual position near the top). Move your hand to the left to get the
trailer to move to the left, and right
to move the trailer right.
DrivingProCarManuals.comMain Menu Table of Contents s t
Page 212 of 272

Exterior Care
Washing Frequent washing helps preserve
your vehicle's beauty. Dirt and grit can scratch the paint, while tree sap
and bird droppings can permanently
ruin the finish.
Wash your vehicle in a shady area, not in direct sunlight. If the vehicle is
parked in the sun, move it into the shade and let the exterior cool down
before you start.
Only use the solvents and cleaners
recommended in this Owner's
Manual.
Chemical solvents and strong cleaners
can damage the paint, metal, and
plastic on your vehicle.
Rinse the vehicle thoroughly with
cool water to remove loose dirt.
Fill a bucket with cool water. Mix
in a mild detergent, such as dishwashing liquid or a product
made especially for car washing.
Wash the vehicle using the water and detergent solution and a soft-
bristle brush, sponge, or soft cloth. Start at the top and work your waydown. Rinse frequently.
Check the body for road tar, tree
sap, etc. Remove these stains with
tar remover or turpentine. Rinse it off immediately so it does not
harm the finish. Remember to re-
wax these areas, even if the rest of the vehicle does not need waxing. When you have washed and rinsed
the whole exterior, dry it with achamois or soft towel. Letting it
air-dry will cause dulling and water
spots.
As you dry the vehicle, inspect it for chips and scratches that could allow
corrosion to start. Repair them with
touch-up paint (see page 215).
The radio antenna on your vehicle does
not need to be removed when you use a "drive-through'' car wash. However, if
you remove the antenna, make sure to
reinstall it and tighten it securely using
an appropriate tool.
Appearance Care
NOTICE
NOTICEProCarManuals.comMain Menu Table of Contents s t
Page 216 of 272

Corrosion Protection
Two factors normally contribute to causing corrosion in your vehicle:
1. Moisture trapped in body cavities. Dirt and road salt that collects in
hollows on the underside of the
vehicle stays damp, promoting corrosion in that area.
2. Removal of paint and protective coatings from the exterior and
underside of the vehicle. Many corrosion-preventive measures
are built into your Honda. You can
help keep your vehicle from
corroding by performing some simple periodic maintenance: Repair chips and scratches in the
paint as soon as you discover them.
Inspect and clean out the drain
holes in the bottom of the doors and body.
Check the floor coverings for
dampness. Carpeting and floor
mats may remain damp for a long
time, especially in winter. This dampness can eventually cause
the floor panels to corrode. Use a high-pressure spray to clean
the underside of your vehicle. This
is especially important in areas
that use road salt in winter. It is also a good idea in humid climates
and areas subject to salt air. Be
careful of the ABS wheel sensors
and wiring at each wheel.
Have the corrosion-preventive coatings on the underside of your
vehicle inspected and repaired periodically.
Appearance CareProCarManuals.comMain Menu Table of Contents s t
Page 219 of 272

Compact Spare Tire
Your vehicle has a compact spare tire that takes up less space. Use thisspare tire as a temporary replace-
ment only. Get your regular tire
repaired or replaced and put back on
your vehicle as soon as you can.
Check the inflation pressure of the
compact spare tire every time you
check the other tires. It should be
inflated to:60 psi (420 kPa , 4.2 kgf/cm2)
Follow these
precautions whenever
you are using the compact spare tire:
Do not exceed 50 mph (80 km/h)
under any circumstances.
This tire gives a harsher ride and
less traction on some road sur-
faces than the regular tire. Use
greater caution while driving on
this tire.
Do not mount snow chains on the
compact spare.
The wheel of the compact spare
tire is designed especially to fit
your vehicle. Do not use your
spare tire on another vehicle
unless it is the same make and
model.
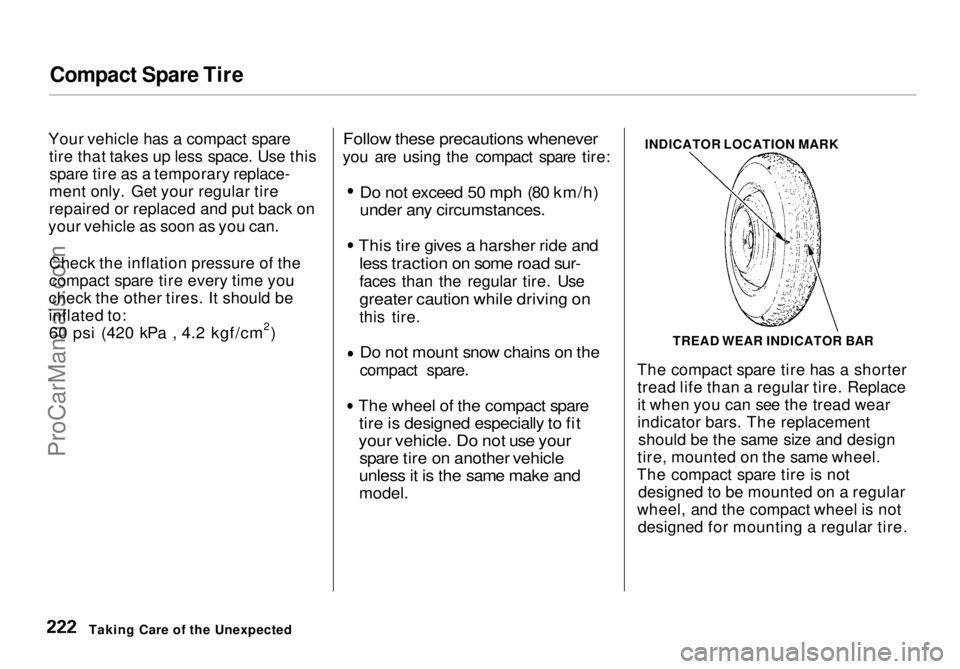
INDICATOR LOCATION MARK
The compact spare tire has a shorter tread life than a regular tire. Replace
it when you can see the tread wear
indicator bars. The replacement should be the same size and design
tire, mounted on the same wheel.
The compact spare tire is not designed to be mounted on a regular
wheel, and the compact wheel is not designed for mounting a regular tire.
Taking Care of the Unexpected TREAD WEAR INDICATOR BARProCarManuals.comMain Menu Table of Contents s t