1998 HONDA ODYSSEY lock
[x] Cancel search: lockPage 30 of 272
Protecting Children
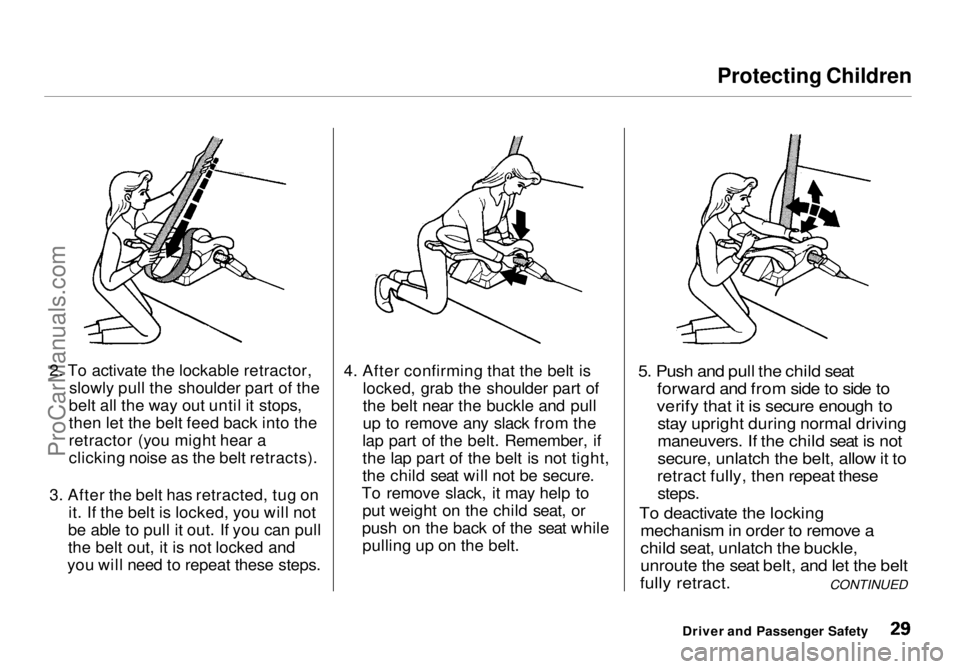
2. To activate the lockable retractor, slowly pull the shoulder part of the
belt all the way out until it stops,
then let the belt feed back into the
retractor (you might hear a
clicking noise as the belt retracts).
3. After the belt has retracted, tug on it. If the belt is locked, you will not
be able to pull it out. If you can pull
the belt out, it is not locked and
you will need to repeat these steps. 4. After confirming that the belt is
locked, grab the shoulder part of
the belt near the buckle and pull
up to remove any slack from the
lap part of the belt. Remember, if
the lap part of the belt is not tight,
the child seat will not be secure.
To remove slack, it may help to put weight on the child seat, or
push on the back of the seat while pulling up on the belt.
5. Push and pull the child seat
forward and from side to side to
verify that it is secure enough to
stay upright during normal driving
maneuvers. If the child seat is not
secure, unlatch the belt, allow it to
retract fully, then repeat these
steps.
To deactivate the locking mechanism in order to remove a
child seat, unlatch the buckle,
unroute the seat belt, and let the belt
fully retract.
Driver and Passenger Safety CONTINUEDProCarManuals.comMain Menu Table of Contents s t
Page 31 of 272
Protecting Children
Installing an Infant Seat With the
Lap Belt
Seven-passenger model only
To install a rear-facing child seat with the lap belt, follow instructionnumber 1 on page 28 for routing and
latching the seat belt. Then pull hard
on the loose end of the belt to
remove any slack (it may help to put
weight on the child seat while pulling on the belt). Finally, follow
instruction number 5 of page 29 to
verify that the child seat is secure. Infant Seat Installation Tips
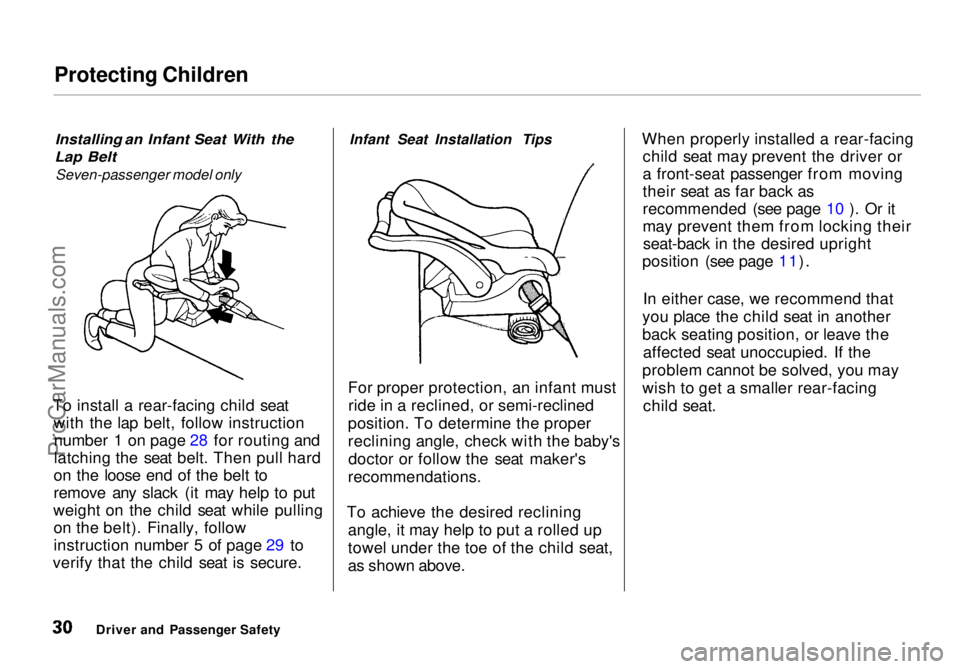
For proper protection, an infant must ride in a reclined, or semi-reclined
position. To determine the proper
reclining angle, check with the baby's doctor or follow the seat maker's
recommendations.
To achieve the desired reclining angle, it may help to put a rolled up
towel under the toe of the child seat,
as shown above. When properly installed a rear-facing
child seat may prevent the driver or
a front-seat passenger from moving
their seat as far back as
recommended (see page 10 ). Or it
may prevent them from locking theirseat-back in the desired upright
position (see page 11).
In either case, we recommend that
you place the child seat in another
back seating position, or leave the affected seat unoccupied. If the
problem cannot be solved, you may
wish to get a smaller rear-facing child seat.
Driver and Passenger SafetyProCarManuals.comMain Menu Table of Contents s t
Page 33 of 272
Protecting Children
If it is necessary to put a forward-
facing child seat in the front, move
the vehicle seat as far to the rear as
possible, be sure the child seat is
firmly secured to the vehicle, and
that the child is properly strapped in
the seat.
Installing a Child Seat With a Lap/
Shoulder Belt
The lap/shoulder belts in the outer
back and front passenger seating
positions have a locking mechanism
that must be activated to secure a
child seat.
The following pages provide
instructions and tips on how to
secure a forward-facing child seat
with this type of seat belt.
See page 34 for how to secure a
forward-facing child seat with the lap
belt.
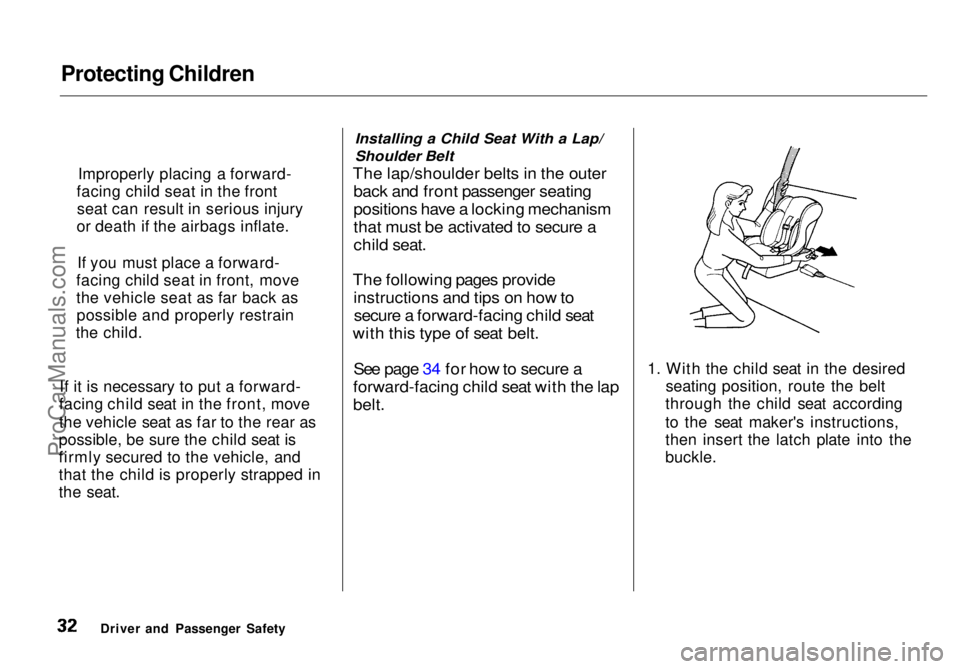
1. With the child seat in the desired
seating position, route the belt
through the child seat according
to the seat maker's instructions,
then insert the latch plate into the
buckle.
Driver and Passenger Safety
Improperly placing a forward-
facing child seat in the front seat can result in serious injury
or death if the airbags inflate.
If you must place a forward-
facing child seat in front, move
the vehicle seat as far back as possible and properly restrain
the child.ProCarManuals.comMain Menu Table of Contents s t
Page 34 of 272
Protecting Children
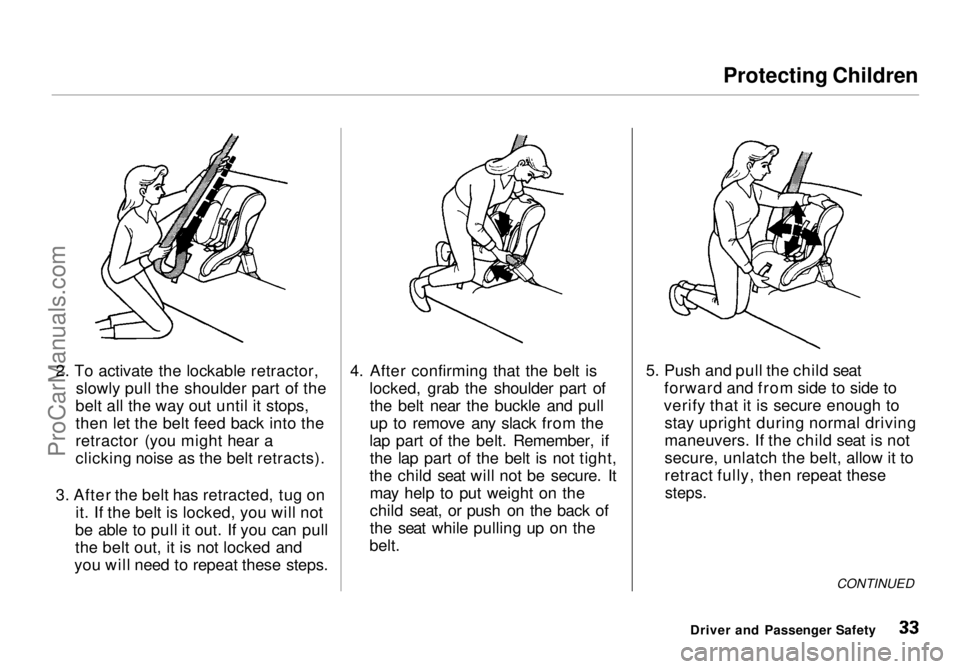
2. To activate the lockable retractor, slowly pull the shoulder part of the
belt all the way out until it stops,
then let the belt feed back into the
retractor (you might hear a
clicking noise as the belt retracts).
3. After the belt has retracted, tug on it. If the belt is locked, you will not
be able to pull it out. If you can pull
the belt out, it is not locked and
you will need to repeat these steps. 4. After confirming that the belt is
locked, grab the shoulder part ofthe belt near the buckle and pull
up to remove any slack from the
lap part of the belt. Remember, if the lap part of the belt is not tight,
the child seat will not be secure. It may help to put weight on the
child seat, or push on the back of
the seat while pulling up on the
belt. 5. Push and pull the child seat
forward and from side to side to
verify that it is secure enough to stay upright during normal driving
maneuvers. If the child seat is not
secure, unlatch the belt, allow it to
retract fully, then repeat these
steps.
CONTINUED
Driver and Passenger SafetyProCarManuals.comMain Menu Table of Contents s t
Page 35 of 272
Protecting Children
To deactivate the locking
mechanism in order to remove a
child seat, unlatch the buckle,
unroute the seat belt, and let the belt
fully retract.
Installing a Child Seat With the Lap
Belt
Seven-passenger model only
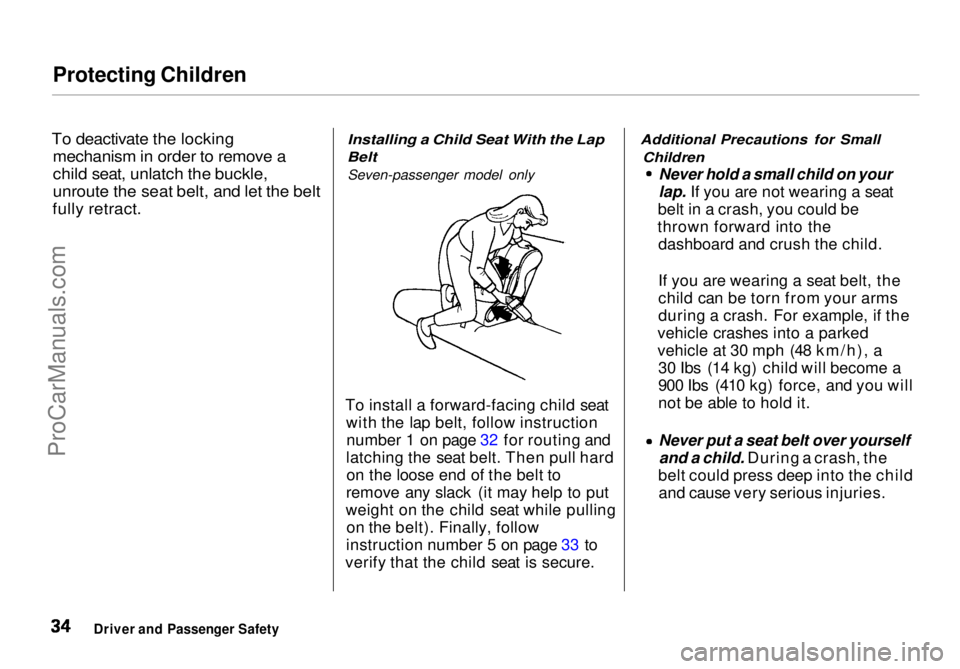
To install a forward-facing child seat with the lap belt, follow instructionnumber 1 on page 32 for routing and
latching the seat belt. Then pull hard on the loose end of the belt to
remove any slack (it may help to put
weight on the child seat while pulling on the belt). Finally, follow
instruction number 5 on page 33 to
verify that the child seat is secure.
Additional Precautions for Small
Children
Never hold a small child on your
lap. If you are not wearing a seat
belt in a crash, you could be
thrown forward into the dashboard and crush the child.
If you are wearing a seat belt, the
child can be torn from your arms
during a crash. For example, if the
vehicle crashes into a parked
vehicle at 30 mph (48 km/h), a 30 Ibs (14 kg) child will become a
900 Ibs (410 kg) force, and you will
not be able to hold it.
Never put a seat belt over yourself
and a child. During a crash, the
belt could press deep into the child and cause very serious injuries.
Driver and Passenger SafetyProCarManuals.comMain Menu Table of Contents s t
Page 42 of 272
Additional Information About Your Seat Belts
Seat Belt System Components
All the seat belts in the 6-passenger model are lap/shoulder belts. In the7-passenger model, the center
position of the bench-type second seat has a lap belt.
The system also includes alight on the instrument
panel to remind you and your
passengers to fasten your belts. If
the driver's seat belt is not fastened
before the ignition is turned ON (II), the light will come on and a beeper
will also sound. The beeper will stop after a few seconds, but the light will
stay on until the driver's seat belt is
fastened.
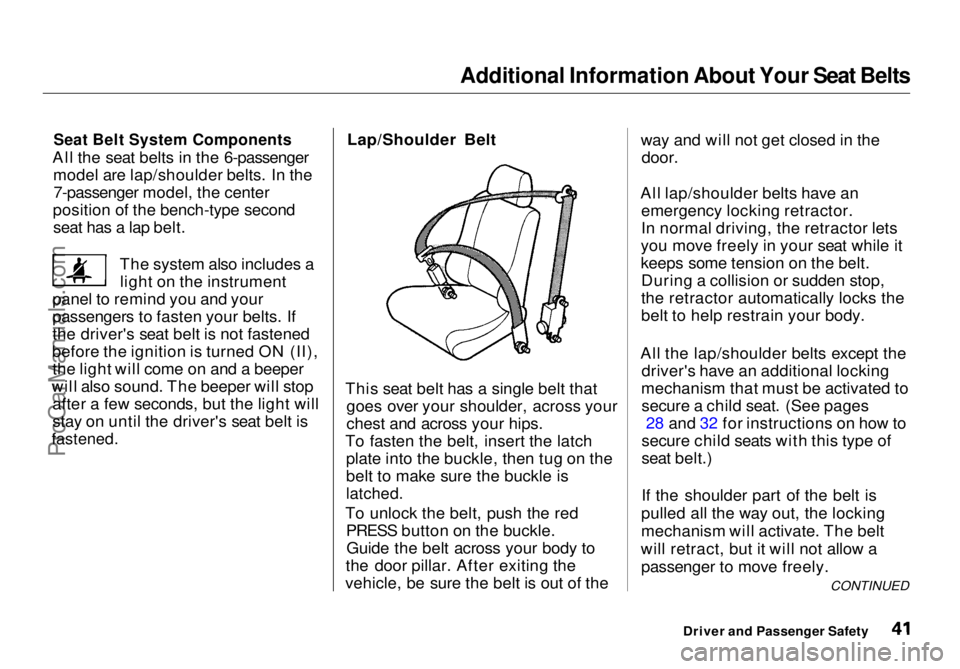
Lap/Shoulder Belt
This seat belt has a single belt that goes over your shoulder, across your
ches
t and
across your hips.
To fasten the belt, insert the latch plate into the buckle, then tug on the
belt to make sure the buckle is
latched.
To unlock the belt, push the red PRESS button on the buckle.Guide the belt across your body to
the door pillar. After exiting the
vehicle, be sure the belt is out of the way and will not get closed in the
door.
All lap/shoulder belts have an emergency locking retractor.
In normal driving, the retractor lets
you move freely in your seat while it
keeps some tension on the belt. During a collision or sudden stop,
the retractor automatically locks the
belt to help restrain your body.
All the lap/shoulder belts except the driver's have an additional locking
mechanism that must be activated to secure a child seat. (See pages 28 and 32 for instructions on how to
secure child seats with this type of
seat belt.)
If the shoulder part of the belt is
pulled all the way out, the locking
mechanism will activate. The belt
will retract, but it will not allow a passenger to move freely.
Driver and Passenger Safety CONTINUEDProCarManuals.comMain Menu Table of Contents s t
Page 43 of 272
Additional Information About Your Seat Belts
To deactivate the locking mechanism, unlatch the buckle and
let the seat belt fully retract. To
refasten the belt, pull it out only as
far as needed.
See page 13 for instructions on how
to wear the lap/shoulder belt
properly.
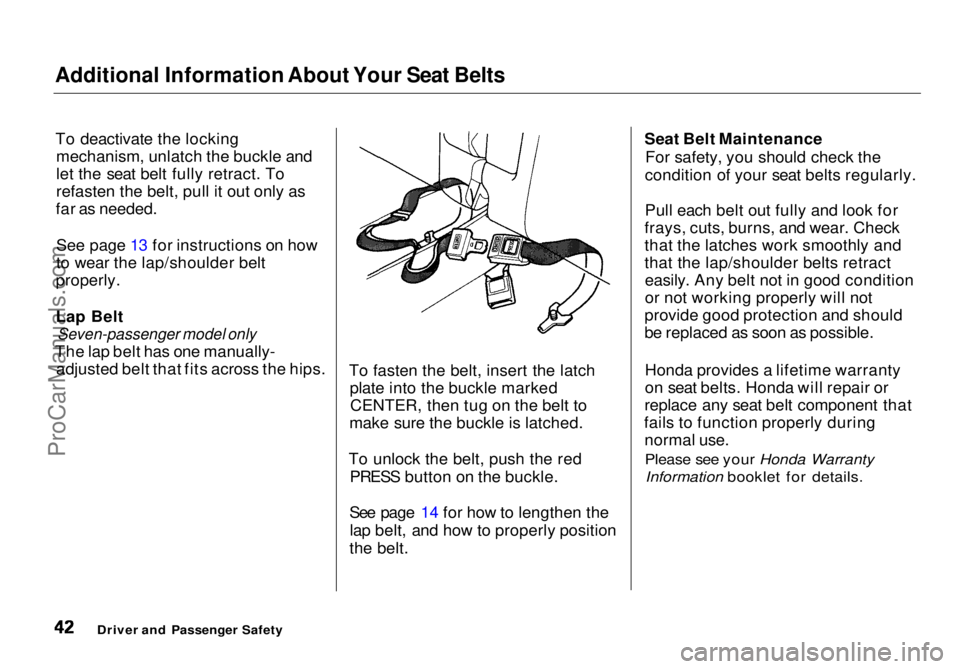
Lap Belt
Seven-passenger model only
The lap belt has one manually- adjusted belt that fits across the hips.
To fasten the belt, insert the latch
plate into the buckle markedCENTER, then tug on the belt to
make sure the buckle is latched.
To unlock the belt, push the red PRESS button on the buckle.
See page 14 for how to lengthen the lap belt, and how to properly position
the belt. Seat Belt Maintenance
For safety, you should check the
condition of your seat belts regularly.
Pull each belt out fully and look for
frays, cuts, burns, and wear. Check
that the latches work smoothly and
that the lap/shoulder belts retract easily. Any belt not in good condition
or not working properly will not
provide good protection and should
be replaced as soon as possible.
Honda provides a lifetime warranty
on seat belts. Honda will repair or
replace any seat belt component that
fails to function properly during normal use.
Please see your Honda WarrantyInformation booklet for details.
Driver and Passenger SafetyProCarManuals.comMain Menu Table of Contents s t
Page 50 of 272

Instruments and Controls
This section gives information about
the controls and displays thatcontribute to the daily operation of
your Honda. All the essential
controls are within easy reach.
Control Locations............................ 50
Indicator Lights................................ 51
Gauges.............................................. 54
Tachometer.................................. 54
Trip Meter.................................... 54
Speedometer................................ 55
Odometer...................................... 55
Temperature Gauge.................... 55
Fuel Gauge................................... 55
Maintenance Required
Indicator.................................... 56
Controls Near the Steering
Wheel........................................ 57
Headlights.................................... 58
Daytime Running Lights............. 58
Instrument Panel Brightness..... 59
Turn Signals................................. 59
Windshield Wipers...................... 60
Windshield Washers................... 61
Rear Window Wiper and
Washer...................................... 61
Hazard Warning........................... 61
Rear Window Defogger.............. 62
Steering Wheel Adjustment....... 62
Steering Wheel Controls ................ 64
Cruise Control.............................. 64
Keys and Locks................................ 67
Keys............................................... 67
Immobilizer System..................... 68
Ignition Switch............................. 69
Power Door Locks....................... 70
Remote Transmitter.................... 71
Childproof Door Locks............... 72
Tailgate......................................... 72
Glove Box..................................... 73
Seats.................................................. 74
Passenger Seating....................... 74
Seat Adjustments......................... 74
Driver's Seat Power Height
Adjustment............................... 75
Armrests....................................... 76
Head Restraints........................... 76
Third Seat Access........................ 77
Removing the Second Seats
in the Six-Passenger Model.... 78
Folding the Second Seats
in the Seven-Passenger
Model.................................... 78
Reclining the Second Seat.......... 79
Folding the Third Seat
in All Models............................ 80
Power Windows............................... 82
Sunroof.............................................. 83
Mirrors.............................................. 84
Adjusting the Power Mirrors..... 84
Parking Brake.................................. 85
Digital Clock..................................... 86 Beverage Holder.............................. 86
Dashboard Compartment............... 88
Center Pocket.................................. 88
Vanity Mirror................................... 88
Cigarette Lighter............................. 89
Ashtrays............................................ 89 Interior Lights.................................. 90
Ceiling Lights............................... 90
Spotlights...................................... 90
Tailgate Light............................... 91 Courtesy Lights........................... 91
Instruments and ControlsProCarManuals.comMain Menu s t