1998 HONDA CIVIC COUPE oil pressure
[x] Cancel search: oil pressurePage 53 of 251
Indicator Lights
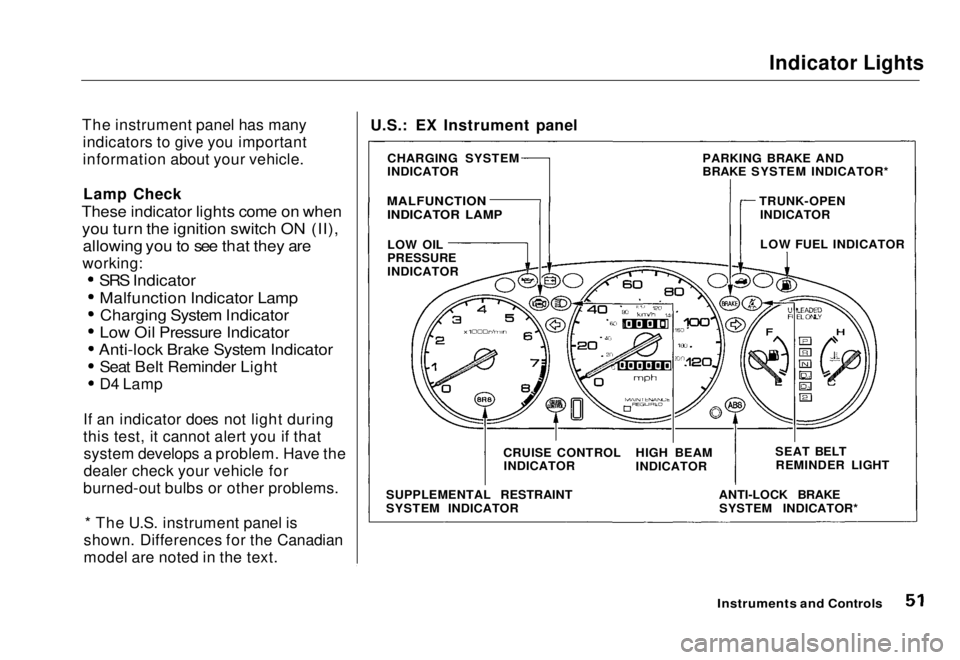
The instrument panel has many indicators to give you important
information about your vehicle.
Lamp Check
These indicator lights come on when
you turn the ignition switch ON (II), allowing you to see that they are
working:
SRS Indicator
Malfunction Indicator LampCharging System Indicator
Low Oil Pressure Indicator
Anti-lock Brake System Indicator
Seat Belt Reminder Light
D4 Lamp
If an indicator does not light during
this test, it cannot alert you if that system develops a problem. Have the
dealer check your vehicle for
burned-out bulbs or other problems.
* The U.S. instrument panel is
shown. Differences for the Canadian
model are noted in the text.
Instruments and Controls
U.S.: EX Instrument panel
CHARGING SYSTEM
INDICATOR
MALFUNCTION
INDICATOR LAMP
LOW OIL
PRESSURE
INDICATOR
SUPPLEMENTAL RESTRAINT
SYSTEM INDICATOR CRUISE CONTROL
INDICATOR HIGH BEAM
INDICATOR
ANTI-LOCK BRAKESYSTEM INDICATOR* SEAT BELT
REMINDER LIGHT
LOW FUEL INDICATOR
PARKING BRAKE AND
BRAKE SYSTEM INDICATOR*
TRUNK-OPENINDICATORMain Menu Table of Contents s t
Page 54 of 251
Indicator Lights
* Differences in the indicators for Canadian models are noted in the text.
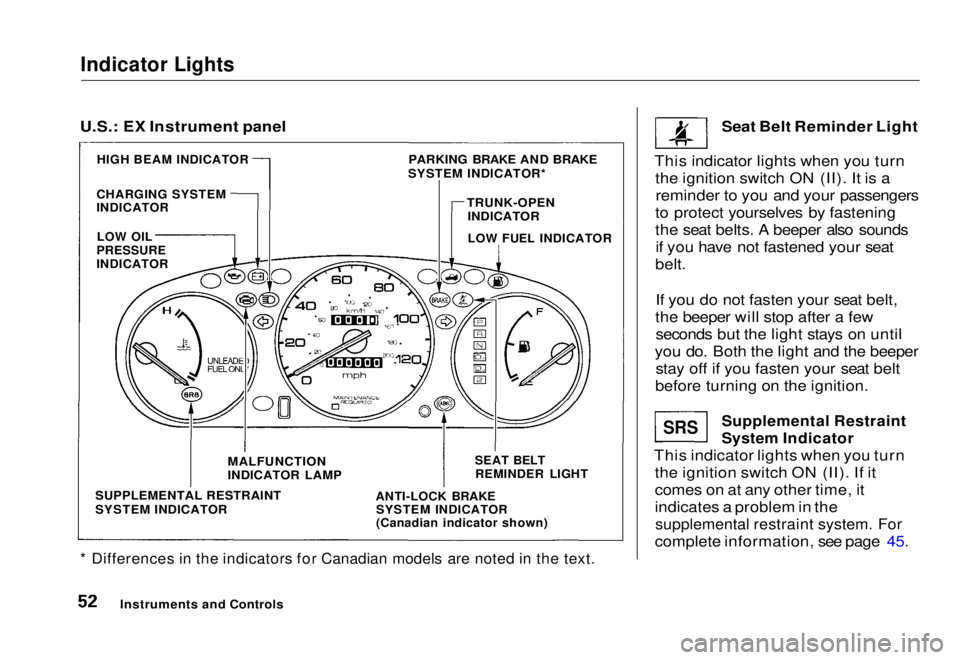
Seat Belt Reminder Light
This indicator lights when you turn the ignition switch ON (II). It is areminder to you and your passengers
to protect yourselves by fastening
the seat belts. A beeper also sounds if you have not fastened your seat
belt.
If you do not fasten your seat belt,
the beeper will stop after a few seconds but the light stays on until
you do. Both the light and the beeper stay off if you fasten your seat belt
before turning on the ignition.
Supplemental Restraint
System Indicator
This indicator lights when you turn the ignition switch ON (II). If it
comes on at any other time, it
indicates a problem in the
supplemental restraint system. For
complete information, see page 45.
Instruments and Controls
SRS
U.S.: EX Instrument panel
PARKING BRAKE AND BRAKE
SYSTEM INDICATOR*
HIGH BEAM INDICATOR
CHARGING SYSTEM
INDICATOR
TRUNK-OPEN
INDICATOR
LOW FUEL INDICATOR
LOW OIL
PRESSURE
INDICATOR
SUPPLEMENTAL RESTRAINT
SYSTEM INDICATOR
MALFUNCTION
INDICATOR LAMP
ANTI-LOCK BRAKE
SYSTEM INDICATOR
(Canadian indicator shown)
SEAT BELT
REMINDER LIGHTMain Menu Table of Contents s t
Page 55 of 251
Indicator Lights
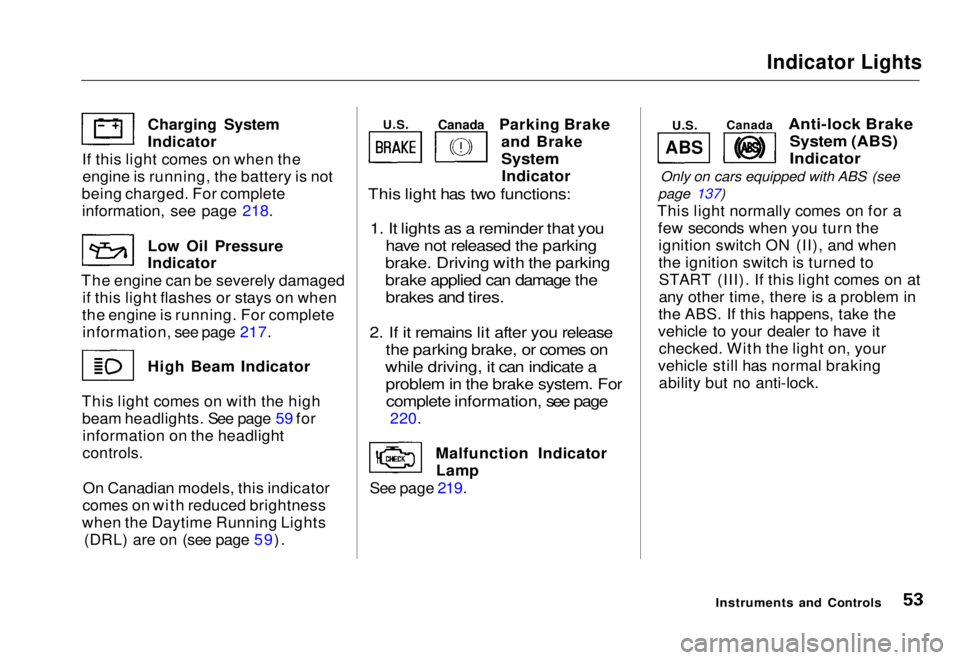
Parking Brake and Brake
System
Indicator
This light has two functions:
1. It lights as a reminder that you have not released the parking
brake. Driving with the parking
brake applied can damage the brakes and tires.
2. If it remains lit after you release the parking brake, or comes on
while driving, it can indicate a problem in the brake system. Forcomplete information, see page
220.
Malfunction Indicator Lamp
See page 219.
Anti-lock Brake
System (ABS)
Indicator
Only on cars equipped with ABS (see
page 137)
This light normally comes on for a few seconds when you turn theignition switch ON (II), and when
the ignition switch is turned toSTART (III). If this light comes on at
any other time, there is a problem in
the ABS. If this happens, take the
vehicle to your dealer to have it checked. With the light on, your
vehicle still has normal braking ability but no anti-lock.
Instruments and Controls
Charging System Indicator
If this light comes on when the engine is running, the battery is not
being charged. For complete
information
,
see page 218.
Low Oil
Pressure
Indicator
The engine can be severely damaged if this light flashes or stays on when
the engine is running. For complete information, see page 217. High Beam Indicator
This light comes on with the high beam headlights. See page 59 forinformation on the headlight
controls.
On Canadian models, this indicator
comes on with reduced brightness
when the Daytime Running Lights (DRL) are on (see page 59).
ABS
U.S.
Canada
U.S.
CanadaMain Menu Table of Contents s t
Page 140 of 251
Driving in Bad Weather
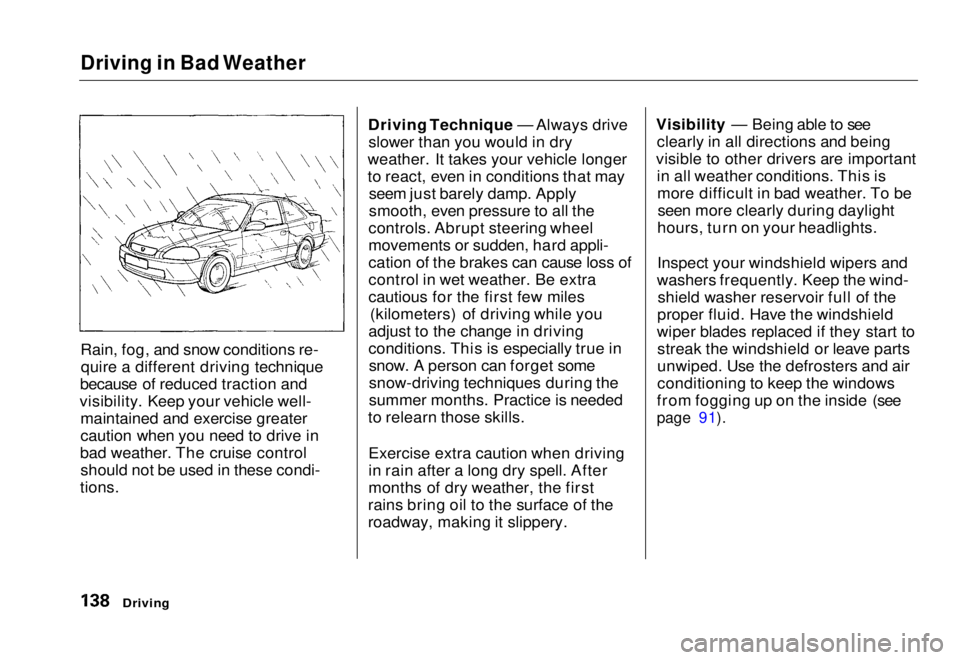
Rain, fog, and snow conditions re-
quire a different driving technique
because of reduced traction and
visibility. Keep your vehicle well- maintained and exercise greater
caution when you need to drive in
bad weather. The cruise control should not be used in these condi-
tions. Driving Technique — Always drive
slower than you would in dry
weather. It takes your vehicle longer
to react, even in conditions that may seem just barely damp. Apply
smooth, even pressure to all the
controls. Abrupt steering wheel
movements or sudden, hard appli-
cation of the brakes can cause loss of
control in wet weather. Be extra
cautious for the first few miles (kilometers) of driving while you
adjust to the change in driving
conditions. This is especially true in snow. A person can forget some
snow-driving techniques during the
summer months. Practice is needed
to relearn those skills.
Exercise extra caution when driving
in rain after a long dry spell. After
months of dry weather, the first
rains bring oil to the surface of the
roadway, making it slippery. Visibility — Being able to see
clearly in all directions and being
visible to other drivers are important in all weather conditions. This ismore difficult in bad weather. To beseen more clearly during daylight
hours, turn on your headlights.
Inspect your windshield wipers and
washers frequently. Keep the wind- shield washer reservoir full of the
proper fluid. Have the windshield
wiper blades replaced if they start to streak the windshield or leave parts
unwiped. Use the defrosters and air
conditioning to keep the windows
from fogging up on the inside (see
page 91).
DrivingMain Menu Table of Contents s t
Page 142 of 251
Maintenance
This section explains why it is important to keep your vehicle well
maintained and to follow basic
maintenance safety precautions.
This section also includes Maintenance Schedules for normaldriving and severe driving conditions,
a Maintenance Record, and instruc-
tions for simple maintenance tasks
you may want to take care of yourself.
If you have the skills and tools to per-
form more complex maintenance tasks on your Honda, you may want
to purchase the Service Manual. See
page 219 for information on how to obtain a copy, or see your Honda
dealer.
Maintenance Safety....................... 142
Important Safety Precautions.. 143
Maintenance Schedule.................. 144
Maintenance Record..................... 151
Owner Maintenance Checks........ 153
Fluid Locations............................... 154
Engine Oil....................................... 155 Adding Oil................................... 155Recommended Oil..................... 155Synthetic Oil............................... 156
Additives..................................... 156
Changing the Oil and Filter...... 157
Cooling System.............................. 159
Adding Engine Coolant............. 159Replacing Engine Coolant........ 161
Windshield Washers..................... 164
Transmission Fluid........................ 164
Automatic
Transmission.......................... 164
5-speed Manual
Transmission.......................... 166
Brake and Clutch Fluid................. 166
Brake System............................. 167Clutch System............................ 167
Power Steering............................... 168
Air Cleaner Element...................... 169 Spark Plugs..................................... 171
Replacement............................... 171
Specifications............................. 172
Battery............................................ 173
Wiper Blades.................................. 175
Air Conditioning System............... 177 Drive Belts...................................... 178
Timing Belt..................................... 178
Tires................................................ 179 Inflation....................................... 179
Recommended Tire Pressures
for Normal Driving............ 180
Inspection................................... 181
Maintenance............................... 181
Tire Rotation.............................. 182
Replacing Tires and Wheels ....
183
Wheels an d
Tires....................... 184
Winter Driving........................... 184 Snow Tires.............................. 184
Tire Chains............................. 185
Lights.............................................. 186 Headlight Aiming...................... 188
Replacing Bulbs......................... 189
Storing Your Vehicle..................... 197
MaintenanceMain Menu s t
Page 154 of 251
Owner Maintenance Checks
You should check the following
items at the specified intervals.
If
you are
unsure of how to perform
any check, turn to the
page given.
Engine oil level
— Check every
time you
fill the fuel tank. See
page 111.
Engine coolant level
— Check the
radiator reserve
tank every time
you fill the fuel tank. See page 112.
Windshield washer fluid
— Check
the level
in the reservoir monthly.
If weather conditions cause you to
use the washers frequently, check
the reservoir each time you stop
for fuel. See page 164.
Automatic transmission
— Check
the flui d
level monthly. See page
164.
Brakes — Check the fluid level
monthly. Se e
page 167.
Tires
— Check the tire pressure
monthly. Examin e
the tread for
wear and foreign objects. See page 180.
Lights — Check the operation of
the headlights ,
parking lights,
taillights, high-mount brake light,
turn signals, brake lights, and
license plate lights monthly. See
page 187.
MaintenanceMain Menu Table of Contents s t
Page 159 of 251
Engine Oil
5. Put a new washer on the drain bolt,
then reinstall the drain bolt.
Tighten it to:
(DX)
33 lbf.ft (44 N.m, 4.5 kgf.m)
(U.S.: HX, EX, Canada: Si)
29 Ibf.ft (39 N.m , 4.0 kgf.m)
6. Refill the engine with the recom-
mended oil.
Engine oil change capacity
(including filter):
(DX)
3.8 US qt (3.6 ,3.2 Imp qt)
(U.S.: HX, EX, Canada: Si)
3.5 US qt (3.3 ,2.9 Imp qt) 7. Replace the engine oil fill cap.
Start the engine. The oil pressure
indicator light should go out within
five seconds. If it does not, turn off the engine and reinspect your
work.
8. Let the engine run for several minutes and check the drain bolt
and oil filter for leaks.
9. Turn off the engine, let it sit for several minutes, then check the oil
level. If necessary, add oil to bring
the level to the upper mark on the
dipstick.
Improper disposal of engine oil can be
harmful to the environment. If you
change your own oil, please dispose of
the used oil properly. Put it in a sealed
container and take it to a recycling
center. Do not discard it in a trash bin
or dump it on the ground.
Maintenance
NOTICEMain Menu Table of Contents s t
Page 178 of 251
Air Conditioning System
Standard on U.S. EX model
Your vehicle's air conditioning is a sealed system. Any major mainte-
nance, such as recharging, should be
done by a qualified mechanic. You
can do a couple of things to makesure the air conditioning works
efficiently. Periodically check the engine's
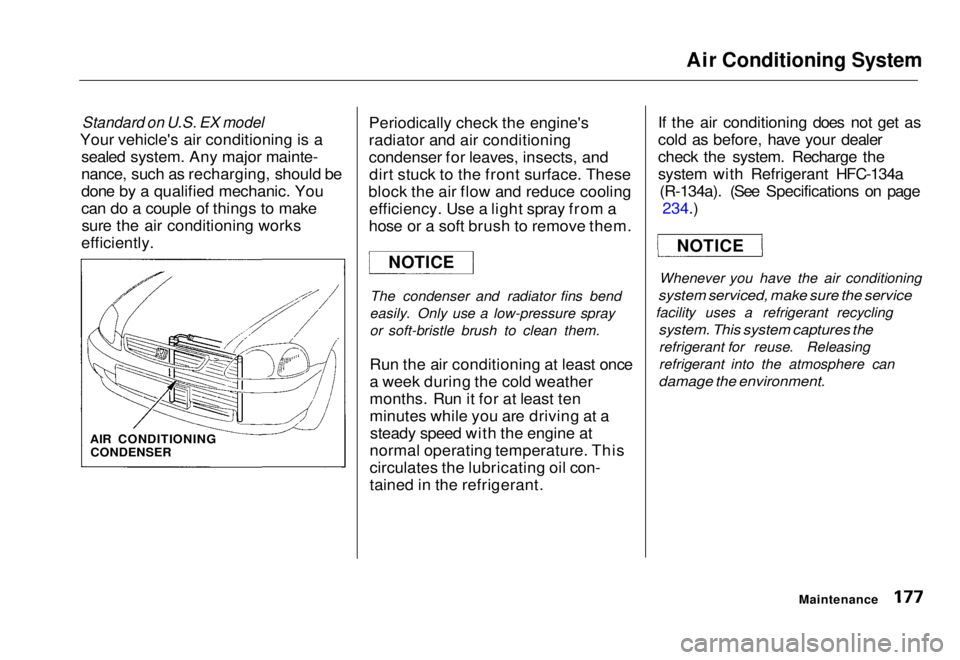
radiator and air conditioning
condenser for leaves, insects, and
dirt stuck to the front surface. These
block the air flow and reduce cooling efficiency. Use a light spray from a
hose or a soft brush to remove them.
The condenser and radiator fins bend
easily. Only use a low-pressure spray
or soft-bristle brush to clean them.
Run the air conditioning at least once
a week during the cold weather
months. Run it for at least ten
minutes while you are driving at a steady speed with the engine at
normal operating temperature. This
circulates the lubricating oil con-
tained in the refrigerant. If the air conditioning does not get as
cold as before, have your dealer
check the system. Recharge the
system with Refrigerant HFC-134a
(R-134a). (See Specifications on page 234.)
Whenever you have the air conditioning
system serviced, make sure the service
facility uses a refrigerant recycling
system. This system captures the
refrigerant for reuse. Releasing
refrigerant into the atmosphere can
damage the environment.
Maintenance
NOTICE
NOTICE
AIR CONDITIONING CONDENSERMain Menu Table of Contents s t