1998 GMC SIERRA light
[x] Cancel search: lightPage 228 of 452
Snow can trap exhaust gases under your vehicle.
This can cause deadly CO (carbon monoxide) gas
to get inside.
CO could overcome you and kill
you.
You can’t see it or smell it, so you might not
know it is
in your vehicle. Clear away snow from
around the base
of your vehicle, especially any
that is blocking your exhaust pipe. And check
around again from time to time to be sure snow
doesn’t collect there.
Open
a window just a little on the side of the
vehicle
that’s away from the wind. This will help
keep
CO out.
Run your engine only as long as you must. This saves
fuel. When you run
the engine, make it go a little faster
than just idle. That is, push the accelerator slightly. This
uses less fuel for the heat that you get and it keeps
the
battery (or batteries) charged. You will need a
well-charged battery
(or batteries) to restart the vehicle,
and possibly for signaling later on with your headlamps.
Let the heater run for a while.
If you have a diesel engine, you may have to run it at a
higher speed to get enough heat. Then, shut the engine
off and close the window almost all the way to preserve
the heat. Start the engine again and repeat this only
when you feel really uncomfortable from the cold. But
do it
as little as possible. Preserve the fuel as long as you
can.
To help keep warm, you can get out of the vehicle
and do some fairly vigorous exercises every half hour or
so until help comes.
4-40
ProCarManuals.com
Page 236 of 452
Camper Wiring Harness
(If Equipped)
~~~
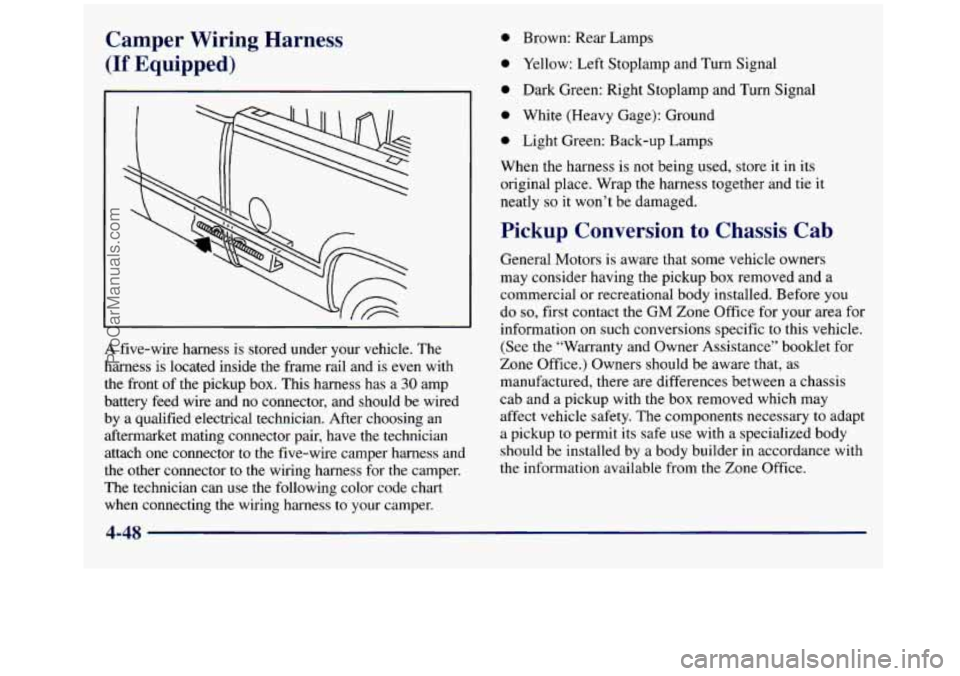
A five-wire harness is stored under your vehicle. The
harness is located inside the frame rail and is even with
the front of the pickup box. This harness has a
30 amp
battery feed wire and no connector, and should be wired
by
a qualified electrical technician. After choosing an
aftermarket mating connector pair, have
the technician
attach one connector to the five-wire camper harness and
the other connector
to the wiring harness for the camper.
The technician can use the following color code chart
when connecting the wiring harness to your camper.
0 Brown: Rear Lamps
0 Yellow: Left Stoplamp and Turn Signal
0 Dark Green: Right Stoplamp and Turn Signal
0 White (Heavy Gage): Ground
0 Light Green: Back-up Lamps
When the harness is
not being used, store it in its
original place. Wrap the harness together and tie
it
neatly so it won’t be damaged.
Pickup Conversion to Chassis Cab
General Motors is aware that some vehicle owners
may consider having the pickup box removed and
a
commercial or recreational body installed. Before you
do so, first contact the GM Zone Office for your area for
information on such conversions specific
to this vehicle.
(See the “Warranty and Owner Assistance” booklet
for
Zone Office.) Owners should be aware that, as
manufactured, there are differences between a chassis
cab and a pickup with the box removed which may
affect vehicle safety. The components necessary to adapt
a pickup
to permit its safe use with a specialized body
should be installed by a body builder in accordance with
the information available from the Zone Office.
4-48
ProCarManuals.com
Page 248 of 452
Trailer Wiring Harness
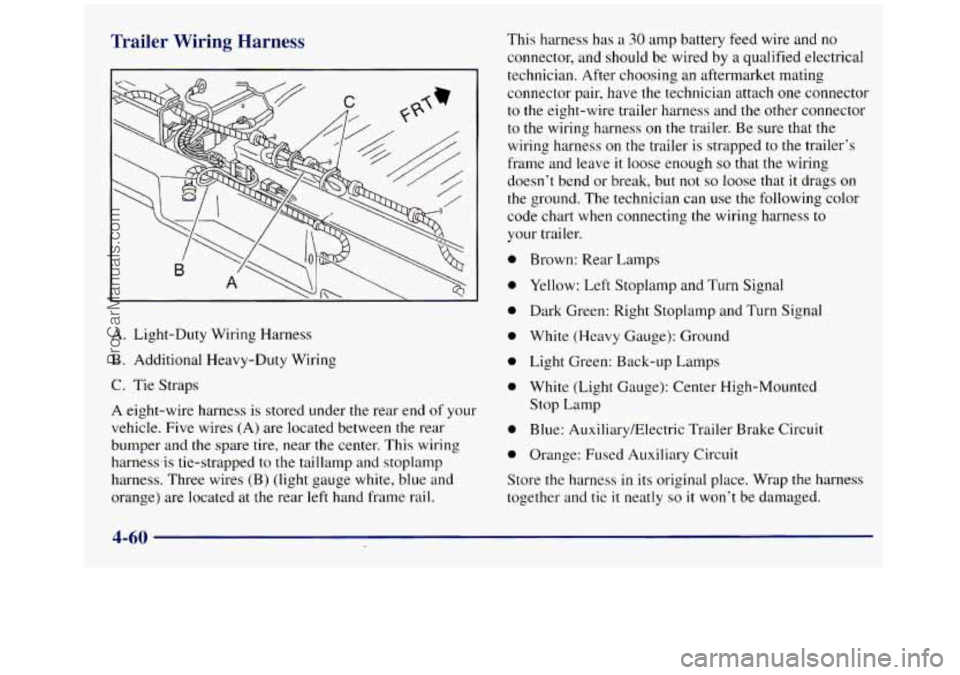
A. Light-Duty Wiring Harness
B. Additional Heavy-Duty Wiring
C. Tie Straps
A eight-wire harness is stored under the rear end of your
vehicle. Five wires (A) are located between the rear
bumper and the spare tire, near the center. This wiring
harnewis tie-strapped to the taillamp and stoplamp
harness. Three wires (B) (light gauge white, blue and
orange) are located at
the rear left hand frame rail. This
harness has a
30 amp battery feed wire and no
connector, and should be wired
by a qualified electrical
technician. After choosing an aftermarket mating
connector pair, have the technician attach one connector
to the eight-wire trailer harness and the other connector
to the wiring harness on the trailer. Be sure that the
wiring harness on the trailer is strapped to the trailer’s
frame and leave
it loose enough so that the wiring
doesn’t bend or break, but not
so loose that it drags on
the ground. The technician can use the following color
code chart when connecting the wiring harness to
your trailer.
0 Brown: Rear Lamps
0 Yellow: Left Stoplamp and Turn Signal
0 Dark Green: Right Stoplamp and Turn Signal
0 White (Heavy Gauge): Ground
0 Light Green: Back-up Lamps
0 White (Light Gauge): Center High-Mounted
Stop Lamp
0 Blue: Auxiliary/Electric Trailer Brake Circuit
0 Orange: Fused Auxiliary Circuit
Store the harness
in its original place. Wrap the harness
together and tie
it neatly so it won’t be damaged.
4-60
ProCarManuals.com
Page 256 of 452
2. Get the vehicles close enough so the jumper cables
can reach, but be sure the vehicles aren’t touching
each other. If they are, it could cause a ground
connection
you don’t want. You wouldn’t be able
to start your vehicle, and the bad grounding could
damage the electrical systems.
To avoid the possibility
of the vehicles rolling, set
the parking brake firmly on both vehicles involved
in the jump start procedure. Put an automatic
transmission in
PARK (P) or a manual transmission
in NEUTRAL (N).
If you have a four-wheel-drive
vehicle, be sure the transfer case is not in
NEUTRAL
(N).
3. Turn off the ignition on both vehicles. Unplug
unnecessary accessories plugged into the cigarette
lighter or accessory power outlets. Turn
off all lamps
that aren’t needed as well as radios. This will avoid
sparks and help save both batteries. In addition, it
could save your radio!
I NOTICE:
If you leave your radio on, it could be badly
damaged. The repairs wouldn’t be covered by
your warranty.
4. Open the hoods and locate the batteries. Find the
positive
(+) and negative (-) terminals on each battery.
If your vehicle has air conditioning, the auxiliary
electric fan under the hood can start up even
when the engine is not running and can injure
you. Keep hands, clothing and tools
away from
any underhood electric fan.
5-4
t
ProCarManuals.com
Page 257 of 452

I
Using a match near a battery can cause battery
gas to explode. People have been hurt doing this,
and some have been blinded. Use a flashlight
if
you need more light.
Be sure the batteries have enough water. You
don’t need to add water to the ACDelco
Freedom@ battery (or batteries) installed in
every new
GM vehicle. But if a battery has filler
caps, be sure the right amount of fluid is there.
If
it is low, add water to take care of that first. If
you don’t, explosive gas could be present.
Battery fluid contains acid that can burn you.
Don’t get it on you.
If you accidentally get it in
your eyes or on your skin, flush the place with
water and get medical help immediately.
5. Check that the jumper cables don’t have loose or
missing insulation.
If they do, you could get a shock.
The vehicles could be damaged too.
Before you connect the cables, here are some
basic things
you should know. Positive (+) will
go to positive
(+) and negative (-) will go to a
metal engine part. Don’t connect positive
(+) to
negative
(-) or you’ll get a short that would
damage the battery and maybe other parts
too.
On vehicles equipped with dual batteries, make any
battery connections
to the primary battery located on
the passenger’s side of the vehicle.
Fans or other moving engine parts can injure you
badly. Keep your hands
away from moving parts
once the engine is running.
5-5
ProCarManuals.com
Page 289 of 452
NOTICE:
Spinning your wheels can destroy parts of your
vehicle as well as the tires. If you spin the wheels
too fast while shifting your transmission back
and forth,
you can destroy your transmission. I
For information about using tire chains on your vehicle,
see “Tire Chains”
in the Index.
Rocking Your Vehicle To Get It Out
First, turn your steering wheel left and right. That will
clear the area around your front wheels. If
you have a
four-wheel drive vehicle, shift into
4HI. Then shift back
and forth between
REVERSE (R) and a forward gear
(or with a manual transmission, between FIRST
(1) or
SECOND (2) and REVERSE (R)), spinning the wheels
as little as possible. Release the accelerator pedal while
you shift, and press lightly on the accelerator pedal
when the transmission is
in gear. If that doesn’t get
you out after a few tries, you may need to be towed out.
Or,
you can use your recovery hooks if your vehicle has
them.
If you do need to be towed out, see “Towing
Your Vehicle”
in the Index.
Using the Recovery Hooks
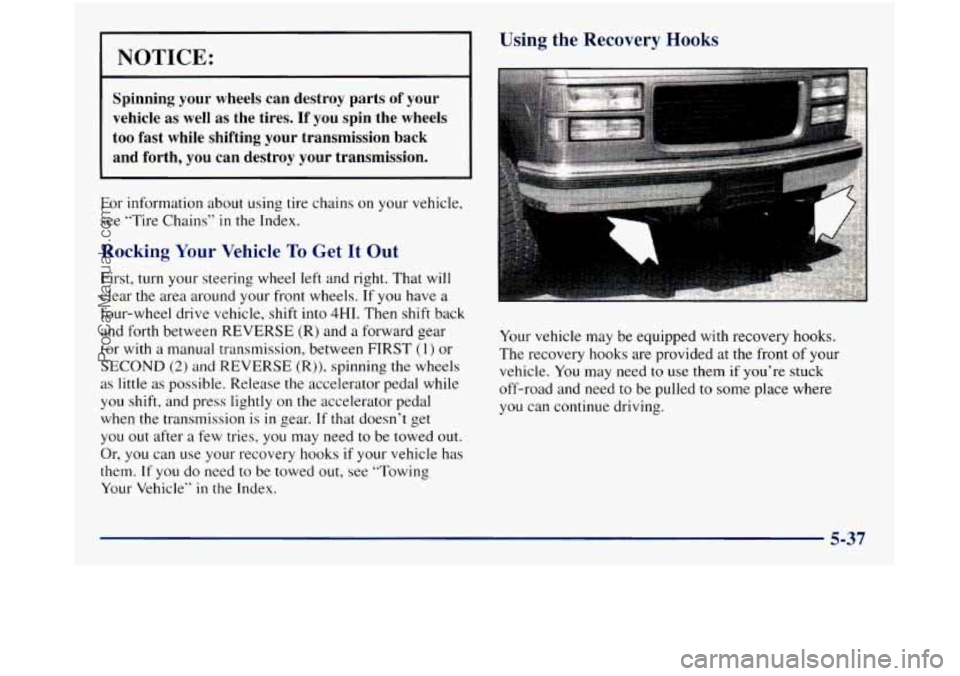
Your vehicle may be equipped with recovery hooks.
The recovery hooks are provided
at the front of your
vehicle.
You may need to use them if you’re stuck
off-road and need to be pulled to some place where
you can continue driving.
5-37
ProCarManuals.com
Page 298 of 452
~ Be
careful not to spill gasoline. Clean gasoline from
~ painted surfaces as soon as possible. See “Cleaning the
i Outside of Your Vehicle” in the Index.
When you put
the cap back on, turn it to the right
(clockwise)
until you hear a clicking sound. Make sure you
fully install the cap. The diagnostic system can determine if
the fuel cap has been left off or improperly installed. This
would allow fuel to evaporate into the atmosphere. See
“Malfunction Indicator Lamp”
in the Index.
NOTICE:
If you need a new cap, be sure to get the right
type. Your dealer can get one for you. If you get
the wrong type, it may not
fit properly. This may
cause your malfunction indicator lamp to light
and your fuel tank and emissions system may be
damaged. See ‘LMalfunction Indicator Lamp” in
the Index.
Filling a Portable Fuel Container
Never fill a portable fuel container while it is in
your vehicle. Static electricity discharge from the
container can ignite the gasoline vapor. You can
be badly burned and your vehicle damaged
if this
occurs.
To help avoid injury to you and others:
Dispense gasoline only into
approved containers.
Do not fill a container while it is inside a
vehicle, in
a vehicle’s trunk, pickup bed or
on any surface other than the ground.
inside of the
fill opening before operating
the nozzle. Contact should be maintained
until the filling is complete.
0 Bring the fill nozzle in contact with the
0 Don’t smoke while pumping gasoline.
6-8
I
ProCarManuals.com
Page 315 of 452
How to Add Fluid
Here’s how to add fluid. Refer to the Maintenance
Schedule to determine what kind of fluid to use. See
”Recommended Fluids and Lubricants”
in the Index.
1. Remove the filler plug.
2. Add fluid at the filler plug hole. Add only enough
fluid to bring the tluid level up to the bottom of the
filler plug hole.
3. Install the filler plug.
Be sure the plug is fully seated.
Hydraulic Clutch
The hydraulic clutch system in your vehicle is
self-adjusting. A slight amount of play (1/4 inch to
1/2 inch or 6 lnm to 12 mm) in the pedal is normal.
It isn‘t a good idea to “top off’ your clutch fluid. Adding
fluid won’t correct a leak.
A fluid loss in this system could
indicate a problem. Have
the system inspected and repaired.
When to Check and What to Use
Refer to the Maintenance
Schedule, Owner Checks
and Services,
to determine
how often you should check
the fluid level
in your clutch
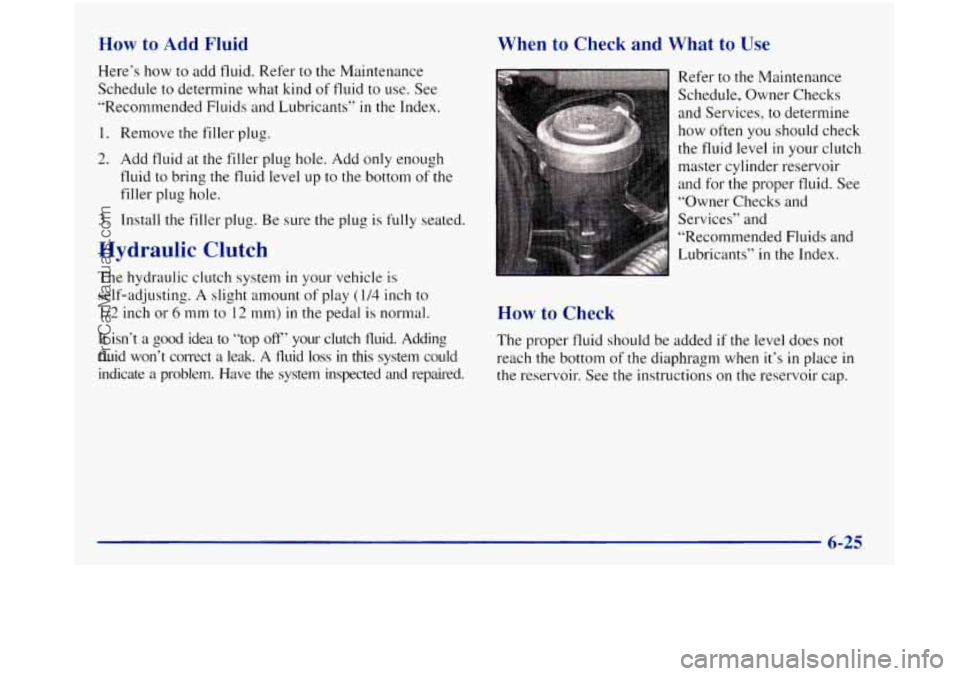
master cylinder reservoir
and for the proper fluid. See
“Owner Checks and
Services” and
“Recommended Fluids and
Lubricants” in the Index.
How to Check
The proper fluid should be added if the level does not
reach the bottom
of the diaphragm when it’s in place in
the reservoir. See the instructions on the reservoir cap.
6-25
ProCarManuals.com