Page 137 of 160
 issued a
gasoline specification to provide information on high quality fuels that
optimize the performance of your vehicle. We recommend the us")
The American Automobile Manufacturers Association (AAMA) issued a
gasoline specification to provide information on high quality fuels that
optimize the performance of your vehicle. We recommend the use of
gasolines that meet the AAMA specification if they are available.
It should not be necessary to add any aftermarket products to your fuel
tank if you continue to use a high-quality fuel.
Cleaner air
Ford approves the use of gasolines to improve air quality, including
reformulated gasolines that contain oxygenates up to 10% ethanol or
15% MTBE.
Do not use gasolines containing methanol, which can damage critical fuel
system components. Damage resulting from the use of methanol may not
be covered by your warranty.
Running out of fuel
Avoid running out fuel because this situation may have an adverse affect
on powertrain components.
If you have run out of fuel:You may need to crank the engine several
times before the system starts to pump fuel from the tank to the engine.
If you run out of fuel, your Check Engine light may come on. For more
information on the Check Engine light, refer to theInstrumentation
chapter.
Calculating fuel economy
To accurately calculate your vehicle's fuel economy:
1. Fill the tank completely and record the initial odometer reading.
2. Each time you fill the tank, record the amount of fuel added (in liters
or gallons).
3. After at least three to five fuel tank fill-ups, fill the fuel tank and
record the current mileage reading.
4. Use one of the following equations to calculate fuel economy.
Liters used x 1004Total kilometers traveled
Total miles traveled4Total gallons used
Keep a record for at least one month. This will provide an accurate
estimate of the vehicle's fuel economy.
Maintenance and care
137
Page 138 of 160

EMISSION CONTROL SYSTEM
Your vehicle is equipped with various emission control components and a
catalytic converter which will enable your vehicle to comply with
applicable exhaust emission standards. To make sure that the catalytic
converter and other emission control components continue to work
properly:
²Use only unleaded fuel.
²Avoid running out of fuel.
²Do not turn off the ignition while your vehicle is moving, especially at
high speeds.
²Have the services listed in your ªService Guideº performed according
to the specified schedule.
The Scheduled Maintenance Services listed in the ªService Guideº are
required because they are considered essential to the life and
performance of your vehicle and to its emissions system.
If other than Ford, Motorcraft or Ford authorized parts are used for
maintenance replacements or for service of components affecting
emission control such non-Ford parts should be equivalent to genuine
Ford Motor Company parts in performance and durability.
Do not park, idle, or drive your vehicle in dry grass or other dry
ground cover. The emission system heats up the engine
compartment and exhaust system, which can start a fire.
Watch for fluid leaks, strange odors, smoke, loss of oil pressure, the
charging system warning light, the ªCheck Engineº light or the
temperature warning light. These events could indicate that the emission
control system is not working properly.
If you smell exhaust fumes of any kind inside your vehicle, have
the dealer inspect and fix your vehicle immediately. Do not drive
if you smell exhaust fumes. These fumes are harmful and could kill
you.
Maintenance and care
138
Page 139 of 160

Do not make any unauthorized changes to your vehicle or engine. By
law, vehicle owners and anyone who manufactures, repairs, services,
sells, leases, trades vehicles, or supervises a fleet of vehicles are not
permitted to intentionally remove an emission control device or prevent
it from working. Information about your vehicle's emission system is on
the Vehicle Emission Control Information Decal located on or near the
engine. This decal identifies engine displacement and gives some tune up
specifications.
Please consult your ªWarranty Guideº for complete emission warranty
information.
Readiness for inspection/maintenance (I/M) testing
In some localities, it may be a legal requirement to pass an I/M test of
the on-board diagnostic (OBD-II) system. If your ªcheck engine/service
engine soonº light is on, reference the applicable light description in the
Warning Lights and Chimessection of your owners guide. Your vehicle
may not pass the I/M test with the ªcheck engine/service engine soonº
light on.
If the vehicle's powertrain system or its battery has just been serviced,
the OBD-II system is reset to a ªnot ready for I/M testº condition. To
ready the OBD-II system for I/M testing, a minimum of 30 minutes of city
and highway driving is necessary as described below:
²First, at least 10 minutes of driving on an expressway or highway.
²Next, at least 20 minutes driving in stop and go, city type traffic with
at least four idle periods.
Allow the vehicle to sit for at least eight hours without starting the
engine. Then, start the engine and complete the above driving cycle. The
engine must warm up to its normal operating temperature. Once started,
do not turn off the engine until the above driving cycle is complete.
EXTERIOR BULBS
Replacing exterior bulbs
Check the operation of the following lamps frequently:
²headlamps
²foglamps
²high-mount brakelamp
²brakelamps
Maintenance and care
139
Page 140 of 160

²turn signals
²license plate lamp
²tail lamps
²back-up lamps
Do not remove lamp bulbs unless they can be replaced immediately with
new ones. If a bulb is removed for an extended period of time,
contaminants may enter the lamp housings and affect lamp performance.
Replacing headlamp bulbs
Handle a halogen headlamp bulb carefully and keep out of
children's reach. Grasp the bulb only by its plastic base and do
not touch the glass. The oil from your hand could cause the bulb to
break the next time the headlamps are operated.
If the bulb is accidentally touched, it should be cleaned with rubbing
alcohol before being used.
To remove the headlamp bulb:
1. Make sure headlamp switch is in OFF position, then open the hood. If
you are replacing the driver side headlamp, unclip the electronic module
on the right side of the battery and move it out of the way.
2. Locate the headlamp bulb through the hole in the upper radiator
support assembly.
3. Disconnect the electrical
connector from the bulb by pulling
the connector rearward.
4. Remove the bulb retaining ring by
rotating it counterclockwise (when
viewed from the rear) about an
eighth of a turn to free it from the
bulb socket, and by sliding the ring
off the plastic base. Keep the ring
because it will be used again to
retain the new bulb.
Maintenance and care
140
Page 141 of 160

5. Remove the old bulb from its socket by gently pulling it straight back
out of the socket. Do not turn the bulb while removing it.
To install the new bulb:
1. With the flat side of the bulb's
plastic base facing upward, insert
the glass end of the bulb into the
socket. You may need to turn the
bulb left or right to line up the
grooves in the plastic base with the
tabs in the socket. When the
grooves are aligned, push the bulb into the socket until the plastic base
contacts the rear of the socket.
2. Slip the bulb retaining ring over the plastic base until it contacts the
rear of the socket by rotating it clockwise until you feel a ªstop.º
3. Push the electrical connector into the rear of the plastic base until it
snaps, locking it into position.
4. Turn the headlamps on and make sure they work properly. If the
headlamp was correctly aligned before you changed the bulb, you should
not need to align it again.
REPLACING THE INTERIOR BULBS
Check the operation of the following interior bulbs frequently:
²interior overhead lamp
²map lamp
Using the right bulbs
Function Number of
bulbsTrade
number
Park/turn/side marker lamps (front) 4 3157
Headlamps 2 9007
Foglamps (if equipped) 2 H3
Hi-mount brakelamp 2 906
Rear stop/tail lamps 2 3157
Rear turn lamps 2 3156
Rear license plate lamps 2 194
Maintenance and care
141
Page 142 of 160
 2 906
Map/dome-Regular Cab (if equipped) 1 212-2
2 906
To replace all instrument panel lights -")
Function Number of
bulbsTrade
number
Backup lamp 2 3156
Dome lamp 1 912
Map/dome-SuperCab (if equipped) 2 906
Map/dome-Regular Cab (if equipped) 1 212-2
2 906
To replace all instrument panel lights - see your dealer.
AIMING THE HEADLAMPS
The alignment of your headlamps should be checked by a qualified
service technician if:
1. Oncoming motorists frequently signal you to deactivate your high
beams, and your high beams are not activated.
2. The headlamps do not seem to provide enough light for clear night
vision.
3. The headlamp beams are pointed substantially away from a slightly
down and to the right position.
CLEANING AND CARING FOR YOUR VEHICLE
Refer to the ªCustomer Assistance Guideº for a list of Ford-approved
cleaners, polishes and waxes.
Washing your vehicle
Wash your vehicle regularly with
cold or lukewarm water. Never use
strong detergents or soap. If your
vehicle is particularly dirty, use a
quality car wash detergent. Always
use a clean sponge, washing glove
or similar device and plenty of water
for best results. To avoid spots,
avoid washing when the hood is still
warm, immediately after or during
exposure to strong sunlight.
Maintenance and care
142
Page 143 of 160

During winter months, it is especially important to wash the vehicle on a
regular basis. Large quantities of dirt and road salt are difficult to
remove and also cause damage to the vehicle. Remove any exterior
accessories, such as antennas, before entering a car wash.
After washing, apply the brakes several times to dry them.
Waxing your vehicle
Wax when water stops beading on the surface. This could be every three
or four months, depending on operating conditions.
Use only carnauba or synthetic-based waxes. Use cleaning fluid or
alcohol with a clean cloth to remove any bugs and tar before waxing
vehicle. Use tar remover to remove any tar spots.
Repairing paint chips
Minor scratches or paint damage from road debris may be repaired with
touch-up paint, repair foil or aerosol paint spray from the Ford accessory
line. Observe the application instructions on the products.
Remove particles such as bird droppings, tree sap, insect remains, tar
spots, road salt and industrial fallout immediately.
Cleaning the wheels
Wash with the same detergent as the body of your vehicle. Do not use
acid-based or alcohol-based wheel cleaners, steel wool, fuel or strong
detergents. Never use abrasives that will damage the finish of special
wheel surfaces. Use a tar remover to remove grease and tar.
Cleaning the engine
Engines are more efficient when they are clean because grease and dirt
buildup keep the engine warmer than normal. When washing:
²Take care when using a power washer to clean the engine. The high
pressure fluid could penetrate the sealed parts and cause damage.
²Do not spray with cold water to avoid cracking the engine block or
other engine components.
²Cover the highlighted areas to prevent water damage when cleaning
the engine.
Maintenance and care
143
Page 144 of 160
²4.0L
²3.0L
Maintenance and care
144
 1
1 2
2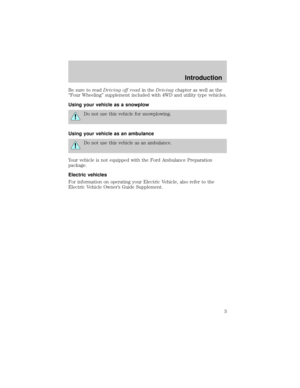 3
3 4
4 5
5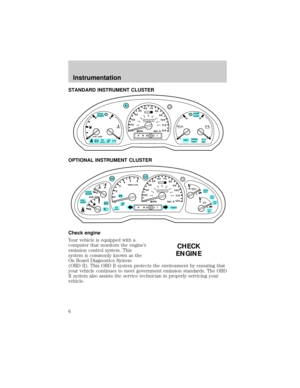 6
6 7
7 8
8 9
9 10
10 11
11 12
12 13
13 14
14 15
15 16
16 17
17 18
18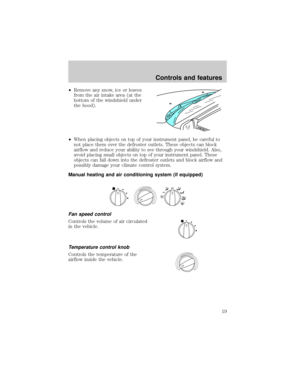 19
19 20
20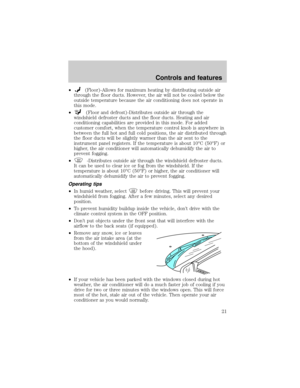 21
21 22
22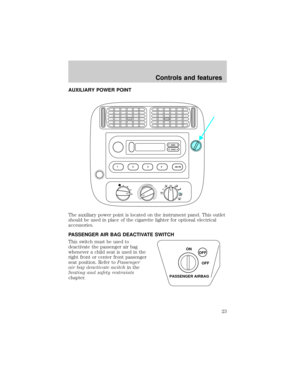 23
23 24
24 25
25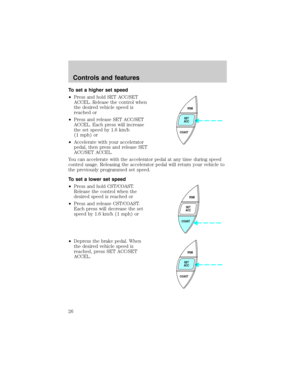 26
26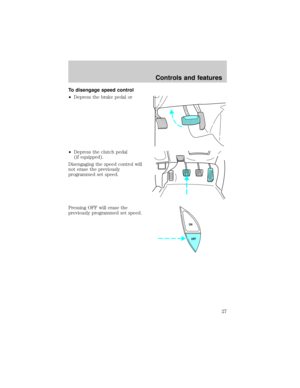 27
27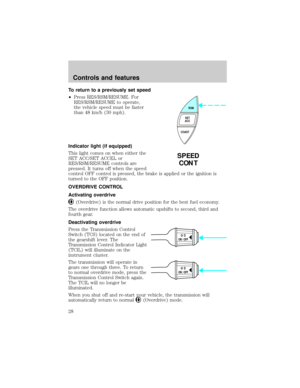 28
28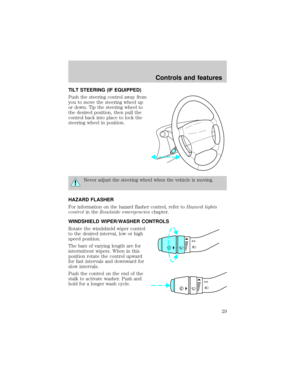 29
29 30
30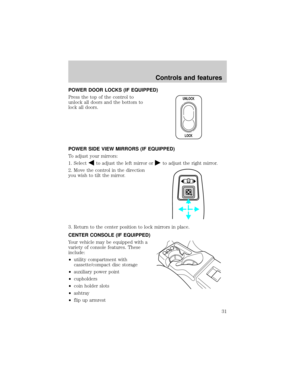 31
31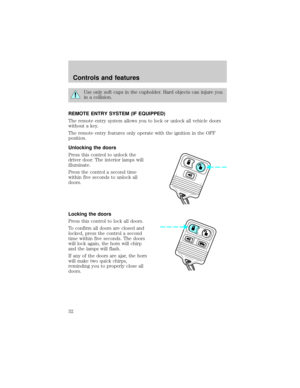 32
32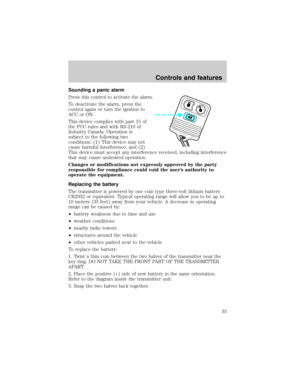 33
33 34
34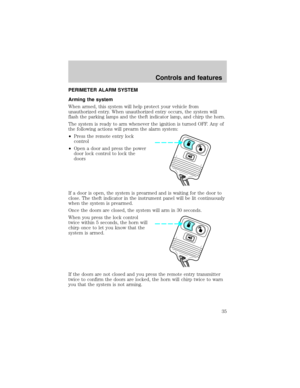 35
35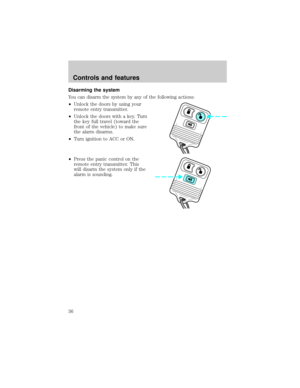 36
36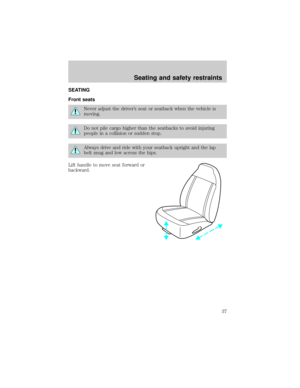 37
37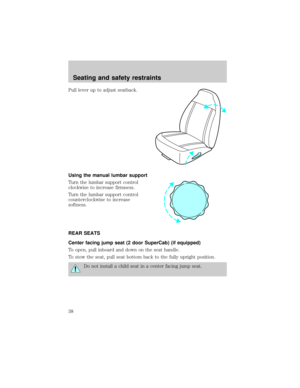 38
38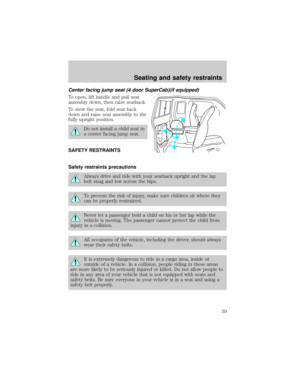 39
39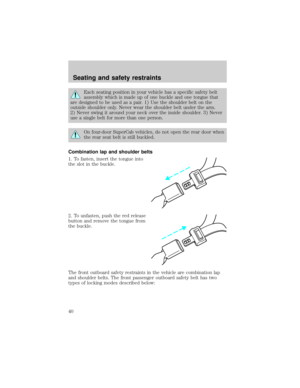 40
40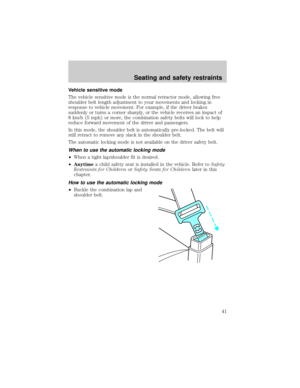 41
41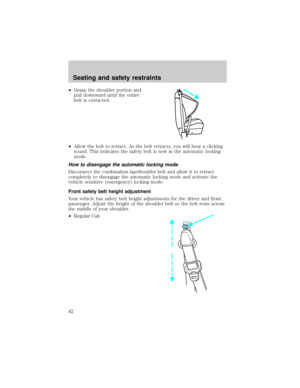 42
42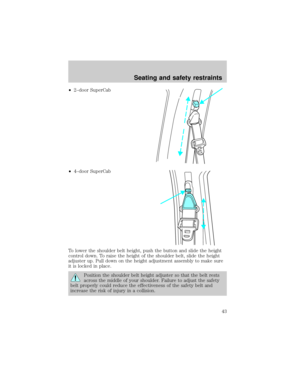 43
43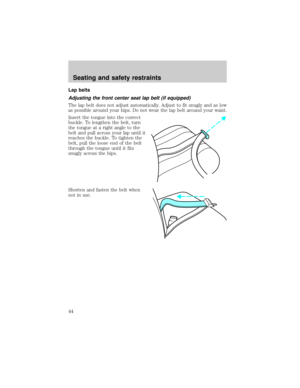 44
44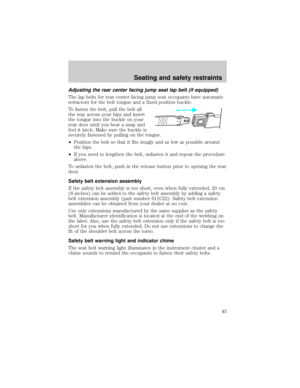 45
45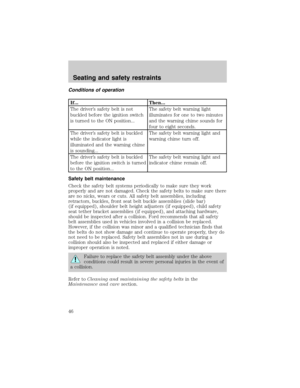 46
46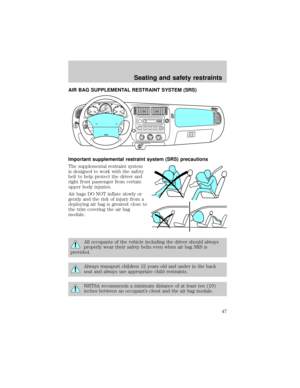 47
47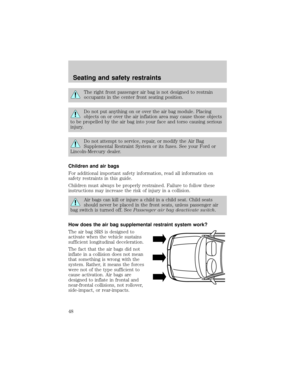 48
48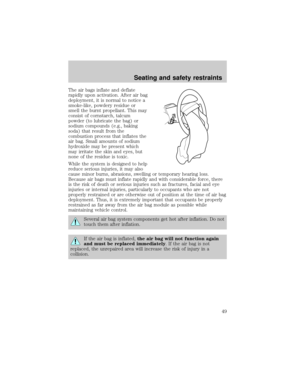 49
49 50
50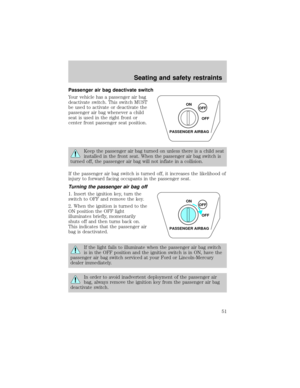 51
51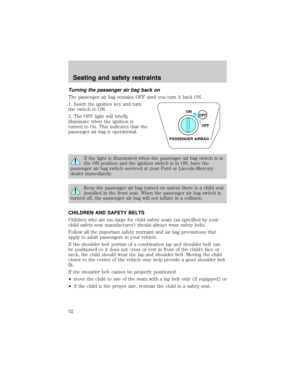 52
52 53
53 54
54 55
55 56
56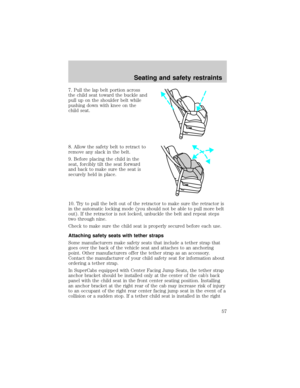 57
57 58
58 59
59 60
60 61
61 62
62 63
63 64
64 65
65 66
66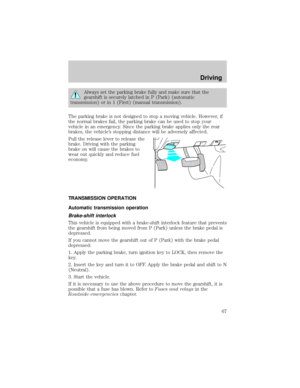 67
67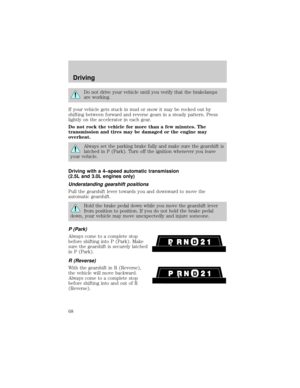 68
68 69
69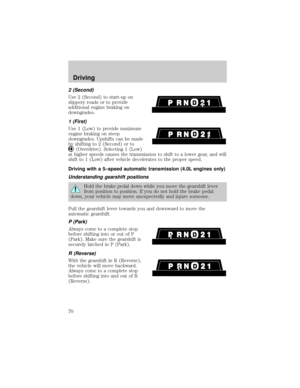 70
70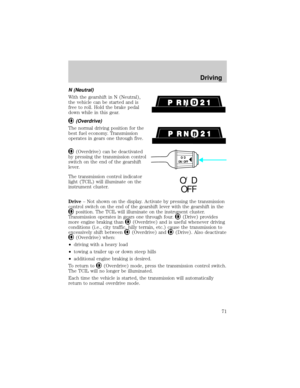 71
71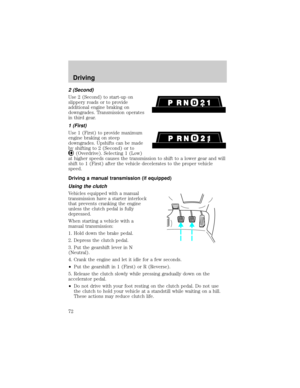 72
72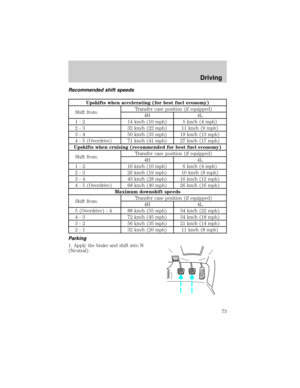 73
73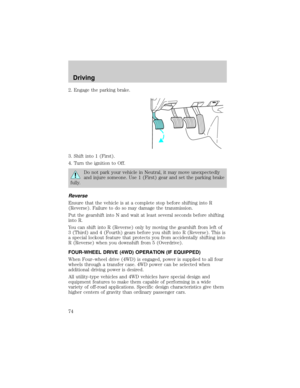 74
74 75
75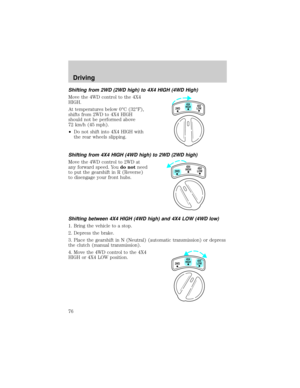 76
76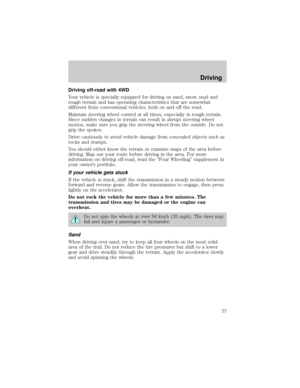 77
77 78
78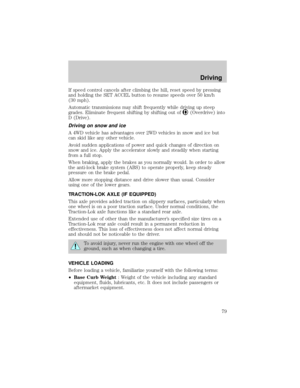 79
79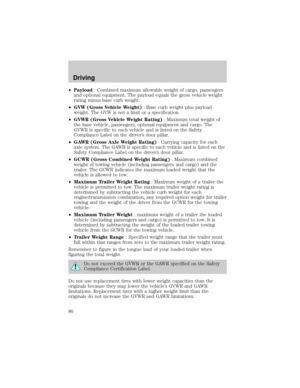 80
80 81
81 82
82 83
83 84
84 85
85 86
86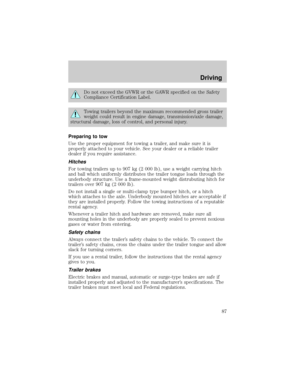 87
87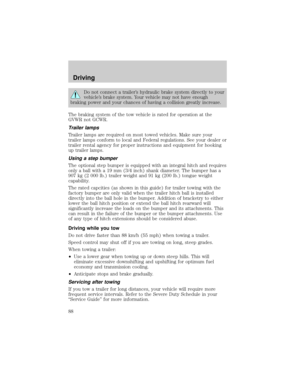 88
88 89
89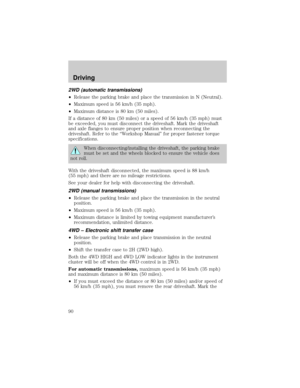 90
90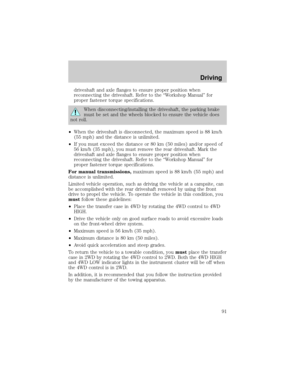 91
91 92
92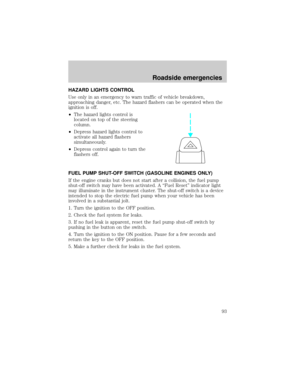 93
93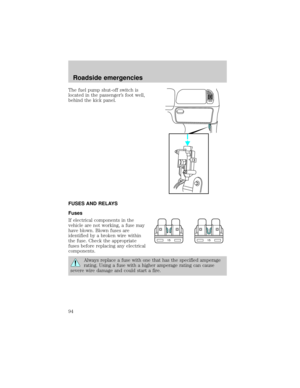 94
94 95
95 96
96 97
97 98
98 99
99 100
100 101
101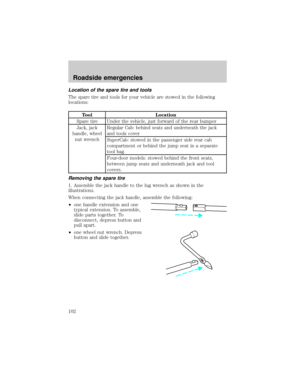 102
102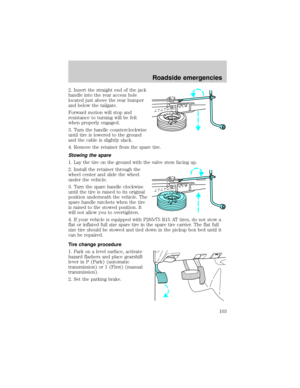 103
103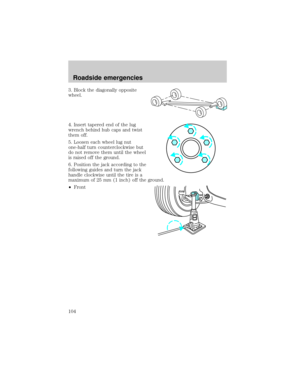 104
104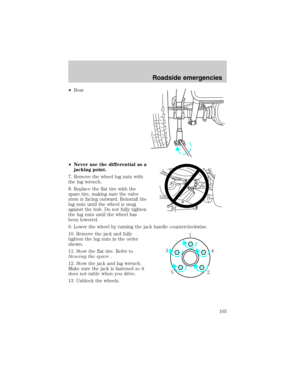 105
105 106
106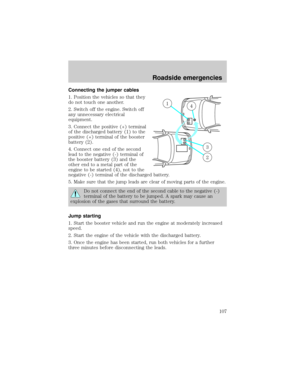 107
107 108
108 109
109 110
110 111
111 112
112 113
113 114
114 115
115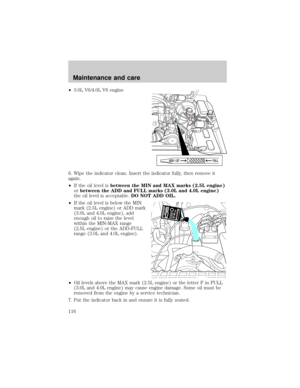 116
116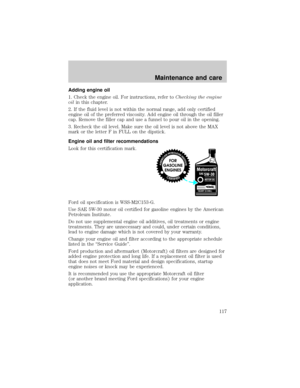 117
117 118
118 119
119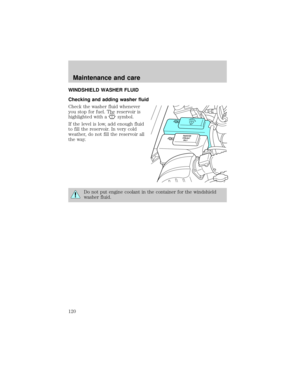 120
120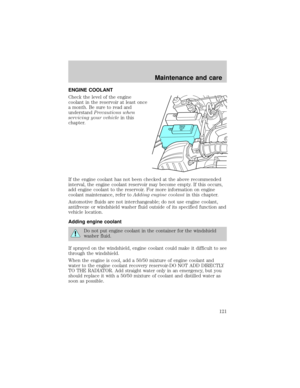 121
121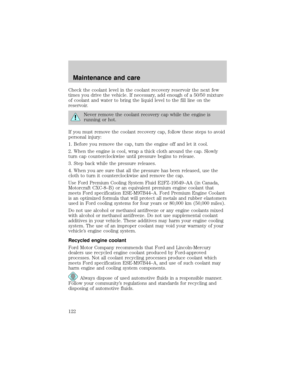 122
122 123
123 124
124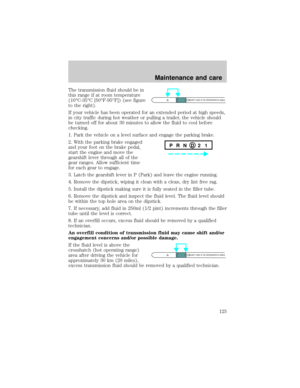 125
125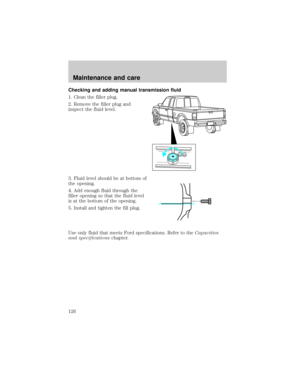 126
126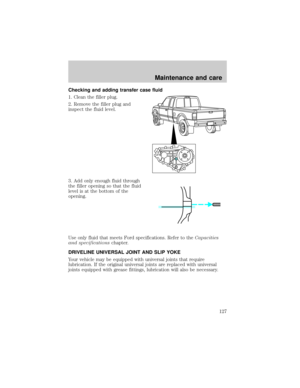 127
127 128
128 129
129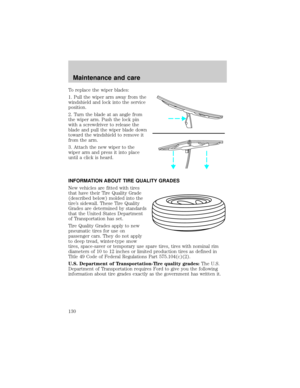 130
130 131
131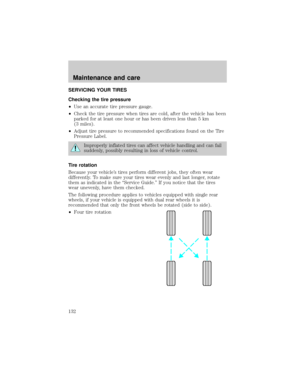 132
132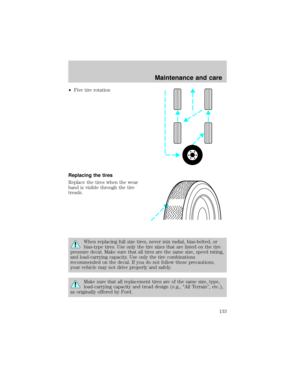 133
133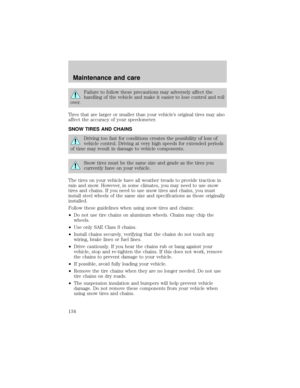 134
134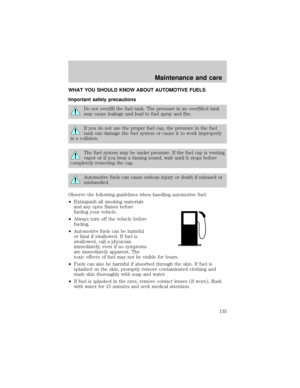 135
135 136
136 137
137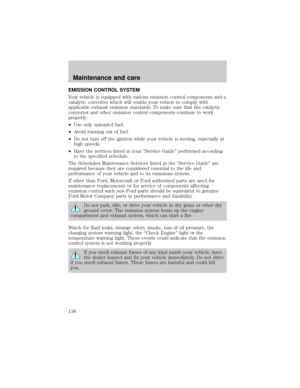 138
138 139
139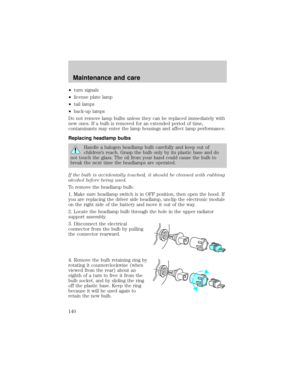 140
140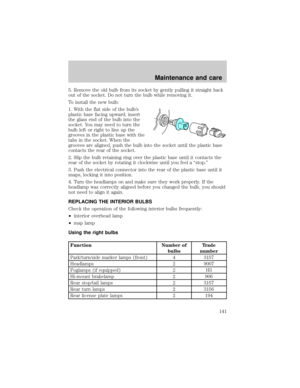 141
141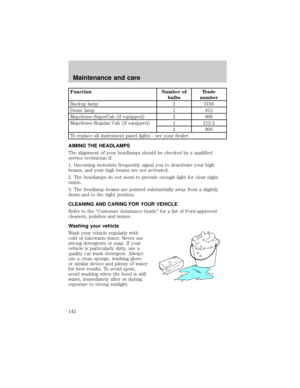 142
142 143
143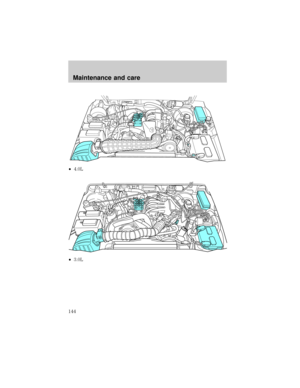 144
144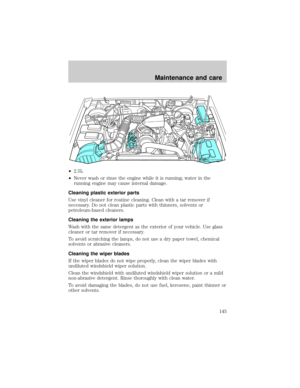 145
145 146
146 147
147 148
148 149
149 150
150 151
151 152
152 153
153 154
154 155
155 156
156 157
157 158
158 159
159