1998 CHEVROLET VENTURE child restraint
[x] Cancel search: child restraintPage 14 of 474
a Section 1 Seats r--Id Restraint Systems
m
Here you’ll find information about the seats in your Chevrolet and how to use your safety belts properly. You can also
learn about some things you should
not do with air bags and safety belts.
1-2
1-6
1-35
1-40
1-41 1-41
1-49 1-50
1-50
1-58 Seats and
Seat Controls
Rear Seats Safety Belts: They’re for Everyone
Here Are Questions Many People Ask About
Safety Belts
-- and the Answers
How to Wear Safety Belts Properly
Driver Position Safety Belt Use During Pregnancy
Right Front Passenger Position
Air Bag Systems
Rear Seat Passengers 1-62
1-64
1-66
1-68
1-7
1
1-82
1-98
1-101
1-101
1-102 Rear Safety Belt Comfort Guides
for Children
and Small Adults
Center Passenger Position (Bench Seat)
Center Passenger Position (Bucket Seat)
Children
Built-in Child Restraint (Option)
Child Restraints
Larger Children Safety Belt Extender
Checking
Your Restraint Systems
Replacing Restraint System
Parts
After a Crash
1-1
ProCarManuals.com
Page 31 of 474
1 Split Bench Seats
A seat that isn’t locked into place properly can
move around in
a collision or sudden stop. People
in the vehicle could be injured. Be sure to lock
the
seat into place properly when installing it.
7. Pull the nylon strap on the back of the seat and raise
the seatback until it locks upright.
8. Push and pull on the seatback to check that it is
locked into place.
If the seatback isn’t locked, it could move
forward in
a sudden stop or crash. That could
cause injury to the person sitting there. Always
press rearward
on the seatback to be sure it
is locked.
I I
If you have the split bench seat (50/50 or 40/60), the
seatbacks can be folded down individually and the
sections can be removed individually.
The sections can
also be adjusted forward or rearward individually.
The second row
(40/60) split bench may be equipped
with built-in child restraint@). See “Built-In Child
Restraint” in the Index.
Folding
or Reclining the Seatbacks
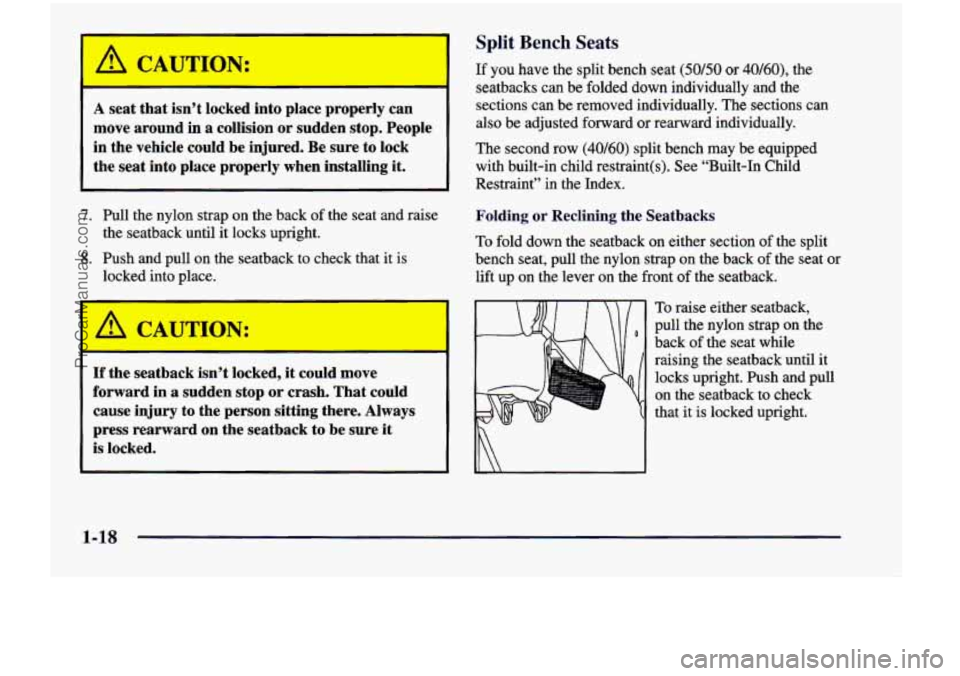
To fold down the seatback on either section of the split
bench seat, pull the nylon strap
on the back of the seat or
lift up on the lever on the front
of the seatback.
To raise either seatback,
pull the nylon strap on the
back
of the seat while
raising the seatback until it
locks upright. Push and pull
on the seatback to check
that it is locked upright.
1-18
ProCarManuals.com
Page 39 of 474
Bucket Seats
There are three types of rear bucket seats: RIGHT
ONLY, CENTER OR LEFT and LEFT ONLY.
RIGHT ONLY and LEFT ONLY seats may be equipped
with the built-in child restraint option.
The rear bucket seats can be removed to provide extra
storage. Each seat that has the built-in child restraint
option fits in only one location
in your vehicle, but seats
that don't have the built-in child restraint option can be
moved to different rows.
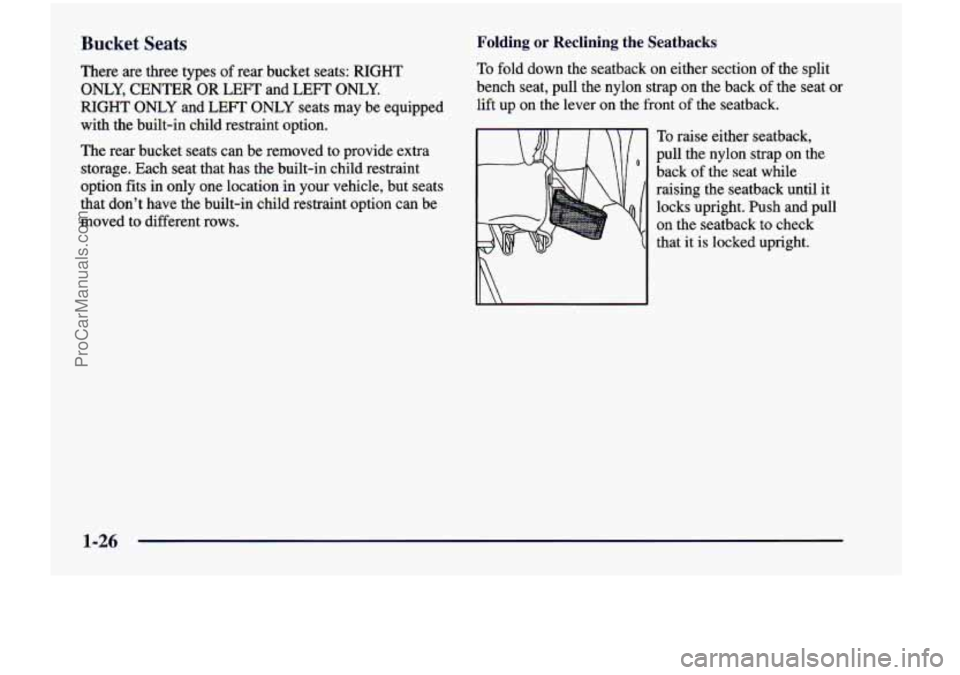
Folding or Reclining the Seatbacks
To fold down the seatback on either section of the split
bench seat, pull the nylon strap
on the back of the seat or
lift up on the lever on the front of the seatback.
To raise either seatback,
pull the nylon strap
on the
back
of the seat while
raising the seatback until
it
locks upright. Push and pull
on the seatback to check
that
it is locked upright.
1-26
ProCarManuals.com
Page 43 of 474
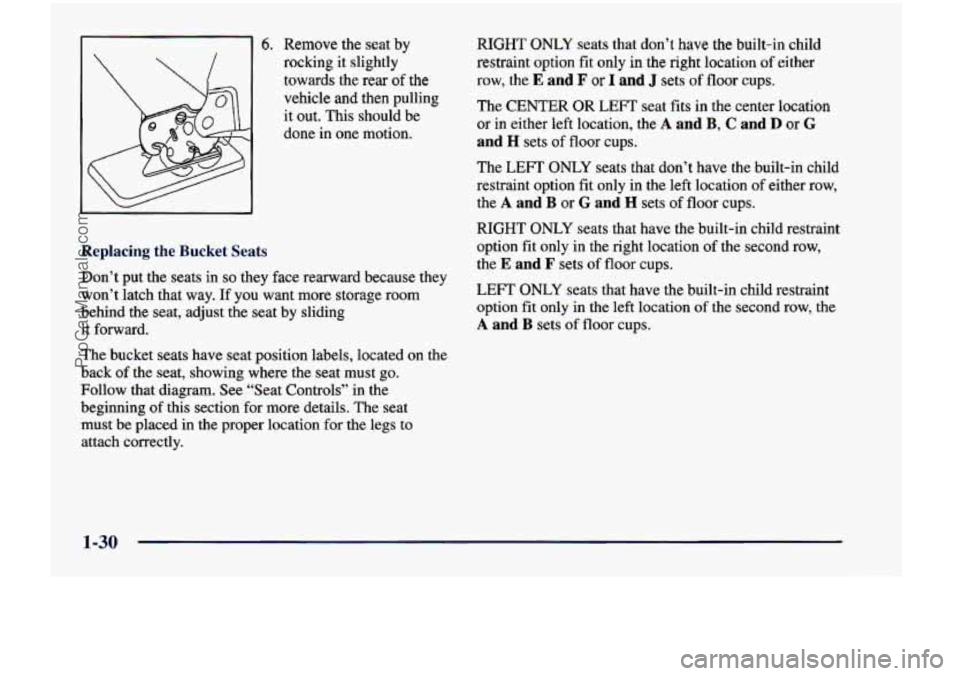
6. Remove the seat by
rocking it slightly
towards the rear
of the
vehicle and then pulling
it out. This should be
done
in one motion.
Replacing the Bucket Seats
Don’t put the seats in so they face rearward because they
won’t latch that way.
If you want more storage room
behind the seat, adjust the seat by sliding
it forward.
The bucket seats have seat position labels, located on the
back
of the seat, showing where the seat must go.
Follow that diagram. See “Seat Controls” in the
beginning
of this section for more details. The seat
must be placed in the proper location for
the legs to
attach correctly. RIGHT
ONLY seats that don’t have the built-in child
restraint option
fit only in the right location of either
row, the
E and F or I and J sets of floor cups.
The
CENTER OR LEFT seat fits in the center location
or in either left location, the A and B, C and D or G
and H sets of floor cups.
The
LEFT ONLY seats that don’t have the built-in child
restraint option fit only in the left location
of either row,
the
A and B or G and H sets of floor cups.
RIGHT ONLY seats that have the built-in child restraint
option
fit only in the right location of the second row,
the
E and F sets of floor cups.
LEFT ONLY seats that have the built-in child restraint
option fit only in the left location
of the second row, the
A and B sets of floor cups.
1-30
ProCarManuals.com
Page 54 of 474
How to Wear Safety Belts Properly
Adults
This part is only for people of adult size.
Be aware that there are special things to know about safety
belts
and children. And there are different rules for smaller
children and babies.
If a child will be riding in your
vehicle, see the part of
hs manual called “Children.”
Follow those rules for everyone’s protection.
First, you’ll want to know which restraint systems your
vehicle has.
We’ll start with the driver position.
Driver Position
This part describes the driver’s restraint system.
Lap-Shoulder Belt
The driver has a lap-shoulder belt. Here’s how to wear
it properly.
1. Close and lock the door.
2. Adjust the seat (to see how, see “Seats” in the Index)
so you can sit up straight.
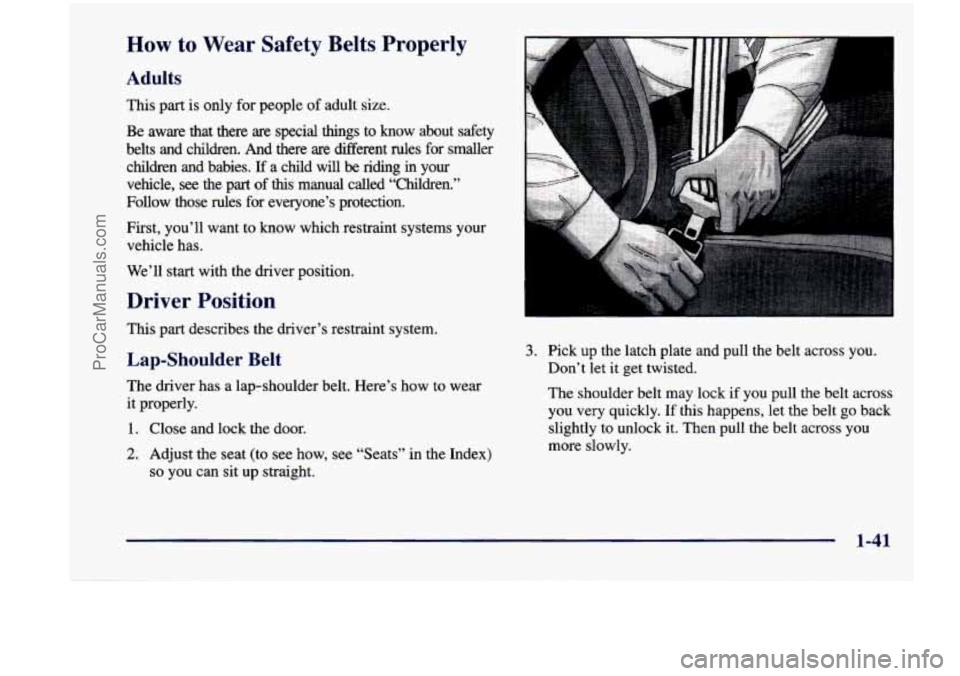
3. Pick up the latch plate and pull the belt across you.
Don’t let it get twisted.
The shoulder belt
may lock if you pull the belt across
you very quickly. If this happens, let the belt go back
slightly to unlock it. Then pull the belt across you
more slowly.
1-41
ProCarManuals.com
Page 63 of 474
The best way to protect the fetus is to protect the mother.
When a safety belt is worn properly, it’s more likely that the
fetus won’t be hurt
in a crash. For pregnant women, as for
anyone,
the key to making safety belts effective is wearing
them properly.
Right Front Passenger Position
To learn how to wear the right front passenger’s safety belt
properly, see “Driver Position” earlier
in this section.
The right front passenger’s safety belt works the same way \
as
the driver’s safety belt
-- except for one thing. If you ever pull
the shoulder portion of the belt out all the way, you will
engage the
child restraint locking feature. If this happens, just
let the belt go back all the way and start again.
Air Bag Systems
This part explains the frontal and side impact air bag systems.
Your vehicle has four air bags -- a “Next Generation”
reduced-force frontal
air bag for the driver, another “Next
Generation” reduced-force
frontal air bag for the right front
passenger, a side impact
air bag for the driver, and
another side impact
air bag for the right front passenger.
Reduced-force frontal
air bags are designed to help reduce
the
risk of injury from the force of an inflating air bag. But
even these
air bags must inflate very quickly if they are to do
their job and comply with federal regulations. Here
are the most important things to know
about the -ir
bag systems:
CAUTION:
You can be severely injd or killed in a crash if
you aren’t wearing your safety belt -- even if you
have
air bags. Wearing your safety belt during a
crash helps reduce your chance of hitting things
inside the vehicle or being ejected from it.
Air bags
are “supplemental restraints”
to the safety belts.
All air bags -- even reduced-force air bags -- are
designed to work with safety belts but don’t
replace them.
Reduced-force frontal
air bags for the driver and
right front passenger are designed to work only
in
moderate to severe crashes where the front of your
vehicle
hits something. They aren’t designed to
inflate
at all in rollover, rem, side or low-speed
frontal crashes. And, for unrestrained occupants,
reduced-force frontal
air bags may provide less
protection in frontal crashes than more forceful
air
bags have provided in the past. The side impact air
CAUTION: (Continued)
1-50
ProCarManuals.com
Page 64 of 474
bags for the drLa’ and right front passenger are
designed to inflate
only in moderate to severe
crashes where something
hits the side of your
vehicle. They aren’t designed to inflate
in frontal,
in rollover or in rear crashes. Everyone in your
vehicle should
wear a safety belt properly --
whether or not there’s an air bag for that person.
Both frontal and side impact
air bags inflate with
great force, faster than the blink of an eye. If you’re
too close to an inflating air bag, it could seriously
injure you. This is true even with reduced-force
frontal
air bags. Safety belts help keep you in position
for
air bag inflation before and during a crash.
Always wear your safety belt, even with
reduced-force frontal
air bags. The driver should sit
as far back as possible while still maintaining control
of the vehicle. Front occupants should not lean on or
sleep against the door. Children
who are up against,
or very close to, an
air bag when it inflates can be seriously injured
or killed. This
is true even though your vehicle
has reduced-force frontal
air bags. Air bags plus
lap-shoulder belts offer the best protection for
adults and older children, but not for young
children and infants. Neither the vehicle’s safety
belt system nor
its air bag system is designed for
them. Young children and infants need the
protection that a child restraint system can
provide.
Always secure children properly in your
vehicle.
To read how, see the part of this manual
called “Children” and see the caution labels on
the sunvisors and the right front passenger’s
safety belt.
1-51
ProCarManuals.com
Page 75 of 474
Rear Safety Belt Comfort Guides for Children and
Small Adults
Your vehicle may have rear shoulder belt comfort guides.
This feature will provide added safety belt comfort for
children who have outgrown child restraints and for small
adults. When installed
on a shoulder belt, the comfort
guide pulls the belt away from the neck and head.
If your vehicle has bucket seats in the second row, there
is one guide for each outside passenger position. If your
vehicle has a bench seat in the second row, there is one
guide for the left-hand outside passenger position. If
your vehicle has third-row seats, there
is one guide for
each outside passenger position.
To provide added safety
belt comfort for children who have outgrown child
restraints and for smaller adults, the comfort guides may
be installed on the shoulder belts. Here’s how
to install a
comfort guide and use the safety belt:
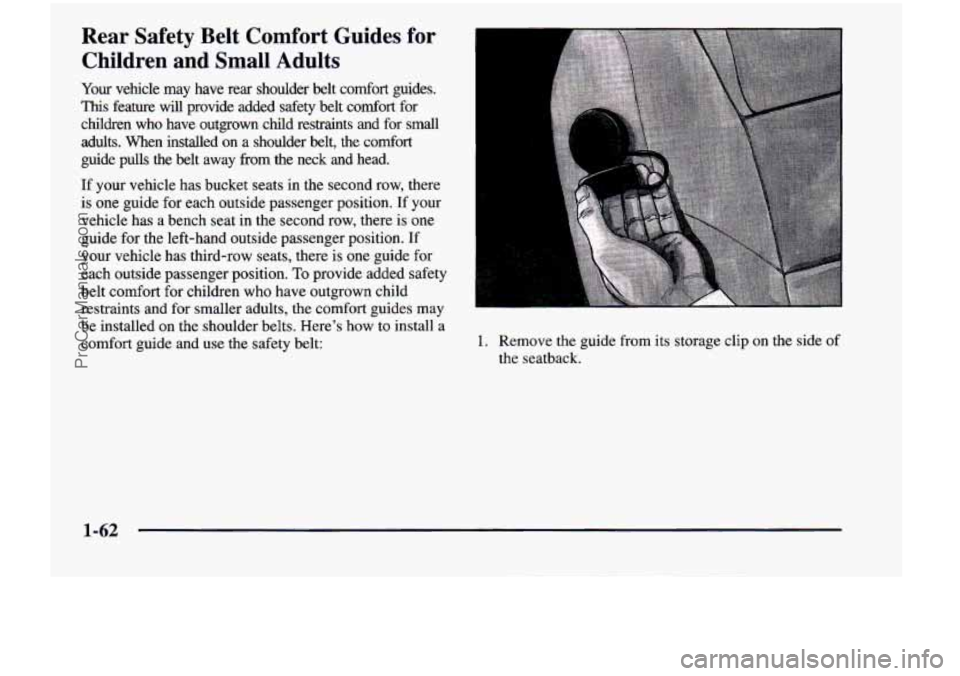
1. Remove the guide from its storage clip on the side of
the seatback.
1-62
ProCarManuals.com