1998 CHEVROLET PRIZM tire type
[x] Cancel search: tire typePage 166 of 364
Downloaded from www.Manualslib.com manuals search engine Skidding
In a skid, a driver can lose control of the vehicle.
Defensive drivers avoid most skids by taking
reasonable care suited to existing conditions, and by
not “overdriving” those conditions. But skids are
always possible.
The three types of skids correspond to your vehicle’s
three control systems. In the braking skid, your wheels
aren’t rolling. In the steering or cornering skid, too
much speed or steering in a curve causes tires to slip and
lose cornering force. And in the acceleration skid, too
much throttle causes the driving wheels to spin.
A cornering skid and an acceleration skid are best
handled
by easing your foot off the accelerator pedal.
If your vehicle starts to slide, ease your foot off the
accelerator pedal and quickly steer the way you want the
vehicle
to go. If you start steering quickly enough, your
vehicle may straighten out. Always be ready for a
second skid
if it occurs.
Of course, traction is reduced when water, snow, ice,
gravel or other material is on the road. For safety, you’ll
want to slow down and adjust your driving to these conditions.
It is important to slow down on slippery
surfaces because stopping distance
will be longer and
vehicle control more limited.
While driving on a surface with reduced traction,
try
your best to avoid sudden steering, acceleration or
braking (including engine braking by shifting to a
lower gear). Any sudden changes could cause the tires
to slide.
You may not realize the surface is slippery until
your vehicle is skidding. Learn to recognize warning
clues
-- such as enough water, ice or packed snow on
the road to make a “mirrored surface”
-- and slow down
when you have any doubt.
If you have the anti-lock braking system, remember: It
helps avoid only the braking skid. If
you do not have
anti-lock, then in a braking skid (where the wheels are
no longer rolling), release enough pressure on the brakes
to get the wheels rolling again. This restores steering
control.
Push the brake pedal down steadily when you
have to stop suddenly.
As long as the wheels are rolling,
you will have steering control.
Page 185 of 364
Downloaded from www.Manualslib.com manuals search engine If you’re using a weight-carrying hitch, the trailer
tongue (A) should weigh
10 percent of the total loaded
trailer weight (B). If you have a weight-distributing
hitch, the trailer tongue
(A) should weigh 12 percent of
the total loaded trailer weight (B).
After you’ve loaded your trailer, weigh the trailer and
then the tongue, separately, to see if the weights are
proper.
If they aren’t, you may be able to get them right
simply by moving some items around in the trailer.
Total Weight on Your Vehicle’s Tires
Be sure your vehicle’s tires are inflated to the upper
limit for cold tires. You’ll find these numbers
on the
Tire-Loading Information label at the rear edge of the
driver’s door opening or see “Loading Your Vehicle” in
the Index. Then be sure you don’t
go over the GVW
limit for your vehicle, including the weight of the
trailer tongue.
Hitches
It’s important to have the correct hitch equipment.
Crosswinds, large trucks going by and rough roads
are a few reasons why you’ll need the right hitch.
Here are some rules to follow:
The rear bumper on your vehicle is not intended
for hitches.
Do not attach rental hitches or other
bumper-type hitches to it. Use only a frame-mounted
hitch that does not attach to the bumper.
Will you have to make any holes in the body of your vehicle when you install a trailer hitch? If you do,
then be sure to seal the holes later when you remove
the hitch. If you don’t seal them, deadly carbon
monoxide
(CO) from your exhaust can get into your
vehicle (see “Carbon Monoxide” in the Index).
Dirt
and water can, too.
4-33
Page 198 of 364
Downloaded from www.Manualslib.com manuals search engine Towing Your Vehicle
Try to have a Chevrolet dealer or a professional towing
service tow your vehicle. See “Roadside Assistance”
in the Index.
If your vehicle has been changed or modified since it
was factory-new by adding aftermarket items like fog
lamps, aero skirting, or special tires and wheels, these
instructions and illustrations may not be correct.
Before you do anything, turn on the hazard
warning flashers.
When you call, tell the towing service:
That your vehicle cannot be towed from the front
That your vehicle has front-wheel drive.
The make, model and year of your vehicle.
Whether you can still move the shift lever.
or
rear with sling-type equipment.
If there was an accident, what was damaged.
When the towing service arrives, let the tow operator
know that this manual contains detailed towing
instructions and illustrations. The operator may
want to see the
I
I
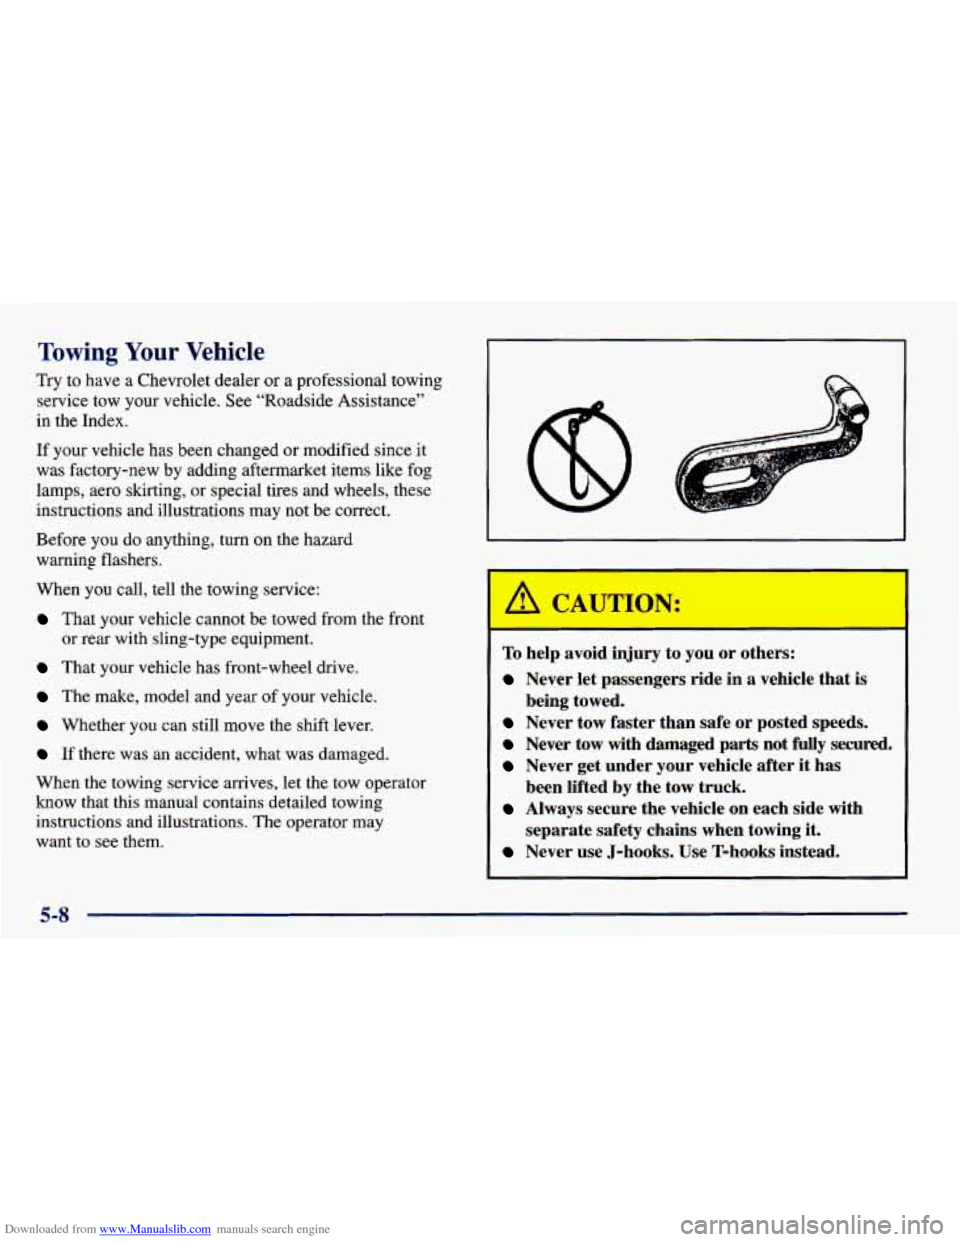
To help avoid injury to you or others:
Never let passengers ride in a vehicle that is
Never tow faster than safe or posted speeds.
Never tow with damaged parts not fully secured.
Never get under your vehicle after it has
been lifted by the tow truck.
Always secure the vehicle on each side with
separate safety chains when towing it.
Never use J-hooks. Use T-hooks instead.
being towed.
5-8
Page 264 of 364

Downloaded from www.Manualslib.com manuals search engine ~ Inflation -- Tire Pressure
The Tire-Loading Information label, which is in your
glove compartment, shows the correct inflation
pressures for your tires when they’re cold. “Cold”
means your vehicle has been sitting for at least three
hours or driven no more than
1 mile (1.6 km).
NOTICE:
Don’t let anyone tell you that underinflation or
overinflation
is all right. It’s not. If your tires
don’t have enough air (underinflation), you can
get the following:
Too much flexing
Too much heat
0 Tire overloading
Bad wear
Bad handling
Bad fuel economy.
NOTICE: (Continued)
I NOTICE: (Continued) I
If your tires have too much air (overinflation),
you can get the following:
Unusual wear
Bad handling
Rough ride
0 Needless damage from road hazards.
When to Check
Check your tires once a month or more.
Don’t forget your compact spare tire. It should be at
60 psi
(420 Wa).
How to Check
Use a good quality pocket-type gage to check tire
pressure. You can’t tell
if your tires are properly inflated
simply by
looking at them. Radial tires may look
properly inflated even when they’re underinflated.
Be sure to put the valve caps back on the valve stems. They help prevent leaks by keeping out dirt
and moisture.
6-38
Page 266 of 364

Downloaded from www.Manualslib.com manuals search engine When It’s Time for New Tires
One way to tell when it’s
time for new tires
is to
check the treadwear
indicators, which will
appear when your tires have
only 1/16 inch (1.6 mm) or
less of tread remaining.
You need a new tire if any of the following statements
are true:
0 You can see the indicators at three or more places
around the tire.
0 You can see cord or fabric showing through the
tire’s rubber.
0 The tread or sidewall is cracked, cut or snagged deep
enough to show cord or fabric.
The tire has a bump, bulge or split.
0 The tire has a puncture, cut or other damage that
can’t be repaired well because of the size or location
of the damage.
Buying New Tires
To find out what kind and size of tires you need, look
at the Tire-Loading Information label.
Make sure the replacements are the same size, load
range, speed rating and construction type (bias,
bias-belted or radial) as your original tires.
Mixing tires could cause you to lose control while
driving.
If you mix tires of different sizes or types
(radial and bias-belted tires), the vehicle may not
handle properly, and you could have a crash.
Using tires of different sizes may also cause
damage to your vehicle. Be sure to use the same
size and type tires
on all wheels.
It’s all right to drive with your compact spare,
though. It was developed for use
on your vehicle.
6-40
Page 267 of 364
Downloaded from www.Manualslib.com manuals search engine I
A CAUTION:
If you use bias-ply tires on your vehicle, the wheel rim flanges could develop cracks after
many miles of driving.
A tire and/or wheel could
fail suddenly, causing a crash. Use only radial-ply tires with the wheels on
your vehicle.
I
Uniform Tire Quality Grading
The following information relates to the system
developed by the United States National Highway
Traffic Safety Administration, which grades tires by
treadwear, traction and temperature performance. (This
applies only to vehicles sold in the United States.) The
grades are molded on the sidewalls of most passenger
car tires. The Uniform Tire Quality Grading system does
not apply to deep tread, winter-type snow tires,
space-saver or temporary use spare tires, tires with
nominal rim diameters of
10 to 12 inches (25 to 30 cm),
or to some limited-production tires.
While the tires available on General Motors passenger cars and light trucks may vary with respect to these grades, they must
also conform to Federal
safety
requirements and additional General Motors Tire
Performance Criteria (TPC) standards.
Treadwear
The treadwear grade is a comparative rating based on
the wear rate
of the tire when tested under controlled
conditions on a specified government test course.
For example, a tire graded 150 would wear one and a
half (1
1/2) times as well on the government course
as a tire graded 100. The relative performance
of
tires depends upon the actual conditions of their use,
however, and may depart significantly from the norm
due to variations in driving habits, service practices
and differences
in road characteristics and climate.
Traction -- A, B, C
The traction grades, from highest to lowest, are A, B, and
C, and they represent the tire’s ability to stop on wet
pavement
as measured under controlled conditions on
specified government test surfaces
of asphalt and concrete.
A tire marked
C may have poor traction performance.
Warning: The traction grade assigned to this tire is based
on braking (straight ahead) traction tests and does not
include cornering (turning) traction.
6-41
Page 270 of 364
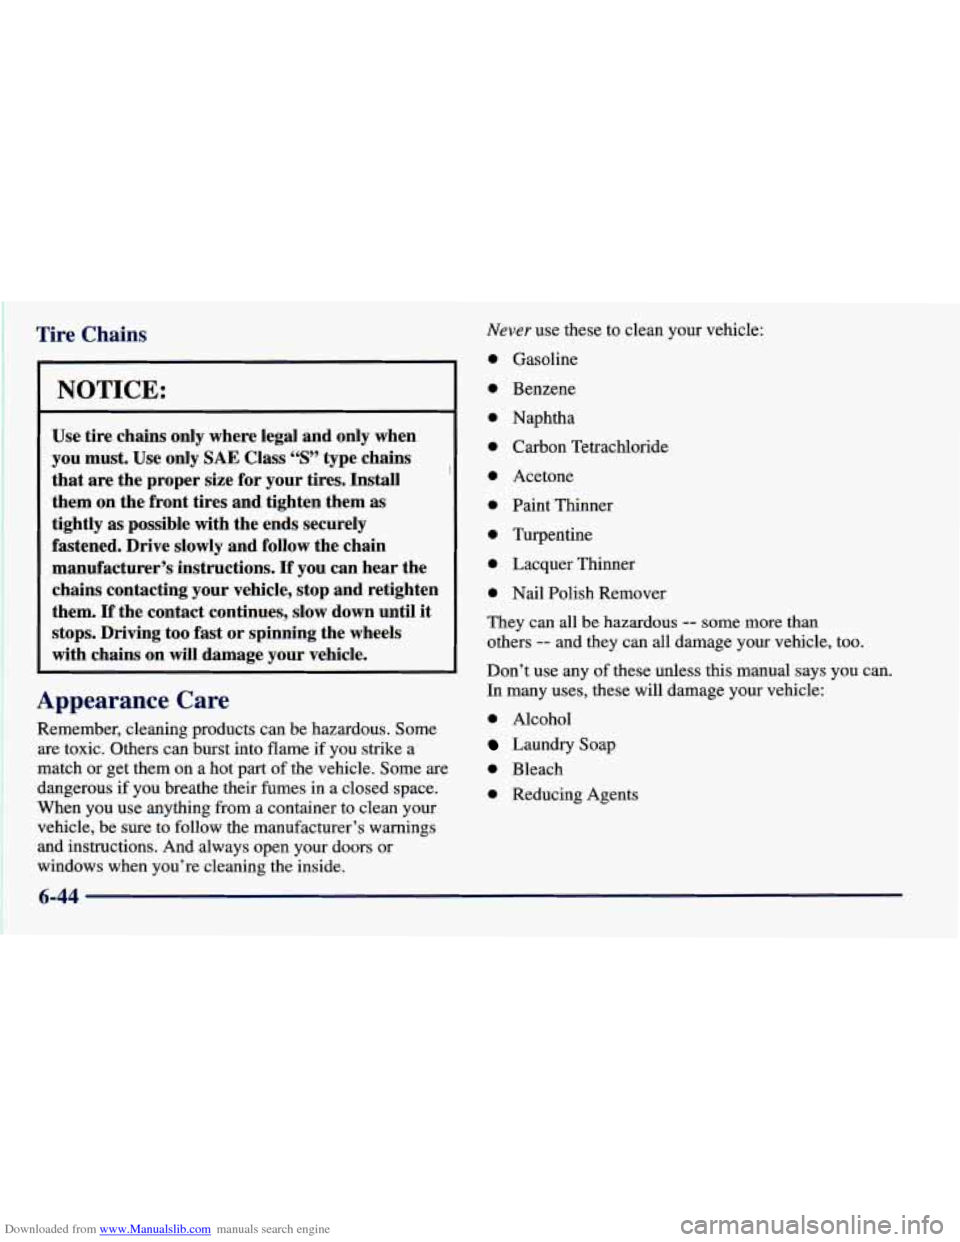
Downloaded from www.Manualslib.com manuals search engine Tire Chains
NOTICE:
Use tire chains only where legal and only when
you must. Use only
SAE Class “S” type chains
that are the proper size for your tires. Install
them on the front tires and tighten them as
tightly as possible with the ends securely
fastened. Drive slowly and follow the chain
manufacturer’s instructions.
If you can hear the
chains contacting your vehicle, stop and retighten
them.
If the contact continues, slow down until it
stops. Driving too fast or spinning the wheels
with chains on will damage your vehicle.
Appearance Care
Remember, cleaning products can be hazardous. Some
are toxic. Others can burst into flame if you strike a
match or get them on a hot part of the vehicle. Some
are
dangerous if you breathe their fumes in a closed space.
When you use anything from a container to clean your
vehicle, be sure to follow the manufacturer’s warnings
and instructions. And always open your doors or
windows when you’re cleaning the inside.
Never use these to clean your vehicle:
0 Gasoline
0 Benzene
0 Naphtha
0 Carbon Tetrachloride
0 Acetone
0 Paint Thinner
0 Turpentine
0 Lacquer Thinner
0 Nail Polish Remover
They can all be hazardous
-- some more than
others
-- and they can all damage your vehicle, too.
Don’t use any of these unless this manual says you can.
In many uses, these will damage your vehicle:
0 Alcohol
Laundry Soap
0 Bleach
0 Reducing Agents
6-44
Page 278 of 364
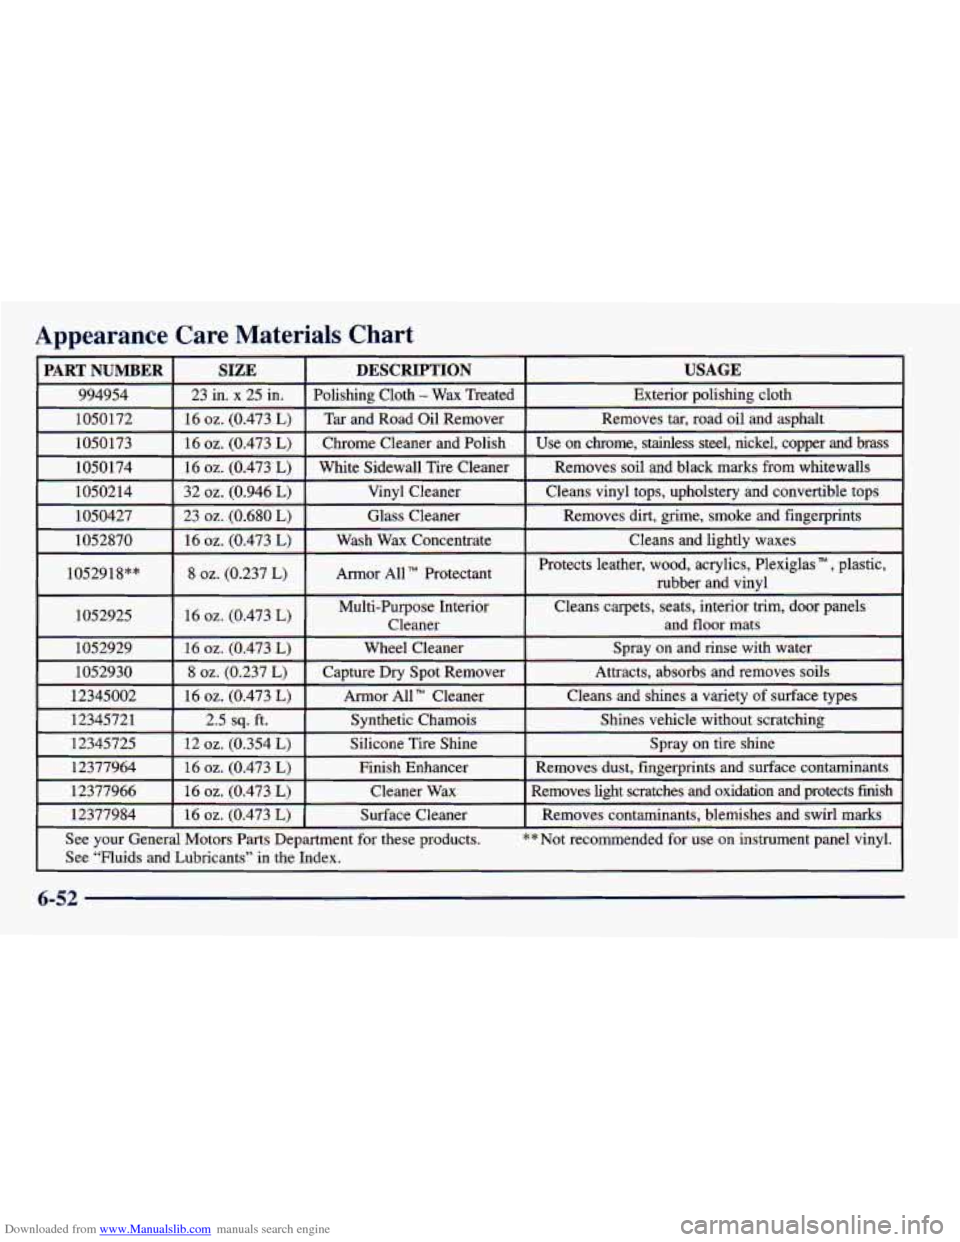
Downloaded from www.Manualslib.com manuals search engine Appearance
I 1052918””
I 1052925
Care Materials Chart
SIZE USAGE DESCRIPTION
23 in. x 25 in.
Exterior polishing cloth
Polishing Cloth - Wax
Treated
16
oz. (0.473 L)
Chrome Cleaner and Polish
16 oz. (0.473 L)
Removes tar, road oil and asphalt
Tar and Road Oil Remover
Cleans and lightly waxes
Wash Wax Concentrate
16
oz. (0.473 L)
Removes dirt, grime, smoke and fingerprints
Glass Cleaner
23 oz. (0.680 L)
Cleans vinyl tops, upholstery and convertible tops
Vinyl Cleaner
32 oz. (0.946 L)
Removes soil and black marks from whitewalls
White Sidewall Tire Cleaner 16 oz. (0.473 L)
Use on chrome, stainless steel, nickel, copper and brass
8
02. (0.237 L) Armor All TM Protectant
16
oz. (0.473 L)
Protects leather, wood, acrylics, Plexiglas , plastic,
rubber and vinyl
Multi-Purpose Interior Cleans carpets, seats, interior trim, door panels
Cleaner and
floor mats
1052929
See your General Motors Parts Department
for these products. ** Not recommended for use on instrument panel vinyl.
Removes
contaminants, blemishes and swirl marks
Surface Cleaner
16
oz. (0.473 L) 12377984 Removes light scratches and oxidation and protects finish
Cleaner Wax
16
oz. (0.473 L) 12377966 Removes
dust, fingerprints and surface contaminants
Finish Enhancer
16
oz. (0.473 L) 12377964 Spray
on tire shine
Silicone Tire Shine
12 oz. (0.354 L) 12345725 Shines
vehicle without scratching
Synthetic Chamois
2.5 sq. ft. 1234572
1 Cleans
and shines a variety of surface types
Armor All
TM Cleaner
16 oz. (0.473 L) 12345002 Attracts,
absorbs and removes soils
Capture
Dry Spot Remover 8 oz. (0.237 L) 1052930 Spray on
and rinse with water
Wheel Cleaner
16
oz. (0.473 L)
See “Fluids and Lubricants” in the Index.
6-52