1998 CHEVROLET MALIBU trailer
[x] Cancel search: trailerPage 78 of 362
Downloaded from www.Manualslib.com manuals search engine New Vehicle “Break-In”
NOTICE:
Your vehicle doesn’t need an elaborate
“break-in.” But
it will perform better in the long
run if you follow these guidelines:
0
0
0
Don’t drive at any one speed -- fast or
slow
-- for the first 500 miles (805 km).
Don’t make full-throttle starts.
Avoid making hard stops for the first
200 miles (322 km) or so. During this time
your new brake linings aren’t yet broken
in. Hard stops with new linings can mean
premature wear and earlier replacement.
Follow this breaking-in guideline every
time you get new brake linings.
Don’t tow
a trailer during break-in.
See “Towing a Trailer’’ in the Index for
more information.
Ignition Positions
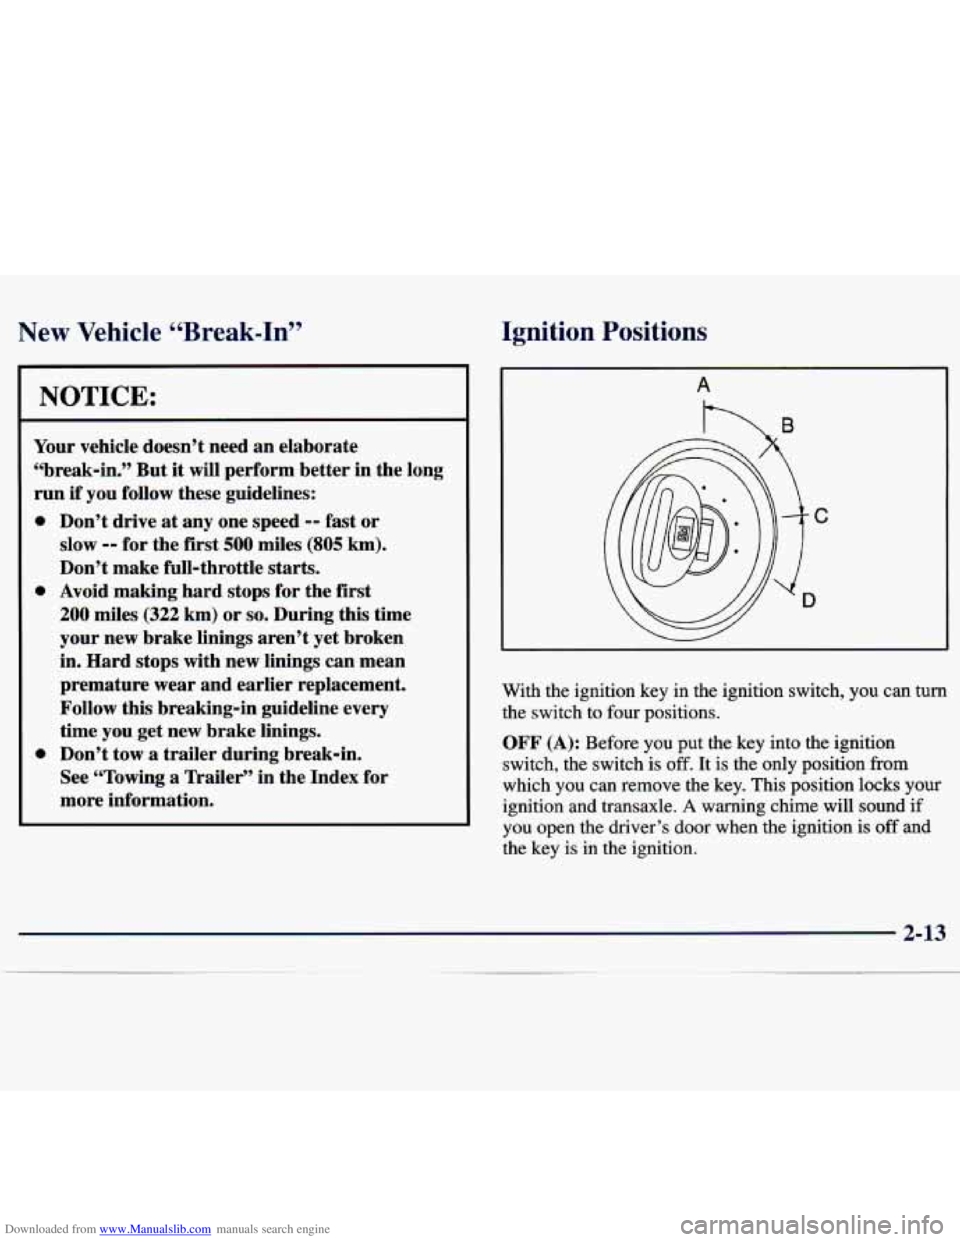
With the ignition key in the ignition switch, you can turn
the switch to four positions.
OFF (A): Before you put the key into the ignition
switch, the switch is
off. It is the only position from
which you can remove the key. This position locks your
ignition and transaxle.
A warning chime will sound if
you open the driver’s door when the ignition
is off and
the key is in the ignition.
2-13
Page 84 of 362
Downloaded from www.Manualslib.com manuals search engine PARK (P): This locks your front wheels. It’s the best
position to use when you start your engine because your
vehicle can’t move easily.
A CAUTION:
It is dangerous to get out of your vehicle if the
shift lever
is not fully in PARK (P) with the
parking brake firmly set. Your vehicle can roll.
Don’t leave your vehicle when the engine
is
running unless you have to. If you have left the
engine running, the vehicle can move suddenly.
You or others could be injured. To be sure your
vehicle won’t move, even when you’re on fairly
level ground, always set your parking brake and
move the shift lever to
PARK (P).
you’re pulling a trailer, see “Towing a Trailer” in
the Index.
, See “Shifting Into PARK (P)” in the Index. If
~
Ensure the shift lever is fully in PARK (P) range
before starting the engine. Your vehicle has a
Brake-Transaxle Shift Interlock. You have to apply
your regular brake before you can shift from PARK
(P)
when the ignition key is in ON. If you cannot shift out
of PARK
(P), ease pressure on the shift lever -- push the
shift lever all the way into PARK (P)
-- as you maintain
brake application. Then move the shift lever into the
gear you wish. (Press the shift lever button before
moving the shift lever.) See “Shifting Out of
PARK (P)”
later in this section.
REVERSE (R): Use this gear to back up.
I NOTICE: 1
Shifting to REVERSE (R) while your vehicle is
moving forward could damage your transaxle.
Shift to
REVERSE (R) only after your vehicle
is stopped. 1
To rock your vehicle back and forth to get out of snow,
ice or sand without damaging your transaxle, see
“Stuck: In Sand, Mud,
Ice or Snow’’ : Index.
2-19
Page 86 of 362
Downloaded from www.Manualslib.com manuals search engine THIRD (3): This position is also used for normal
driving, however, it offers more power and lower fuel
economy than AUTOMATIC
OVERDRIVE (D). Here
are some times you might choose THIRD
(3) instead of
AUTOMATIC OVERDRIVE
(D):
0 When driving on hilly, winding roads.
When towing a trailer, so there is less shifting
When going down a steep hill.
SECOND
(2): This position gives you more power but
lower fuel economy.
You can use SECOND (2) on hills.
It can help control your speed as you
go down steep
mountain roads, but then you would also want to use
your brakes
off and on.
between gears.
NOTICE:
Don’t
drive in SECOND (2) for more than 25 miles
(41 km), or at speeds over 55 mph (88 km/h), or
you can damage your transaxle. Use AUTOMATIC
OVERDRIVE @) or THIRD (3) as much as
possible. Don’t shift into SECOND (2) unless you
are going slower than 65 mph (105 km/h) or you
can damage your engine. FIRST
(1): This
position gives you even more power
(but lower fuel economy) than
SECOND (2). You can
use it on very steep hills, or
in deep snow or mud.
If the selector lever is put in FIRST
(I), the transaxle
won’t shift into first gear until the vehicle is going
slowly enough.
I
NOTICE:
If your front wheels can’t rotate, don’t try to
drive. This might happen if you were stuck in
very deep sand or mud
or were up against a solid
object. You can damage your transaxle.
Also, if you stop when going uphill, don’t hold
your vehicle there with only the accelerator
pedal. This could overheat and damage the
transaxle. Use your brakes or shift into
PARK (P)
to hold your vehicle in position on a hill.
2-21
Page 87 of 362
Downloaded from www.Manualslib.com manuals search engine Second-Gear Start
Your vehicle is equipped with a second-gear start
feature. Place the shift lever
in SECOND (2) gear to
provide more traction when you are starting on ice
or
other slippery surfaces. The transaxle will be in
SECOND (2) gear when the vehicle begins to move.
After starting in
SECOND (2) gear, place the shift lever
in
THIRD (3) or AUTOMATIC OVERDRIVE (D).
This feature is only for improved traction only when the
road surface is slippery and is not intended for
continuous use or when the vehicle is stuck in sand,
mud, ice, snow or gravel.
Parking Brake
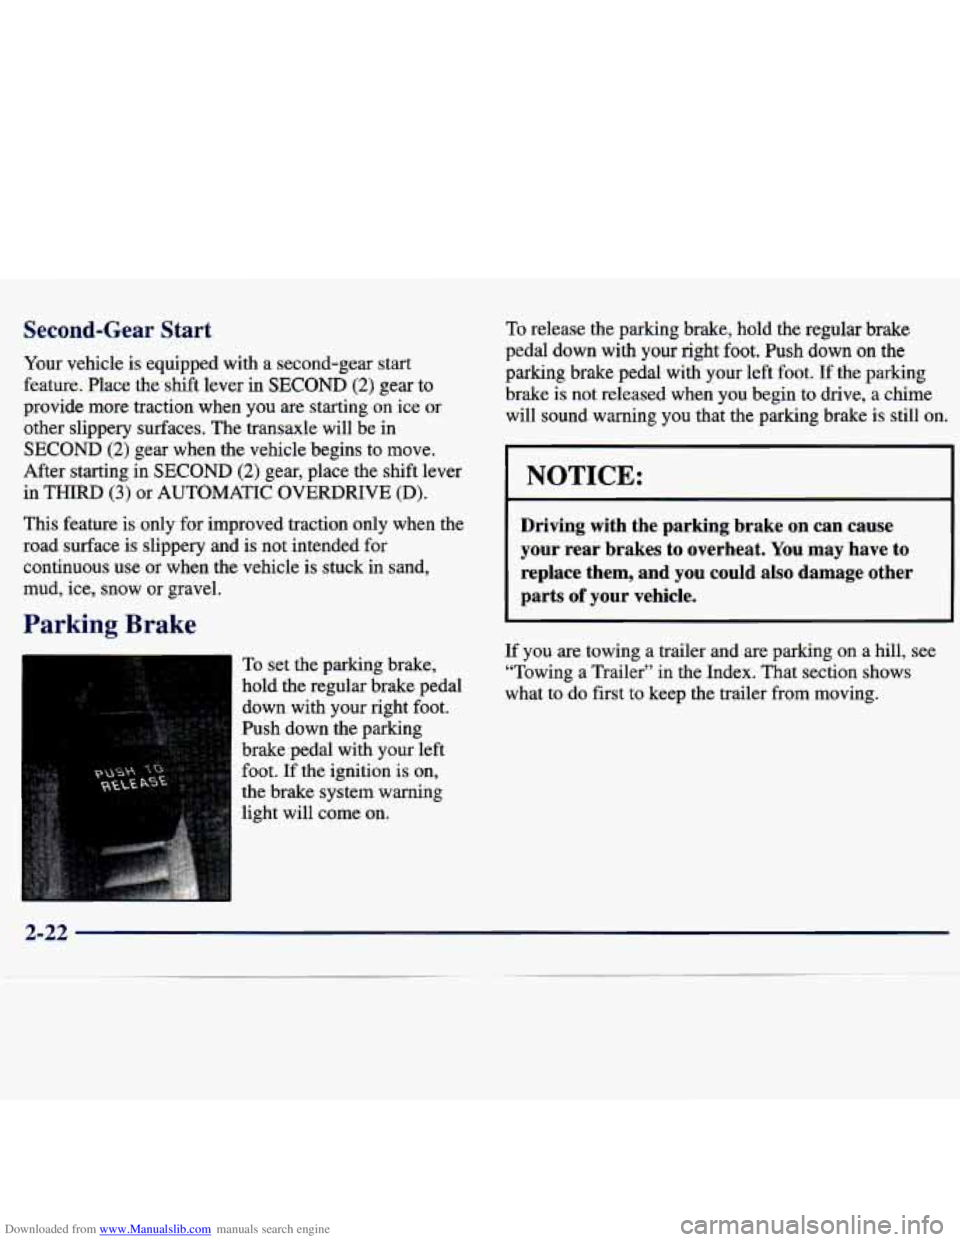
To set the parking brake,
hold the regular brake pedal
down with your right foot.
Push down the parking
brake pedal with your left
foot.
If the ignition is on,
the brake system warning
light will come on.
To release the parking brake, hold the regular brake
pedal down with your right foot. Push down
on the
parking brake pedal with your left foot. If the parking
brake is not released when you begin to
drive, a chime
will sound warning you that the parking brake is still on,
NOTICE:
Driving with the parking brake on can cause
your rear brakes to overheat. You may have
to
replace them, and you could also damage other
parts
of your vehicle.
If you are towing a trailer and are parking on a hill, see
“Towing a Trailer” in the Index. That section shows
what to do first
to keep the trailer from moving.
2-22
Page 88 of 362
Downloaded from www.Manualslib.com manuals search engine Shifting Into PARK (P)
I
A CAUTION:
It can be dangerous to get out of your vehicle if
the shift lever is not fully in
PARK (P) with the
parking brake firmly set. Your vehicle can roll.
If
you have left the engine running, the vehicle can
move suddenly. You or others could be injured.
To be sure your vehicle won’t move, even when
you’re on fairly level ground, use the steps that
follow. If you’re pulling
a trailer, see “Towing a
Trailer” in the Index.
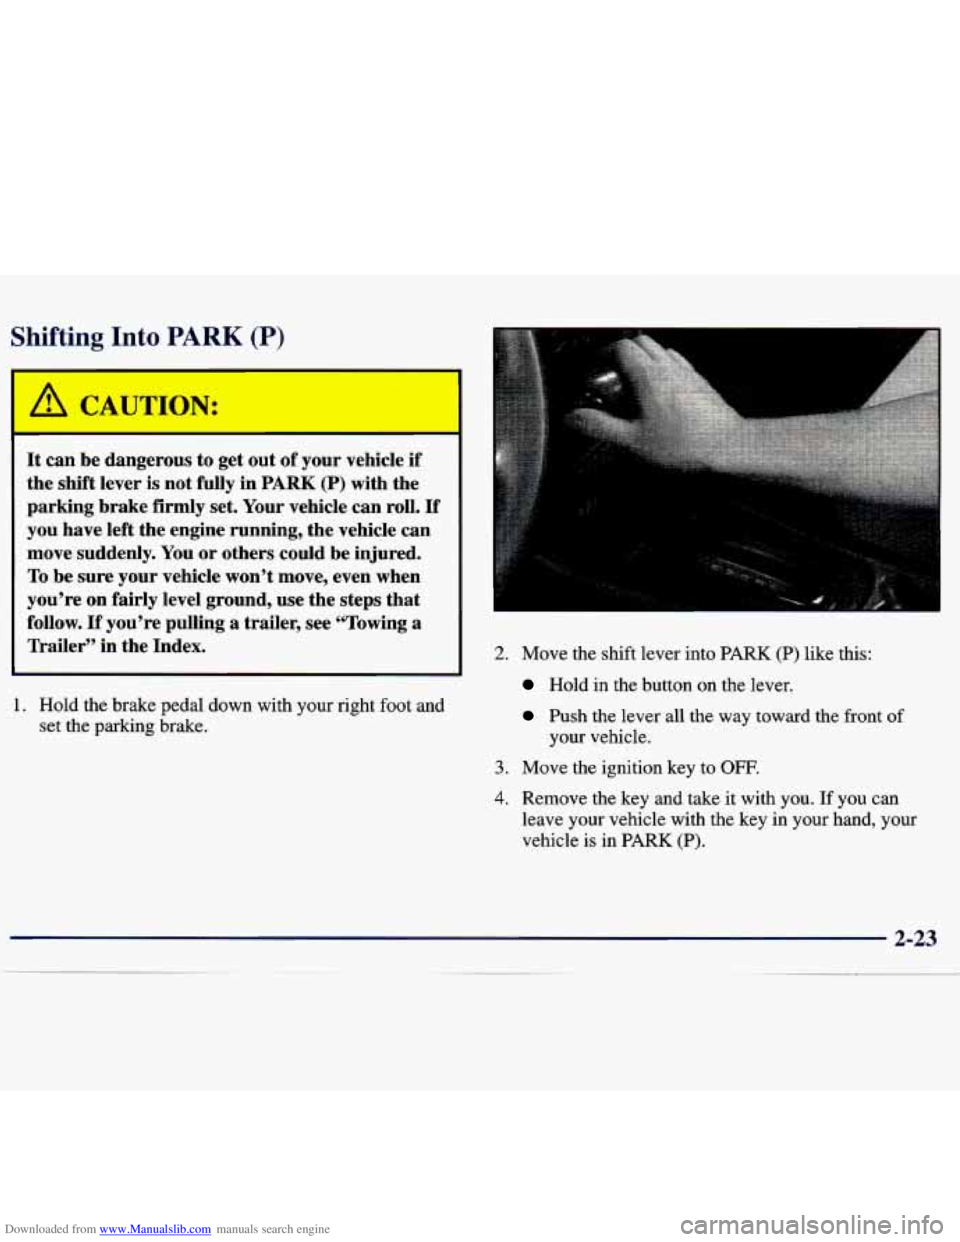
1. Hold the brake pedal down with your right foot and
set the parking brake.
2. Move the shift lever into PARK (P) like this:
Hold in the button on the lever.
Push the lever all the way toward the front of
your vehicle.
3. Move the ignition key to OFF,
4. Remove the key and take it with you. If you can
leave your vehicle with the key in your hand, your
vehicle is in PARK
(P).
Page 92 of 362
Downloaded from www.Manualslib.com manuals search engine Power Windows (If Equipped)
I
It can be dangerous to get out of your vehicle if
the shift lever is not fully in PARK (P) with the
parking brake firmly set, Your vehicle can roll.
Don’t leave your vehicle when the engine
is
running unless you have to. If you’ve left the
engine running, the vehicle can move suddenly.
You or others could be injured.
To be sure your
vehicle won’t move, even when you’re
on fairly
level ground, always set your parking brake and
move the shift lever to
PARK (P).
Follow the proper steps to be sure your vehicle won’t
move. See “Shifting Into
PARK (P)” in the Index.
If you are parking on a hill and
if you’re pulling a
trailer, also see “Towing a Trailer” in the Index.
Windows
Manual Windows
On a vehicle with manual windows, use the window
crank to open and close each window. The
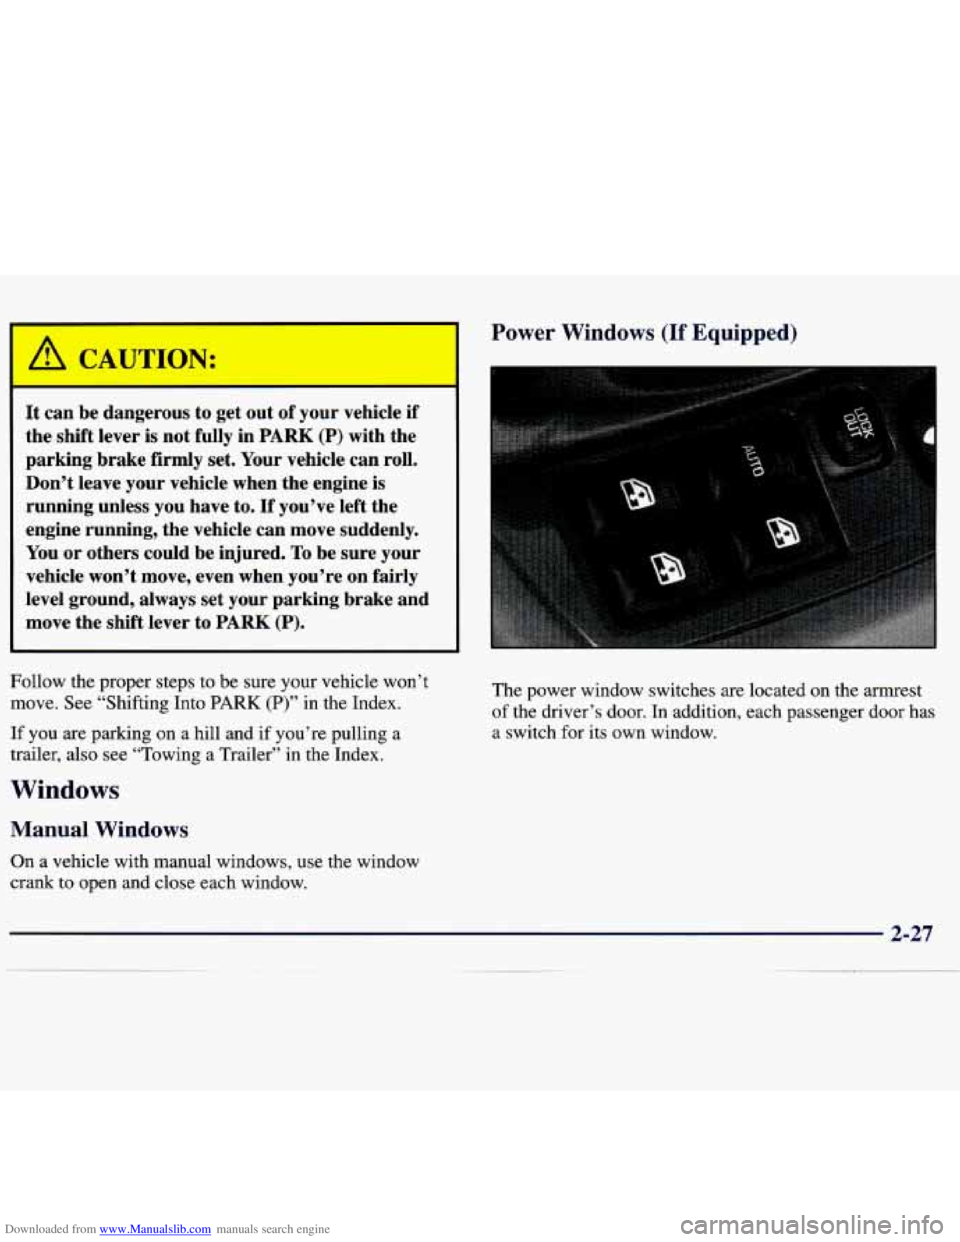
power window switches are located on the armrest
of the driver’s door. In addition, each passenger door has
a switch for its own window.
Page 121 of 362
Downloaded from www.Manualslib.com manuals search engine This light should come on, as a check to show you it is
working, when the ignition is on and the engine is not
running. If the light doesn’t come on, have it repaired.
This light will also come on during a malfunction in one
of two ways:
0
0 Light Flashing -- A misfire condition has been
detected.
A misfire increases vehicle emissions and
may damage the emission control system
on your
vehicle. Dealer or qualified service center diagnosis
and service may be required.
Light On Steady -- An emission control system
malfunction has been detected on your vehicle.
Dealer or qualified service center diagnosis and service may be required.
If the Light Is Flashing
The following may prevent more serious damage to
your vehicle:
0 Reducing vehicle speed.
Avoiding hard accelerations.
0 Avoiding steep uphill grades.
0 If you are towing a trailer, reduce the amount of
cargo being hauled as soon as
it is possible. If
the light stops flashing and
remains on steady, see “If
the Light Is On Steady” following.
If the light continues to flash, when it is safe to do so,
stop the vehicle. Find a safe place to park your vehicle.
Turn the key
off, wait at least 10 seconds and restart the
engine. If the light remains on steady, see “If the Light
Is On Steady” following. If the light is still flashing,
follow the previous steps, and drive the vehicle to your
dealer or qualified service center for service.
If the Light Is On Steady
You may be able to correct the emission system
malfunction by considering the following:
Did you recently put fuel into your vehicle?
If
so, reinstall the fuel cap, making sure to fully install
the cap. The diagnostic system can determine if the fuel
cap has been left
off or improperly installed. A loose or
missing fuel cap will allow fuel to evaporate into the
atmosphere. A few driving trips with the cap properly
installed should turn the light off.
Did you just drive through a deep puddle of water?
If so, your electrical system may be wet. The condition
will usually be corrected when the electrical system
dries out.
A few driving trips should turn the light off.
Page 152 of 362
Downloaded from www.Manualslib.com manuals search engine 0 Section 4 Your Driving and the Road
Here you’ll find information about driving on different kinds of roads and in varying weather conditions. We’ve also
included many other useful tips on driving.
4-2
4-3
4-6
4-6
4-9
4-11
4-12
4-13
4- 14
4- 16 Defensive
Driving
Drunken Driving
Control of a Vehicle
Braking Steering
Off-Road Recovery
Passing
Loss of Control
Driving at Night
Driving in Rain and on Wet Roads 4-
19
4-20
4-2 1
4-22 4-22
4-24
4-28
4-30
4-32 City Driving
Freeway Driving
Before Leaving on a Long
Trip
Highway Hypnosis
Hill and Mountain Roads
Winter Driving
Recreational Vehicle Towing Loading Your Vehicle
Towing a Trailer