1998 CHEVROLET CORVETTE center console
[x] Cancel search: center consolePage 92 of 378
Downloaded from www.Manualslib.com manuals search engine Limited-Slip Rear Axle
Your limited-slip rear axle can give you additional
traction on snow, mud, ice, sand or gravel. It works like
a standard axle most of the time, but when one of the
rear wheels has no traction and the other does, this
feature will allow the wheel with traction to move
the vehicle.
Selective Real Time Damping
(Option)
You may have a ride control system on your vehicle
called Selective Real Time Damping (SRTD). The
system provides the following performance benefits:
0 Reduced impact harshness
0 Improved road isolation
0 Improved high-speed stability
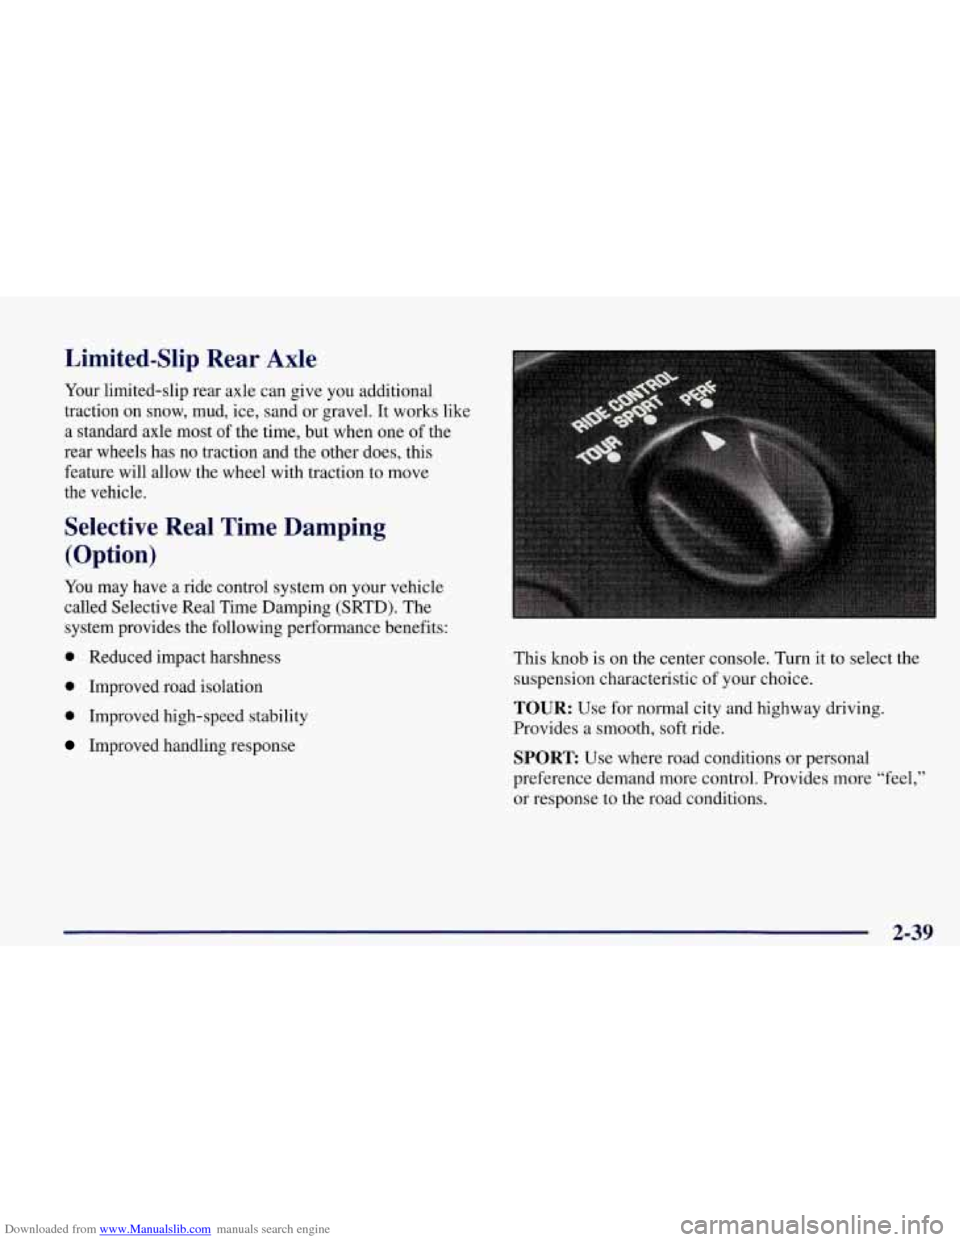
Improved handling response This knob is on the center console. Turn
it to select the
suspension characteristic of your choice.
TOUR: Use for normal city and highway driving.
Provides a smooth, soft ride.
SPORT Use where road conditions or personal
preference demand more control. Provides more
“feel,”
or response to the road conditions.
2-39
Page 107 of 378
Downloaded from www.Manualslib.com manuals search engine Powermeated Remote Control Mirrors
Convex Outside Mirror
Your passenger’s side mirror is convex. A convex
mirror’s surface is curved
so you can see more from the
driver’s seat.
A convex mirror can make things (like other
vehicles) look farther away than they really are.
If
you cut too sharply into the right lane, you
could hit a vehicle on
your right. Check your
inside mirror or glance over your shoulder before changing lanes.
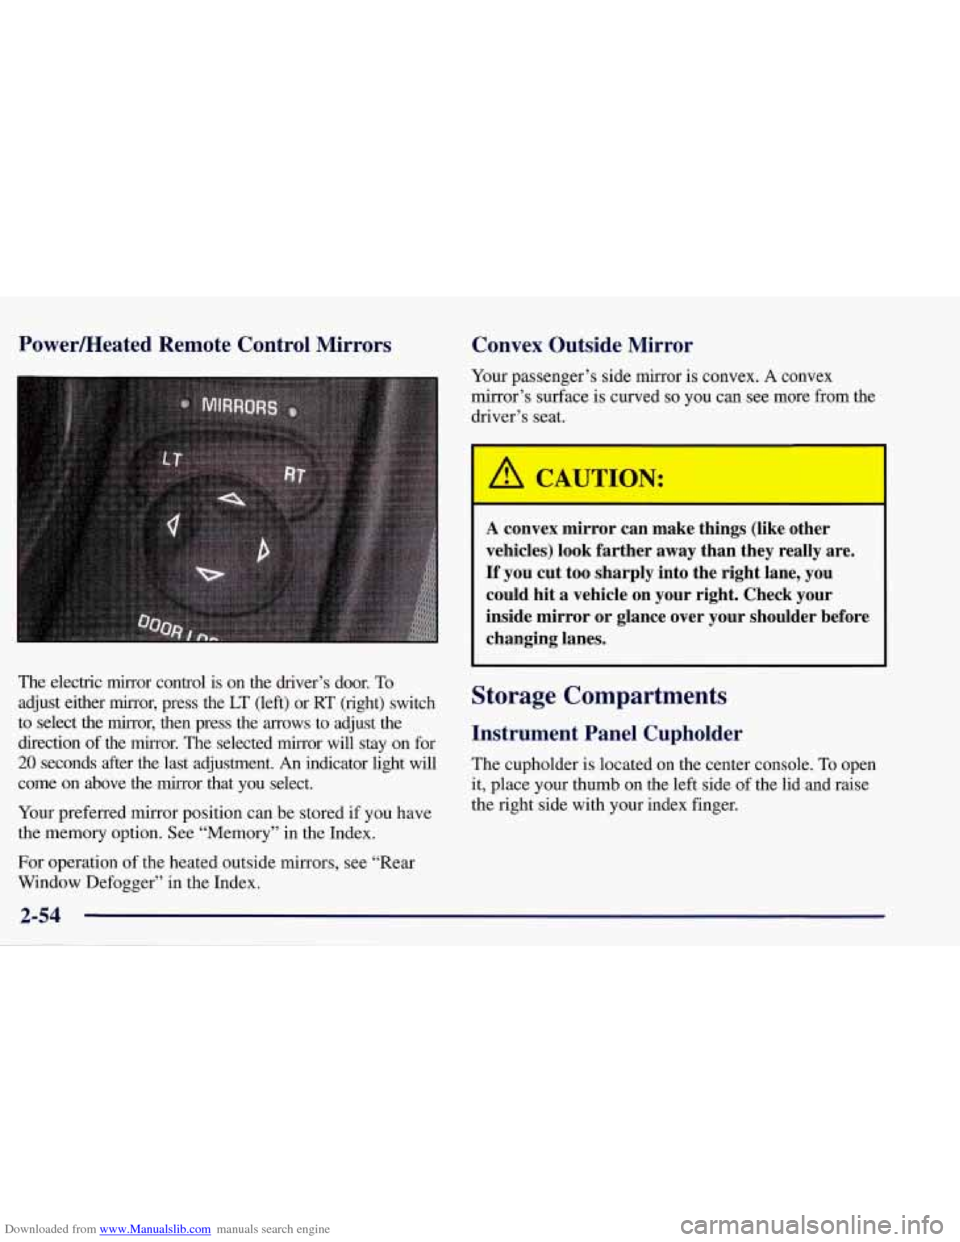
The electric mirror control is on the driver’s door. To
adjust either mirror, press the
LT (left) or RT (right) switch
to select the mirror, then press the arrows to adjust the
direction of the mirror. The selected mirror will stay on for
20 seconds after the last adjustment. An indicator light will
come on above the mirror that you select.
Your preferred mirror position can be stored if you have
the memory option. See “Memory” in the Index.
For operation of the heated outside
mirrors, see “Rear
Window Defogger” in the Index.
Storage Compartments
Instrument Panel Cupholder
The cupholder is located on the center console. To open
it, place your thumb on the left side of the lid and raise
the right side with your index finger.
Page 108 of 378
Downloaded from www.Manualslib.com manuals search engine Center Console
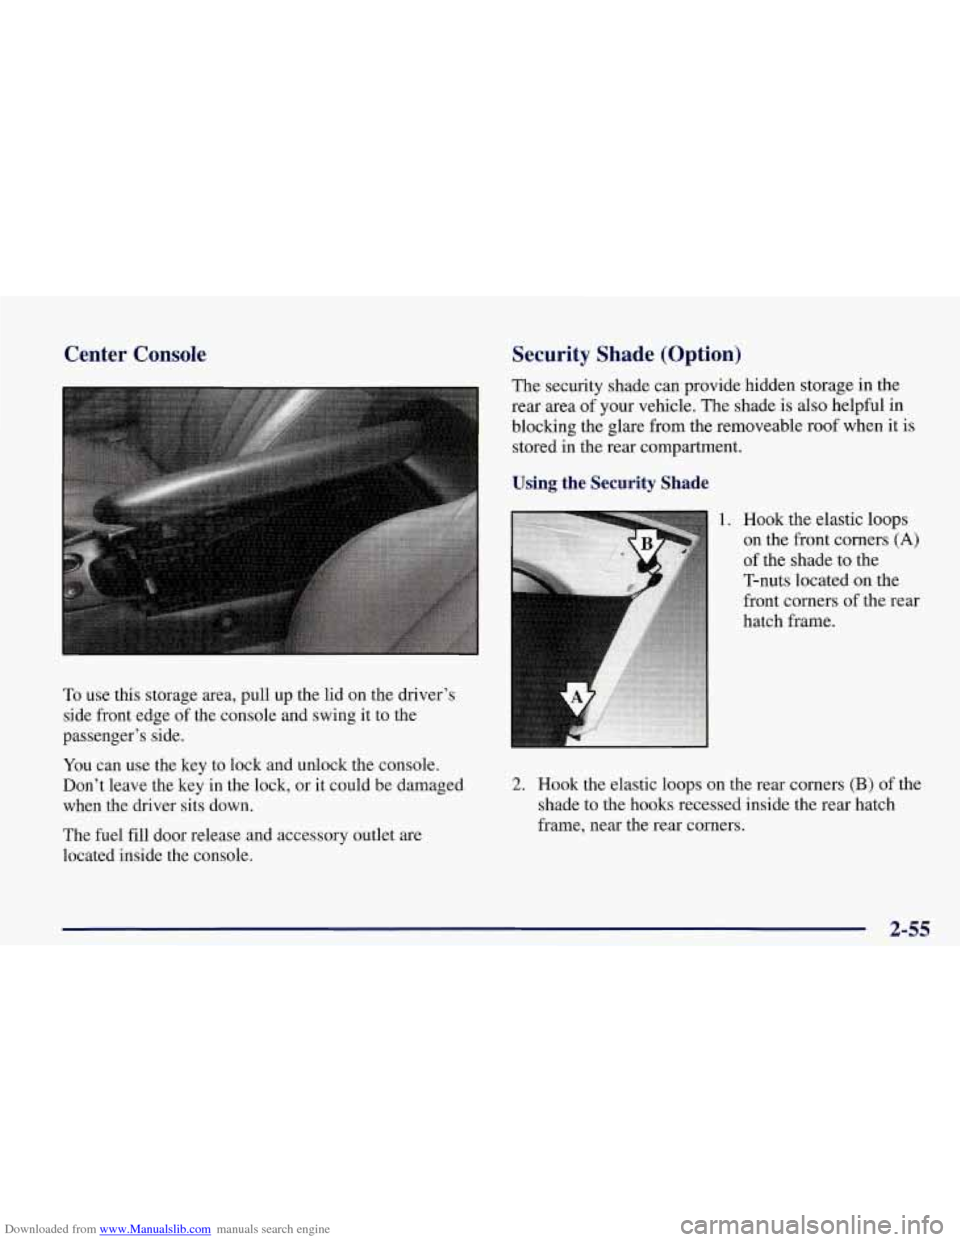
To use this storage area, pull up the lid on the driver's
side front edge of the console and swing it to the
passenger's side.
You can use the key to lock and unlock the console.
Don't leave the key in the lock, or it could be damaged
when the driver sits down.
The fuel fill door release and accessory outlet are
located inside the console.
Security Shade (Option)
The security shade can provide hidden storage in the
rear area of your vehicle. The shade is also helpful in
blocking the glare from the removeable roof when it is
stored in the rear compartment.
Using the Security Shade
1. Hook the elastic loops
on the front corners
(A)
of the shade to the
T-nuts located on the
front corners of the rear
hatch frame.
2. Hook the elastic loops on the rear corners (B) of the
shade to the hooks recessed inside the rear hatch
frame, near the rear corners.
2-55
Page 112 of 378
Downloaded from www.Manualslib.com manuals search engine Accessory Outlet
This outlet is located inside the center console, on the
forward left side. Remove the tethered cap to use the
outlet. The outlet can be used to connect electrical
equipment such as
a cellular phone or CB radio. Be sure
to follow the installation instructions included with the
equipment. Replace the cap when the outlet is not in use.
NOTICE:
When using the accessory outlet:
The maximum load of any electrical
equipment should not exceed
15 amps.
Be sure to turn off any electrical equipment
when not in use. Leaving electrical
equipment on for extended periods can
drain your battery.
We recommend that you see a qualified technician or your
dealer for the proper installation of your equipment.
Floor Mats (Option)
Your vehicle’s floor mats are specially designed to
remain in position under your feet and out of reach of
the accelerator pedal. The driver’s side floor mat is held
in place by two locator hooks and the passenger’s side is
held in place by one.
Be sure that the driver’s side floor mat is properly
placed on the floor
so that it does not block the
movement of the accelerator pedal.
2-59
Page 171 of 378
Downloaded from www.Manualslib.com manuals search engine When you enter a vehicle in cold weather, turn the
blower fan to the highest speed for a few moments
before driving
off. This helps clear the intake outlets
of snow and moisture, and reduces the chance of
fogging the inside of the windows.
Keep the area around the base of the center
instrument panel console and air path under the seats
clear of objects. This helps air circulate throughout
your vehicle.
Audio Systems
Your Delco Electronics audio system has been designed
to operate easily and give years of listening pleasure.
You will get the most enjoyment out of it if you acquaint
yourself with it first. Find out what your Delco
Electronics system can do and how to operate all its
controls, to be sure you're getting the most out of the
advanced engineering that went into it.
Setting the Clock for All Systems
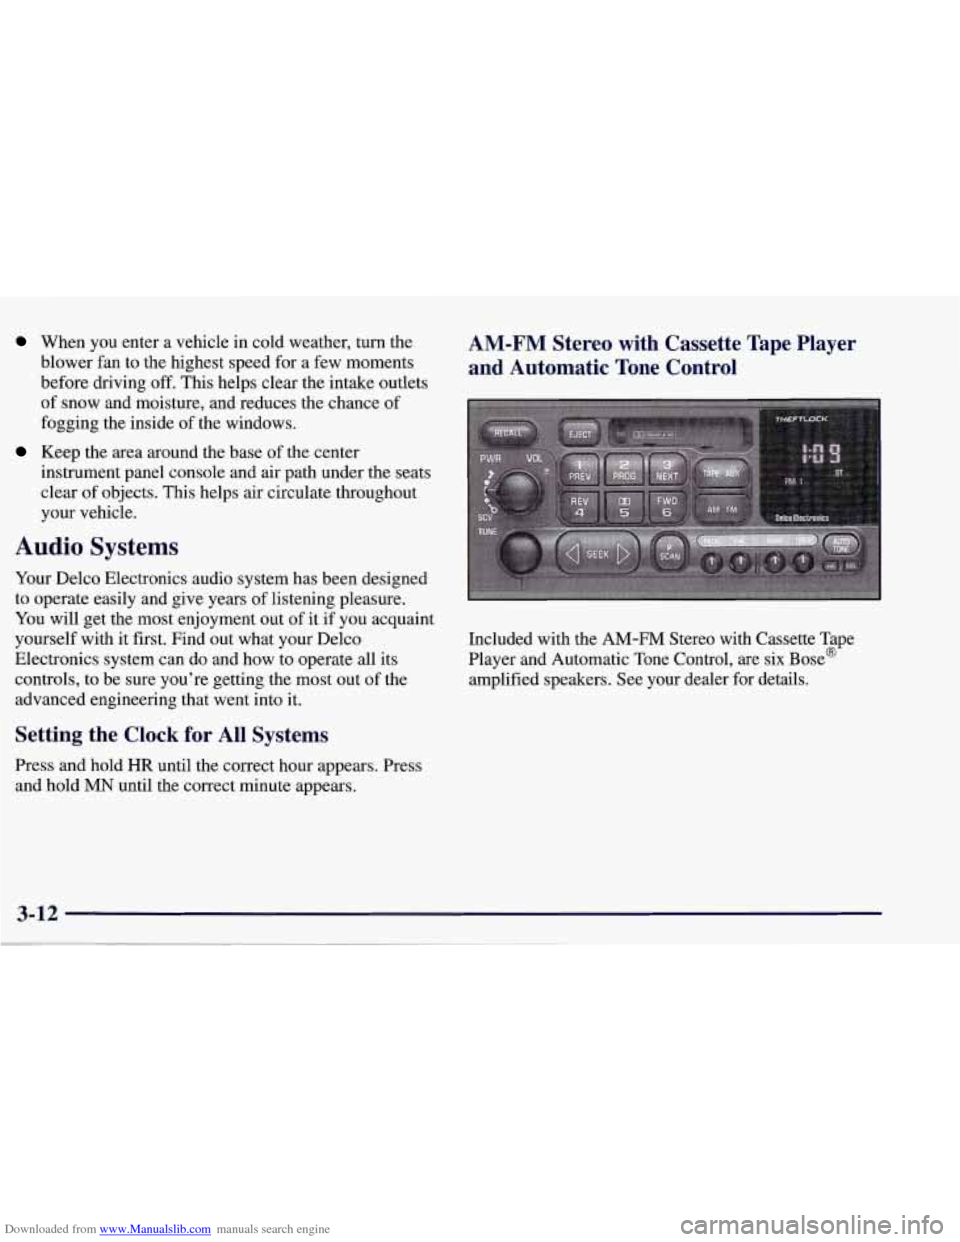
Press and hold HR until the correct hour appears. Press
and hold
MN until the correct minute appears.
AM-FM Stereo with Cassette Tape Player
and Automatic Tone Control
Included with the AM-FM Stereo with Cassette Tape
Player and Automatic Tone Control, are six Bose@
amplified speakers. See your dealer for details.
Page 250 of 378
Downloaded from www.Manualslib.com manuals search engine You can also write us at the following address for
advice. Just tell
us where you’re going and give your
Vehicle Identification Number (VIN).
General Motors Overseas Distribution Corporation
1908 Colonel Sam Drive
Oshawa, Ontario
L1H 8P7
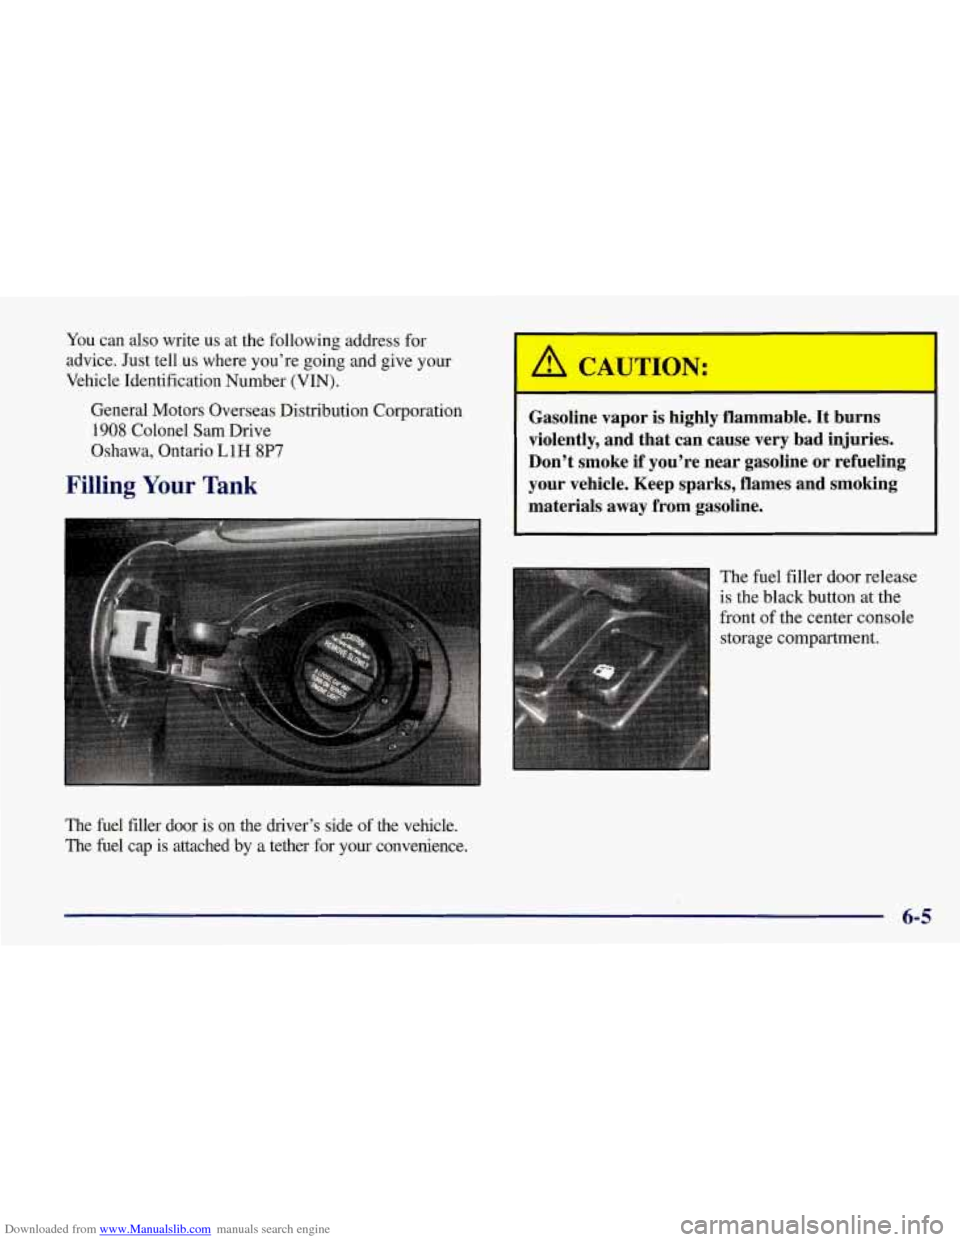
Filling Your Tank
The fuel filler door is on the driver’s side of the vehicl\
e. The fuel cap is attached by
a tether for your convenience.
rn A CAUTION:
I
Gasoline vapor is highly flammable. It burns
violently, and that can cause very bad injuries.
Don’t smoke if you’re near gasoline or refueling
your vehicle. Keep sparks, flames and smoking
materials away from gasoline.
The fuel filler door release
is the black button at the
front of the center console
storage compartment.
I
6-5
Page 314 of 378
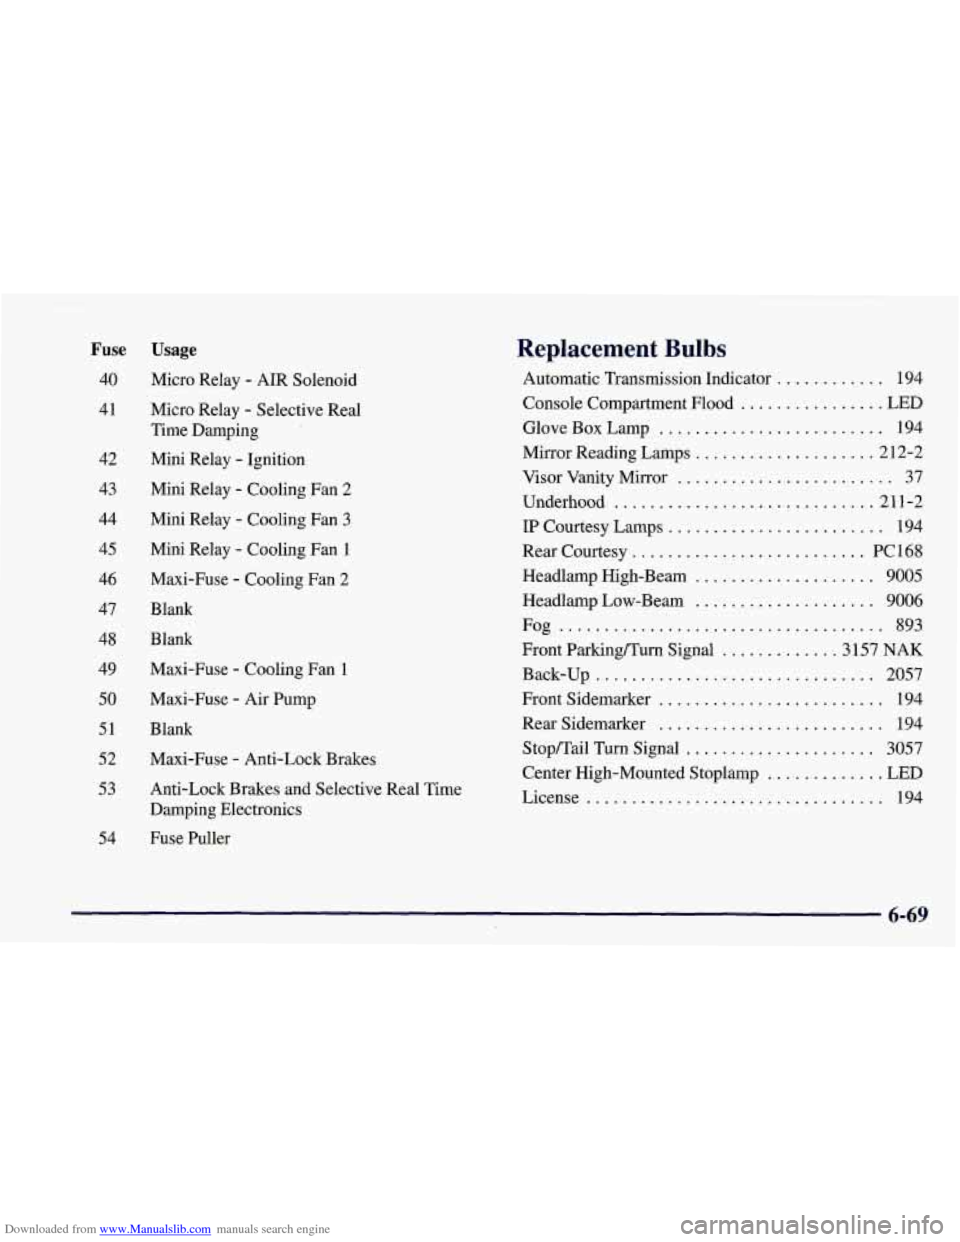
Downloaded from www.Manualslib.com manuals search engine 42
43
44
45
46
47
48
49
50 51
52
53
Fuse Usage
40 Micro Relay . AIR Solenoid
41 Micro Relay
. Selective Real
Time Damping
Mini Relay
. Ignition
Mini Relay
. Cooling Fan 2
Mini Relay . Cooling Fan 3
Mini Relay . Cooling Fan 1
Maxi-Fuse
. Cooling Fan 2
Blank
Blank
Maxi-Fuse
. Cooling Fan 1
Maxi-Fuse
. Air Pump
Blank
54 Maxi-Fuse
. Anti-Lock
Brakes
Anti-Lock Brakes and Selective Real
Time
Damping Electronics
Fuse Puller
Replacement Bulbs
Console Compartment Flood ................ LED
Glove Box Lamp
......................... 194
Mirror Reading Lamps
.................... 212-2
Visor Vanity Mirror
........................ 37
Automatic
Transmission Indicator
............ 194
Underhood
............................... 1-2
IP Courtesy Lamps ........................ 194
Rear Courtesy
.......................... PC168
Headlamp High-Beam .................... 9005
Headlamp Low-Beam
.................... 9006
Front ParkingKurn Signal
............. 3 157 NAK
Back-up ............................... 2057
Fog
.................................... 893
Front Sidemarker
......................... 194
Rear Sidemarker
......................... 194
Stopmail Turn Signal
..................... 3057
License
................................. 194
Center High-Mounted Stoplamp
............. LED
6-69
Page 357 of 378
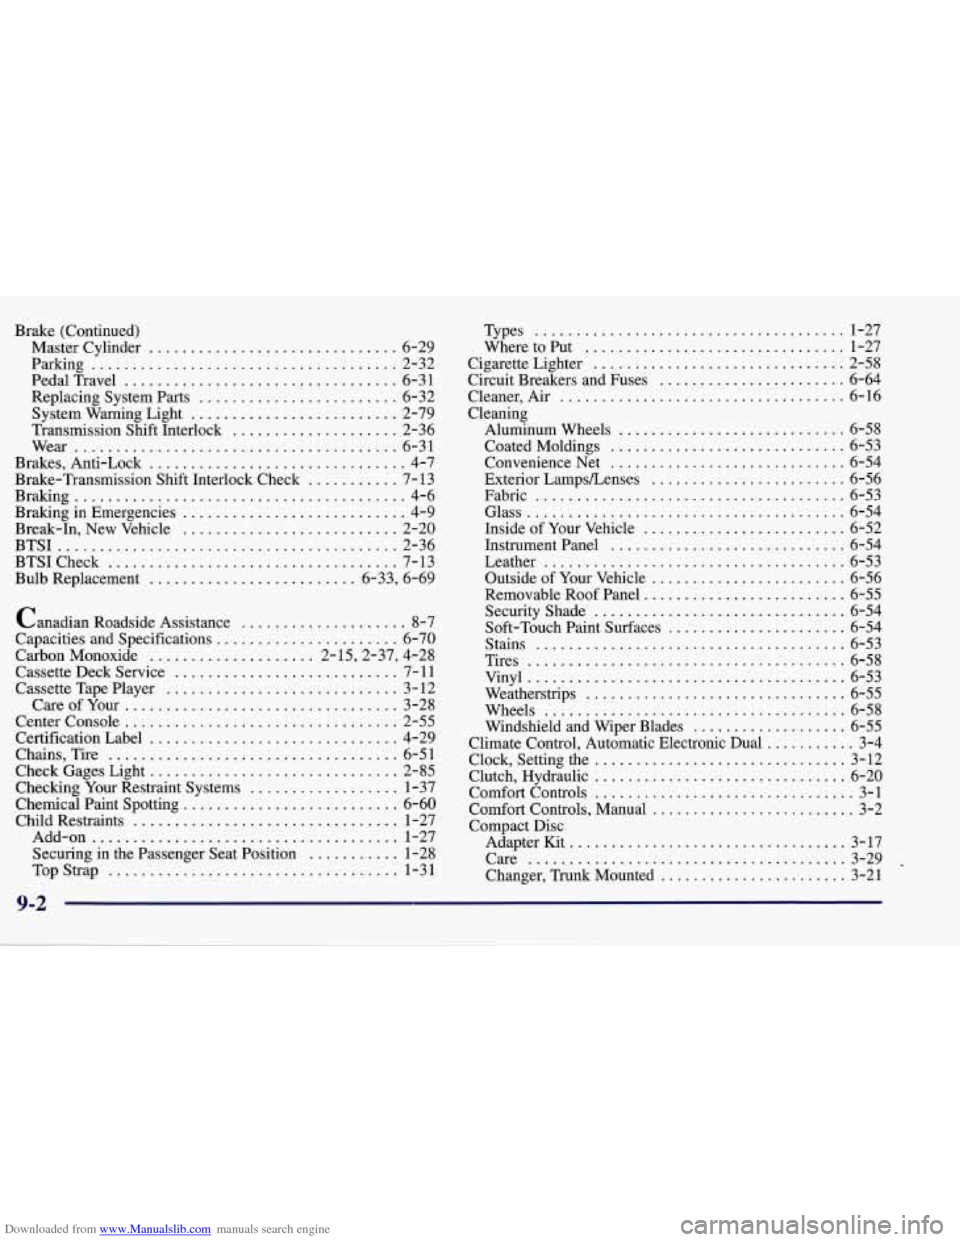
Downloaded from www.Manualslib.com manuals search engine Brake (Continued) Master Cylinder
.............................. 6-29
Parking
..................................... 2-32
PedalTravel
................................. 6-31
Replacing System Parts
........................ 6-32
System Warning Light
......................... 2-79
Transmission Shift Interlock
.................... 2-36
Wear
....................................... 6-31
Brakes. Anti-Lock
............................... 4-7
Brake-Transmission Shift Interlock Check
........... 7- 13
Braking
........................................ 4-6
Braking in Emergencies
........................... 4-9
Break.In. New Vehicle
.......................... 2-20
BTSI
......................................... 2-36
BTSICheck
................................... 7-13
Bulb Replacement
......................... 6.33. 6.69
Canadian Roadside Assistance
.................... 8-7
Capacities and Specifications
...................... 6-70
Carbon Monoxide
.................... 2.15.2.37. 4.28
Cassette Deck Service
........................... 7- 11
Cassette Tape Player ............................ 3-12
CareofYour
................................. 3-28
Center Console
................................. 2-55
Certification Label
.............................. 4-29
Chains. Tire
................................... 6-51
Check Gages Light
.............................. 2-85
Checking Your Restraint Systems
.................. 1-37
Chemical Paint Spotting
.......................... 6-60
Child Restraints
................................ 1-27
Add-on
..................................... 1-27
Securing in the Passenger Seat Position
........... 1-28
Top Strap
.................................... 1-3 1
Types ...................................... 1-27
WheretoPut
................................ 1-27
Cigarette Lighter
............................... 2-58
Circuit Breakers and Fuses
....................... 6-64
Cleaner. Air
................................... 6-16
Cleaning Aluminum Wheels
............................ 6-58
Coated Moldings
............................. 6-53
ConvenienceNet
............................. 6-54
Exterior LampsLenses
........................ 6-56
Fabric
...................................... 6-53
Glass
....................................... 6-54
Inside of Your Vehicle
......................... 6-52
Instrument Panel
............................. 6-54
Leather
..................................... 6-53
Outside of Your Vehicle
........................ 6-56
Removable Roof Panel
......................... 6-55
Security Shade
............................... 6-54
Soft-Touch Paint Surfaces
...................... 6-54
Stains
...................................... 6-53
Tires
....................................... 6-58
Vinyl
....................................... 6-53
Weatherstrips
................................ 6-55
Wheels
..................................... 6-58
Windshield and Wiper Blades
................... 6-55
Climate Control. Automatic Electronic Dual
........... 3-4
Clock. Setting the
............................... 3-12
Clutch. Hydraulic
............................... 6-20
Comfort Controls
................................ 3-1
Comfort Controls. Manual
......................... 3-2
Compact Disc
AdapterKit
.................................. 3-17
Care
....................................... 3-29 .
Changer. TmnkMounted ....................... 3-21
9-2