1998 CADILLAC SEVILLE service
[x] Cancel search: servicePage 279 of 378
Downloaded from www.Manualslib.com manuals search engine If your vehicle is certified to meet California Emission
Standards (indicated on the underhood emission control
label), it is designed to operate on fuels that meet
California specifications. If such fuels are not available
in states adopting California emissions standards, your
vehicle will operate satisfactorily on fuels meeting
federal specifications, but emission control system
performance may be affected. The malfunction indicator
lamp on your instrument panel may turn on and/or your
vehicle may fail
a smog-check test. If this occurs, return
to your authorized Cadillac dealer for diagnosis to
determine the cause of failure. In the event it is
determined that the cause of the condition is the type of
fuels used, repairs may not be covered by your warranty.
Some gasolines that are not reformulated for low
emissions contain an octane-enhancing additive called
methylcyclopentadienyl manganese tricarbonyl (MMT); ask your service station operator whether or not his fuel
contains MMT. General Motors does not recommend the
use of such gasolines. If fuels containing MMT are used,
spark plug life may be reduced and your emission
control system performance may be affected. The
malfunction indicator lamp on your instrument panel
may turn
on. If this occurs, return to your authorized
Cadillac dealer for service. To
provide cleaner air, all gasolines in the United States
are now required to contain additives that will help
prevent deposits from forming in your engine and fuel
system, allowing your emission control system to
function properly. Therefore, you should not have to add
anything to the fuel. In addition, gasolines containing
oxygenates, such as ethers and ethanol, and
reformulated gasolines may be available in your area to
help clean the air. General Motors recommends that you
use these gasolines if
they comply with the
specifications described earlier.
I NOTICE:
Your vehicle was not designed for fuel that
contains methanol. Don’t use it.
It can corrode
metal parts in your fuel system and also damage
plastic and rubber parts. That damage wouldn’t
be covered under your warranty.
6-4
Page 290 of 378
Downloaded from www.Manualslib.com manuals search engine How to Reset the Oil Life Indicator
After the oil has been changed, display the ENGINE
OIL LIFE message by pressing the INFO button. Then
press and hold the INFO RESET button until the display
shows
“100.” This resets the oil life index. The message
will remain off until the next oil change is needed.
The percentage of oil life remaining may be checked at
any time by pressing the INFO button several times until
the ENGINE
OIL LIFE message appears. For more
information on the Oil Life feature, see “Oil Life
Indicator” in the Index.
What to Do with Used Oil
Did you know that used engine oil contains certain
elements that may be unhealthy for your skin and could
even cause cancer? Don’t let used oil stay on your skin
for
very long. Clean your skin and nails with soap and
water, or a good hand cleaner. Wash or properly throw
away clothing or rags containing used engine oil. (See
the manufacturer’s warnings about the use and disposal
of oil products.)
Used oil can be
a real threat to the environment. If you
change your own oil, be sure to drain all free-flowing oil
from the filter before disposal. Don’t ever dispose of oil
by putting it in the trash, pouring it on the ground, into
sewers, or into streams or bodies of water. Instead,
recycle it by taking it to a place that collects used oil. If
you have a problem properly disposing of your used oil,
ask your dealer, a service station or a local recycling
center for
help.
6-15
Page 293 of 378
Downloaded from www.Manualslib.com manuals search engine Follow these steps to reinstall the air cleaner assembly:
1.
2.
3.
4.
5.
Slide the air cleaner lid into the slots in the bottom of
the air cleaner base.
Close the cover and make sure that both latches are
secure and fully engaged.
Reinstall the clean air duct over the mass airflow
sensor. Make sure that the duct is secure around the
entire outer edge of the sensor.
Tighten the air duct clamp. Reconnect the
MI’ sensor.
Refer to the Maintenance Schedule
to determine when to
replace the air filter.
See “Scheduled Maintenance Services” in the
Maintenance Schedule booklet.
’ A ( JTION:
Operating the engine with the air cleaner off can
cause you or others to be burned, The
air cleaner
not only cleans the
air, it stops flame if the engine
backfires.
If it isn’t there, and the engine
backfires, you could be burned. Don’t drive with
it
off, and be careful working on the engine with
the air cleaner off.
I NOTICE:
If the air cleaner is off, a backfire can cause a
damaging engine fire. And, dirt can easily get
into your engine, which will damage it. Always
have the air cleaner in place when you’re driving.
6-18
Page 294 of 378
Downloaded from www.Manualslib.com manuals search engine Automatic Transaxle Fluid
When to Check and Change
A good time to check your automatic transaxle fluid
level is when the engine oil is changed.
Change both the fluid and filter every
50,000 miles
(83 000 km) if the vehicle is mainly driven under one
or more of these conditions:
0 In heavy city traffic where the outside temperature
0 In hilly or mountainous terrain. regularly reaches
90 OF (32 O C) or higher.
0 When doing frequent trailer towing.
0 Uses such as found in taxi, police or delivery service.
If you do not use your vehicle under any of these
conditions, the fluid and filter do not require change
until the message CHANGE
TRANS FLUID appears on
the Driver Information Center.
See “Scheduled Maintenance Services” in the Index.
How to Check
Because this operation can be a little difficult, you may
choose to have this done
at your Cadillac dealership
Service Department.
If you do it yourself, be sure to follow all the instructions
here, or you could get a false reading on the dipstick.
1 NOTICE: - -1
Too much or too little fluid can damage your
transaxle.
Too much can mean that some of the
fluid could come out and fall on hot engine parts or exhaust system parts, starting a fire. Be sure to
get an accurate reading if you check your
transaxle fluid.
Wait at least 30 minutes before checking the transaxle
fluid level if you have been driving:
When outside temperatures are above 90°F (32°C).
At high speed for quite a while.
In heavy traffic -- especially in hot weather.
0 While pulling a trailer.
6-19
Page 305 of 378
Downloaded from www.Manualslib.com manuals search engine Brake Wear
Your vehicle has four-wheel disc brakes.
Disc brake pads have built-in wear indicators that make
a high-pitched warning sound when the brake pads are
worn and new pads are needed. The sound may come
and
go or be heard all the time your vehicle is moving
(except when you are pushing on the brake
pedal firmly).
r
A CAUTION:
The brake wear warning sound means that soon
your brakes won’t work well. That could lead to
an accident. When you hear the brake wear
warning sound, have your vehicle serviced.
Your vehicle also has electronic wear sensors that let you
know when the brake pads are significantly worn and new
pads are needed. The
CHANGE BRAKE PADS message
will be displayed on the Driver
Information Center when
the brake pads are worn and need
to be replaced. (See
“Change Brake Pads Message” in the Index.)
-
I A CAUTION:
\-I
The CHANGE BRAKE PADS message or the
high-pitched warning sound means that soon
your brakes won’t work well. That could lead to
an accident. When the
CHANGE BRAKE PADS
message comes on and stays on, have your
vehicle serviced.
6-30
Page 309 of 378
Downloaded from www.Manualslib.com manuals search engine Bulb Replacement
For any bulb changing procedure not listed in this
section, contact your dealer service department.
Ualogen B--%
4 CAUTT^”T:
Halogen bulbs have pressurized gas inside and
can burst
if you drop or scratch the bulb. You or
others could be injured.
Be sure to read and
follow the instructions on the bulb package.
Headlamps
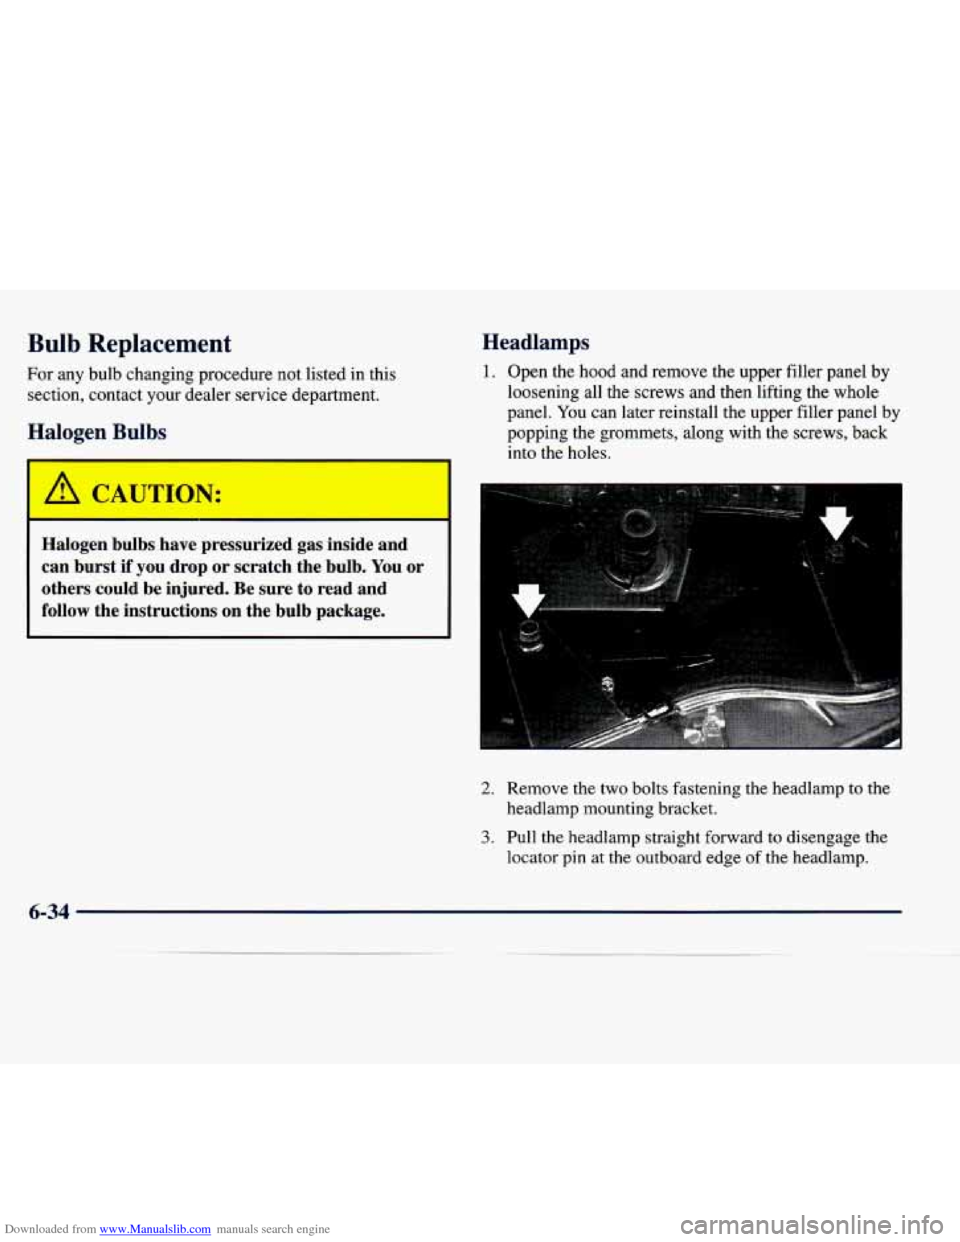
1. Open the hood and remove the upper filler panel by
loosening all the screws and then lifting the whole
panel. You can later reinstall the upper filler panel by
popping the grommets, along with the screws, back
into the holes.
2. Remove the two bolts fastening the headlamp to the
headlamp mounting bracket.
3. Pull the headlamp straight forward to disengage the
locator
pin at the outboard edge of the headlamp.
6-34
Page 314 of 378
Downloaded from www.Manualslib.com manuals search engine Front Tlurn Signal Lamps
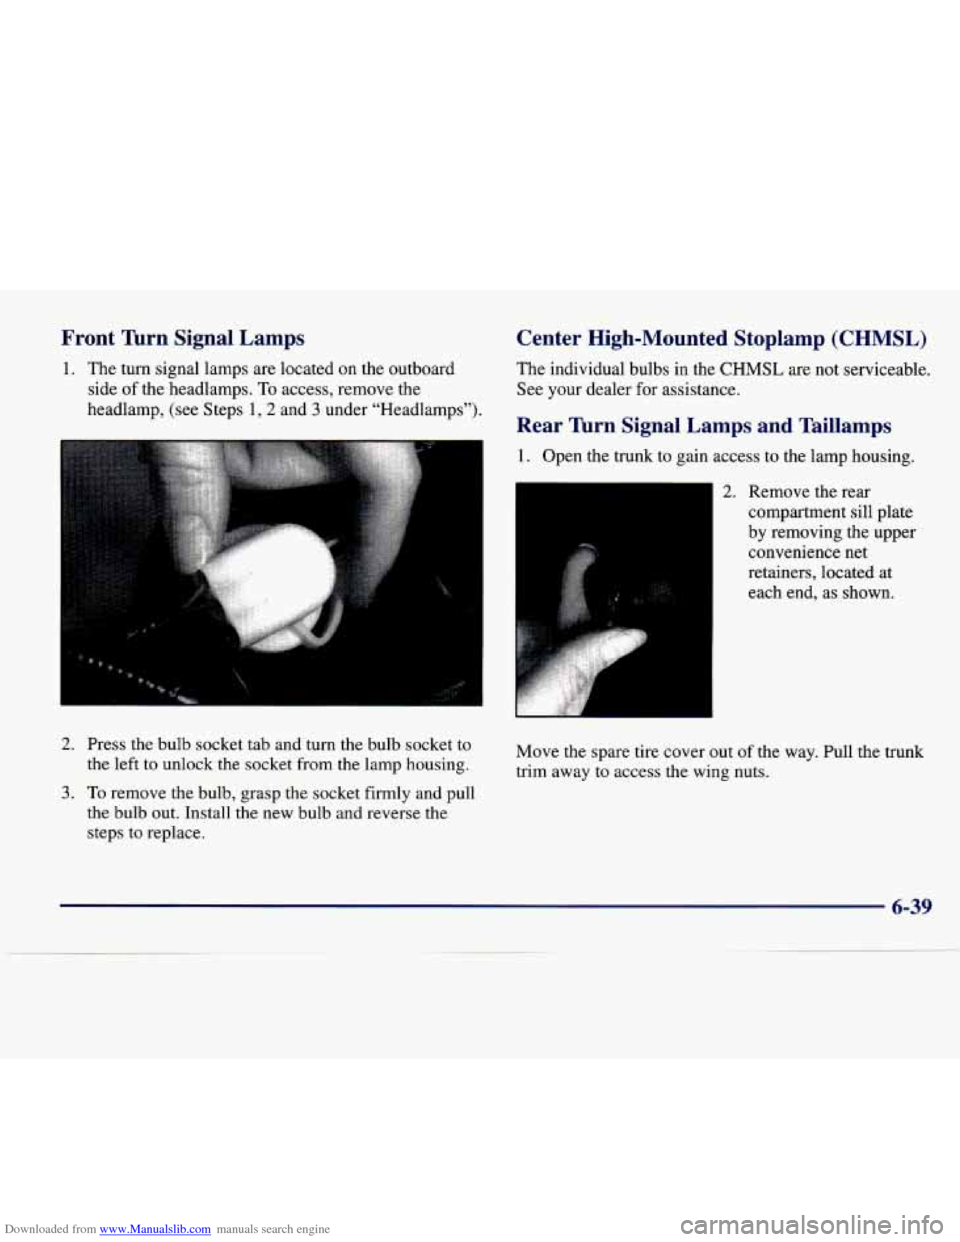
1. The turn signal lamps are located on the outboard
side of the headlamps. To access, remove the
headlamp,
(see Steps 1,2 and 3 under “Headlamps”).
2. Press the bulb socket tab and turn the bulb socket to
the left to unlock the socket from the lamp housing.
3. To remove the bulb, grasp the socket firmly and pull
the bulb out. Install the new bulb and reverse the
steps
to replace.
Center High-Mounted Stoplamp (CHMSL)
The individual bulbs in the CHMSL are not serviceable.
See your dealer for assistance.
Rear Turn Signal Lamps and Taillamps
1. Open the trunk to gain access to the lamp housing.
2. Remove the rear
compartment sill plate
by removing the upper
convenience net
retainers, located at
each end, as shown.
Move the spare tire cover out
of the way. Pull the trunk
trim away to access the wing nuts.
6-39
Page 316 of 378
Downloaded from www.Manualslib.com manuals search engine Windshield Wiper Blade -
Replacement
It’s a good idea to clean or replace the wiper blade assembly on a regular basis or when worn. For proper
windshield wiper blade length and type, see “Normal
Maintenance Replacement
Parts” later in this section.
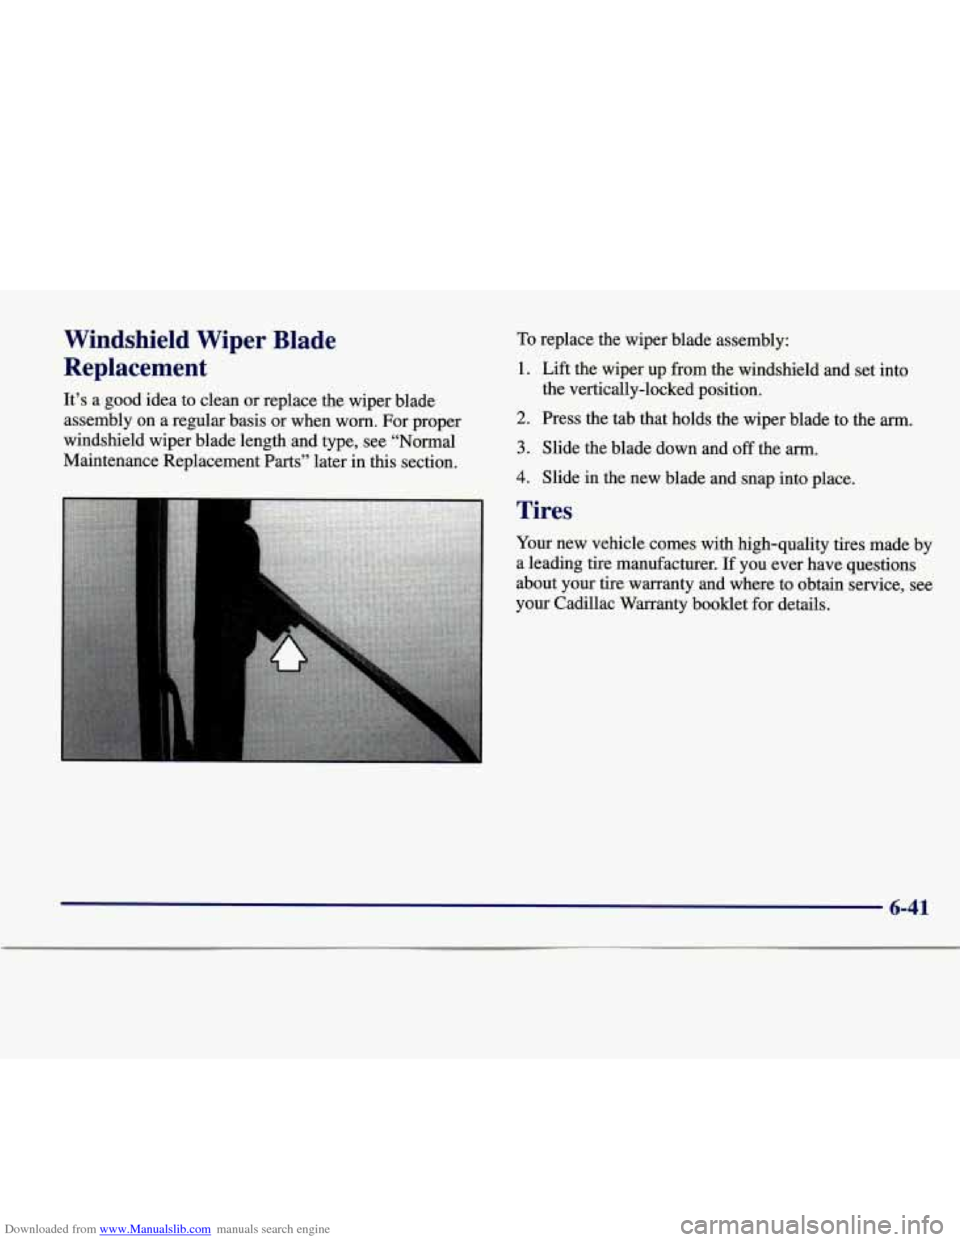
To replace the wiper blade assembly:
1. Lift the wiper up from the windshield and set into
the vertically-locked position.
2. Press the tab that holds the wiper blade to the arm.
3. Slide the blade down and off the arm.
4. Slide in the new blade and snap into place.
Tires
Your new vehicle comes with high-quality tires made by
a leading tire manufacturer.
If you ever have questions
about your tire warranty and where to obtain service, see
your Cadillac Warranty booklet for details.
6-41