1998 CADILLAC SEVILLE mirror
[x] Cancel search: mirrorPage 111 of 378
Downloaded from www.Manualslib.com manuals search engine PowedHeated Remote Control Mirror
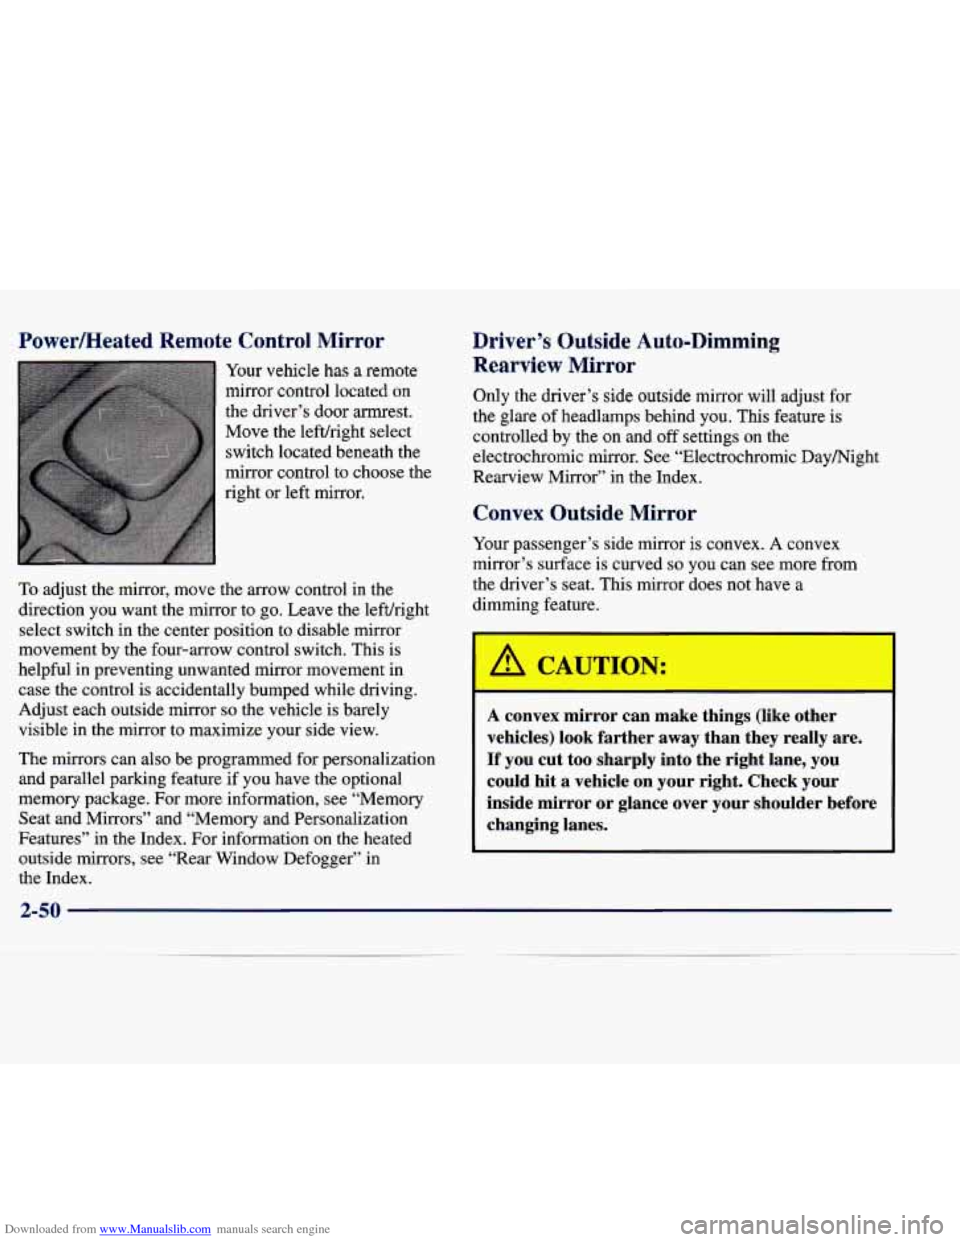
Your vehicle has a remote
mirror control located on
the driver’s door armrest.
Move the lefthight select
switch located beneath
the
mirror control to choose the
right or left mirror.
To adjust the mirror, move the arrow control in the
direction you want the mirror to
go. Leave the lefuright
select switch in the center position to disable mirror
movement by the four-arrow control switch. This is
helpful in preventing unwanted mirror movement in case the control is accidentally bumped while driving.
Adjust each outside mirror so the vehicle is barely
visible in the mirror to maximize your side view.
The mirrors can also be programmed for personalizauon
and parallel parking feature if you have the optional
memory package. For more information, see “Memory Seat and Mirrors” and “Memory and Personalization
Features” in the Index. For infomation on the heated
outside mirrors, see “Rear Window Defogger’’ in the Index.
Driver’s Outside Auto-Dimming Rearview
Mirror
Only the driver’s side outside mirror will adjust for
the glare of headlamps behind you. This feature is
controlled by the on and off settings on the
electrochromic mirror. See “Electrochromic Daymight
Rearview Mirror” in the Index.
Convex Outside Mirror
Your passenger’s side mirror is convex. A convex
mirror’s surface is curved
so you can see more from
the driver’s seat. This mirror does not have a
dimming feature.
A CAUTIC) r:
I
A convex mirror can make things (like other
vehicles) look farther away than they really are.
If you cut too sharply into the right lane,
you
could hit a vehicle on your right. Check your
inside mirror or glance over your shoulder before
changing lanes.
2-50
Page 112 of 378
Downloaded from www.Manualslib.com manuals search engine Curbview Assist Mirror (If Equipped)
If your vehicle is equipped with memory mirrors, it will
also be equipped with the curbview assist
mirror feature.
This feature
will cause the passenger mirror to tip when
the vehicle is in REVERSE (R). This feature is
especially useful in allowing you to view the curb when
you are parallel parking. If further adjustment is needed
after the mirror
is tipped, the mirror switch may be used
to adjust the mirror. If the mirror switch
is pressed while
the passenger mirror is tipped, the mirror will move in
that direction, but will return to its original position once
the vehicle is shifted out of
REVERSE (R).
Once the shift lever is shifted out of REVERSE (R) and
a five second delay has occurred, the passenger side
mirror will return to its original position.
To program the feature, see “Curbview Assist Mirror” in
the Index.
Storage Compartments
Glove Box
The glove box is located in front of the passenger’s seat.
To lock the glove box door, insert the master key into
the lock cylinder and
turn it to the right. Turn the key to
the left
to unlock the door.
Map Pocket
The mapktorage pockets are located on each front door as
well as on the passenger’s and driver’s front seatbacks.
Page 115 of 378
Downloaded from www.Manualslib.com manuals search engine Illuminated Visor Vanity Mirror
Turn the sunshade down and lift the cover to see the
mirror. Move the slide switch up or down to brighten or
dim the lamp.
Cellular TeleI '>one (Option)
Remote Door unlock
Your vehicle has been prewlred for dealer installation of
a dual-mode (analog/digital) cellular telephone. A fixed
mobile or a portable hand-held system are available.
Either system has steering wheel telephone controls and information output through the DIC. Voice activation
and hands-free operation are standard features. For more
information, contact your dealer.
A user's guide is
provided with the telephone.
OnStar System (Option)
This system may be ordered through your dealer if you have the optional fixed cellular telephone. The
following services are available
24 hours a day:
0 Roadside Service with Location
Emergency Services Button
Theft DetectiodNotification and
Stolen-Vehicle Tracking
Deployment
Automatic Notification of Frontal Air Bag
Concierge/Customer Convenience Services
For more information, contact your dealer.
Assist Straps
An assist strap above each door can be used when
getting out of your vehicle.
Garment Hooks
For your convenience, a garment hook is attached to the
rear assist strap.
Floor Mats
Your vehicle is equipped with rubber-backed front and
rear floor mats. Keep them clean by vacuuming and using a spot cleaner,
if necessary. Do not machine wash.
2-54
Page 136 of 378
Downloaded from www.Manualslib.com manuals search engine All of these situations are normal and do not indicate
that anything is wrong.
0 At the gas station the gas pump shuts off before the
gage reads
F.
0 The gage may change when you turn, stop quickly or
accelerate quickly.
GAL FUEL USED on the Driver Information Center
does not correspond exactly to the amount
of fuel
remaining as shown on the fuel gage.
Continuous Variable Road Sensing
Suspension (CVRSS)
The CVRSS automatically adjusts the ride of your
vehicle. Automatic ride control
is achieved through a
computer used to control and monitor the suspension
system. The controller receives input from various
sensors to determine the proper system response. If
the
controller detects a problem within the system, the DIC
will display a SERVICE SUSPENSION SYS message.
If this message appears, have your vehicle serviced at
your dealership.
Driver Information Center (DIC)
This display gives you the status of many of your
vehicle’s systems. The DIC is also used to display driver
personalization features and warninghtatus messages.
Memory and Personalization Features
(If Equipped)
Your vehicle may have memory personalization.
Memory settings that have been previously programmed (HVAC settings, radio preset settings, exterior lighting
choices, remote confirmation choices, seat positions,
column positions,
mirror and programmable automatic
door lock choices) can be recalled by pressing the
unlock button on the
RKE transmitter or by placing the
key
in your vehicle’s ignition.
To begin programming, the ignition must be in ON, your
vehicle in PARK
(P), and if your vehicle has memory,
press the appropriate memory button
“1” or “2”, located
on the driver’s door panel, prior to programming. Press
the
INFO button one or more times until the FEATURE
PROGRAMMING prompt appears on the Driver Information Center (DIC) display. Press the
ON/OFF
button to enter FEATURE PROGRAMMING. To exit,
press the INFO
RESET button.
2-75
Page 137 of 378
Downloaded from www.Manualslib.com manuals search engine Remote Recall Memory (If Equipped)
Press the down arrow on the INFO button one or more
times until the REMOTE RECALL MEMORY prompt
appears. To turn the feature on, press the ON/OFF
button until ON is displayed on the DIC. The seat and
mirror memory settings that have been previously
programmed can be recalled by pressing the unlock
button on the
RKE transmitter. The column will move
when the key is inserted in the ignition and moved to
ON. To turn the feature off, press the ON/OFF button
until OFF is displayed.
Key in Recall (If Equipped)
Press the down arrow on the INFO button one or more
times until the
KEY IN RECALL prompt appears on the
DIC display. To turn the feature on, press the ON/OFF
button until ON appears. The seat
and mirror memory
settings that have been previously programmed will be
recalled when the key is inserted in the ignition. The
column will move when the key is moved to
ON. To
turn the feature off, press the ON/OFF button until
OFF appears.
Auto Exit Seat (If Equipped)
Press the down arrow on the INFO button one or more
times until the
AUTO EXIT SEAT prompt shows on the
DIC display. This feature will move the seat to the driver’s exit position when the key is moved out of ON
(away from
START) and the driver’s door is opened. To
turn this feature on, press the ON/OFF button until ON
appears on the DIC.
To turn this feature off, press the
ON/OFF button until
OFF shows.
Auto Exit Steering Wheel (If Equipped)
Press the down arrow on the INFO button one or more
times until the AUTO EXIT
STRG WHEEL prompt
appears on the Driver Information Center (DIC) display.
This feature will move the column to the driver’s exit
position when the key is moved out of ON (away from
START) and the driver’s door is opened.
2-76
-
Page 140 of 378
Downloaded from www.Manualslib.com manuals search engine Driver Unlock Key Off
Press the down arrow on the INFO button one or more
times until the DRIVER UNLOCK
KEY OFF prompt
appears. This feature will automatically unlock only the
driver’s door when the ignition key is moved to
OW. To
turn the feature on, press ON/OFF until ON is displayed
on the DIC. To
turn the feature off, press ON/OFF until
OFF is displayed.
Doors Unlock in PARK (P)
Press the down arrow on the INFO button one or more
times until the DOORS UNLOCK
IN PARK prompt
appears. This feature will automatically unlock all doors
when the vehicle is shifted into PARK
(P). To turn the
feature on, press
ON/OFF until ON is displayed on the
DIC.
To turn the feature off, press ON/OFF until OFF
is displayed.
Doors Unlock Key Off
Press the down arrow on the INFO button one or more
times until the DOORS UNLOCK
KEY OFF prompt
appears.
This feature will automatically unlock all doors
when the ignition key is turned to
OFF. To turn the
feature on, press
ON/OFF until ON is displayed on the
DIC.
To turn the feature off, press ON/OFF until OFF
is displayed.
Curbview Assist Mirror (If Equipped)
Press the down arrow on the INFO button one or more times
until the MIRROR TO CURB IN REV prompts appears on
the DIC display.
This feature will move the passenger’s
outside rearview mirror
to a curb view position when the
console shifter is placed
in REVERSE (R) and it will return
the mirror to the last known driving position when the
console shifter is moved out of REVERSE (R).
To turn this
feature on, press the ON/OFF button until ON is displayed on
the DIC. To
turn the feature off, press the ON/OFF button
until OFF is displayed. For more information, see “Curbview
Assist Mirror”
in the Index.
Driver’s Names Set/Recall (If Equipped)
After the FEATURE PROGRAMMING prompt is
displayed on the Driver Information Center (DIC) and
the
ON/OFF button is pressed, the prompts DRIVER
NO 1 or DRIVER NO 2 will appear. These prompts
correspond to which
RKE transmitter button or memory
recall button has been pressed on the
RKE transmitter.
You may have your name and a second driver’s name
displayed here replacing the prompts DRIVER
NO 1
and DRIVER NO 2. A dealership can program your
vehicle to display the names you want. The names will
appear whenever the key position
is turned to ON only
if RKE transmitters 1 or 2 are used to enter the vehicle
or buttons
1 or 2 on the driver’s door are pressed.
2-79
Page 158 of 378
Downloaded from www.Manualslib.com manuals search engine Rear Window Defogger
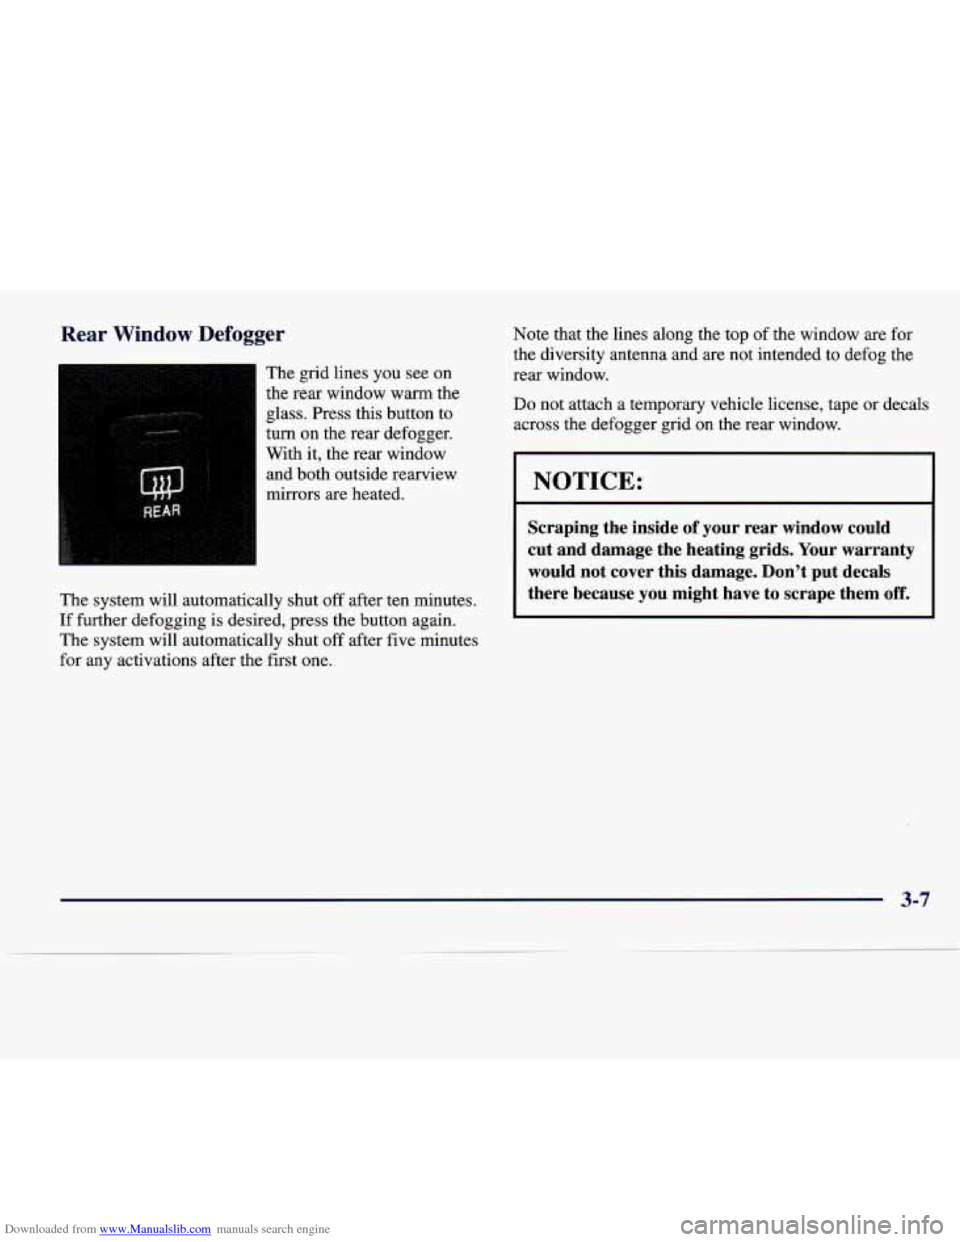
The grid lines you see on
the rear window warm the
glass. Press this button to
turn
on the rear defogger.
With it, the rear window
and both outside rearview
mirrors are heated.
The system will automatically shut
off after ten minutes.
If further defogging is desired, press the button again.
The system will automatically shut
off after five minutes
for any activations after the first one. Note that the lines along the top
of the
window are for
the diversity antenna and are not intended to defog the
rear window.
Do not attach a temporary vehicle license, tape or decals
across the defogger grid
on the rear window.
I NOTICE:
Scraping the inside of your rear window could
cut and damage the heating grids. Your warranty would not cover this damage. Don’t put decals
there because you might have
to scrape them off.
3-7
Page 211 of 378
Downloaded from www.Manualslib.com manuals search engine Check your mirrors, glance over your shoulder, and
start your left lane change signal before moving out
of the right lane to pass. When you are far enough
ahead of the passed vehicle to see its front in your
inside mirror, activate your right lane change signal
and move back into the right lane. (Remember that
your right outside mirror is convex. The vehicle you
just passed may seem to be farther away from you
than it really is.)
Try not to pass more than one vehicle at a time
on two-lane roads. Reconsider before passing the
next vehicle.
Don’t overtake a slowly moving vehicle too rapidly.
Even though the brake lamps are not flashing, it may
be slowing down or starting to turn.
If you’re being passed, make it easy for the
following driver to get ahead
of you. Perhaps you
can ease a little to the right.
Loss of Control
Let’s review what driving experts say about what
happens when the three control systems (brakes, steering
and acceleration) don’t have enough friction where the
tires meet the road to do what the driver has asked.
In any emergency, don’t give up. Keep trying to steer and
constantly seek an escape route or area of less danger.
Skidding
In a skid, a driver can lose control of the vehicle.
Defensive drivers avoid most skids by taking reasonable
care suited to existing conditions, and by not “overdriving”\
those conditions. But skids
are always possible.
The three types of skids correspond to your vehicle’s
three control systems. In the braking skid, your wheels
aren’t rolling. In the steering
or cornering skid, too
much speed or steering in a curve causes tires to slip
and
lose cornering force. And in the acceleration skid, too
much throttle causes the driving wheels to spin.
A cornering skid is best handled by easing your foot off
the accelerator pedal.
Remember: Any traction control system helps avoid
only the acceleration skid.
4-14