1998 CADILLAC SEVILLE manual radio set
[x] Cancel search: manual radio setPage 164 of 378
Downloaded from www.Manualslib.com manuals search engine Setting the Tone
TONE: Press and release this button until the desired
tone control (BASS, TREBLE or MIDRANGE) is
found. The radio keeps separate tone settings for each
band, each preset and each source.
LEVEL: After selecting the desired tone control, press
the plus
(+) or minus (-) symbol on this button to select
the desired level.
Adjusting the Speakers
4 SPEAKER: Press and release this button until the
desired BALANCE or FADE control is found.
LEVEL: After selecting the desired BALANCE or
FADE control, press the plus
(+) or minus (-) symbol on
this button to select the desired level.
Playing a Cassette Tape
With the radio on, insert a cassette tape. The tape will
begin playing as soon as it is inserted. When one side of
your cassette tape is done playing, auto reverse plays the
other side
of your cassette tape. Cassette tapes may be
loaded with the radio
off but they will not start playing
until the radio is on. If you want to insert a cassette tape
when the ignition is
off, first press the eject button. While
the tape is playing, use the VOL,
TONE, LEVEL,
and SPEAKER controls just as you do for the radio.
Other controls may have different functions when a tape
is inserted. The display will show an underlined tape
symbol. TAPE PLAY will appear on the display when a
tape is playing, with an arrow to indicate which side
of
the tape is playing.
If an error occurs while trying to play a cassette tape,
it could be that:
The cassette tape is tight and the cassette player
cannot turn the hubs
of the tape. Hold the cassette
tape with the open end down and
try turning the right
hub to the left with a pencil. Flip the tape over and
repeat. If the hubs do not turn easily, your cassette
tape may be damaged and should not be used in the
player. Try a new tape to be sure your player is
working properly.
The cassette tape is broken. (Check to see if your
tape is broken. Try a new tape.)
RW Press the left arrow to rewind the tape rapidly. The
radio will play while the tape rewinds. You may use
your station pushbuttons to tune to another radio station
while in
RW mode. Press the left arrow again to return
to playing speed.
3-13
. ..
Page 165 of 378
Downloaded from www.Manualslib.com manuals search engine FF: Press the right arrow to fast forward to another part
of the tape. The radio will play while the tape advances.
You
may use your station pushbuttons to tune to another
radio station while in
FF mode. Press the right arrow
again to return to playing speed.
TUNE-SEEK: When this button is pressed, it has two
positions. This button works the same, whether it is
pressed to the first or second position. Press this button to seek to the next or previous selection on the tape.
Your tape must have at least three seconds of silence
between each selection for TUNE-SEEK to work. The
sound will mute while seeking.
SCAN: Press this button to listen to selections for a few
seconds. The tape will go to a selection, stop for a few
seconds, then
go on to the next selection. Press this
button again to stop scanning.
SIDE: Press this button to change the side of the tape
that is playing.
6 EJECT: Press the upward triangle button to
remove a tape. The radio will play. Eject may be activated with the radio off and/or the ignition
off.
CLEAN TAPE: If this message appears on the display,
the cassette tape player needs to be cleaned. It will still
play tapes, but you should clean it as soon as possible to
prevent damage to the tapes and player. See “Care of
Your Cassette Tape Player” in the Index. After you clean
the player, press and hold the eject button for three
seconds to reset the CLEAN TAPE indicator.
Your cassette tape player automatically reduces
background noise from tapes encoded with Dolby
NR.
Dolby Noise Reduction is manufactured under a license
from Dolby Laboratories Licensing Corporation. Dolby
and the double-D symbol
are trademarks of Dolby
Laboratories Licensing Corporation.
Auto Cr02 allows the cassette tape player to adjust to
the type of cassette tape for clearer sound for Cr02
cassette tapes.
Playing a Compact Disc
Insert a disc partway into the slot, label side up. The
player will pull it in. If the ignition and the radio
are
on and the underlined compact disc symbol appears on
the display, the disc will begin playing. Compact discs
may be loaded with the radio
off but they will not start
playing until the radio is on. If you want to insert
a disc
when the ignition is off, first press the eject button.
3-1
Page 167 of 378

Downloaded from www.Manualslib.com manuals search engine AM-FM Stereo with Cassette Tape and
MiniDisc@ Player (If Equipped)
Playing the Radio
PWRNOL: Press this knob lightly to turn the system
on. Press the knob again to turn the system off. To
increase volume, turn the knob to the right. Turn it to the
left to decrease volume.
SOURCE: Press this button to select a source. Sources
include cassette and MiniDisc. The audio source must
be loaded to play. Available loaded sources
are shown
on the display.
If a source is being used, it will be
underlined
on the display. If none of the audio sources
are loaded, NO SOURCE LOADED will appear on the
display. Press this button again or
BAND to switch back
to the radio.
MUTE: Press this button to silence the system. Press it
again to turn on the sound.
Finding a Station
BAND: Press this button to select AM, FM1 or FM2.
TUNE-SEEK: When this button is pressed it has two
positions. Press this button to the first position to
manually tune to higher or lower stations. If this button
is held at the first position for a few seconds, the radio
will continue tuning until this button is released. Press
this button to the second position and release to seek to
the next higher
or lower radio station.
SCAN: Press this button for less than two seconds to
scan radio stations. The radio will go to a station, stop
for five seconds, then go on to the next station. Press
this button again to stop scanning.
3-16
Page 168 of 378
Downloaded from www.Manualslib.com manuals search engine PUSHBUTTONS: The six numbered pushbuttons let
you return to your favorite stations. You can set up to
18 stations (six AM, six FMl and six FM2). Just:
1. Turn the radio on.
2. Press
BAND to select AM, FM1 or FM2.
3. Tune in the desired station.
4. Press and hold one of the six numbered buttons
for more than two seconds until you hear a beep.
Whenever you press that numbered button for less
than two seconds, the station you set will return.
5. Repeat the steps for each pushbutton.
When battery power is removed and later applied, you
will not have to reset your radio presets because the
radio remembers them.
PRESET SCAN: Press and hold SCAN for more than
two seconds until you hear a beep to listen to each of
your preset stations for five seconds. The radio will
go
to the first preset station stored on your pushbuttons,
stop for five seconds, then go on to the next preset
station. Press SCAN again to stop scanning. If a preset
station has weak reception, the radio will not stop at the
preset station.
Setting the Tone
TONE:
Press and release this button until the desired
tone control (BASS, TREBLE or MIDRANGE) is found. The radio keeps separate tone settings for each
band, each preset (except weather band presets), and each source.
LEVEL: After selecting the desired tone control, press
the plus
(+) or minus (-) symbol on this button to select
the desired level.
Adjusting the Speakers
4 SPEAKER: Press and release this button until the
desired BALANCE or FADE control is found.
LEVEL: After selecting the desired BALANCE or
FADE control, press the plus
(+) or minus (-) symbol
on this button to select the desired level.
3-17
Page 169 of 378
Downloaded from www.Manualslib.com manuals search engine Playing a Cassette Tape
With the radio on, insert a cassette tape. The tape will
begin playing as soon as it is inserted. When one side of
your cassette tape is done playing, auto reverse plays the
other side of your cassette tape. Cassette tapes may be
loaded with the radio off but they will not start playing
until the radio is on.
If you want to insert a cassette tape
when the ignition is
off, first press the eject button.
While the tape is playing, use the VOL, TONE, LEVEL,
and SPEAKER controls just as you do for the radio.
Other controls may have different functions when a tape
is inserted. The display will show an underlined tape
symbol. TAPE PLAY
will appear on the display when a
tape is playing, with an arrow to indicate which side of
the tape is playing.
If an error occurs while trying to play a cassette tape, it
could be that:
The cassette tape is tight and the cassette player
cannot turn the hubs of the tape. Hold the cassette
tape with the open end down and try turning the right
hub to the left with a pencil. Flip the tape over and
repeat. If the hubs do not turn easily, your cassette
tape may be damaged and should not be used in the
player. Try a new tape to be sure your player is working properly.
The cassette tape is broken. (Check to see if your
tape is broken. Try a new tape.)
RW Press the left arrow to rewind the tape rapidly.
The radio will play while the tape rewinds. You may use
your station pushbuttons to tune to another radio station while in RW mode. Press the left arrow again to return
to playing speed.
FF: Press the right arrow to fast forward to another part
of the tape. The radio will play while the tape advances.
You may use your station pushbuttons to tune to another
radio station while in
FF mode. Press the right arrow
again to return to playing speed.
TUNE-SEEK: When this button is pressed, it has
two positions. This button works the same, whether it
is
pressed to the first or second position. Press this button
to seek to the next or previous selection on the tape.
Your tape must have at least three seconds of silence
between each selection for
TUNE-SEEK to work. The
sound will mute while seeking.
SCAN: Press this button to listen to selections for a few
seconds. The tape will go to a selection, stop for a few
seconds,
then go on to the next selection. Press this
button again to stop scanning.
Page 170 of 378
Downloaded from www.Manualslib.com manuals search engine SIDE: Press this button to change the side of the tape
that is playing.
A EJECT Press the upward triangle button to the
right
of the cassette tape player to remove a tape. The
radio will play. Eject may be activated with the radio
off
and/or the ignition off.
CLEAN TAPE: If this message appears on the display,
the cassette tape player needs to be cleaned.
It will still
play tapes, but you should clean it as
soon as possible to
prevent damage to the tapes and player. See “Care of
Your Cassette Tape Player” in the Index. After you clean
the player, press and hold the eject button for three
seconds to reset the CLEAN TAPE indicator.
Your cassette tape player automatically reduces
background noise from tapes encoded with Dolby
NR.
Dolby Noise Reduction is manufactured under a license
from Dolby Laboratories Licensing Corporation. Dolby
and the double-D symbol are trademarks
of Dolby
Laboratories Licensing Corporation.
Auto Cr02 allows the cassette tape player to adjust to
the type of cassette tape for clearer sound for Cr02
cassette tapes.
Playing a MiniDisc
Insert a disc partway into the slot, label side up. The
player will pull it in. If the ignition and the radio are on
and the underlined MiniDisc symbol appears on the
display, the disc will begin playing. MiniDiscs may be
loaded with the radio
off but they will not start playing
until the radio is on. If you want to insert a disc when
the ignition is off, first press the eject button.
While a MiniDisc is playing,
MD TRACK number will
appear on the display followed by ALBUM title, then
TRACK title. The display then reverts back to showing
MD TRACK number.
If you’re driving on a very rough road or if it’s very
hot, the disc may not play. If the disc comes out, it
could be that:
0 It is dirty, scratched or wet.
The air is very humid. (If so, wait about an hour
If any error occurs repeatedly or
if an error can’t be
corrected, please contact your dealer. and try again.)
RW Press and hold
the left arrow to reverse the
MiniDisc. Release it to return to playing speed.
Page 171 of 378
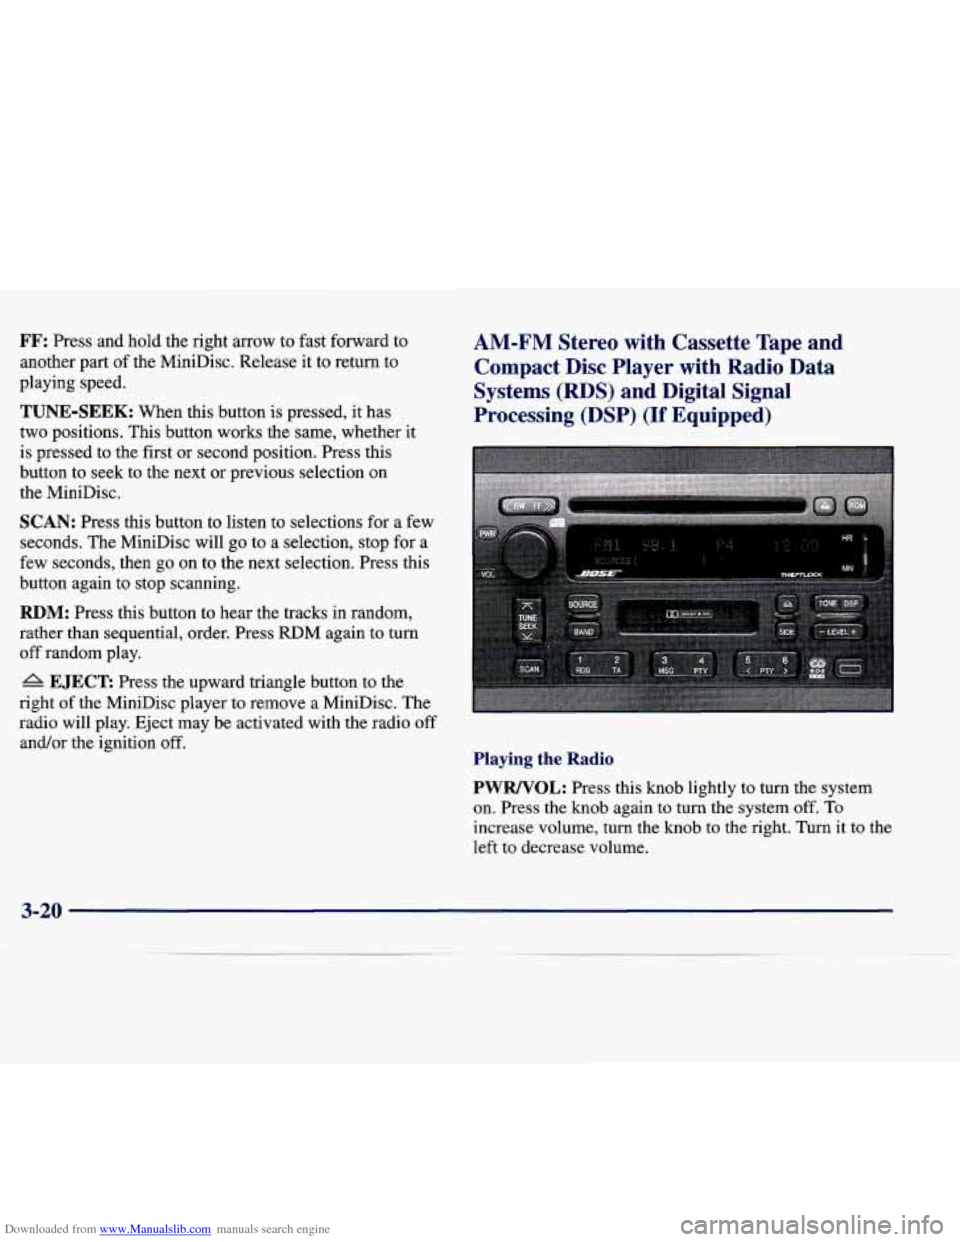
Downloaded from www.Manualslib.com manuals search engine FF: Press and hold the right arrow to fast forward to
another part of the MiniDisc. Release it to return to
playing speed.
TUNE-SEEK: When this button is pressed, it has
two positions. This button works the same, whether
it
is pressed to the first or second position. Press this
button to seek to the next or previous selection on
the MiniDisc.
SCAN: Press this button to listen to selections for a few
seconds. The MiniDisc will
go to a selection, stop for a
few seconds, then go on to the next selection. Press this
button again to stop scanning.
RDM: Press this button to hear the tracks in random,
rather than sequential, order. Press
RDM again to turn
off random play.
A EJECT Press the upward triangle button to the
right of the MiniDisc player to remove a MiniDisc. The
radio will play. Eject may be activated with the radio
off
andor the ignition off.
AM-FM Stereo with Cassette Tape and
Compact Disc Player with Radio Data
Systems
(RDS) and Digital Signal
Processing (DSP)
(If Equipped)
Playing the Radio
PWRNOL:
Press this knob lightly to turn the system
on. Press the knob again
to turn the system off. To
increase volume, turn the knob to the right. Turn it to the
left to decrease volume.
3-20
Page 172 of 378
Downloaded from www.Manualslib.com manuals search engine AVC: Your system has a feature called Automatic
Volume Control (AVC). With AVC, your audio system
monitors the noise in the vehicle. Then, AVC
automatically adjusts the volume level
so that it always
sounds the same to you. To use AVC, press and hold the
TONE button until AUTO VOLUME CONTROL OFF appears on the display. Then press the LEVEL
plus
(+) symbol. AUTO VOLUME CONTROL ON
will appear on the display. AVC VOLUME will appear
on the display any time you adjust the volume while
AVC
is on. To turn AVC off, press and hold the
TONE button until AUTO VOLUME CONTROL
ON
appears on the display. Then press the LEVEL minus (-)
symbol. AUTO VOLUME CONTROL OFF will appear
on the display.
SOURCE: Press this button to select a source. Sources
include cassette and compact disc. The audio source
must be loaded to play. Available loaded sources are shown on the display.
If a source is being used, it will be
underlined on the display. If none
of the audio sources
are loaded,
NO SOURCE LOADED will appear on the
display. Press this button again or BAND to switch back
to the radio.
Finding a Station
BAND: Press this button to select AM, FMl, FM2
or weather.
TUNE-SEEK: When this button is pressed it has two
positions. Press this button to the first position to
manually tune to higher or lower stations. If this button
is held at the first position for a few seconds, the radio
will continue tuning until this button is released. Press
this button to the second position and release to seek to
the next higher or lower radio station.
SCAN: Press this button for less than two seconds to
scan radio stations. The radio will go to
a station, stop
for five seconds, then go on to the next station. Press
this button again to stop scanning.
PUSHBUTTONS: The six numbered pushbuttons let
you return to your favorite stations. The RDS PTY mode must be off to use this mode.
You can set up to
24 stations (six AM, six FM1, six FM2 and six
weather). Just:
1. Turn the radio on.
2. Press BAND to select AM, FM1, FM2 or weather.
3. Tune in the desired station.
4. Press and hold one of the six numbered buttons for
more than two seconds. Whenever you press that
3-21