1998 CADILLAC CATERA lock
[x] Cancel search: lockPage 98 of 346

Downloaded from www.Manualslib.com manuals search engine Torque Lock
If you are parking on a hill and you don’t shift your
transmission into PARK (P) properly, the weight of the
vehicle may put too much force on the parking pawl
in
the transmission. You may find it difficult to pull the
shift lever out of PARK (P). This is called “torque lock.”
To prevent torque lock, set the parking brake and then
shift into PARK
(P) properly before you leave the
driver’s seat.
To find out how, see “Shifting Into
PARK (P)” in the Index.
If torque lock does occur, you may need to have another
vehicle push yours a little uphill to take some of the
pressure from the parking pawl in the transmission,
so
you can pull the shift lever out of PARK (P).
Shifting Out of PARK (P)
Your vehicle has a Brake-Transmission Shift Interlock
(BTSI). You have to fully apply the regular brakes
before you can shift from PARK (P) when the ignition is
in
ON. See “Automatic Transmission” in the Index.
If you cannot shift out
of PARK (P), ease pressure on
the shift lever
-- push the shift lever all the way into
PARK (P) as you maintain brake application. Then
move the shift lever into the gear you want. If you ever
hold the brake pedal down but still can’t shift out of
PARK
(P), try this:
1. Turn the ignition key to OFF. Open and close the
driver’s door to turn off the Retained Accessory
Power (RAP) feature.
2. Apply and hold the brake until the end of Step 8.
Page 99 of 346

Downloaded from www.Manualslib.com manuals search engine A
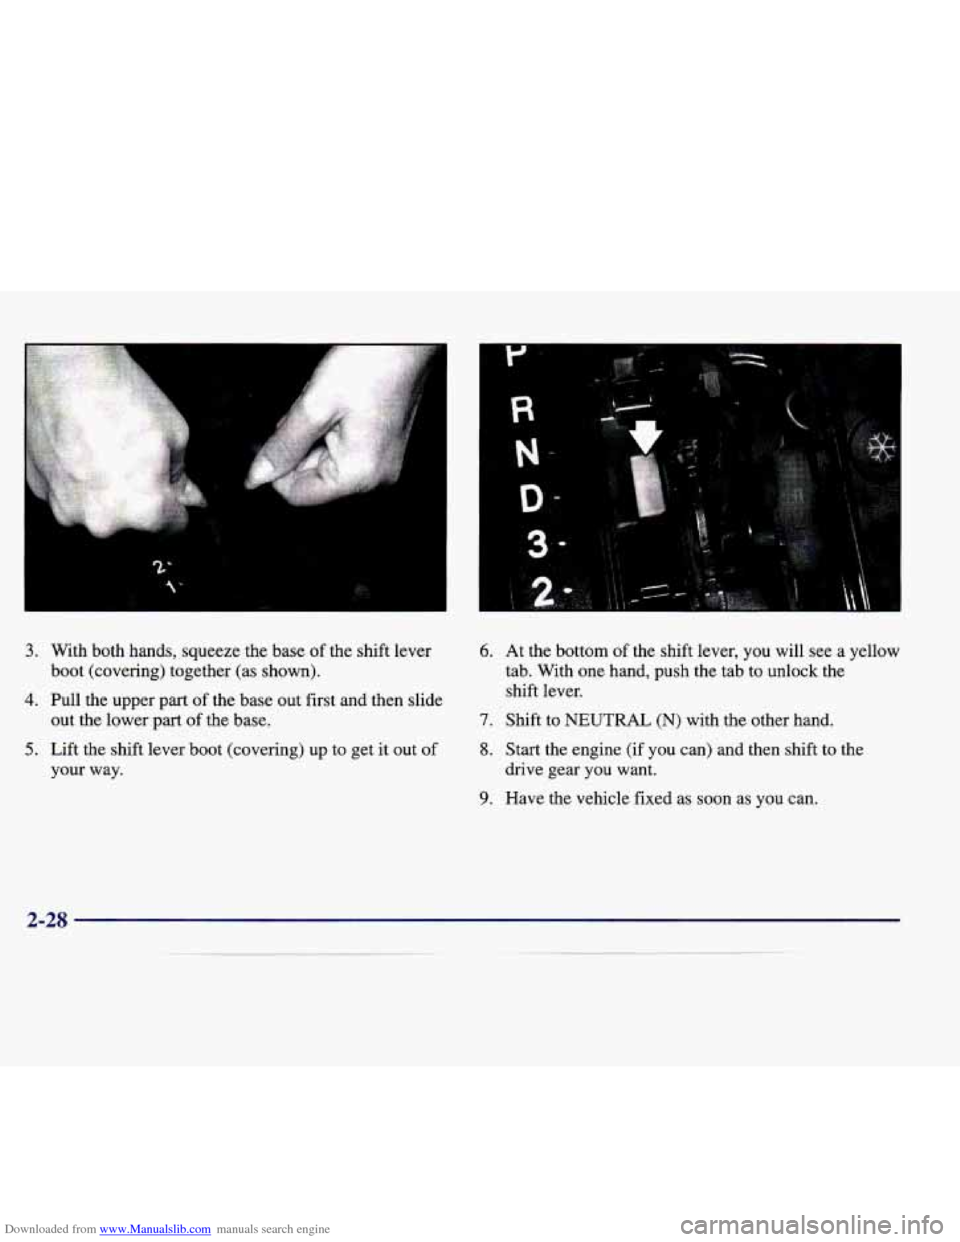
3. With both hands, squeeze the base of the shift lever
4. Pull the upper part of the base out first and then slide
5. Lift the shift lever boot (covering) up to get it out of
boot (covering) together (as shown).
out the lower part
of the base.
your way.
6. At the bottom of the shift lever, you will see a yellow
tab. With one hand, push the tab to unlock the
shift lever.
7. Shift to NEUTRAL (N) with the other hand.
8. Start the engine (if you can) and then shift to the
drive gear you want.
9. Have the vehicle fixed as soon as you can.
Page 102 of 346

Downloaded from www.Manualslib.com manuals search engine Windows
Power Windows
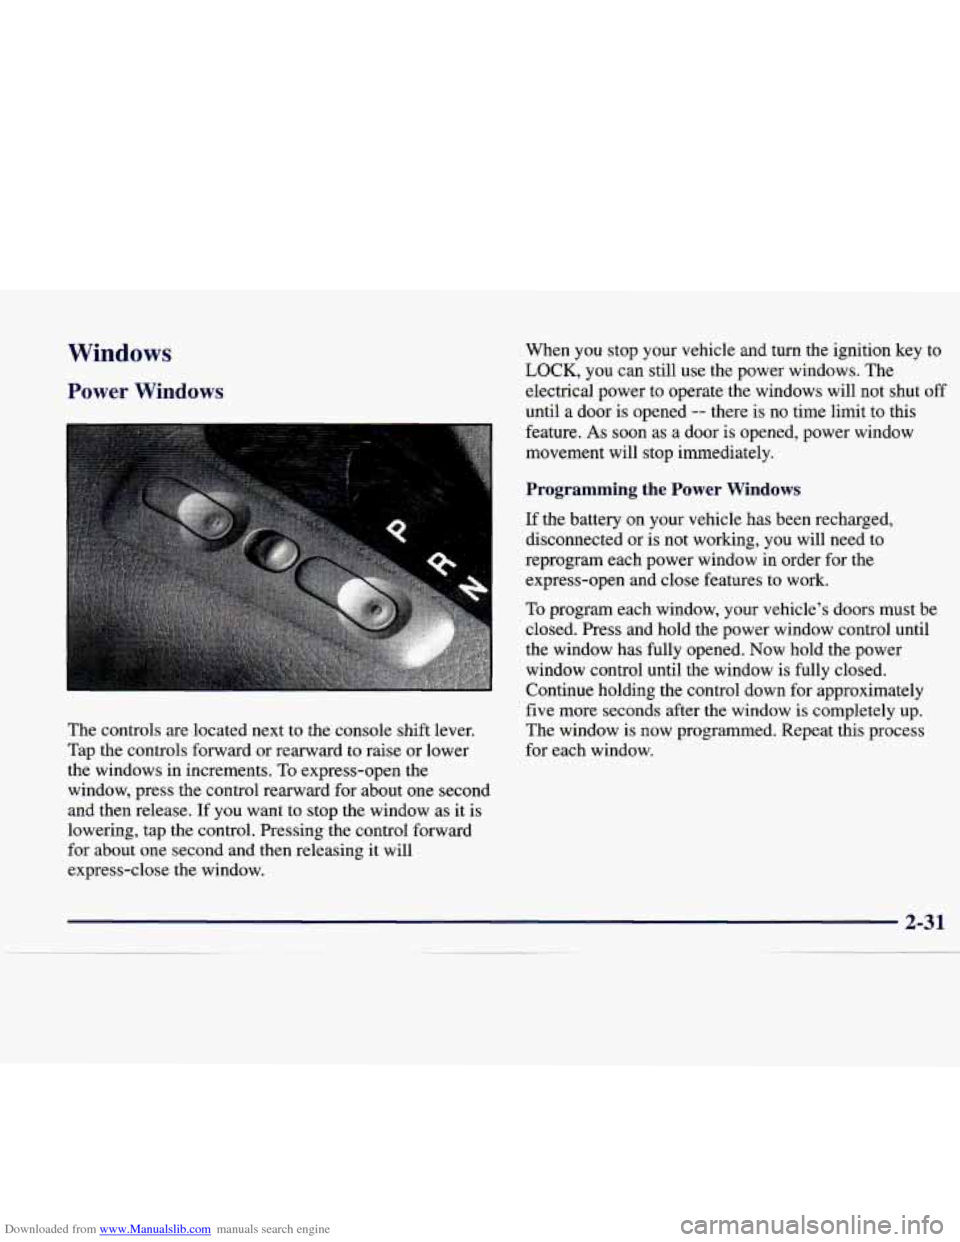
The controls are located next to the console shift lever.
Tap the controls forward or rearward to raise or lower
the windows in increments.
To express-open the
window, press the control rearward for about one second
and then release.
If you want to stop the window as it is
lowering, tap the control. Pressing the control forward
for about one second and then releasing it will
express-close the window. When
you stop your vehicle and turn the ignition key to
LOCK, you
can still use the power windows. The
electrical power to operate the windows will not shut
off
until a door is opened -- there is no time limit to this
feature.
As soon as a door is opened, power window
movement will stop immediately.
Programming the Power Windows
If the battery on your vehicle has been recharged,
disconnected or is not working, you will need to
reprogram each power window in order for the
express-open and close features to work.
To program each window, your vehicle’s doors must be
closed. Press and hold the power window control until
the window has fully opened. Now hold the power
window control until the window is fully closed.
Continue holding the control down for approximately
five more seconds after the window is completely up.
The window is now programmed. Repeat this process
for each window.
Page 103 of 346

Downloaded from www.Manualslib.com manuals search engine Anti-Pinch Feature
If a hand, an am or another object is in the
way of the
power window express-closing, the window will
immediately stop at the obstruction and express-open to
a preset factory position.
LA C. LJTION:
Pressing and holding the power window control
button will turn
off the anti-pinch feature. If this
happens,
a power window won’t stop if
something gets in the
way. You or others could be
injured, and your window could be damaged. Be
careful not to press and hold the power window
control button.
I
Rear Window Lockout
I
Pressing this button
rearward will disable the
rear passenger window controls. This is a useful
feature
if you have children
as passengers. Press the
button forward to allow
your passengers to use their
window controls.
Horn
The horn can be sounded by pressing either horn symbol
on the steering wheel. The symbols are located at about
the 9 and
3 o’clock positions.
Page 104 of 346

Downloaded from www.Manualslib.com manuals search engine Tilt Steering Wheel
1;
Tilt steering allows you to adjust the steering wheel
before you begin driving. Raising the steering wheel to
the highest level gives your legs more room when you
enter and exit your vehicle.
Hold the steering wheel and pull the lever toward you
to tilt the wheel. Adjust the steering wheel to a
comfortable position and then release the lever
to lock
the wheel in place.
Turn SignaVMultifunction Lever
Turn and Lane Change Signals
To signal a turn, move the lever all the way up or down.
The lever returns automatically when the turn
is complete.
This arrow
on the
instrument panel will flash
in the direction of the turn
or lane change.
Raise or lower the lever until the arrow starts
to flash to
signal a lane change. Hold it there until the lane change
is complete. The lever returns when it’s released.
Arrows that flash rapidly when signaling for a turn or
lane change may be caused by a burned-out front signal
bulb (this
does not occur with a burned-out rear bulb).
Other drivers won’t see the
turn signal. Replace
burned-out bulbs to help avoid possible accidents. Check the fuse
(see “Fuses and Circuit Breakers” in the
Index) and for burned-out bulbs if the arrow fails to
work when signaling a turn.
Page 106 of 346

Downloaded from www.Manualslib.com manuals search engine Be sure to clear ice and snow from the wiper blades
before using them. If they’re frozen to the windshield,
carefully loosen
or thaw them. If the blades do become
damaged, replace them with new blades.
Heavy snow
or ice can overload the wiper motor. A
circuit breaker will stop the motor until it cools. Clear
away snow
or ice to prevent an overload.
Windshield -washer
Pull and hold the washer
lever to wash the
windshield. Release the
lever when
you have
enough fluid. The wipers
will clear the windshield and either stop or return
to
A telltale light on the instrument panel will be displayed
when
the washer fluid reaches a low level. See “Low
Washer Fluid Warning Light” in the Index for
more information.
I
A CAUTION:
--
In freezing weather, don’t use your washer until
the windshield
is warmed. Otherwise the washer
fluid can form ice on the windshield, blocking
your vision.
Page 112 of 346

Downloaded from www.Manualslib.com manuals search engine Wiper-Activated Headlamps
This feature activates the low-beam headlamps, parking
lamps, sidemarker lamps and taillamps after the
windshield wipers have been in use for about
20 seconds.
The wiper-activated headlamps light the way in poor
weather and
also make your vehicle more visible to
other drivers.
If the wipers are on and the ignition switch
is turned off, the headlamps will immediately turn off.
The headlamps will also deactivate if the windshield
wipers have been turned
off for about 20 seconds.
Perimeter Lighting
This feature turns on the low-beam headlamps,
parking lamps, sidemarker lamps and taillamps for
about
20 seconds after the unlock button on the remote
keyless entry transmitter is pressed. Perimeter lighting
immediately ends when your vehicle’s ignition is turned
to
ON or START.
Lamps On Reminder
You will hear a warning chime if you open the door
while leaving the lamps on, if the manual headlamp
control is activated. An exception to this is when you’re
using the twilight sentinel.
Daytime Running Lamps
Daytime Running Lamps (DRL) can make it easier for
others to see the front of your vehicle during the day.
DIU, can be helpful in many different driving
conditions, but they can be especially helpful in the short periods after dawn and before sunset.
The DRL system will make the high-beam headlamps
come on at reduced brightness when:
your vehicle’s ignition is in ON or START,
the low-beam headlamps are off (the manual lamp
switch is in the off or park lamp position) and
your vehicle’s transmission is shifted out of
PARK
(P).
When DRL are on, only the high-beam headlamps (at
reduced brightness) will be on.
No other exterior lamps
such as
the parking lamps, taillamps, etc. will be on
when the DRL
are being used. The instrument panel
won’t be lit up either.
When the twilight sentinel is on and it’s dark enough
outside, the high-beam headlamps (at reduced intensity)
will change to low-beam headlamps. When it’s bright
enough outside, the regular lamps will go off, and the
high-beam headlamps change to the reduced brightness
of
DRL.
2-41
__
Page 115 of 346

Downloaded from www.Manualslib.com manuals search engine If you rotate the control dial all the way up, the lamps Light Sensor
will remain on for about three minutes after the ignition
has been turned to
OFF or LOCK. If you rotate the
control dial all the way down, the lamps will go
off
quickly. You can adjust the delay time from a few
seconds up to three minutes.
I
1
1 To turn the twilight sentinel off, press the OFF button
again. The indicator light in the button will be on.
This
lets the driver know that the system has been turned off.
The twilight sentinel also turns off if the ignition is
turned to
OFF or to LOCK.
-. ~ ~ -- - This light in the instrument
panel will come on if the ignition is on and: The
light sensor for the twilight sentinel is located in the
center of the front defogger grille. If you cover the
sensor, it will read “dark” and the parking lamps and
low-beam headlamps will come on.
1 0 The headlamps have not been manually turned on,
1 0 The twilight sentinel senses it is dark outside,
l 0 The twilight sentinel is OFF and
~ 0 The transmission is not in PARK (P).