1998 BUICK PARK AVENUE fuses
[x] Cancel search: fusesPage 83 of 426

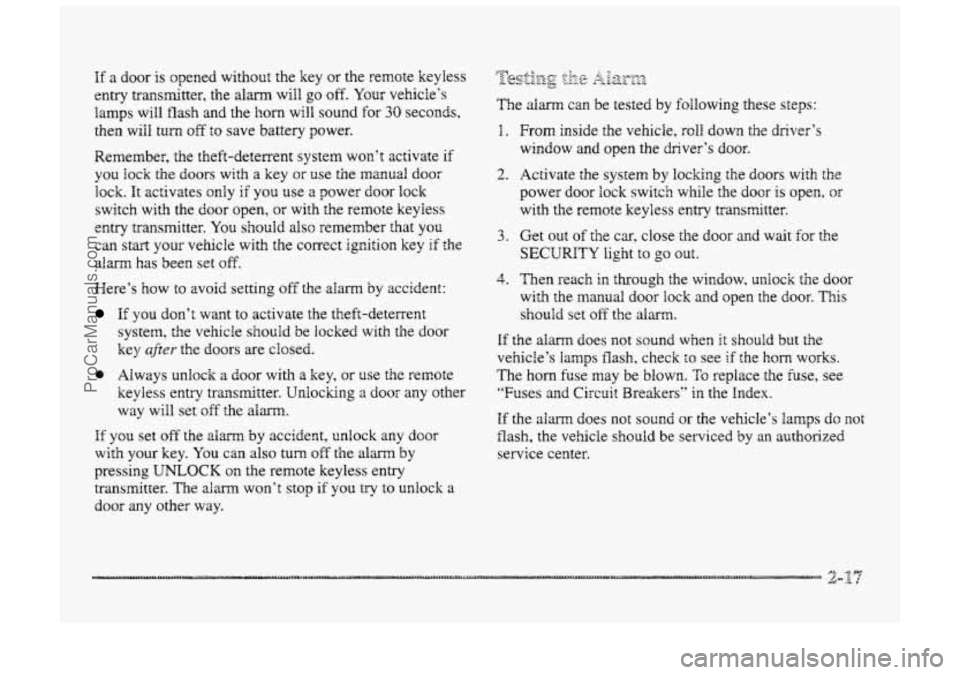
If a door is opened without the key OF the remote keyless
entry transmitter, the alm will
go off. Your vehicie‘s
lamps will flash and the
horn will sound for 30 seconds,
then
will turn of€ to save battery power.
Remember, the theft-deterrent system won’t activate if
you !ock the doors with a key or use the manual door
lock. kt activates only if you use a power door lock
switch with the
door open, or with the remote keyless
entry transmitter.
You should also remember that you
can start your vehicle with the correct ignition key if the
alm
has been set off.
Were’s how to avoid setting off the dam by accident:
I€ you don’t want to activate the theft-deterrent
system, the vehicle
should be locked with the door
key
after the doors are closed.
e Always U~IQC~ a door with a key, or use the remote
keyless entry transmitter. Unlocking
a door any other
way will set
of€ the alarm.
If you set off the alarm by accident, unlock any door
with your key. You can also turn off the alm by
pressing
UNLOCK on the remote keyless entry
transmitter. The
aim won’t stop if you try to unlock a
door any other way.
The aEm can be tested by following these steps:
1. From inside the vehicle, roll down foe driver’s
window and
open the driver’s door.
2. Activate the system by locking the doors with the
power
door lock switch while the door is open, or
with the remote keyless entry transmitter.
SECURITY light to go out.
3. Get out of the car, close the door and wait €or the
4. Then reach in through the window, unioclc the door
with the manual door lock and open the door. This
shouhd set off the altum.
If the alarm does not sound when it shdd but the
vehicle‘s
iiamps flash, check to see if the horn works.
The horn fuse may be blown. TQ replace the fuse, see
“Fuses and
Circrrit Breakers“ in the Index.
HE the alarm does not sound or the vehicle’s Bamps dc not
flash, the vehicle should be serviced by an authorized
service center.
ProCarManuals.com
Page 85 of 426

If the engine still does not start, and the key appears to
be undamaged, try mother ignition key. At this time,
you may also want to check the fuse (see “Fuses and
Circuit Breakers’‘
in the Index). If the engine still does
not start with the other key, your vehicle needs service.
If your vehicle does start, the €kt key may be faulty.
See your dealer or a
Iocksrnith who can service the
PASS-Key
IIH tc have a new key Bade.
It is possible for the PASS-Key IIP decoder to learn the
transponder value
of a new replacement key. Up to
ten additional keys may be programmed for the vehicle.
This procedure is €or learning additional keys only. If all
the currently programed keys are lost or do not
operate, you must see your dealer or a locksmith who
can service PASS-Key
HI1 to have keys made and
programmed
to the system.
See your dealer or 2 locksmith who can service
PASS-Key
III to get 2 new key blank that is a cut
exactly
as a current black colored driver’s key that
operztes the system.
Do not use 2 gray colored valet key
for this procedure.
To program the new key:
1.
2.
3.
4.
5.
Insert the cumrent driver’s key (black in color) i~* the
ignition
and start the engine. If the engine wiil not
start see your dealer for service.
After the engine has started,
turn the key to the off
position, and remove the key.
Insert the key
to be progrmmed and turn it to the
mn position within ten seconds of removing the
previous key.
The
SECURITY telltale iight will off once the
key
has been programmed. It may not be apparent
that the SECURITY light went on due to how
quickly
the key is programmed.
Repeat steps
1 through 4 if additional keys are to
be programmed.
ff you are ever driving and the SECURITY iight comes
or; and stays on, you will be able to restart your engine if
you turn it off. Your BASS-Key III system, however, is
not working properly and must be serviced by your
dealer.
You vehicle is not protected by the PASS-Key
III system at this time.
If you lose or damage a PASS-Key I11 key, see your
dealer or a locksmith who can service PASS-Key HIT to
have a new key made.
ProCarManuals.com
Page 103 of 426

E a bulb is burned out, replace it to help avoid itr~
accident. If the mows don’t go on at all when you
signal a turn, check the €use (see “‘Fuses md Circuit
Breakers” in the Index) and f~r burned-out bulbs.
If you have a trailer towing option with added wiring for
the trailer lamps, the signal indicator will flash even if a
turn signal bulb is burned aut. Check the front and rea
turn signal lamps regularly to make sure they are
workirzg. Note: You do not need to add a
different Basher.
If your turn signal is left on ~CZ more than 3/4 of a mile
(1.2 h), a chime will sound ai each flash of the turn
signal. To turn df the chime, move the turn signal lever
to the dTposition.
When the high beams are
on, a light the instrdment
panel wiil ~SQ be on. if
This feztuse lets you use your high-beam headlamps to
signal a driver in front of you that you want to pass. It
works even if your headamps xe 3ff.
To use it, pull the turn signal lever toward you, but not
so far that you hear a click.
If your headlamps are off or on low beam, your
high-beam headlamps will turn on. They’ll stay QPI as
long as you hold the Iever toward you and the
high-beam indicator on the dash will come on. Release
the Iever to turn the high-beam headlamps off.
ProCarManuals.com
Page 338 of 426

NOTICE:
Don’t add anything electrical to your vehicle
unless you check with your dealer first. Some
electrical equipment can damage your vehicle
and the damage wouldn’t be covered by your
warranty. Some add-on electrical equipment
can keep other components
from working as
they should.
Your vehicle has an air bag system. Before attempting to
add anything electrical to your vehicle, see “Servicing
Your Air Bag-Equipped Vehicle” in the Index.
To check ;he fuses in this underhood fuse center, mrn
the knob to the left and remove the cover. There is a
chart inside the cover that explains the features and
controls governed by each fuse and relay.
ProCarManuals.com
Page 339 of 426

The wiring circuits in your vehicle are potected from
short circuits by a combination of fuses and circuit
breakers. This greatly reduces ?;he chance
of damage
caused
by electrical problems.
Look at the silver-cobred band inside the fuse. If the
band is broken or melted, replace the fuse. Be sure
you
replace a bad fuse with a new one of the identical size
and rating.
Tlere
are three fase blocks in your vehicle: the
Instrument
Pace1 Fuse Block located under the
instrument panel, the Underhood Fuse Block located
QTP
the passenger's side engine compartment and the Xear
Fuse Block, located under the rear seat.
I.
2.
3.
4.
5.
Remove the two 7 mm screws located aIsng the
front edge of the panel.
Lower the
hush panel. The fuse block is a
rectangular covered box iocated on the far right side
under the instrument panel.
Remove the cover. Now you can see the hses 2nd
replace them.
Place the wide
end of the he puller over the plastic
end of the f;crse.
Squeeze the ends over the fuse and pull it out.
Spare fuses are located in the enpty slots shown OR the
foliowing chat.
When finished, repiace the hush panei. Replace lamps,
connectors,
and HVAC duct temperature sensors if they
were removed.
ProCarManuals.com
Page 404 of 426

Brake Adjustment
.................................. 6-32
Fluid
....................................... 6-29
Master Cylinder
.............................. 6-29
Parking
..................................... 2- 27
PedalTravel
................................. 6-32
Replacing System Parts
........................ 6-32
System Warning Light
......................... 2-77
Transaxle Shift Interlock
....................... 2-3 1
Transaxle Shift Interlock Check .................. 7-33
Wear
....................................... 6-31
Trailer
...................................... 4-36
Brakes,
Anti-Lock ............................... 4-7
Brahng ........................................ 4-6
Braking in Emergencies
.......................... 4-10
Break-In,
New Vehicle .......................... 2-20
BTSI ......................................... 2- 31
BTSI Check
................................... 7-33
Bulb Replacement
.............................. 6-33
Canadian Roadside Assistance
.................... 8-5
Capacities and Specifications ...................... 6-72
Carbon Monoxide
............... 2- 15,2-32,4-29.4-35
Cassette Deck Service
........................... 7-3 1
Cassette Tape Player ....................... 3- 10. 3. 14
Care
....................................... 3-35
Errors ................................. 3.12. 3.16
CD Changer. Trunk Mounted
...................... 3-27
Cellular Phone Readiness Package
................. 2-64
Center Passenger Position
........................ 1-27
Central
Door Unlocking System .................... 2-5
Certification Label
.............................. 4-3 1
Chains. Safety ................................. 4-35
Chains. Tire
................................... 6-54
Change Engine Oil Soon ......................... 6-16
Changing a Flat Tire
............................. 5-22
Check Engine Light
............................. 2-79
Check Tire Pressure System
....................... 6-47
Checking Your Restraint Systems
.................. 1-52
Chemical Paint Spotting
.......................... 6-61
Child Restraints
................................ 1-37
Securing
in a Rear Outside Seat Position ........... 1-43
Securing in the Center Rear Seat Position
.......... 1-45
Securing in the Right Front Seat Position
.......... 1-47
TopStrap
................................... 1-42
Where to Put
................................ 1-41
Chrome Wheels. Cleaning
........................ 6-60
Cigarette Lighter
............................... 2-63
Circuit Breakers
and Fuses ....................... 6-65
Cleaner.
Air ................................... 6-17
Cleaning Aluminum or Chrome Wheels
................... 6-60
Exterior LampsLenses
........................ 6-59
Fabric
...................................... 6-56
Glass
....................................... 6-58
Inside of Your Vehicle ......................... 6-55
InstrumentPanel
............................. 6-57
Leather
..................................... 6-57
Outside
of Your Vehicle ........................ 6-59
Speaker Covers
.............................. 6-57
Special Problems
............................. 6-56
Stains
...................................... 6-56
Tires
....................................... 6-60
Vinyl
....................................... 6-57
Wheels
..................................... 6-60
Windshield and Wiper Blades
................... 6-58
ProCarManuals.com
Page 407 of 426

Fuel .......................................... 6-3
Canada ...................................... 6- 4
DoorLock ................................... 6- 7
Filling YQLK Tank .............................. 6-5
Gage ....................................... 2-83
In Foreign Countries ........................... 6-5
Instmrnent Panell ............................. 6-65
Rea-
....................................... 6-69
Uderhooc! ..................................6 -67
Fuses and Circuit Breakers ....................... 6-55
Gages
Fuse
31ock
Engine CooZarrt Temperature .................... 2-79
Fuel ....................................... 2-83
GamentWodts ................................ 2-64
GAWR ....................................... 4-3:
Gex lositions, Atrtcmatic Transaxle ................ 2 - ,
Lamp ...................................... 2-50
Gross Axle Weigh: Rsting ........................ 4-3 I
Cross Irehide
V?eight Ratir, g ...................... "3 I
Guide en Frangais 11
Garage Door Opecer ....................... 2-57.3-67
.. .................................
GVWR ....................................... 4-31
Halogen Bulbs ................................ 6-33
&zaz Warning Fhshers .......................... 5-2
Head Restraim ................................. 1-7
Meadlamps
.................................... 2-44
Bulb Replacement ............................ 6-34
HigNLow Beam Changer ...................... 2-37
OnRerninder
................................ 2-45
Aiming ..................................... 6-37
Head-up Display ............................... 2-84
Hewing Impaired . Customer Assistance .............. 8-4
Heated Backlite Actenna ......................... 3-36
Hexed OLiesicie LMP, ITOT ........................... 2-56
HeatedSeacs 1-5
.. eaeir;g ........................................ 3-5 7& I *1gh-8errm . Headlamps 2-37
Migh\.Yay Hypnosis .............................. 4-24
Eiil md Mouaataia Rwds ......................... 4-24
Hitches . TraiEer ................................. 4-35
Mood
Checking Thi~~p iinier ......................... 6-9
ReIease ...................................... 6-9
Worn ......................................... 2-34
3UD ......................................... m 1-84
Mydra~tik B~kl: '&Tsj-;lib:g Lights ................... 2-77
Wycirc;plariinlg .................................. 4-B9
.................................... T- .
..........................
If ;I Tire ~oes Fiat .............................. 5-21
Igrrition P~sitio~s ............................... 2-29
Ignition Transaxle Lock Check .................... 7-34
hilurninzted Entry ............................... 2-47
Tnflaticsn. Tire &-essure ........................... 6-46
Inside Manuai DayNght Rearview 1h4in-m ........... 2-50
inspections .................................... 7-35
Bruk Systen; ................................ 7-35
Exhaust System .............................. 7-35
Front Drive Axle Boot ......................... 7-35
Front D~ive Axle Seal ......................... 7-35
Suspension .................................. 7-35
Throttle Linkage .............................. 7-35
Engine Cooling system ........................ 7-35
Steering .................................... 7-35
ProCarManuals.com