1998 BMW 740I clock
[x] Cancel search: clockPage 11 of 211
Contents
Overview
Controls and features
Cockpit16
Instrument cluster18
Indicator and warning lamps20
Multifunction steering wheel
(MFL)23
Hazard warning flashers24
Warning triangle24
First-aid kit24
Refueling25
Fuel specifications25
Tire inflation pressure26
Locks and security systems:
Keys30
Electronic vehicle
immobilizer31
Central locking system32
Door locks – outside32
Radio remote control33
Door locks – inside36
Luggage compartment lid37
Luggage compartment39
Alarm system40
Electric power windows42
Security glass43
Sliding/Tilt sunroof44
Adjustments:
Seats46
Steering wheel49
Mirrors50
Seat, mirror and steering wheel
memory51
Car Memory, Key Memory53
Passenger safety systems:
Safety belts54
Airbags55
Child restraints57
Child restraint installation58
Child-safety locks58
Driving:
Steering/Ignition lock59
Starting engine59
Switching off engine60Parking brake61
Automatic transmission62
Automatic transmission with
Steptronic65
Turn signal/Headlamp flasher68
Washer/Wiper system/Rain
sensor68
Rear window defroster70
Cruise control70
Everything under control:
Odometer, outside temperature
display72
Tachometer72
Energy control73
Fuel gauge73
Temperature gauge74
Service Interval Display74
Check Control 75
Multi-Information Display
(MID)78
Digital clock79
Onboard computer84
Technology for safety and
convenience:
Park Distance Control PDC90
Automatic Stability Control plus
Traction (ASC+T)/Dynamic Sta-
bility Control (DSC)92
Electronic Damper Control
(EDC)93
Tire Pressure Control (RDC)94
Page 30 of 211
Overview
Controls and features
Operation, care
and maintenance
Owner service procedures
Technical data
Index Advanced technology
29n
RepairsIndexOverview Controls Car care Technology Data
Parking brake61
Automatic transmission62
Automatic transmission with
Steptronic65
Indicator/Headlamp flasher68
Washer/Wiper system/Rain
sensor68
Rear window defroster70
Cruise control70
Everything under control:
Odometer, outside temperature
display72
Tachometer72
Energy control73
Fuel gauge73
Temperature gauge74
Service Interval Display74
Check Control75
Multi-Information Display
(MID)78
Digital clock79
Onboard computer84
Technology for safety and
convenience:
Park Distance Control (PDC)90
Automatic Stability Control plus
Traction (ASC+T)/Dynamic Sta-
bility Control (DSC)92
Electronic Damper Control
(EDC)93
Tire Pressure Control (RDC)94Lamps:
Parking lamps/Low beams96
Instrument panel rheostat96
High beams/Parking lamps97
Fog lamps97
Interior lamps97
Reading lamps98
Controlling the climate
for pleasant driving:
Automatic climate control100
Rear passenger-area air
conditioning105
Seat heating106
Steering wheel heating106
Rear window blind107
Independent ventilation
system107
Cabin convenience:
Integrated Universal
Remote control108
Glove compartment110
Center armrests111
Additional storage areas113
Cup holder113
Cellular phone113
Ashtray114
Cigarette lighter115
Rear footrests115
Loading and transporting cargo:
Ski bag116
Cargo loading118
Roof-mounted luggage rack118
Page 57 of 211
56n
Airbags
For your safety, comply with the
following instructions for the air-
bags. If you do not, the airbags may not
be able to provide their maximum pro-
tection. All passengers in the vehicle
should be aware of and comply with
this information:
The airbags are supplemental restraint
devices designed to provide extra pro-
tection; they are not a substitute for
safety belts. Wear your safety belt at all
times. The airbags will not be triggered
in the event of a minor accident, a vehi-
cle roll-over, or collisions from the rear.
In these situations, the safety belts pro-
vide optimal protection.
Adjust your seat to a position that pro-
vides maximum distance between you
and the steering wheel, the instrument
panel and the door while still allowing
comfortable and safe access to all vehi-
cle controls.
Hold the steering wheel at the rim
(hands at the "9 o'clock and 3 o'clock"
positions) in order to avoid injuries to
the hands or arms if the airbag is trig-
gered.
Never allow any objects to obstruct the
area between the airbag and the driver/
passenger.
Do not use the cover panel above the
passenger-side airbag as a storage
area.
Do not apply tape or stickers or other
material over the padded steering
wheel hub, the instrument panel, the
side trim panels of the front or rear
doors and the roof pillars or the sides of
the headliner, or modify them in any
other way.
Do not install a rear-facing child-re-
straint device on the front passenger
seat.
If your vehicle is equipped with side air-
bags in the rear, be sure that child seats
are installed correctly and with the
greatest possible distance from the
door. Do not allow children to lean out
of the child's seat in the direction of the
door. Otherwise, serious injuries could
occur if the airbag is triggered.<
Even when all these guidelines are fol-
lowed, there is still a small residual risk
of injuries to the face, hands and arms
occurring in isolated instances. The ig-
nition and inflation noise may provoke a
mild temporary hearing loss in extremely
sensitive individuals.
Airbag warning information is also pro-
vided on the sun visors.
For additional information concerning the
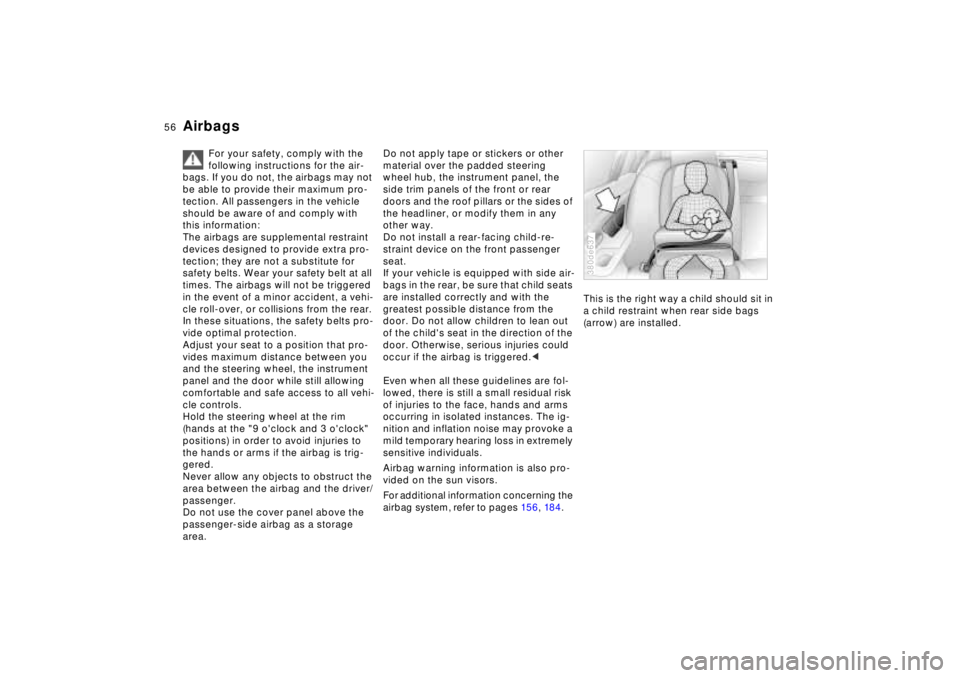
airbag system, refer to pages 15 6, 18 4.This is the right way a child should sit in
a child restraint when rear side bags
(arrow) are installed.
380de637
Page 79 of 211
78n
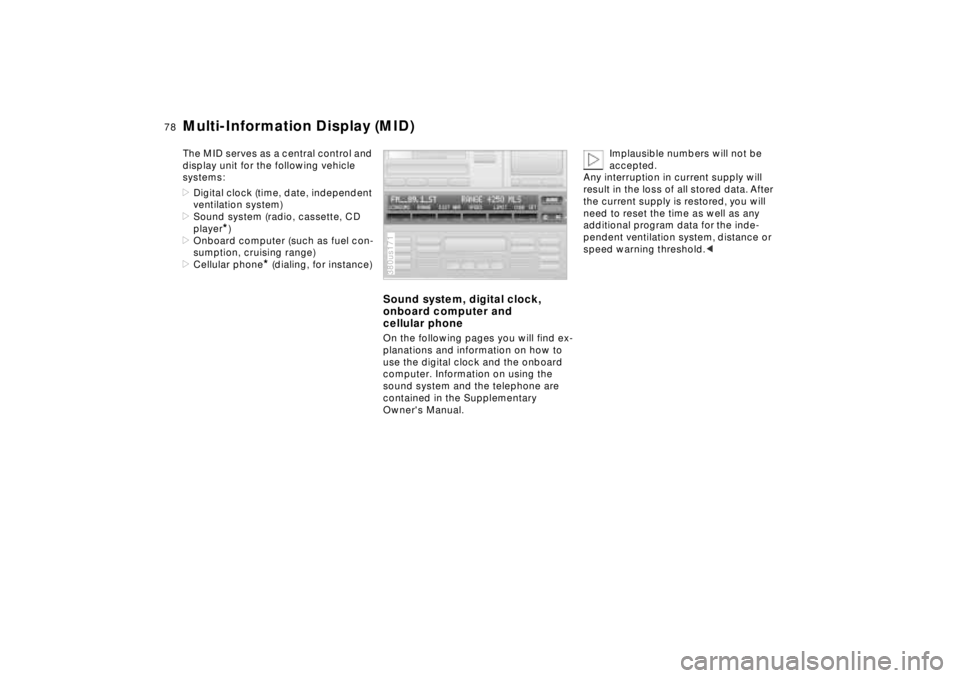
Multi-Information Display (MID)The MID serves as a central control and
display unit for the following vehicle
systems:
>Digital clock (time, date, independent
ventilation system)
>Sound system (radio, cassette, CD
player
*)
>Onboard computer (such as fuel con-
sumption, cruising range)
>Cellular phone
* (dialing, for instance)
Sound system, digital clock,
onboard computer and
cellular phoneOn the following pages you will find ex-
planations and information on how to
use the digital clock and the onboard
computer. Information on using the
sound system and the telephone are
contained in the Supplementary
Owner's Manual.380us171
Implausible numbers will not be
accepted.
Any interruption in current supply will
result in the loss of all stored data. After
the current supply is restored, you will
need to reset the time as well as any
additional program data for the inde-
pendent ventilation system, distance or
speed warning threshold.<
Page 80 of 211
79n
RepairsIndexOverview Controls Car care Technology Data
Digital clockFrom ignition switch position 1, you can
make use of the following functions:
>Time and date
>Program an hourly reminder (memo),
for instance, to remind you of news
broadcasts
>Independent ventilation system.380us173
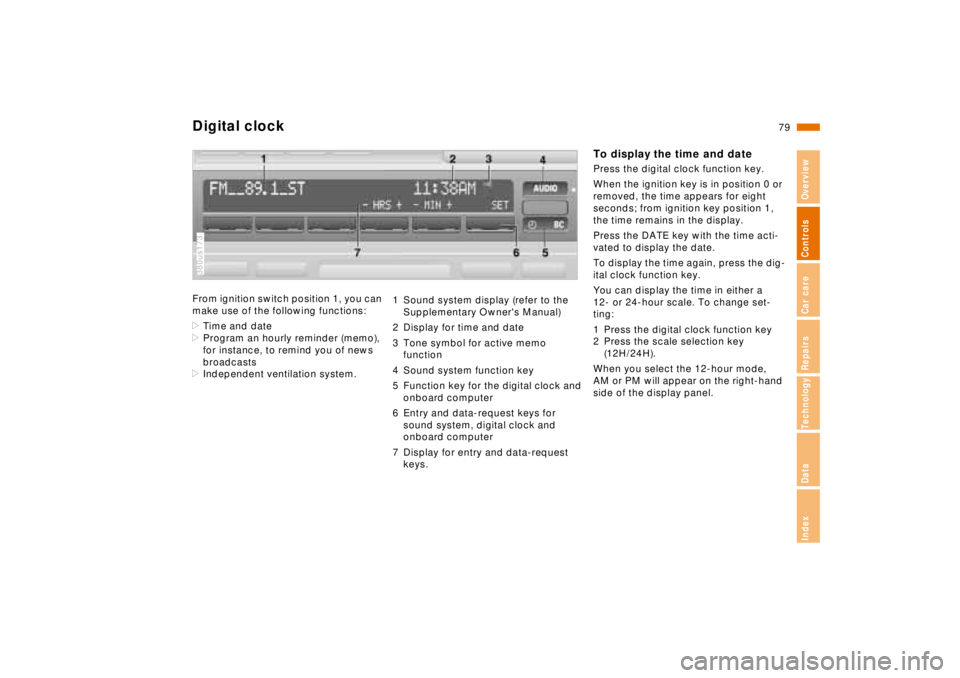
1 Sound system display (refer to the
Supplementary Owner's Manual)
2 Display for time and date
3 Tone symbol for active memo
function
4 Sound system function key
5 Function key for the digital clock and
onboard computer
6 Entry and data-request keys for
sound system, digital clock and
onboard computer
7 Display for entry and data-request
keys.
To display the time and datePress the digital clock function key.
When the ignition key is in position 0 or
removed, the time appears for eight
seconds; from ignition key position 1,
the time remains in the display.
Press the DATE key with the time acti-
vated to display the date.
To display the time again, press the dig-
ital clock function key.
You can display the time in either a
12- or 24-hour scale. To change set-
ting:
1 Press the digital clock function key
2 Press the scale selection key
(12H/24H).
When you select the 12-hour mode,
AM or PM will appear on the right-hand
side of the display panel.
Page 81 of 211
80n
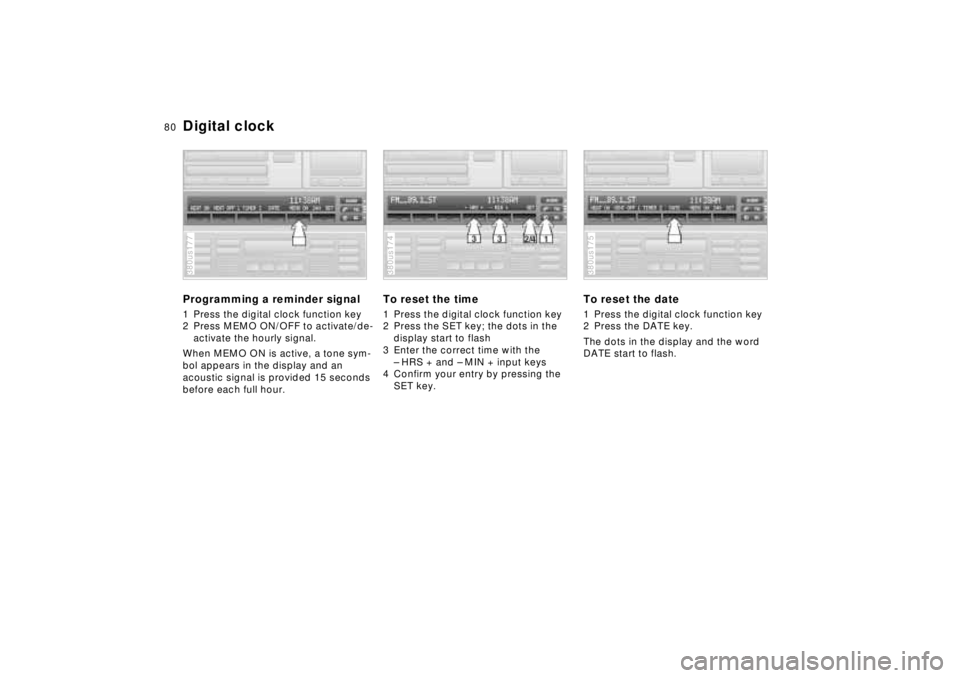
Digital clockProgramming a reminder signal1 Press the digital clock function key
2 Press MEMO ON/OFF to activate/de-
activate the hourly signal.
When MEMO ON is active, a tone sym-
bol appears in the display and an
acoustic signal is provided 15 seconds
before each full hour.380us177
To reset the time1 Press the digital clock function key
2 Press the SET key; the dots in the
display start to flash
3 Enter the correct time with the
– HRS + and – MIN + input keys
4 Confirm your entry by pressing the
SET key.380us174
To reset the date1 Press the digital clock function key
2 Press the DATE key.
The dots in the display and the word
DATE start to flash.380us175
Page 82 of 211
81n
RepairsIndexOverview Controls Car care Technology Data
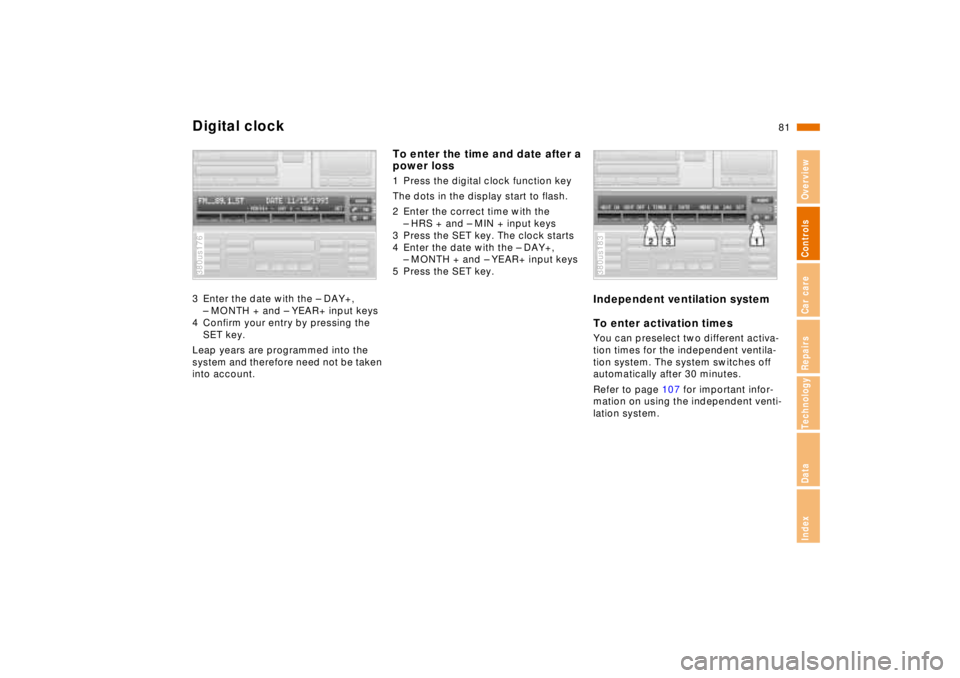
Digital clock3 Enter the date with the – DAY+,
– MONTH + and – YEAR+ input keys
4 Confirm your entry by pressing the
SET key.
Leap years are programmed into the
system and therefore need not be taken
into account.380us176
To enter the time and date after a
power loss1 Press the digital clock function key
The dots in the display start to flash.
2 Enter the correct time with the
– HRS + and – MIN + input keys
3 Press the SET key. The clock starts
4 Enter the date with the – DAY+,
– MONTH + and – YEAR+ input keys
5 Press the SET key.
Independent ventilation system
To enter activation times You can preselect two different activa-
tion times for the independent ventila-
tion system. The system switches off
automatically after 30 minutes.
Refer to page 107 for important infor-
mation on using the independent venti-
lation system.380us183
Page 83 of 211
82n
Digital clockTo enter the first activation timeBefore you can enter data, the ignition
key must be at position 1 and the digital
clock must be visible in the display.
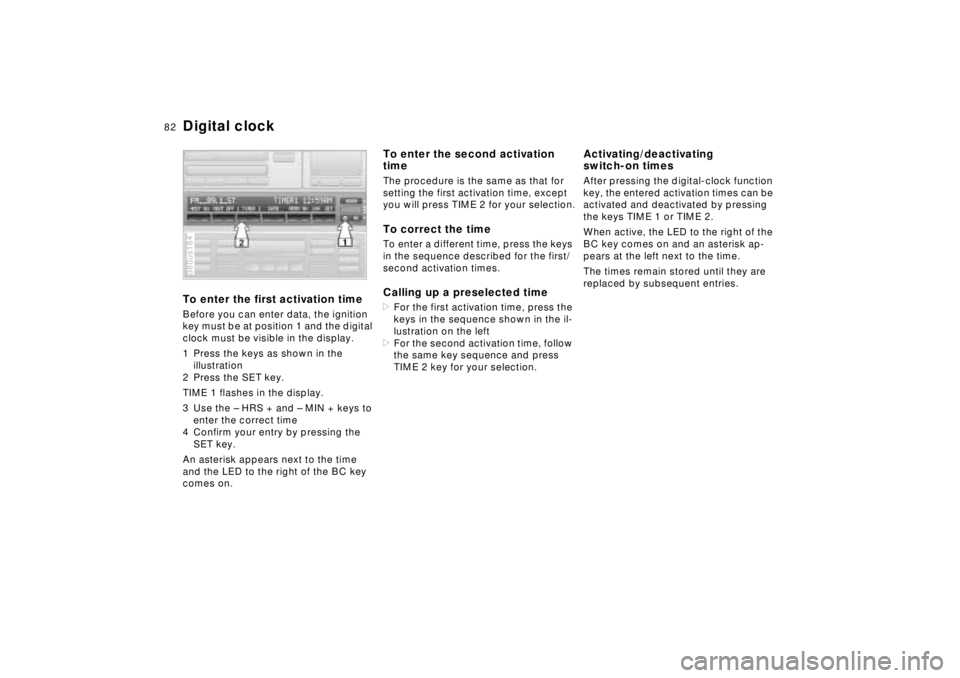
1 Press the keys as shown in the
illustration
2 Press the SET key.
TIME 1 flashes in the display.
3 Use the – HRS + and – MIN + keys to
enter the correct time
4 Confirm your entry by pressing the
SET key.
An asterisk appears next to the time
and the LED to the right of the BC key
comes on.380us184
To enter the second activation
timeThe procedure is the same as that for
setting the first activation time, except
you will press TIME 2 for your selection.To correct the timeTo enter a different time, press the keys
in the sequence described for the first/
second activation times.Calling up a preselected time>For the first activation time, press the
keys in the sequence shown in the il-
lustration on the left
>For the second activation time, follow
the same key sequence and press
TIME 2 key for your selection.
Activating/deactivating
switch-on timesAfter pressing the digital-clock function
key, the entered activation times can be
activated and deactivated by pressing
the keys TIME 1 or TIME 2.
When active, the LED to the right of the
BC key comes on and an asterisk ap-
pears at the left next to the time.
The times remain stored until they are
replaced by subsequent entries.