1998 BMW 740I tow
[x] Cancel search: towPage 162 of 211
Overview
Controls and features
Operation, care
and maintenance
Owner service procedures
Technical data
Index Advanced technology
161n
RepairsIndexOverview Controls Car care Technology Data
Replacement procedures:
Onboard tool kit162
Windshield wiper blades162
Lamps and bulbs163
Remote control168
Changing tires170
Battery173
Fuses176
In case of electrical
malfunction:
Fuel filler door178
Sliding/Tilt sunroof178
Assistance, giving and
receiving:
Jump-starting179
Towing the vehicle180
Page 163 of 211
162n
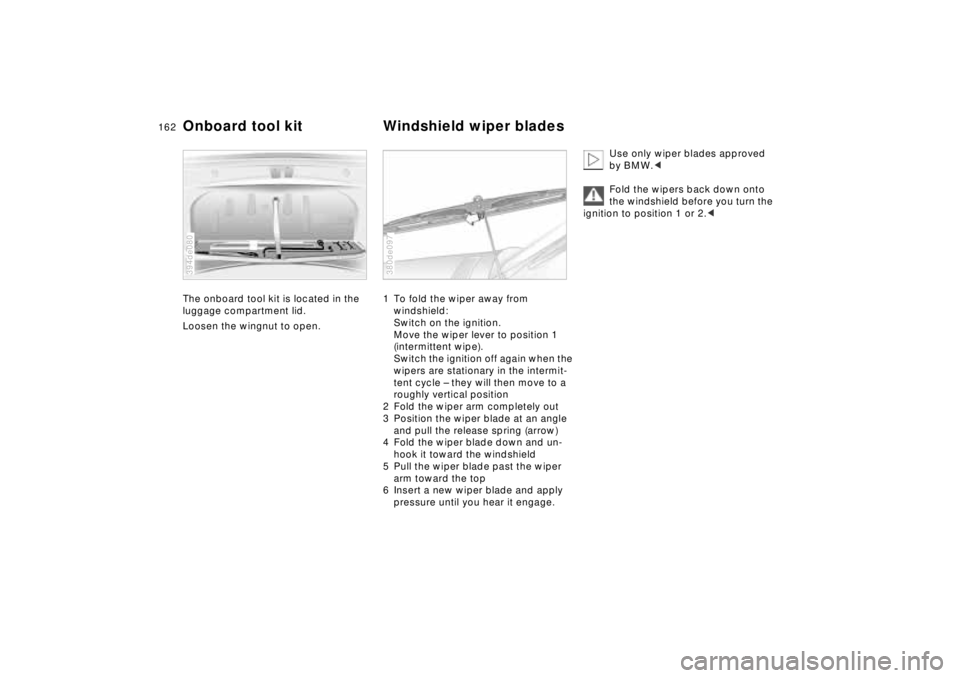
The onboard tool kit is located in the
luggage compartment lid.
Loosen the wingnut to open.
394de080
1 To fold the wiper away from
windshield:
Switch on the ignition.
Move the wiper lever to position 1
(intermittent wipe).
Switch the ignition off again when the
wipers are stationary in the intermit-
tent cycle – they will then move to a
roughly vertical position
2 Fold the wiper arm completely out
3 Position the wiper blade at an angle
and pull the release spring (arrow)
4 Fold the wiper blade down and un-
hook it toward the windshield
5 Pull the wiper blade past the wiper
arm toward the top
6 Insert a new wiper blade and apply
pressure until you hear it engage.380de097
Use only wiper blades approved
by BMW.<
Fold the wipers back down onto
the windshield before you turn the
ignition to position 1 or 2.<
Onboard tool kit Windshield wiper blades
Page 166 of 211
165n
RepairsIndexOverview Controls Car care Technology Data
Lamps and bulbsTurn signals/Parking lamps
(side marker lamps), frontDual-filament bulb, 21 watt
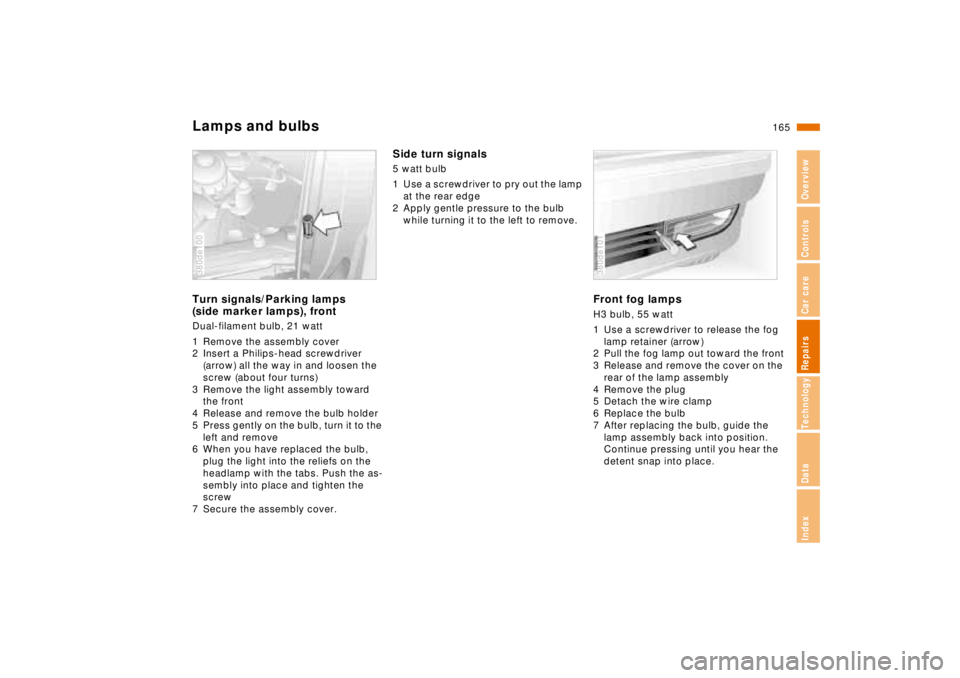
1 Remove the assembly cover
2 Insert a Philips-head screwdriver
(arrow) all the way in and loosen the
screw (about four turns)
3 Remove the light assembly toward
the front
4 Release and remove the bulb holder
5 Press gently on the bulb, turn it to the
left and remove
6 When you have replaced the bulb,
plug the light into the reliefs on the
headlamp with the tabs. Push the as-
sembly into place and tighten the
screw
7 Secure the assembly cover.380de100
Side turn signals5 watt bulb
1 Use a screwdriver to pry out the lamp
at the rear edge
2 Apply gentle pressure to the bulb
while turning it to the left to remove.
Front fog lampsH3 bulb, 55 watt
1 Use a screwdriver to release the fog
lamp retainer (arrow)
2 Pull the fog lamp out toward the front
3 Release and remove the cover on the
rear of the lamp assembly
4 Remove the plug
5 Detach the wire clamp
6 Replace the bulb
7 After replacing the bulb, guide the
lamp assembly back into position.
Continue pressing until you hear the
detent snap into place.380de101
Page 181 of 211
180n
Jump-starting Towing the vehicle6 If the battery of the support vehicle is
weak, start its engine and let it run
7 Start the engine on the vehicle need-
ing the jump-start, and allow it to run
as usual. If the first start attempt is
not successful, wait a few minutes
before another attempt in order to
allow the discharged battery to re-
charge
8 Before disconnecting the jumper ca-
bles from your BMW, turn on the rear
window defroster and set the blower
to the highest speed; allow the en-
gine to run approx. 10 seconds. This
will prevent a voltage surge from the
voltage regulator to the electrical ac-
cessories
9 Then disconnect the jumper cables in
reverse sequence.
Have the battery recharged if neces-
sary.
Tow fittingThe screw-in tow fitting is stored in the
onboard tool kit; be sure that it remains
in the vehicle at all times. This fitting is
designed for installation in the tow
sockets located at the front and rear of
the vehicle, and is intended for towing
on proper road surfaces only.
It should not be used to pull a vehicle
out of deep snow, mud, sand, etc. Al-
ways observe all applicable towing laws
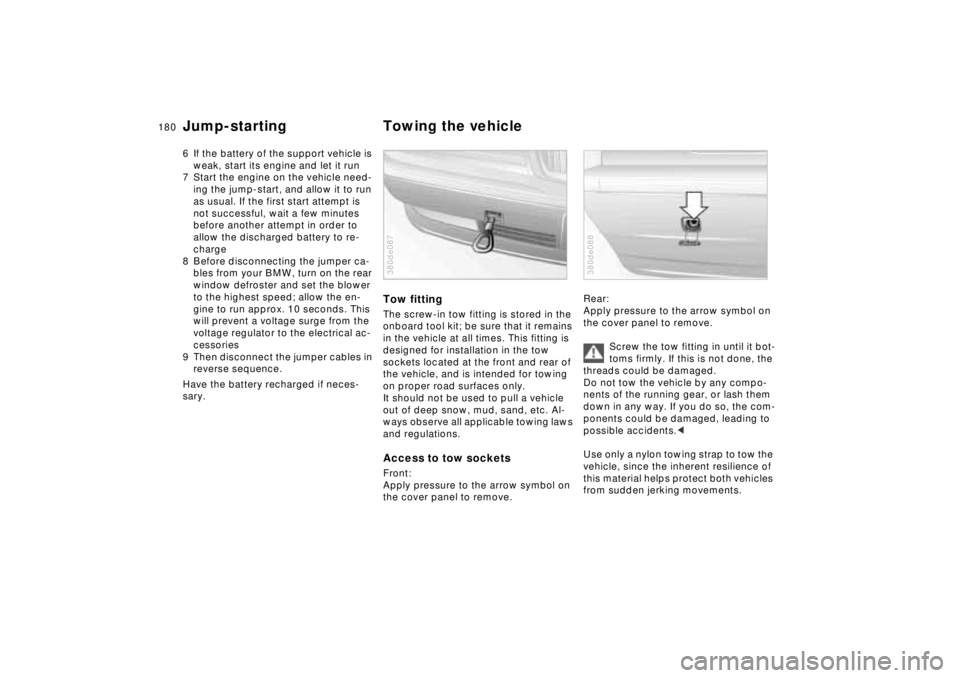
and regulations.Access to tow socketsFront:
Apply pressure to the arrow symbol on
the cover panel to remove.380de087
Rear:
Apply pressure to the arrow symbol on
the cover panel to remove.
Screw the tow fitting in until it bot-
toms firmly. If this is not done, the
threads could be damaged.
Do not tow the vehicle by any compo-
nents of the running gear, or lash them
down in any way. If you do so, the com-
ponents could be damaged, leading to
possible accidents.<
Use only a nylon towing strap to tow the
vehicle, since the inherent resilience of
this material helps protect both vehicles
from sudden jerking movements.380de088
Page 182 of 211
181n
RepairsIndexOverview Controls Car care Technology Data
Towing the vehicle
The towed vehicle should always
be the lighter of the two vehicles.
If this is not the case, it is no longer
possible to control vehicle response.<
Tow-startingIt is not possible to start the engine of
vehicles equipped with automatic trans-
mission by towing or pushing.
For instructions on jump starting, refer
to page 179.
Never attempt to use your vehicle to
push another car, as damage to the
energy-absorbing bumpers could
result.
Towing a vehicle with automatic
transmission1 Place selector lever in position N
2 Towing speed:
Max. 45 mph (70 km/h)
3 Towing distance:
Max. 95 miles (150 km)
4 Leave the ignition key at position 1 to
ensure that the brake lamps, turn sig-
nals, horn and windshield wipers re-
main operative, and to prevent the
steering lock detent from engaging
5 Switch on the hazard-warning system
(observe country-specific regula-
tions).
Find some means of identifying the ve-
hicle in tow, for instance, place a sign
or warning triangle in the rear window.
Make sure that the ignition key re-
mains in position 1 even when the
electrical system has failed to prevent
the steering lock from engaging.
The steering and brakes are without
power assist when the engine is off.
This means that increased effort is re-
quired for steering and braking.<
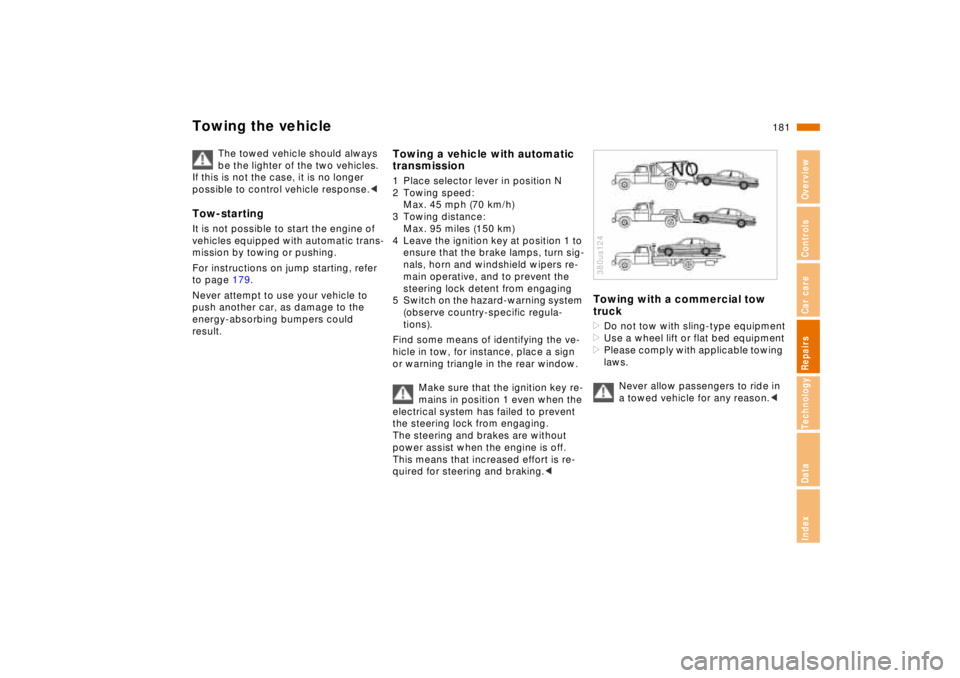
Towing with a commercial tow
truck>Do not tow with sling-type equipment
>Use a wheel lift or flat bed equipment
>Please comply with applicable towing
laws.
Never allow passengers to ride in
a towed vehicle for any reason.< 380us124
Page 204 of 211
RepairsIndexOverview Controls Car care Technology Data
Everything from A to Z
203n
Convenience operating mode
for windows and sliding/tilt
roof32
Convenience operating mode
for windows and sliding/tilt
sunroof33
Convenience starting59
Coolant146
Coolant temperature
gauge74
Coolant, antifreeze128
Cooling system, capacity 197
Cruise control70
Cruising range85
DDaytime-driving light
switch96
DBC (Dynamic Brake
Control)127
Defrosting, windows102
Digital clock79
Digital sound processor187
Dimensions195
Dimming feature, interior
rearview mirror50
Dipstick, engine oil143
Disc brakes126
Disconnect the battery175
Displacement194
Displays18
Distance86Distance warning90
Door key30
Door warning lamps, bulb
replacement167
Doors, emergency release 32
Doors, radio remote
control33
Drink holders113
Drive belts198
Driving notes123
DSC (Dynamic Stability
Control)92
Dynamic Brake Control
(DBC)127
Dynamic Stability Control
(DSC)92
EEDC (Electronic Damper
Control)93
Electric power windows42
Electric rear seat
adjustment48
Electric steering wheel
adjustment49
Electrical accessories,
failure176
Electrical system198
Electronic Damper Control
(EDC)93
Electronic immobilizer31Emergency deactivation of
the alarm system41
Emergency release
doors32
fuel filler door178
luggage compartment
lid37
sliding/tilt sunroof178
Energy Control73
Engine coolant146
Engine data194
Engine oil consumption143
Engine oil pressure20
Engine oil specifications144
Estimated time of arrival87
Exterior door handles,
lighted33
Exterior finish, care151, 152
FFailure messages75
First-aid kit24
Fittings for tow-starting
and towing180
Flashlight111
Flat tires132
Fluid, power steering148
Fog lamps97
bulb replacement165
switch97
Footwell lamps98Footwell lamps, bulb
replacement167
For wheelslip control, refer
to ASC+T/DSC92
Front armrest112
Front seat adjustment46
Fuel25
Fuel consumption
indicator73
Fuel filler door25
Fuel filler door,
manual release after
electrical fault178
Fuel gauge73
Fuel specifications25
Fuel tank capacity197
Fuel, average fuel
consumption85
Fuses176
GGasoline25
Glove compartment110
Glove compartment lamp,
bulb replacement167
Gross vehicle weight196HHand brake, refer to Parking
brake61
Handsfree system113
Hazard warning triangle24
Page 207 of 211
Everything from A to ZStarting assistance179
Starting the engine59
Steering130
Steering lock59
Steering wheel adjustment,
automatic49
Steering wheel lock59
Steering wheel memory51
Steering wheel, heated106
Steptronic65
Stopping the vehicle60
Storage facilities113
Sun visors51
Symbols4,173TTachometer72
Tail lamps166
Tail lamps,
bulb replacement166
Tank capacity197
Technical modifications
6,157
Telephone
Refer to Car telephone 131
Telephone hookup113
Temperature adjustment 103
Temperature display, engine
coolant74
Temperature display,
outside temperature72
Third brake lamp166Tilt alarm41
Tire code134
Tire damage132
Tire failure170
Tire inflation pressure 26, 132
Tire Pressure Control
(RDC)94
Tire replacement133
Tire tread132
Tires, specifications136
Tools162
Topping up the windshield/
washer fluid reservoir142
Torque194
Towing eyes180
Towing the vehicle180
Tow-starting180
Track circle195
Transmission62,65
Tread depth, tires132
Trip odometer72
Trunk lid, refer to luggage
compartment lid37
Turn signal22,68
Turn signals, bulb
replacement165,166
Turning circle195
UUniversal Remote
Control108
Used batteries175
VVanity mirrors51
Vehicle battery173
Vehicle identification148
Vehicle Identification
Number148
Vehicle storage156
Ventilation outlet,
ventilation100
Ventilation, draft-free104
Voice input23WWarning lamp "Please fasten
safety belts"21
Warning lamps20
Warnings75
Washer system68
Washing your car150
Water on the roads
Flooding123
Waxing, finish152
Weights196
Wheel lug wrench171
Wheel rims134
Wheelbase195
Wheels and tires134,136
Width195
Windows, convenience
operating mode32
Windows, radio remote
control33
Windows,demisting102Windshield washer
Reservoir capacity197
Windshield washer nozzle
adjustment142
Windshield wiper blades,
replacing162
Windshield wipers68
Windshield, defrosting69
Winter operation128
Winter tires135
Wiper blades, replacing162
Wipers68
Work in the engine
compartment137
XXenon lamps96,164,190
Page 208 of 211
Repairs
Index
Overview
Controls
Car care
Technology
Data
Owner service procedures from A to Z207 n
A
Adding brake fluid 147
Adding engine coolant 146
Adding engine oil 143
Adding fluid, power steering 148
Air pressure 26
B
Backup lamps, bulb
replacement 166
Battery change, radio remote control 168
Battery, checking charge condition 174
Battery, discharged 179
Brake lamps, bulb replacement 166
Brakes, brake faults 128
Bulb replacement 163
C
Changing a wheel 170
Charging the battery 174
Check Control 75
Checking the engine oil 143
Checking tire pressure 26
D
Defrosting, windows102
Difficult steering 130
Doors, manual operation 32
E
Electrical accessories,
failure 176
Electrical fault fuel filler door 178
Sliding/Tilt sunroof 178
Emergency release Doors 32
Fuel filler door 178
Luggage compartment
lid 37
Sliding/Tilt sunroof 178
Engine oil specifications 144
F
Failure messages75
Filling the windshield washer fluid reservoir 142
First-aid kit 24
Fittings, tow-starting and towing 180
Fog lamp,
replace the bulb 165
Footwell lamps, bulb replacement 167 Fuel filler door,
manual release after
electrical fault 178
Fuses, replacing 176
G
Glove compartment lamp,
bulb replacement 167
H
Hazard warning flashers 24
Hazard warning triangle 24
High beam headlamps, bulb replacement 164,165
Hood release 137
I
Indicator lamps 20
Interior lamps, bulb replacement 167
Interior motion sensor, deactivation 41
J
Jump starting 179
L
License plate lamps, bulb
replacement 166
Low beam headlamps, bulb
replacement 164 Luggage compartment
lamps, bulb
replacement 167
Luggage compartment lid, emergency release 37
M
Maintenance74,149
Malfunction displays 75
N
New transmitter, radio re-
mote control 168
O
Oil level check 143
Oil specifications 144
Onboard tool kit 162
P
Power steering,
adding fluid 148
Pressure, tires 26
R
Radio remote control,
battery change 168
Radio remote control, new transmitter 168
Rear lamp assembly 166
Removing condensation, windows 102