Page 25 of 38
19-22
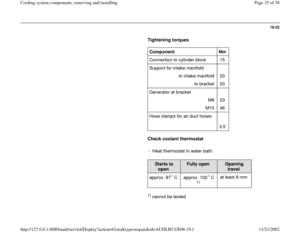
Tightening torques
Component
Nm
Connection to cylinder block 15
Support for intake manifold
to intake manifold 20
to bracket 20
Generator at bracket
M8 23
M10 46
Hose clamps for air duct hoses
3.5
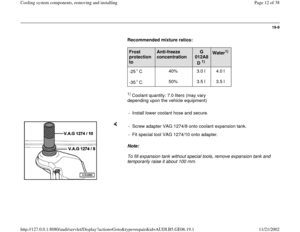
Check coolant thermostat
- Heat thermostat in water bath.
Starts to
open
Fully open
Opening
travel
approx. 87 C
approx. 102 C
1)
at least 8 mm
1) cannot be tested
Pa
ge 25 of 38 Coolin
g system com
ponents, removin
g and installin
g
11/21/2002 htt
p://127.0.0.1:8080/audi/servlet/Dis
play?action=Goto&t
yp
e=re
pair&id=AUDI.B5.GE06.19.1
Page 26 of 38
19-23
Lower coolant line, removing and
installing
Special tools and equipment
Removing
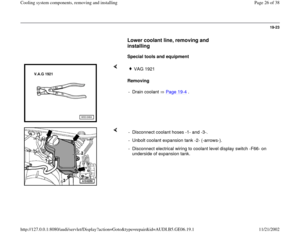
VAG 1921
- Drain coolant Page 19
-4 .
- Disconnect coolant hoses -1- and -3-.
- Unbolt coolant expansion tank -2- (-arrows-).
- Disconnect electrical wiring to coolant level display switch -F66- on
underside of expansion tank.
Pa
ge 26 of 38 Coolin
g system com
ponents, removin
g and installin
g
11/21/2002 htt
p://127.0.0.1:8080/audi/servlet/Dis
play?action=Goto&t
yp
e=re
pair&id=AUDI.B5.GE06.19.1
Page 27 of 38
19-24
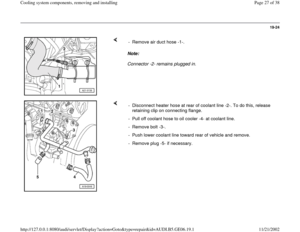
Note:
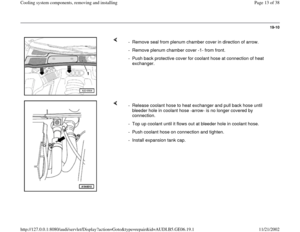
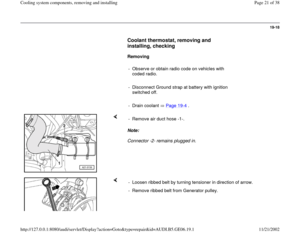
Connector -2- remains plugged in. - Remove air duct hose -1-.
- Disconnect heater hose at rear of coolant line -2-. To do this, release
retaining clip on connecting flange.
- Pull off coolant hose to oil cooler -4- at coolant line.
- Remove bolt -3-.
- Push lower coolant line toward rear of vehicle and remove.
- Remove plug -5- if necessary.
Pa
ge 27 of 38 Coolin
g system com
ponents, removin
g and installin
g
11/21/2002 htt
p://127.0.0.1:8080/audi/servlet/Dis
play?action=Goto&t
yp
e=re
pair&id=AUDI.B5.GE06.19.1
Page 28 of 38
19-25
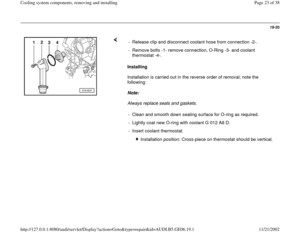
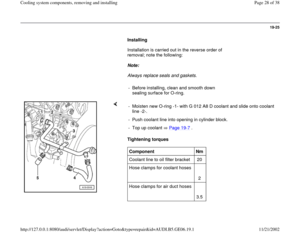
Installing
Installation is carried out in the reverse order of
removal; note the following:
Note:
Always replace seals and gaskets.
- Before installing, clean and smooth down
sealing surface for O-ring.
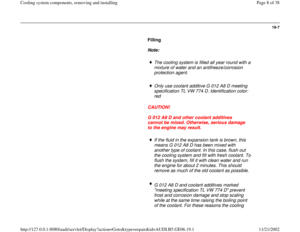
Tightening torques - Moisten new O-ring -1- with G 012 A8 D coolant and slide onto coolant
line -2-.
- Push coolant line into opening in cylinder block.
- Top up coolant Page 19
-7 .
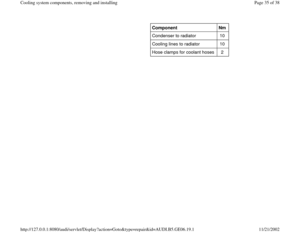
Component
Nm
Coolant line to oil filter bracket 20
Hose clamps for coolant hoses
2
Hose clamps for air duct hoses
3.5
Pa
ge 28 of 38 Coolin
g system com
ponents, removin
g and installin
g
11/21/2002 htt
p://127.0.0.1:8080/audi/servlet/Dis
play?action=Goto&t
yp
e=re
pair&id=AUDI.B5.GE06.19.1
Page 29 of 38
19-26
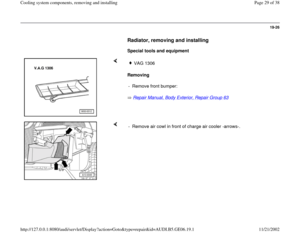
Radiator, removing and installing
Special tools and equipment
Removing
Repair Manual, Body Exterior, Repair Group 63
VAG 1306
- Remove front bumper:
- Remove air cowl in front of charge air cooler -arrows-.
Pa
ge 29 of 38 Coolin
g system com
ponents, removin
g and installin
g
11/21/2002 htt
p://127.0.0.1:8080/audi/servlet/Dis
play?action=Goto&t
yp
e=re
pair&id=AUDI.B5.GE06.19.1
Page 30 of 38
19-27
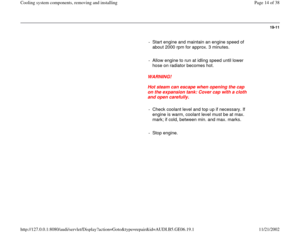
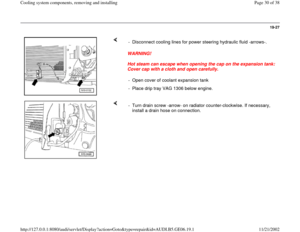
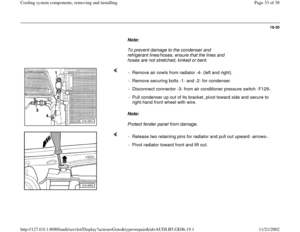
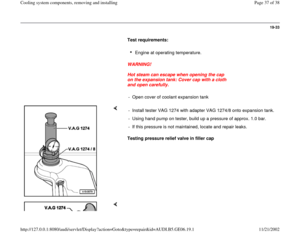
WARNING!
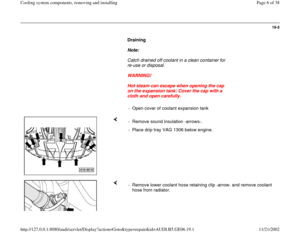
Hot steam can escape when opening the cap on the expansion tank:
Cover cap with a cloth and open carefully. - Disconnect cooling lines for power steering hydraulic fluid -arrows-.
- Open cover of coolant expansion tank
- Place drip tray VAG 1306 below engine.
- Turn drain screw -arrow- on radiator counter-clockwise. If necessary,
install a drain hose on connection.
Pa
ge 30 of 38 Coolin
g system com
ponents, removin
g and installin
g
11/21/2002 htt
p://127.0.0.1:8080/audi/servlet/Dis
play?action=Goto&t
yp
e=re
pair&id=AUDI.B5.GE06.19.1
Page 31 of 38
19-28
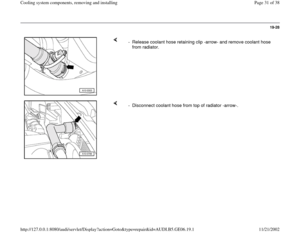
- Release coolant hose retaining clip -arrow- and remove coolant hose
from radiator.
- Disconnect coolant hose from top of radiator -arrow-.
Pa
ge 31 of 38 Coolin
g system com
ponents, removin
g and installin
g
11/21/2002 htt
p://127.0.0.1:8080/audi/servlet/Dis
play?action=Goto&t
yp
e=re
pair&id=AUDI.B5.GE06.19.1
Page 32 of 38
19-29
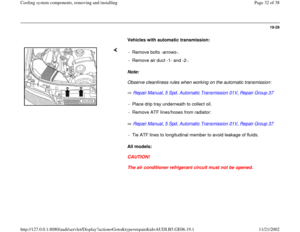
Vehicles with automatic transmission:
Note:
Observe cleanliness rules when working on the automatic transmission:
Repair Manual, 5 Spd. Automatic Transmission 01V, Repair Group 37
Repair Manual, 5 Spd. Automatic Transmission 01V, Repair Group 37
All models:
CAUTION!
The air conditioner refrigerant circuit must not be opened. - Remove bolts -arrows-.
- Remove air duct -1- and -2-.
- Place drip tray underneath to collect oil.
- Remove ATF lines/hoses from radiator:- Tie ATF lines to longitudinal member to avoid leakage of fluids.
Pa
ge 32 of 38 Coolin
g system com
ponents, removin
g and installin
g
11/21/2002 htt
p://127.0.0.1:8080/audi/servlet/Dis
play?action=Goto&t
yp
e=re
pair&id=AUDI.B5.GE06.19.1