Page 265 of 419
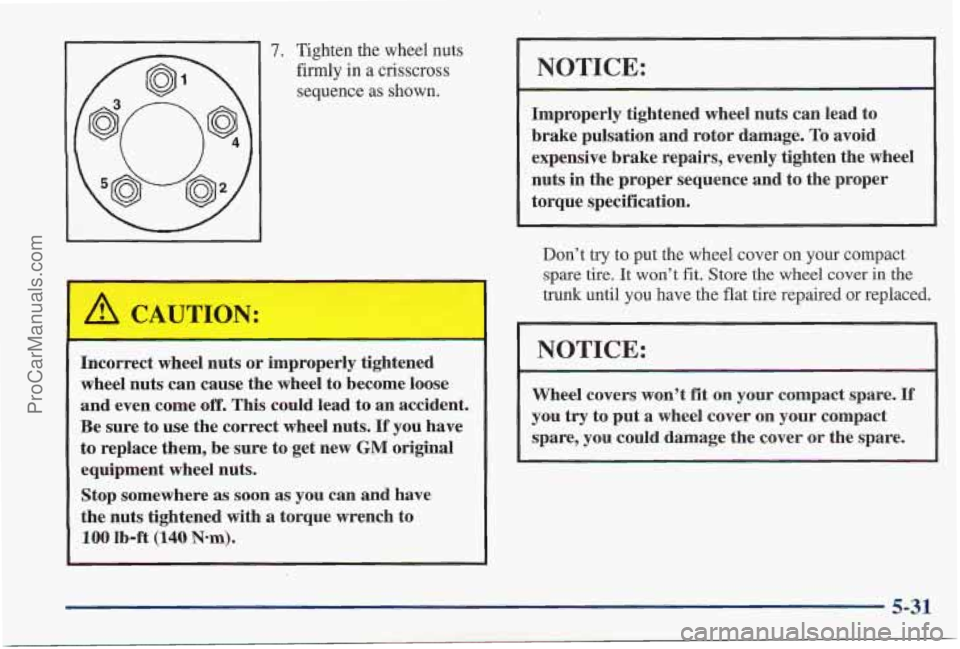
7. Tighten the wheel nuts
firmly in
a crisscross
sequence as shown.
Incorrect wheel nuts or improperly tightened
wheel nuts can cause the wheel to become loose
and even come off. This could lead
to an accident.
Be sure to use the correct wheel nuts.
If you have
to replace them, be sure to get new GM original
equipment wheel nuts.
Stop somewhere as soon as you can and have
the nuts tightened with
a torque wrench to
100 Ib-ft (140 Nom). ’
NOTICE:
Improperly tightened wheel nuts can lead to
brake pulsation and rotor damage.
To avoid
expensive brake repairs, evenly tighten the wheeI
nuts in the proper sequence and to the proper
torque specification.
Don’t try to put the wheel cover on your compact
spare tire.
It won’t fit. Store the wheel cover in the
trunk until you have th’e flat tire repaired or replaced.
NOTICE:
Wheel covers won’t fit on your compact spare. If
you try to put a wheel cover on your compact
spare, you could damage the cover or the spare.
5-31
ProCarManuals.com
Page 266 of 419
Storing the Flat Tire and Tools
Storing a jack, a tire or other equipment in the
passenger compartment
of the vehicle could
cause
injury. In a sudden stop or collision, loose
equipment could strike someone. Store
all these
in the proper place.
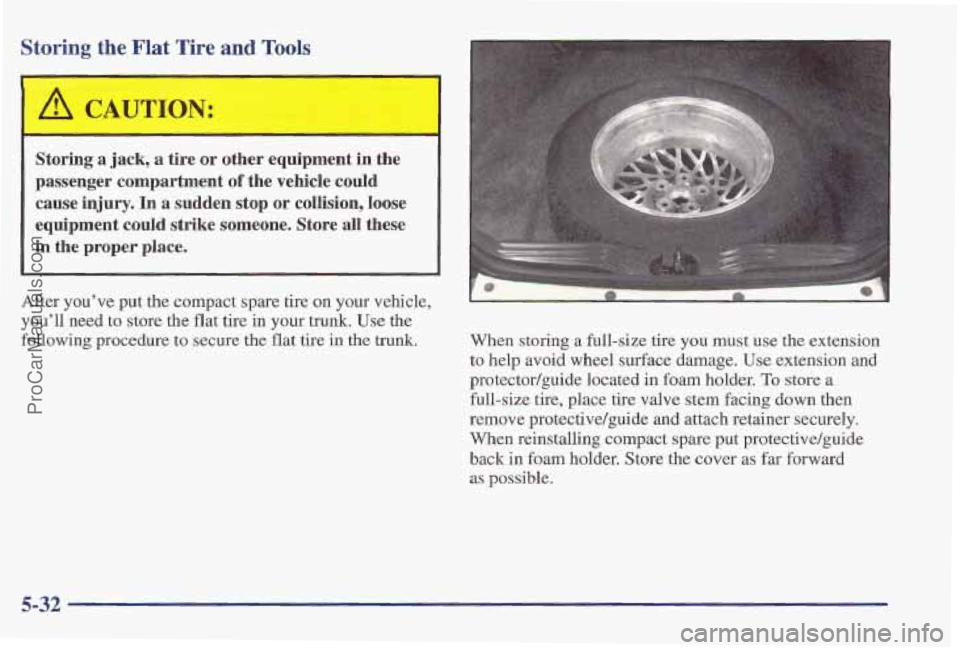
After you’ve put the compact spare tire on your vehicle,
you’ll need to store the flat tire in your trunk. Use the
following procedure
to secure the flat tire in the trunk. When storing a full-size tire you must use the extension
to help avoid wheel surface damage. Use extension and
protector/guide located in foam holder.
To store a
full-size tire, place tire valve stem facing down then
remove protectivelguide and attach retainer securely.
When reinstalling compact spare put protective/guide
back in foam holder. Store the cover
as far forward
as possible.
5-32
ProCarManuals.com
Page 267 of 419
Storing the Spare Tire and Tools
1
I
Storing a jack, a tire or ‘other equipment in the
passenger compartment
of the vehicle could
cause injury. In a sudden stop or collision, loose
equipmen.t could strike someone. Store all these in the proper place.
The compact spare is for temporary use only. Replace
the compact spare tire with a full-size tire as soon as you
can. See “Compact Spare Tire” in the Index. See the
storage instructions label to replace your compact spare
into your trunk properly.
Be sure to calibrate your check tire pressure system after
you replace your compact
spare tire with a full-sized
one. See “Check Tire Pressure Light” in the Index.
I
1. Retainer
2. Cover
3. Retainer
(Full Size
Spare)
4. Tire
5. Nut
6. Jack
7. Wrench
8. Lock Nut Tool
9. Foam
10. Bolt Screw
11. Extension and
Protector/Guide
5-33
ProCarManuals.com
Page 311 of 419
5. Remove the bulb from the socket.
6. Place the new bulb into the socket.
7. Turn the bulb socket 114 turn clockwise to replace it.
8. Carefully replace the headlamp assembly into the
vehicle. Be careful to avoid scratching or chipping
the paint
on the vehicle while replacing.
9. Replace the two bolts on the top of the
headlamp assembly.
10. Close the hood.
Center High-Mounted Stoplamp
1. Open the trunk.
2. Reach through the access opening in the trunk and
remove the slotted vent by squeezing the ends and
pulling down.
ProCarManuals.com
Page 312 of 419
3. Remove the bulb by turning it 1/4 turn
4. Place the new bulb into the bulb socket.
5. Turn the bulb 1/4 turn clockwise to replace, Replace
counterclockwise.
the vent you removed earlier.
6. Close the trunk,
Taillamps
1. Unhook the convenience net (if equipped)
and remove.
2. Unscrew the lower convenience net hook attachment.
3. Pull the trunk trim carpeting back from the rear of
the trunk.
4. Remove the upper trunk trim hook and the two
plastic wing nuts
from the taillamp.
6-42
ProCarManuals.com
Page 335 of 419
Vehicle Identification Number (VIN)
I
ENGINEA7 f ASSEMBLY
CODE MODEL YEAR PLANT
This is the legal identifier for your Pontiac. It appears on
a plate in the front corner
of the instrument panel, on the
driver’s side. You can see it if
you look through the
windshield
from outside your vehicle. The VIN also
appears on the Vehicle Certification and Service Parts
labels and the certificates of title and registration.
Engine Identification
The 8th character in your VIN is the engine code. This
code will help you identify your engine, specifications
and replacement parts.
Service Parts Identification Label
You’ll find this label on the underside of your trunk lid.
It’s very helpful if
you ever need to order parts. On this
label
is:
your VIN,
the model designation,
paint information and
0 a list of all production options and special equipment.
Be
sure that this label is not removed from the vehicle.
ProCarManuals.com
Page 341 of 419
Fuse
FUTURE
PARK
LP
FOG LP
FUTURE
ECM
FUEL PMP
TCC
ALT
Description
Spare
Chimemall Module, Taillamps,
Park Lamps, Sidemarker Lamps, Dimmable
Lamps
Fog Lamps
Spare
ECM/PCM
Fuel Pump
Automatic Transaxle: Enable,
Switch, Shift,
PWM
Alt Sense
Fuse
RADIO
AC CLU
Description
Radio, Remote Lock Control,
Theft Shock Sensor, Trip
Computer, HVAC Module, ABS
Module, Security LED
AC Clutch
B/U LP
Trunk Release, Back-up Lamps
IGN MODULE
Ignition Module
IGNI-UH
INJ MAF,
Heated Sensors, Canister
Prg,
Boost Solenoid
Fuel Injectors
6-71
ProCarManuals.com
Page 389 of 419
USAGE
Chassis
Lubrication
Windshield Washer Solvent
Hood Latch
Assembly,
Pivots, Spring Anchor and
Release Pawl
~~
FLUIDLUBRICANT
Chassis lubricant (GM Part
No. 1052497 or equivalent) or
lubricant meeting requirements
of NLGI
## 2, Category LB
or GC-LB.
GM Optikleen@ Washer Solvent
(GM Part
No. 1051515)
or equivalent.
Lubriplate lubricant aerosol (GM Part
No. 12346293 or
USAGE
(GM Part No. 12346241
Hinges Multi-purpose lubricant, Superlube@
Hood
and Door
FLUIDLLUBRICANT
or equivalent).
Fuel Door Hinge
Engine oil or Lubriplate Lubricant
and Trunk
(GM Part
No. 10501.09).
Access Panel
Hinges
Weatherstrip Dielectric Silicone
Grease (GM
Conditioning Part
No. 12345579
or equivalent).
equivalent) or lubricant meeting See “Replacement Parts” in the Index for recommended
requirements of NLGI
# 2, replacement filters and spark plugs.
Category LB or GC-LB.
ProCarManuals.com