Page 34 of 247

Flexible seating .................................................2-32
Sliding three-passenger seat ...............................2-38
Supplemental restraint system (supplemental
air bag system).....................................................2-42
Supplemental air bag system...............................2-45
Warning labels......................................................2-47
Supplemental air bag warning light......................2-47
Seat belts .............................................................2-49
Precautions on seat belt usage ...........................2-49
Child safety...........................................................2-50
3-point type with retractor ....................................2-51
3-point type seat belt with retractor for second
row bucket seats ..................................................2-53
Three-passenger bench seat ...............................2-57
2-point type without retractor (center of
three-passenger bench seat) ...............................2-58
Seat belt extenders ..............................................2-60
Seat belt maintenance .........................................2-60Child restraints for infants and small children......2-60
Installation at three-passenger bench seat
center position ......................................................2-62
Installation at second and third row outboard
positions ...............................................................2-63
Child restraint with top tether strap ......................2-65
Installation on second row bench or bucket
seat .......................................................................2-66
Installation on three-passenger bench seat in
second row ...........................................................2-67
Installation on three-passenger bench seat in
third row................................................................2-68
Integrated child safety seats (if so equipped) ......2-71
Tilting steering wheel ...........................................2-78
Outside mirror control...........................................2-79
Outside mirrors .....................................................2-80
Inside mirror .........................................................2-80
Vanity mirror .........................................................2-80
ZX
Page 37 of 247

WARNING
c
Always have the doors locked while
driving. Along with the use of seat
belts, this provides greater safety in
the event of an accident by helping to
prevent persons from being thrown
from the vehicle. This also helps keep
children and others from unintention-
ally opening the doors, and will help
keep out intruders.
cBefore opening any door, always look
for and avoid oncoming traffic.
cDo not leave children unattended in-
side the vehicle. They could unknow-
ingly activate switches or controls. Un-
attended children could become
involved in serious accidents.
CAUTION
c
Always use the door handle to open or
close the sliding door. Do not attempt to
open or close the door by merely plac-
ing your hand on the door edge or door
slide roller, as this may cause injury.
cWhen opening the sliding door on a
slope, ensure that it is fully open and
that it does not close by itself.
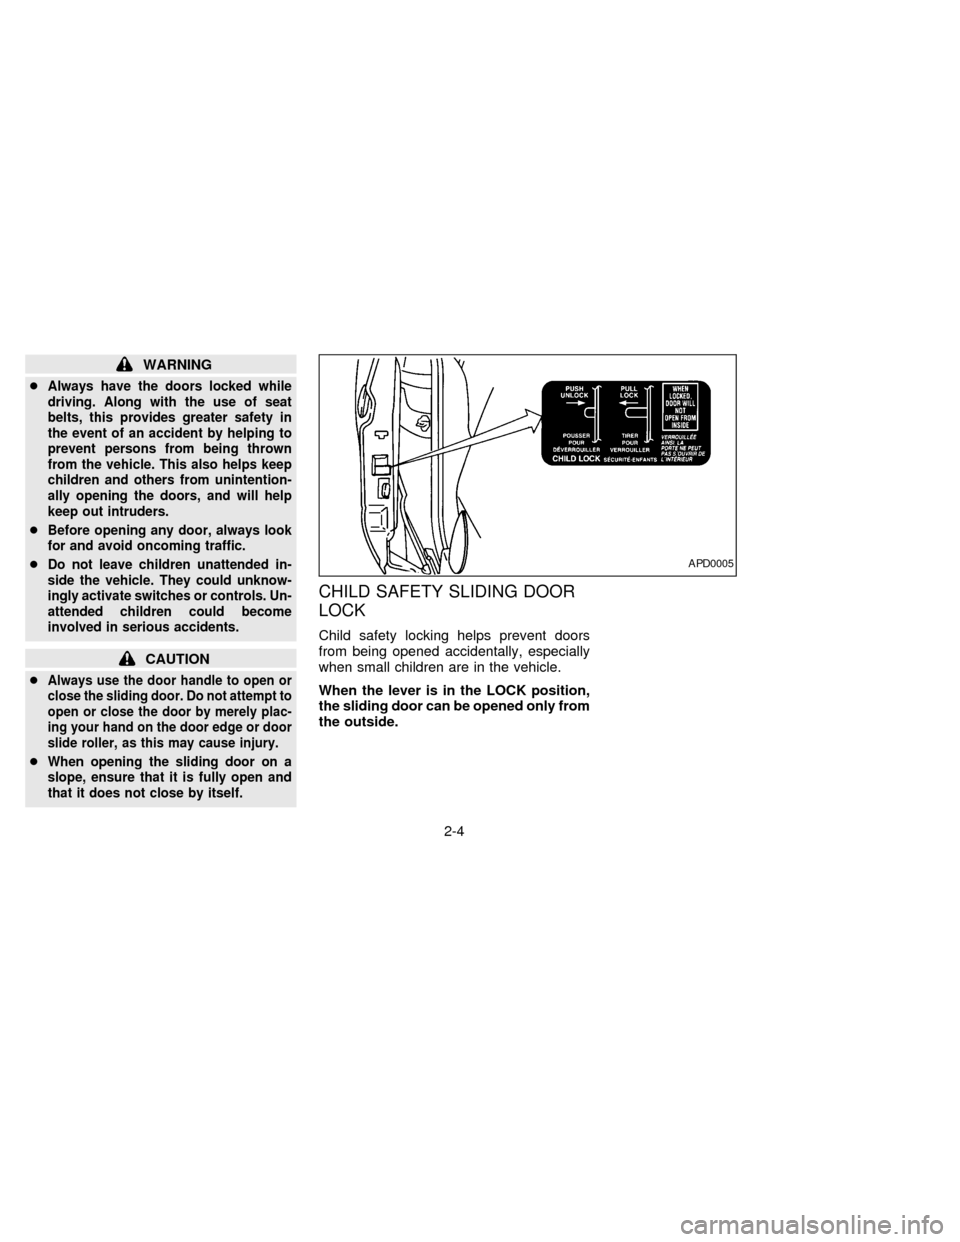
CHILD SAFETY SLIDING DOOR
LOCK
Child safety locking helps prevent doors
from being opened accidentally, especially
when small children are in the vehicle.
When the lever is in the LOCK position,
the sliding door can be opened only from
the outside.
APD0005
2-4
ZX
Page 38 of 247
POWER DOOR LOCK
(if so equipped)
cOperating the lock-unlock switch locks or
unlocks all doors.
cIf the power door lock switch is pressed
when the sliding door is open, the sliding
door automatically locks when it is
closed.
WARNING
cBefore opening any door, always
look for and avoid oncoming traffic.
cDo not leave children unattended in-
side the vehicle. They may inadvert-
ently activate switches or controls.
Unattended children could become
involved in serious accidents.
APD0844APD0845
2-5
ZX
Page 40 of 247

It is possible to lock/unlock all doors, turn
the interior lights on or off, and activate the
panic alarm by using the remote controller
from outside the vehicle.
Be sure to remove the key from the
vehicle before locking the doors and
leaving it.
The remote controller can operate at a
distance of approximately 49 ft (15 m) from
the vehicle. (The effective distance depends
on the conditions around the vehicle.)
As many as four remote controllers can be
used with one vehicle. For more information
concerning the purchase and use of addi-
tional remote controllers, contact your NIS-
SAN dealer.
CAUTION
Listed below are conditions or occur-
rences which will damage the remote
controller:
cDo not allow the remote controller to
become wet.
cDo not drop the remote controller.
cDo not strike the remote controller
sharply against another object.cDo not place the remote controller
for an extended period in an area
where temperatures exceed 140ÉF
(60ÉC).
Locking doors
1. Close all of the doors.
2. Push the
button on the multi-remote
controller.
3. All of the doors lock.
4. The parking lights flash twice and the
horn chirps to verify all the doors are
locked.
Unlocking doors
1. Push thebutton on the multi-remote
controller. Only the driver side door un-
locks.
2. The interior lights come on and stay on
for 30 seconds.
3. Push the
button on the multi-remote
controller again within five seconds. The
passenger doors and the rear door un-
lock.The interior lights can be turned off without
waiting 30 seconds by either turning the
ignition to ON or locking the doors with the
multi-remote controller.
Using the panic alarm
If you are near your vehicle and feel threat-
ened, you may activate the panic alarm to
call attention as follows:
1. Push the
button on the remote con-
troller for at least one full second.
2. The theft warning alarm (horn) sounds
and the headlights and tail lights flash for
30 seconds.
3. The panic alarm stops when:
cit has run for 30 seconds, or
cthe
or thebutton is pressed, or
c
thebutton is released and re-pushed.
MULTI-REMOTE CONTROL
SYSTEM (if so equipped)
2-7
ZX
Page 43 of 247
1. Pull the hood lock release handles1
located below the instrument panel; the
hood then springs up slightly.
2. Pull up on the lever
s2at the front of the
hood and raise the hood.3. Insert the support rod
s3into the slot on
the underside of the hood.
4. When closing the hood, reset the support
rod to its original position, then slowly
close the hood and make sure it locks
into place.WARNING
cMake sure the hood is completely
closed and latched before driving.
Failure to do so could cause the
hood to fly open and result in an
accident.
cIf you see steam or smoke coming
from the engine compartment, to
avoid injury do not open the hood.
PD1336MAPD0141
HOOD RELEASE
2-10
ZX
Page 44 of 247
Key operation
To unlock the rear door, turn the key coun-
terclockwise. To open the rear door, lift up
on the opener handle near the license plate.
To close, lower and push the rear door
down securely.
To lock the rear door without the key, set the
lock lever to the lock position following the
``Push to Lock'' instructions near the latch,
then close the rear door securely.
WARNING
Do not drive with the rear door or glass
open. This could allow dangerous ex-
haust gases to be drawn into the ve-
hicle. See ``Exhaust gas'' in the ``Start-
ing and driving'' section.
APD0824
REAR DOOR LOCK
2-11
ZX
Page 46 of 247
The cargo net keeps packages in the cargo
area from moving around while your vehicle
is driven.
To install the cargo net, attach the four
loops to the four retainers.
To remove the cargo net, detach the four
loops from the cargo net retainers.WARNING
cProperly secure all cargo to help
prevent it from sliding or shifting. Do
not place cargo higher than the seat-
backs. In a sudden stop or collision,
unsecured cargo could cause per-
sonal injury.
cBe sure to secure all four loops onto
the retainers. The cargo restrained
by the net must not exceed 50 lbs.
(22.7 kg) or the net may not stay
secured.
APD0037
CARGO NET
(if so equipped)
2-13
ZX
Page 48 of 247

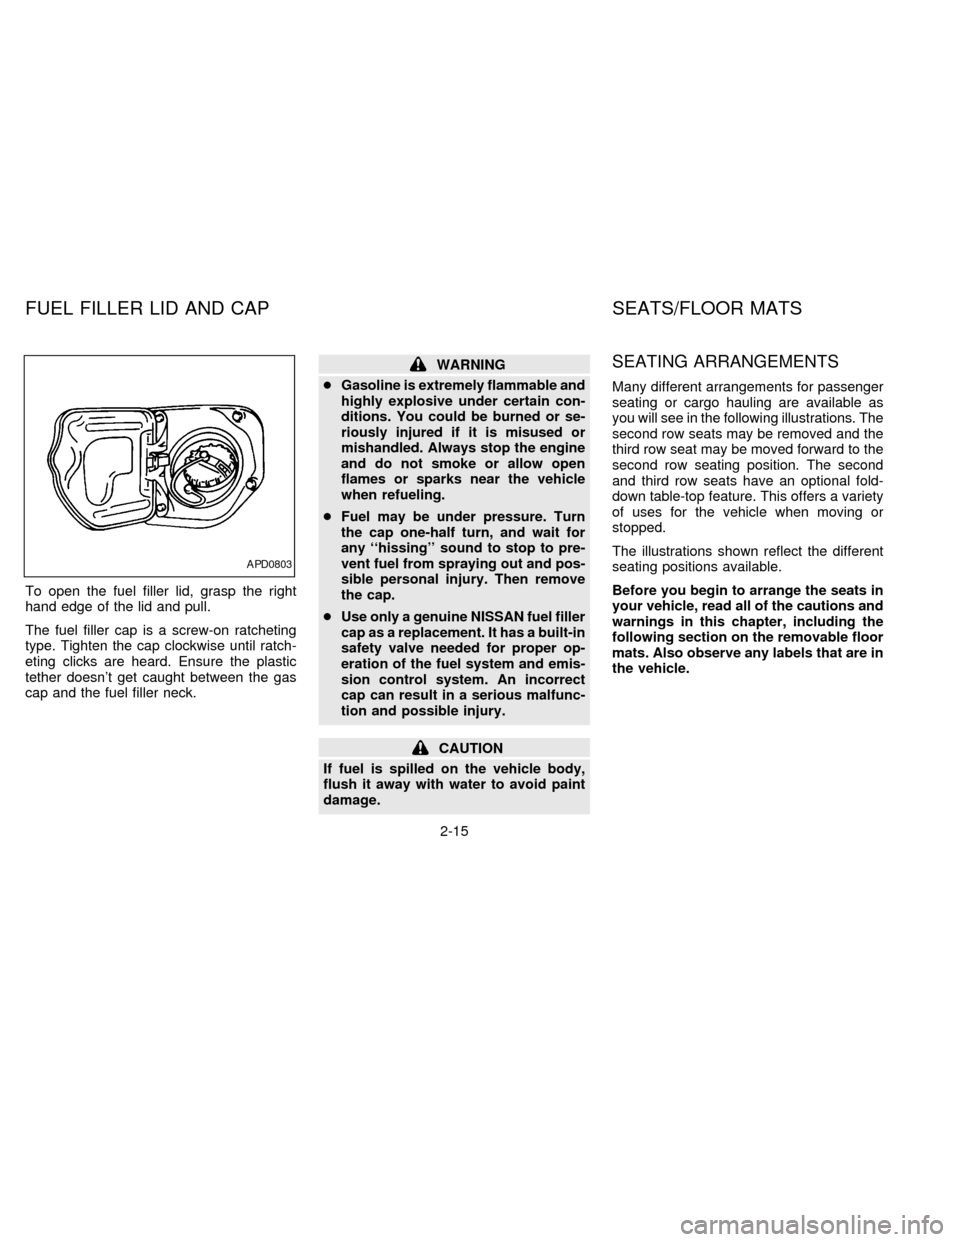
To open the fuel filler lid, grasp the right
hand edge of the lid and pull.
The fuel filler cap is a screw-on ratcheting
type. Tighten the cap clockwise until ratch-
eting clicks are heard. Ensure the plastic
tether doesn't get caught between the gas
cap and the fuel filler neck.
WARNING
cGasoline is extremely flammable and
highly explosive under certain con-
ditions. You could be burned or se-
riously injured if it is misused or
mishandled. Always stop the engine
and do not smoke or allow open
flames or sparks near the vehicle
when refueling.
cFuel may be under pressure. Turn
the cap one-half turn, and wait for
any ``hissing'' sound to stop to pre-
vent fuel from spraying out and pos-
sible personal injury. Then remove
the cap.
cUse only a genuine NISSAN fuel filler
cap as a replacement. It has a built-in
safety valve needed for proper op-
eration of the fuel system and emis-
sion control system. An incorrect
cap can result in a serious malfunc-
tion and possible injury.
CAUTION
If fuel is spilled on the vehicle body,
flush it away with water to avoid paint
damage.
SEATING ARRANGEMENTS
Many different arrangements for passenger
seating or cargo hauling are available as
you will see in the following illustrations. The
second row seats may be removed and the
third row seat may be moved forward to the
second row seating position. The second
and third row seats have an optional fold-
down table-top feature. This offers a variety
of uses for the vehicle when moving or
stopped.
The illustrations shown reflect the different
seating positions available.
Before you begin to arrange the seats in
your vehicle, read all of the cautions and
warnings in this chapter, including the
following section on the removable floor
mats. Also observe any labels that are in
the vehicle.
APD0803
FUEL FILLER LID AND CAP SEATS/FLOOR MATS
2-15
ZX