1997 NISSAN FRONTIER warning light
[x] Cancel search: warning lightPage 28 of 204

2Pre-driving checks and adjustments
Key .........................................................................2-2
Door locks ..............................................................2-2
Power door lock (if so equipped) ...........................2-3
Hood release ..........................................................2-4
Glove box lock (if so equipped) .............................2-4
Fuel filler cap ..........................................................2-5
Tailgate latch ..........................................................2-5
Tie down hooks ......................................................2-7
Front separate seats ..............................................2-8
Seat adjustment .....................................................2-8
Head restraints .....................................................2-11
Tilting front separate seat ....................................2-11
Bench seat ...........................................................2-12
Seat adjustment ...................................................2-12
Tilting bench seat .................................................2-12
Jump seat .............................................................2-13
Supplemental restraint system (supplemental
air bag system).....................................................2-14
Supplemental air bag system...............................2-15
Warning labels......................................................2-17
Supplemental air bag warning light......................2-17Seat belts .............................................................2-19
Precautions on seat belt usage ...........................2-19
Child safety...........................................................2-20
3-point type with retractor ....................................2-21
2-point type without retractor (center of bench
seat and jump seats)............................................2-23
Seat belt extenders ..............................................2-24
Seat belt maintenance .........................................2-24
Child restraints for infants and small children......2-24
Installation on front passenger seat (3-point
type with retractor) ...............................................2-26
Installation in center of bench seat (2-point
type without retractor) ..........................................2-27
Top strap child restraint .......................................2-28
Tilting steering wheel (if so equipped) .................2-29
Outside mirror remote control
(if so equipped) ....................................................2-30
Outside mirrors .....................................................2-30
Inside mirror .........................................................2-31
Vanity mirror (if so equipped)...............................2-31
ZX
Page 31 of 204
WARNING
cMake sure the hood is completely
closed and latched before driving.
Failure to do so could cause the
hood to fly open and result in an
accident.
cIf you see steam or smoke coming
from the engine compartment, to
avoid injury do not open the hood.
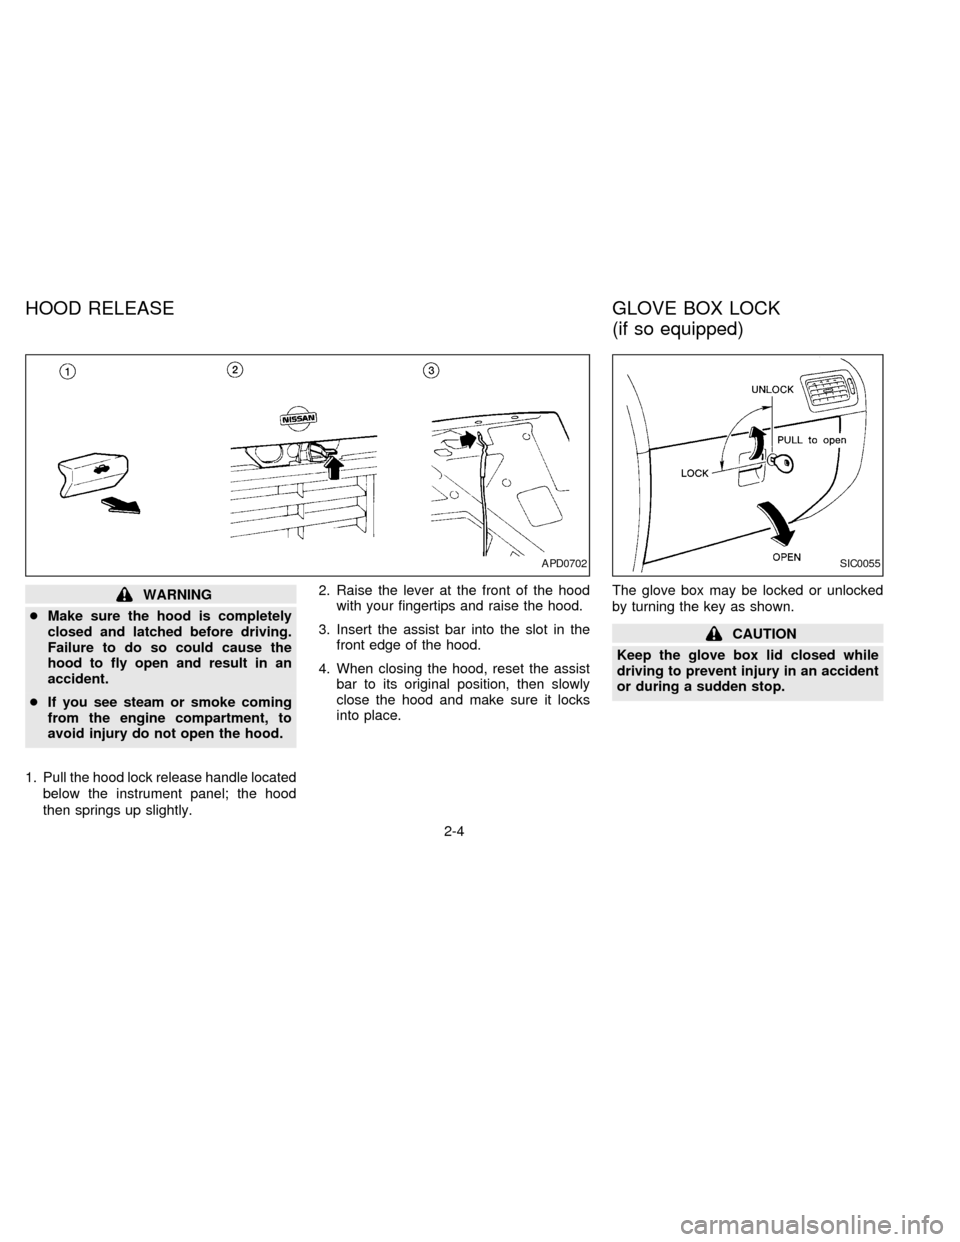
1. Pull the hood lock release handle located
below the instrument panel; the hood
then springs up slightly.2. Raise the lever at the front of the hood
with your fingertips and raise the hood.
3. Insert the assist bar into the slot in the
front edge of the hood.
4. When closing the hood, reset the assist
bar to its original position, then slowly
close the hood and make sure it locks
into place.The glove box may be locked or unlocked
by turning the key as shown.
CAUTION
Keep the glove box lid closed while
driving to prevent injury in an accident
or during a sudden stop.
APD0702SIC0055
HOOD RELEASE GLOVE BOX LOCK
(if so equipped)
2-4
ZX
Page 32 of 204
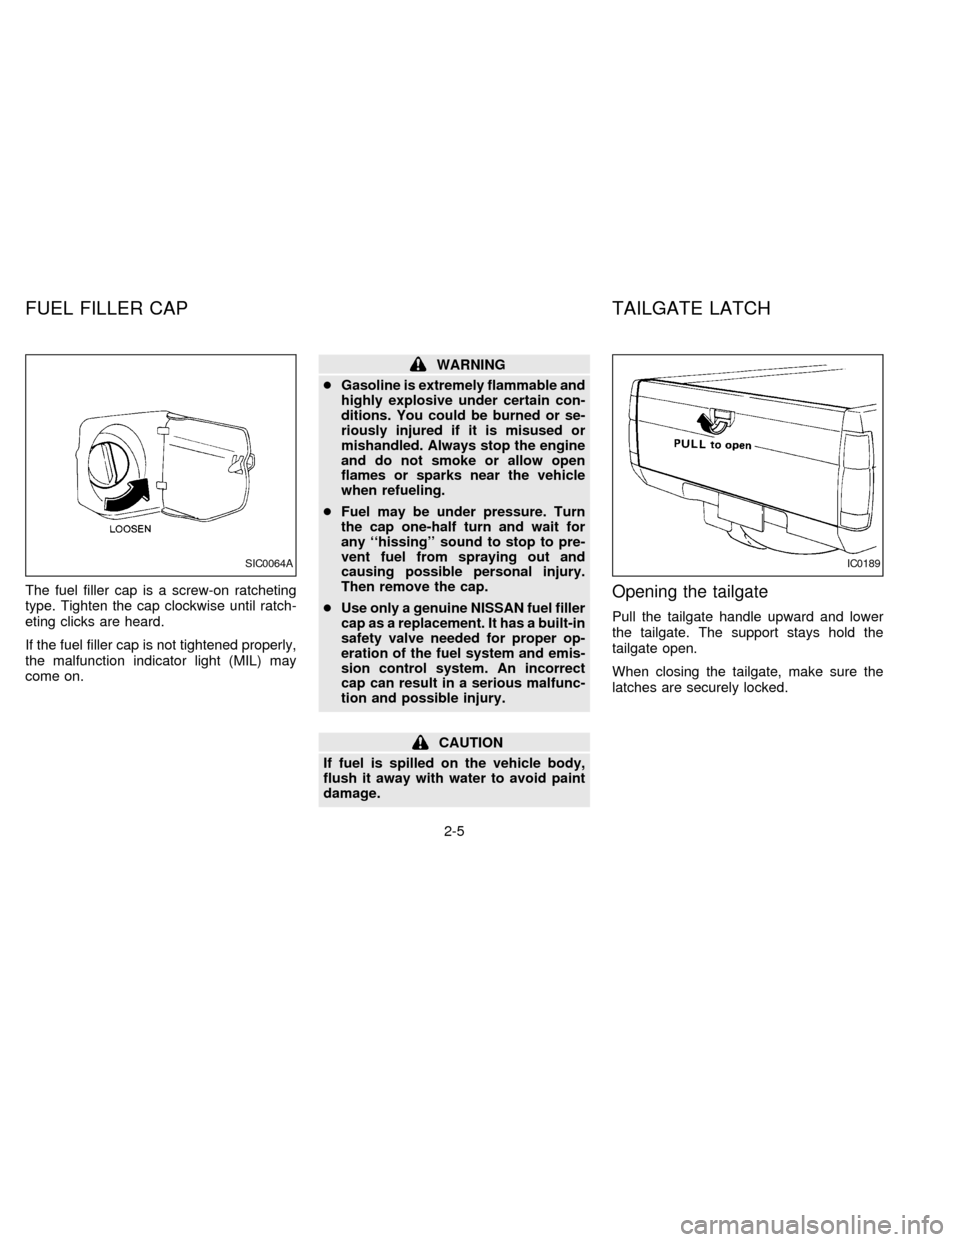
The fuel filler cap is a screw-on ratcheting
type. Tighten the cap clockwise until ratch-
eting clicks are heard.
If the fuel filler cap is not tightened properly,
the malfunction indicator light (MIL) may
come on.
WARNING
cGasoline is extremely flammable and
highly explosive under certain con-
ditions. You could be burned or se-
riously injured if it is misused or
mishandled. Always stop the engine
and do not smoke or allow open
flames or sparks near the vehicle
when refueling.
cFuel may be under pressure. Turn
the cap one-half turn and wait for
any ``hissing'' sound to stop to pre-
vent fuel from spraying out and
causing possible personal injury.
Then remove the cap.
cUse only a genuine NISSAN fuel filler
cap as a replacement. It has a built-in
safety valve needed for proper op-
eration of the fuel system and emis-
sion control system. An incorrect
cap can result in a serious malfunc-
tion and possible injury.
CAUTION
If fuel is spilled on the vehicle body,
flush it away with water to avoid paint
damage.
Opening the tailgate
Pull the tailgate handle upward and lower
the tailgate. The support stays hold the
tailgate open.
When closing the tailgate, make sure the
latches are securely locked.
SIC0064AIC0189
FUEL FILLER CAP TAILGATE LATCH
2-5
ZX
Page 44 of 204

Warning labels about the supplemental air
bag system are placed in the vehicle as
shown in the illustration.The supplemental air bag warning light,
displaying AIR BAG in the instrument panel,
monitors the circuits of the supplemental air
bag. The circuits monitored by the supple-
mental air bag warning light are the diagno-
sis sensor unit, the supplemental air bag
module and all related wiring.
When the ignition key is in the ON or START
position, the supplemental air bag warning
light illuminates for about 7 seconds and
then turns off. This means the system is
operational.
If any of the following conditions occur, the
supplemental air bag needs servicing and
APD0705APD0706
WARNING LABELS SUPPLEMENTAL AIR BAG
WARNING LIGHT
2-17
ZX
Page 45 of 204
should be taken to your nearest authorized
NISSAN dealer:
1. The supplemental air bag warning light
does not come on and remain on for 7
seconds and then go off as described
above.
2. The supplemental air bag warning light
flashes intermittently or remains on.
3. The supplemental air bag warning light
does not come on at all.
Under these conditions, the Supplemental
Restraint System (supplemental air bag
system) may not function properly. It must
be checked and repaired.
WARNING
If the supplemental air bag warning
light is on, it could mean that the
supplemental air bag will not operate in
an accident.
Repair and replacement procedure
The supplemental air bag system is de-
signed to inflate on a one-time-only basis.
As a reminder, unless it is damaged, the
supplemental air bag warning light remainsilluminated after inflation has occurred.
Repair and replacement of the supplemen-
tal air bag system should be done only by
an authorized NISSAN dealer.
To ensure long-term functioning, the
system must be inspected 10 years after
the date of manufacture noted on the
certification label located on the driver
side front pillar.
When maintenance work is required on the
vehicle, the supplemental air bag system
and related parts should be pointed out to
the person conducting the maintenance.
The ignition key must always be in the LOCK
position when working under the hood or
inside the vehicle.
WARNING
cOnce the supplemental air bag in-
flates, the supplemental air bag
module will not function again and
should be replaced by an authorized
NISSAN dealer. The supplemental air
bag module cannot be repaired.cThe supplemental air bag system
should be inspected by an autho-
rized NISSAN dealer if there is any
damage to the front end portion of
the vehicle.
cIf you need to dispose of the supple-
mental air bag or scrap the vehicle,
contact an authorized NISSAN
dealer. Correct supplemental air bag
disposal procedures are set forth in
the appropriate NISSAN Service
Manual. Incorrect disposal proce-
dures could cause personal injury.
2-18
ZX
Page 58 of 204
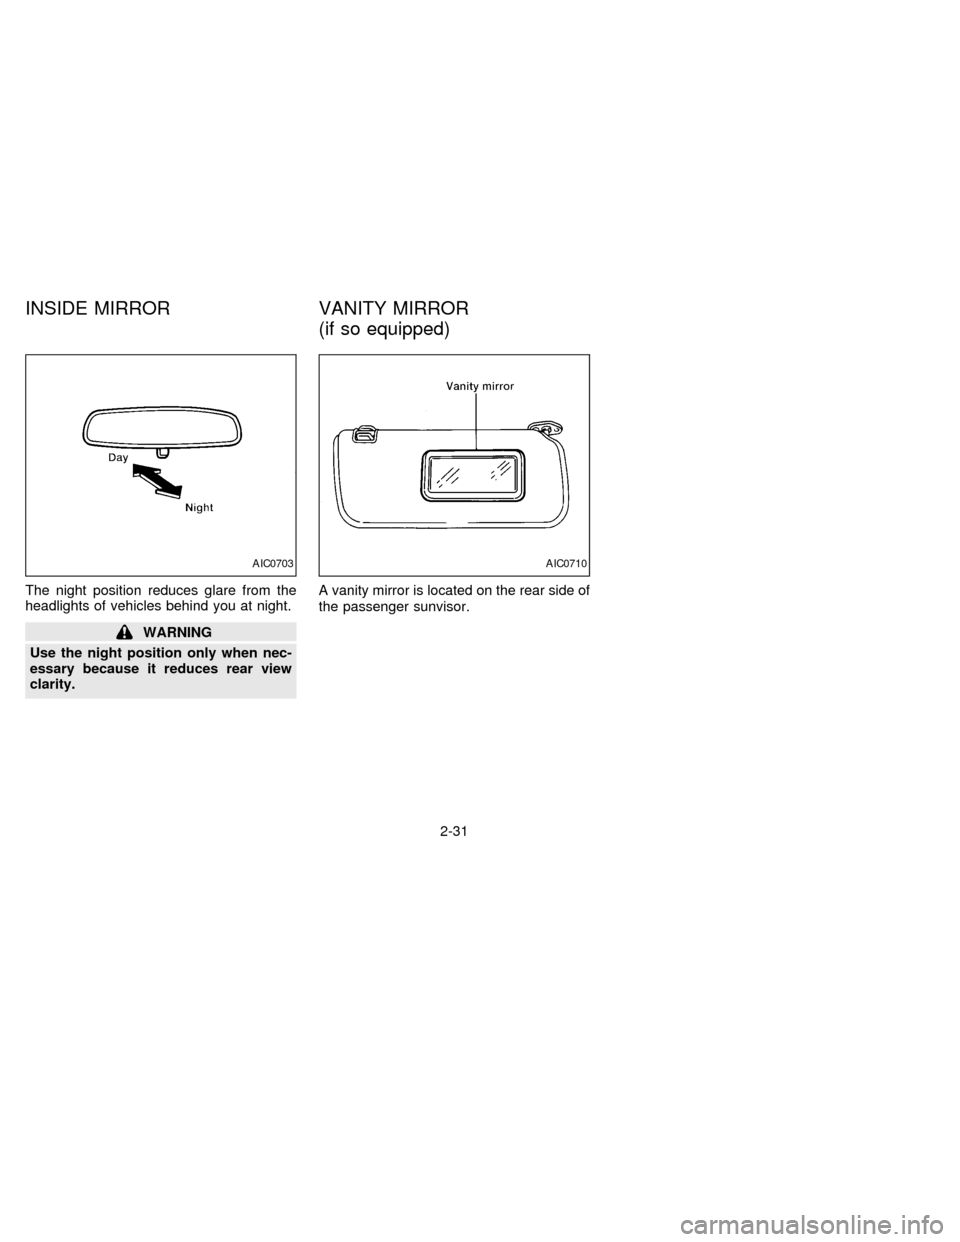
The night position reduces glare from the
headlights of vehicles behind you at night.
WARNING
Use the night position only when nec-
essary because it reduces rear view
clarity.A vanity mirror is located on the rear side of
the passenger sunvisor.
AIC0703AIC0710
INSIDE MIRROR VANITY MIRROR
(if so equipped)
2-31
ZX
Page 85 of 204
WARNING
Never drive under the influence of alco-
hol or drugs. Alcohol in the blood
stream reduces coordination, delays
reaction time and impairs judgement.
Driving after drinking alcohol increases
the likelihood of being involved in an
accident injuring yourself and others.
Additionally, if you are injured in the
accident alcohol can increase the se-
verity of injury.
NISSAN is committed to safe driving. How-
ever, you must choose not to drive under
the influence of alcohol. Every year thou-
sands of people are injured or killed in
alcohol related accidents. Although the local
laws vary on what is considered to be
legally intoxicated, the fact is that alcohol
affects all people differently and most
people underestimate the effects of alcohol.
Remember, drinking and driving don't mix!
And that's true for drugs, too (over the
counter, prescription, and illegal drugs).
Don't drive if your ability to operate your
vehicle is impaired by alcohol, drugs, or
some other physical condition.
MANUAL TRANSMISSION
The switch includes an anti-theft steering
lock device.
The key can only be removed when the
switch is in the LOCK position.
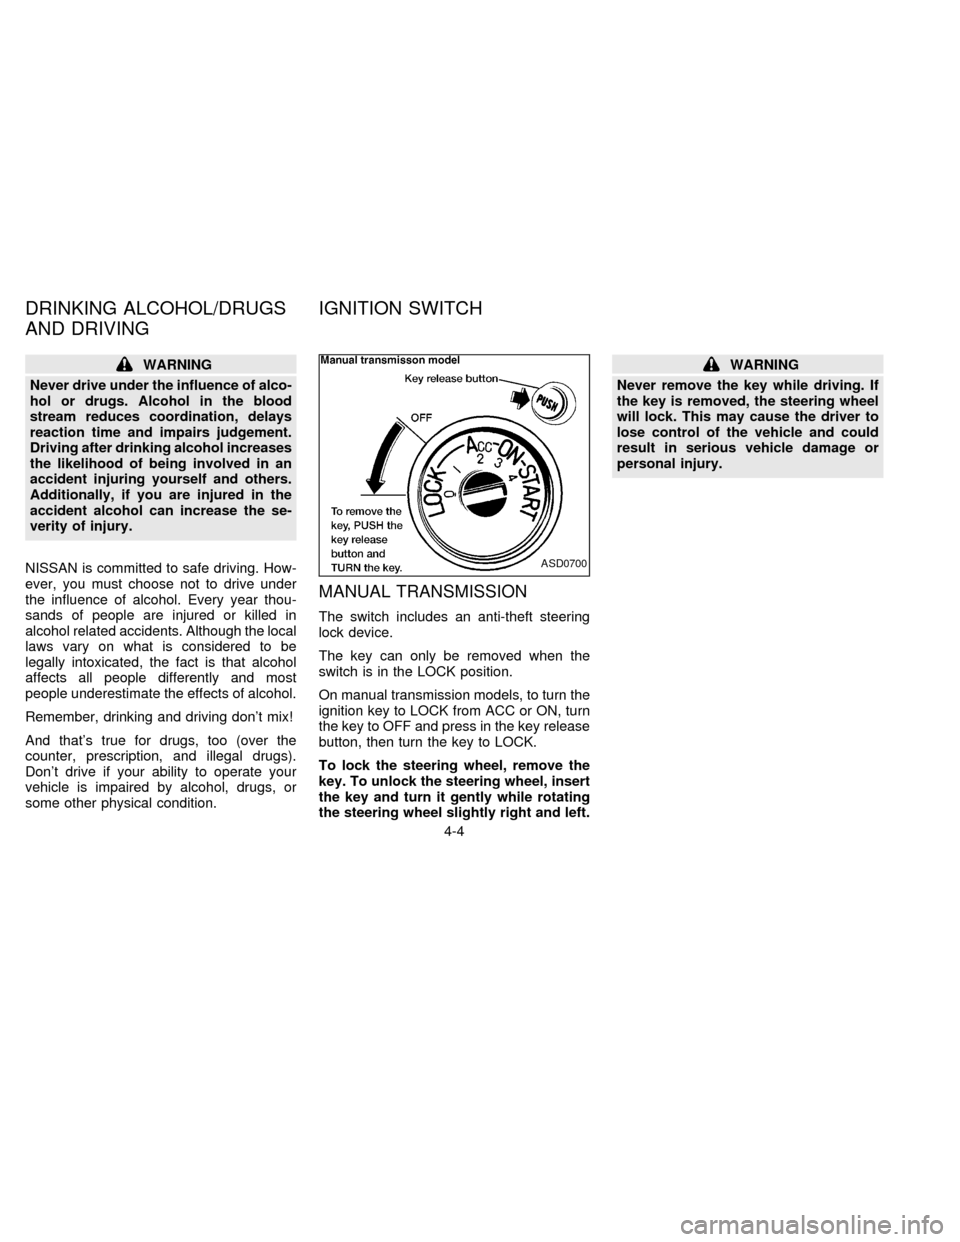
On manual transmission models, to turn the
ignition key to LOCK from ACC or ON, turn
the key to OFF and press in the key release
button, then turn the key to LOCK.
To lock the steering wheel, remove the
key. To unlock the steering wheel, insert
the key and turn it gently while rotating
the steering wheel slightly right and left.
WARNING
Never remove the key while driving. If
the key is removed, the steering wheel
will lock. This may cause the driver to
lose control of the vehicle and could
result in serious vehicle damage or
personal injury.
ASD0700
DRINKING ALCOHOL/DRUGS
AND DRIVINGIGNITION SWITCH
4-4
ZX
Page 86 of 204
AUTOMATIC TRANSMISSION
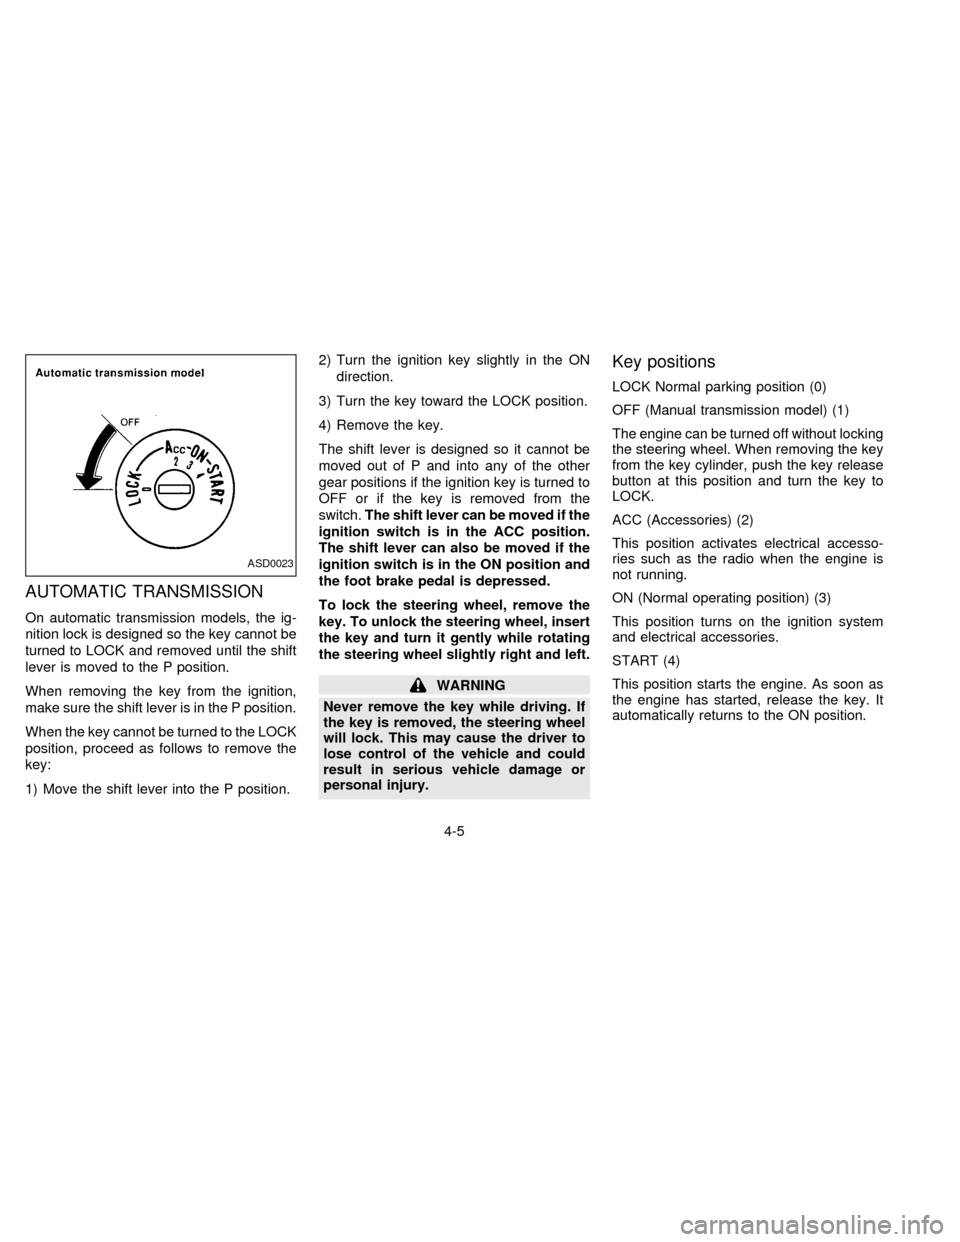
On automatic transmission models, the ig-
nition lock is designed so the key cannot be
turned to LOCK and removed until the shift
lever is moved to the P position.
When removing the key from the ignition,
make sure the shift lever is in the P position.
When the key cannot be turned to the LOCK
position, proceed as follows to remove the
key:
1) Move the shift lever into the P position.2) Turn the ignition key slightly in the ON
direction.
3) Turn the key toward the LOCK position.
4) Remove the key.
The shift lever is designed so it cannot be
moved out of P and into any of the other
gear positions if the ignition key is turned to
OFF or if the key is removed from the
switch.The shift lever can be moved if the
ignition switch is in the ACC position.
The shift lever can also be moved if the
ignition switch is in the ON position and
the foot brake pedal is depressed.
To lock the steering wheel, remove the
key. To unlock the steering wheel, insert
the key and turn it gently while rotating
the steering wheel slightly right and left.
WARNING
Never remove the key while driving. If
the key is removed, the steering wheel
will lock. This may cause the driver to
lose control of the vehicle and could
result in serious vehicle damage or
personal injury.
Key positions
LOCK Normal parking position (0)
OFF (Manual transmission model) (1)
The engine can be turned off without locking
the steering wheel. When removing the key
from the key cylinder, push the key release
button at this position and turn the key to
LOCK.
ACC (Accessories) (2)
This position activates electrical accesso-
ries such as the radio when the engine is
not running.
ON (Normal operating position) (3)
This position turns on the ignition system
and electrical accessories.
START (4)
This position starts the engine. As soon as
the engine has started, release the key. It
automatically returns to the ON position.
ASD0023
4-5
ZX