Page 19 of 204
The instrument brightness control operates
when the light switch is in theorposition.
Turn the control to adjust the brightness of
the instrument panel lights.Push the switch on to warn other drivers
when you must stop or park under emer-
gency conditions. All turn signal lights flash.
WARNING
cWhen stalled or stopped on the road-
way under emergency conditions,
move the vehicle well off the road.cDo not use the hazard warning flash-
ers while moving on the highway
unless unusual circumstances force
you to drive so slowly that your ve-
hicle might become a hazard to other
traffic.
cTurn signals do not work when the
hazard warning flasher lights are on.
The hazard warning flashers can be actu-
ated with the ignition switch in any position.
Some state laws may prohibit the use of
the hazard warning flasher switch while
driving.
SIC0052SIC0050
INSTRUMENT BRIGHTNESS
CONTROLHAZARD WARNING FLASHER
SWITCH
1-12
ZX
Page 20 of 204

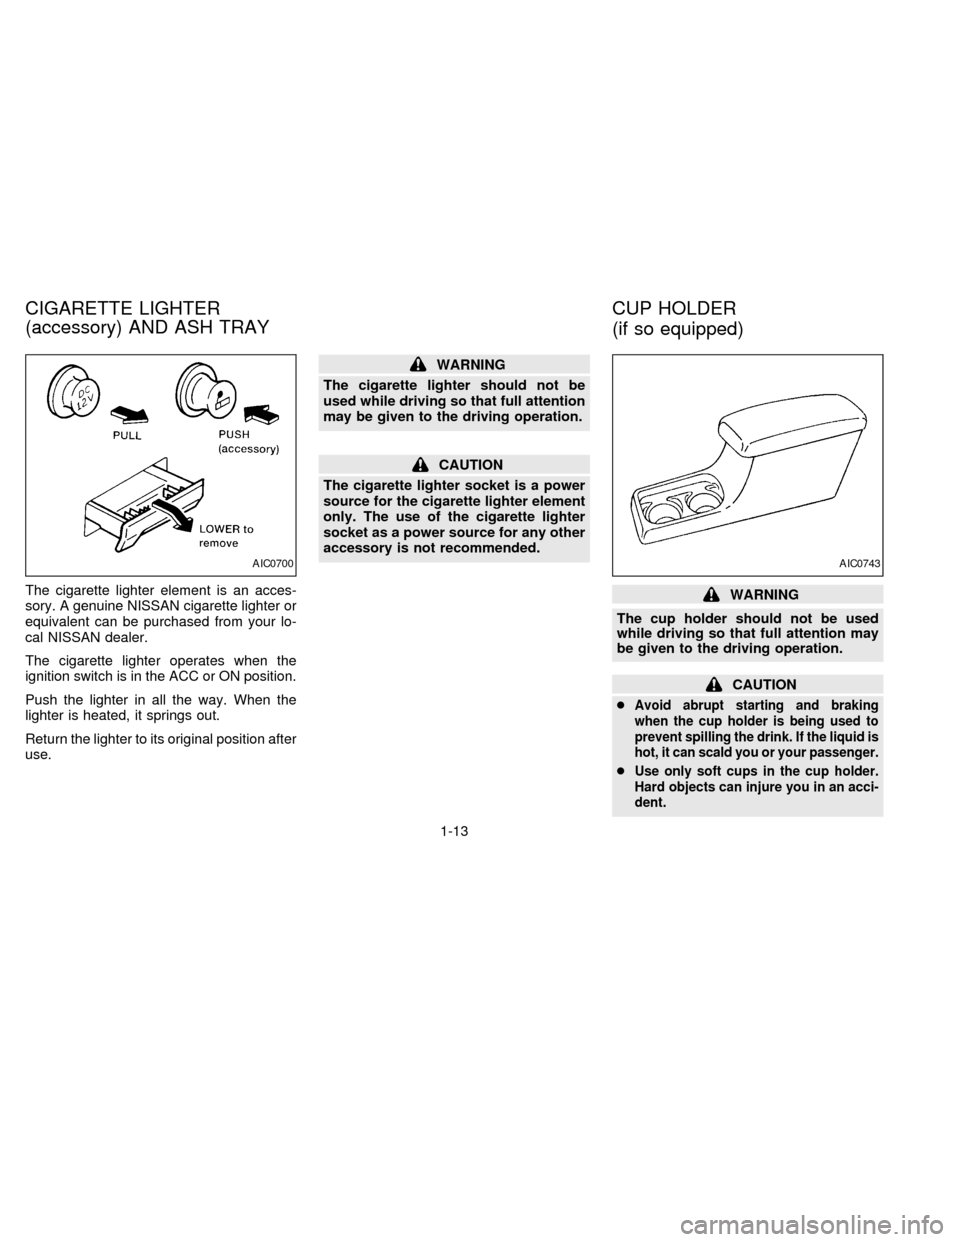
The cigarette lighter element is an acces-
sory. A genuine NISSAN cigarette lighter or
equivalent can be purchased from your lo-
cal NISSAN dealer.
The cigarette lighter operates when the
ignition switch is in the ACC or ON position.
Push the lighter in all the way. When the
lighter is heated, it springs out.
Return the lighter to its original position after
use.
WARNING
The cigarette lighter should not be
used while driving so that full attention
may be given to the driving operation.
CAUTION
The cigarette lighter socket is a power
source for the cigarette lighter element
only. The use of the cigarette lighter
socket as a power source for any other
accessory is not recommended.
WARNING
The cup holder should not be used
while driving so that full attention may
be given to the driving operation.
CAUTION
c
Avoid abrupt starting and braking
when the cup holder is being used to
prevent spilling the drink. If the liquid is
hot, it can scald you or your passenger.
cUse only soft cups in the cup holder.
Hard objects can injure you in an acci-
dent.
AIC0700AIC0743
CIGARETTE LIGHTER
(accessory) AND ASH TRAYCUP HOLDER
(if so equipped)
1-13
ZX
Page 22 of 204
The side windows can be opened or closed
by turning the hand crank on each door.WARNING
cMake sure that all passengers have
their hands, etc. inside the vehicle
before closing the windows. Use the
window lock switch to prevent unex-
pected use of the power windows.
cDo not leave children unattended in-
side the vehicle. They could un-
knowingly activate switches or con-
trols and become trapped in a
window. Unattended children could
become involved in a serious acci-
dent.The power window operates when the igni-
tion key is ON.
To open or close the window, press the
switch and hold it down. The main switch
(driver's switch) also opens or closes the
passenger side window.
Locking passenger's window
When the lock button is pushed in, only the
driver side window can be opened or
closed. Push it in again to cancel.
AIC0648AIC0741
MANUAL WINDOWS POWER WINDOWS
(if so equipped)
1-15
ZX
Page 24 of 204
Tilting up
Pull the handle down, then push the handle
up to the fully tilted position.
WARNING
cIn an accident you could be thrown
from the vehicle through an open
sunroof. Always use seat belts and
child restraints.cDo not allow anyone to stand up or
extend any portion of their body out
of the sunroof opening while the
vehicle is in motion or while the
sunroof is closing.
CAUTION
cRemove water drops, snow, ice or
sand from the sunroof before
opening.
cDo not place heavy objects on the
sunroof or surrounding area.
IC1300-AIC0197
OPERA WINDOW
(if so equipped)SUNROOF
(if so equipped)
1-17
ZX
Page 25 of 204
Closing
Pull the handle forward to unlock, then push
the handle up completely.
Removing the sun shade
1. Turn each knob counterclockwise while
lifting the sun shade upward.
2. Slide the shade backward to remove it.
Installing the sun shade
1. Insert the two hooks on the front edge of
sun shade into holders on the roof.
2. Align the two bolts on the rear edge of
sun shade with the lock nuts, then se-
curely tighten the lock nuts.
WARNING
Do not remove or install the sun shade
while driving so that full attention may
be given to the driving operation.
IC0198AIC0706
1-18
ZX
Page 26 of 204
Removing the sunroof
1. Remove the sun shade before removing
the sunroof.
2. Tilt the sunroof.
3. Push the knob located on each end of the
handle and push the sunroof upwards to
disengage the handle linkage.
4. Pull the sunroof up from outside of the
vehicle until it is perpendicular to the roof
panel.5. Slide the sunroof to the left and remove
it.WARNING
Do not remove the sunroof while driv-
ing so that full attention may be given
to the driving operation.
Installing the sunroof
1. While placing the sunroof perpendicular
to the roof panel, position the sunroof
and engage the retainer with the hinge.
2. Slide the sunroof to the right until the red
mark on the hinge disappears.
3. Carefully lower the sunroof, making sure
it is in line with the roof opening.
4. Engage the handle linkage.
Be sure the sunroof is securely installed.
SIC0072SIC0073
1-19
ZX
Page 28 of 204

2Pre-driving checks and adjustments
Key .........................................................................2-2
Door locks ..............................................................2-2
Power door lock (if so equipped) ...........................2-3
Hood release ..........................................................2-4
Glove box lock (if so equipped) .............................2-4
Fuel filler cap ..........................................................2-5
Tailgate latch ..........................................................2-5
Tie down hooks ......................................................2-7
Front separate seats ..............................................2-8
Seat adjustment .....................................................2-8
Head restraints .....................................................2-11
Tilting front separate seat ....................................2-11
Bench seat ...........................................................2-12
Seat adjustment ...................................................2-12
Tilting bench seat .................................................2-12
Jump seat .............................................................2-13
Supplemental restraint system (supplemental
air bag system).....................................................2-14
Supplemental air bag system...............................2-15
Warning labels......................................................2-17
Supplemental air bag warning light......................2-17Seat belts .............................................................2-19
Precautions on seat belt usage ...........................2-19
Child safety...........................................................2-20
3-point type with retractor ....................................2-21
2-point type without retractor (center of bench
seat and jump seats)............................................2-23
Seat belt extenders ..............................................2-24
Seat belt maintenance .........................................2-24
Child restraints for infants and small children......2-24
Installation on front passenger seat (3-point
type with retractor) ...............................................2-26
Installation in center of bench seat (2-point
type without retractor) ..........................................2-27
Top strap child restraint .......................................2-28
Tilting steering wheel (if so equipped) .................2-29
Outside mirror remote control
(if so equipped) ....................................................2-30
Outside mirrors .....................................................2-30
Inside mirror .........................................................2-31
Vanity mirror (if so equipped)...............................2-31
ZX
Page 30 of 204

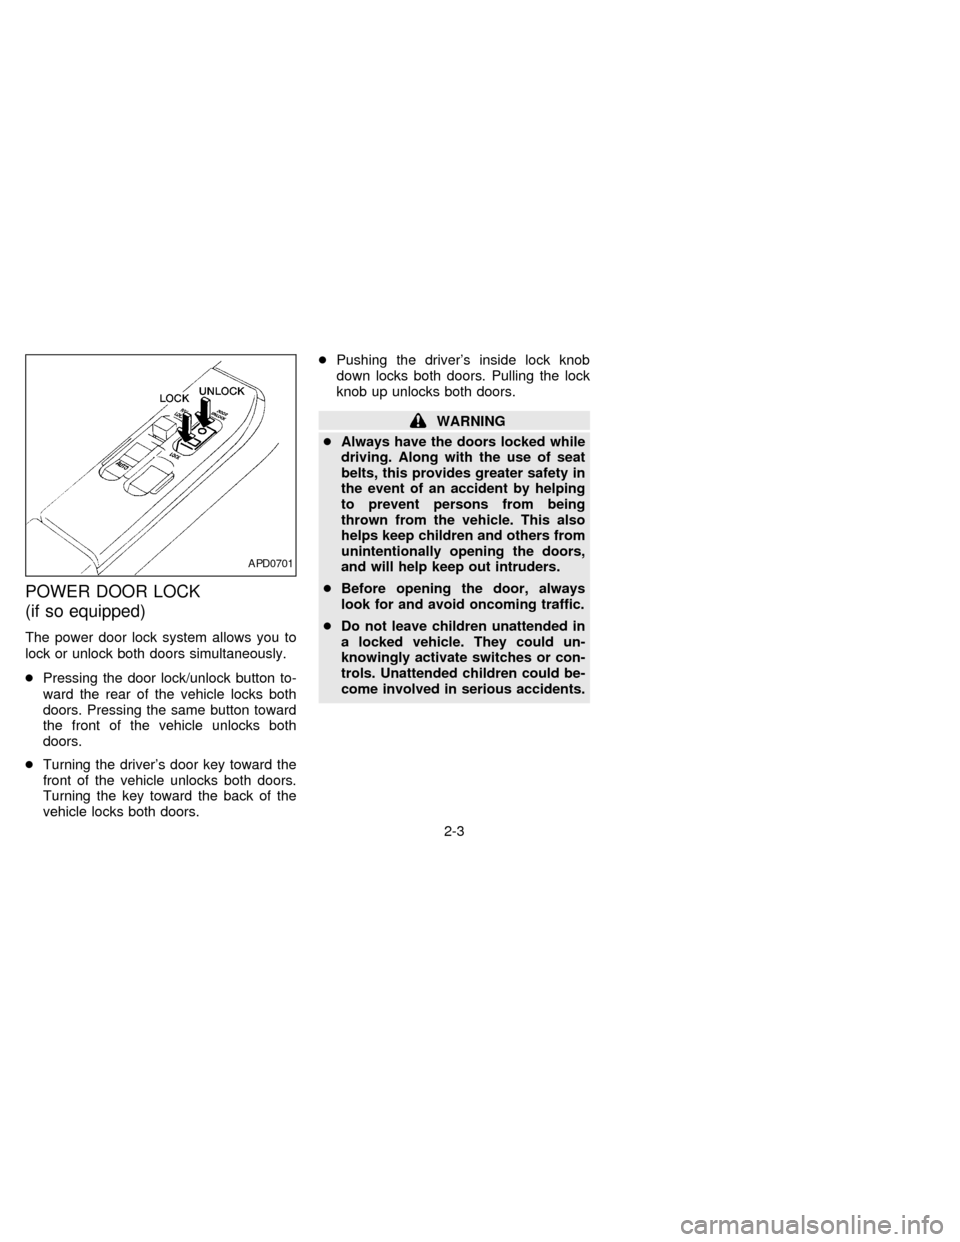
POWER DOOR LOCK
(if so equipped)
The power door lock system allows you to
lock or unlock both doors simultaneously.
cPressing the door lock/unlock button to-
ward the rear of the vehicle locks both
doors. Pressing the same button toward
the front of the vehicle unlocks both
doors.
cTurning the driver's door key toward the
front of the vehicle unlocks both doors.
Turning the key toward the back of the
vehicle locks both doors.cPushing the driver's inside lock knob
down locks both doors. Pulling the lock
knob up unlocks both doors.
WARNING
cAlways have the doors locked while
driving. Along with the use of seat
belts, this provides greater safety in
the event of an accident by helping
to prevent persons from being
thrown from the vehicle. This also
helps keep children and others from
unintentionally opening the doors,
and will help keep out intruders.
cBefore opening the door, always
look for and avoid oncoming traffic.
cDo not leave children unattended in
a locked vehicle. They could un-
knowingly activate switches or con-
trols. Unattended children could be-
come involved in serious accidents.
APD0701
2-3
ZX