1997 NISSAN FRONTIER ESP
[x] Cancel search: ESPPage 65 of 204

three minutes with the windows open to
vent hot air from the passenger compart-
ment. Then, close the windows. This
allows the air conditioner to cool the
interior more quickly.
cThe air conditioning system should be
operated for about ten minutes at least
once a month, especially in winter. This
helps prevent damage to the system due
to lack of lubrication.
cIf the coolant temperature gauge ex-
ceeds the (hot) position, turn the air
conditioner off. Have your vehicle in-
spected by a NISSAN dealer. See ``If
your vehicle overheats'' in the ``In case of
emergency'' section for additional infor-
mation.
AIR FLOW CHARTS
The following charts show the switch and
lever positions forMAXIMUM and QUICK
heating, cooling or defrosting.
The air intake lever should always be in
the
position for heating and de-
frosting.
AHA0700
3-6
ZX
Page 92 of 204
the accelerator pedal fully and hold it
to help start the engine.
cIn the summer, when restarting the
engine within 30 minutes after it has
been stopped, keep the accelerator
pedal fully depressed while starting.
CAUTION
Do not operate the starter for more than
15 seconds at a time. If the engine does
not start, turn the key off and wait 10
seconds before cranking again, other-
wise the starter could be damaged.
4.Warm-up
Always allow the engine to idle for at
least 30 seconds after starting. Drive at a
moderate speed for a short distance first,
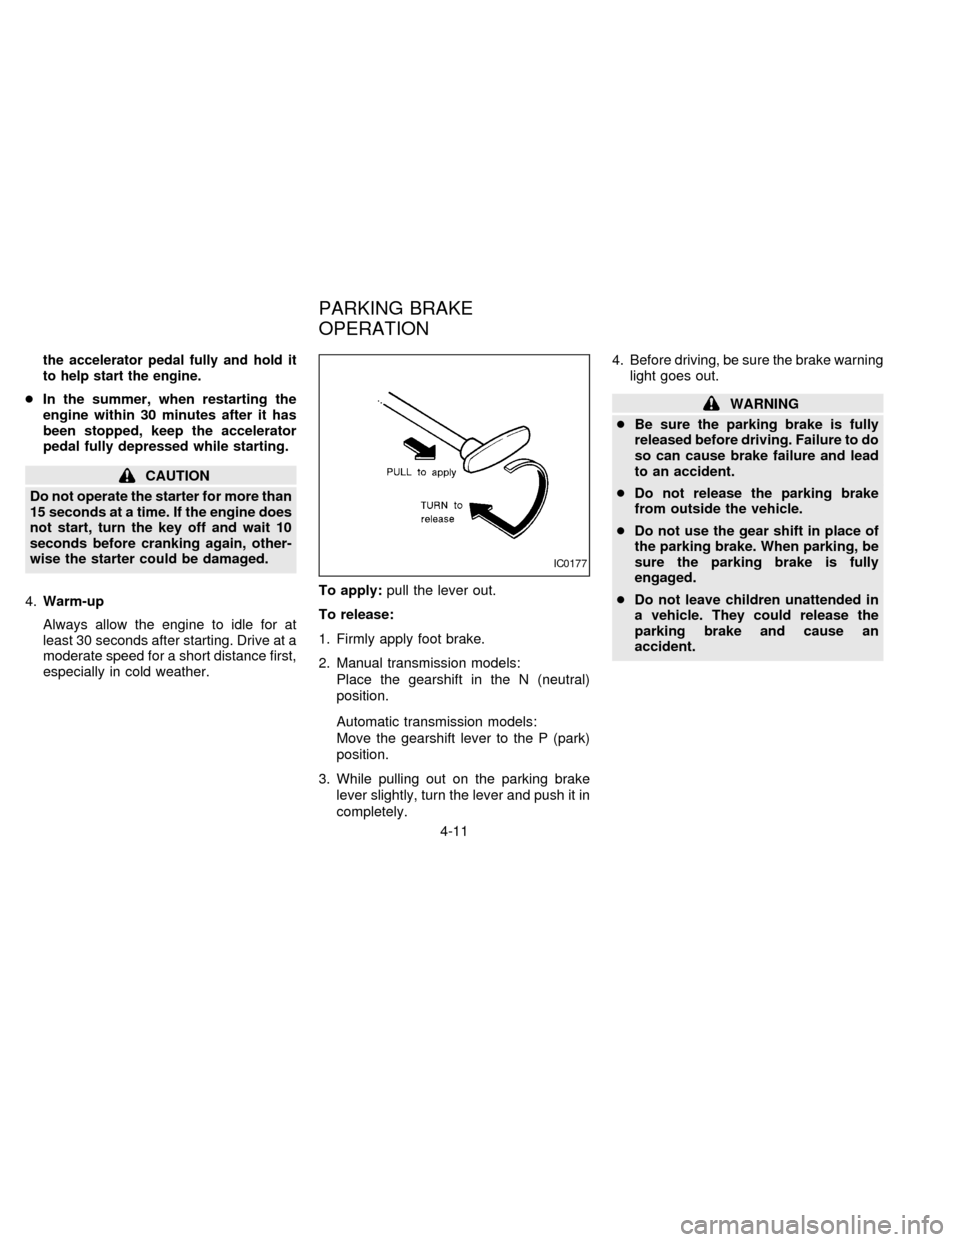
especially in cold weather.To apply:pull the lever out.
To release:
1. Firmly apply foot brake.
2. Manual transmission models:
Place the gearshift in the N (neutral)
position.
Automatic transmission models:
Move the gearshift lever to the P (park)
position.
3. While pulling out on the parking brake
lever slightly, turn the lever and push it in
completely.4. Before driving, be sure the brake warning
light goes out.
WARNING
cBe sure the parking brake is fully
released before driving. Failure to do
so can cause brake failure and lead
to an accident.
cDo not release the parking brake
from outside the vehicle.
cDo not use the gear shift in place of
the parking brake. When parking, be
sure the parking brake is fully
engaged.
cDo not leave children unattended in
a vehicle. They could release the
parking brake and cause an
accident.
IC0177
PARKING BRAKE
OPERATION
4-11
ZX
Page 105 of 204
Automatic transmission models:
Move the gearshift lever to the P (Park)
position.
WARNING
Safe parking procedures require that
both the parking brake be set and the
transmission placed into P position
(automatic) or in the appropriate gear
(manual). Failure to do so could cause
the vehicle to move unexpectedly or
roll away and result in an accident.
Make sure the gear lever has been
pushed as far forward as it can go and
cannot be moved without depressing
the button at the end of the lever.
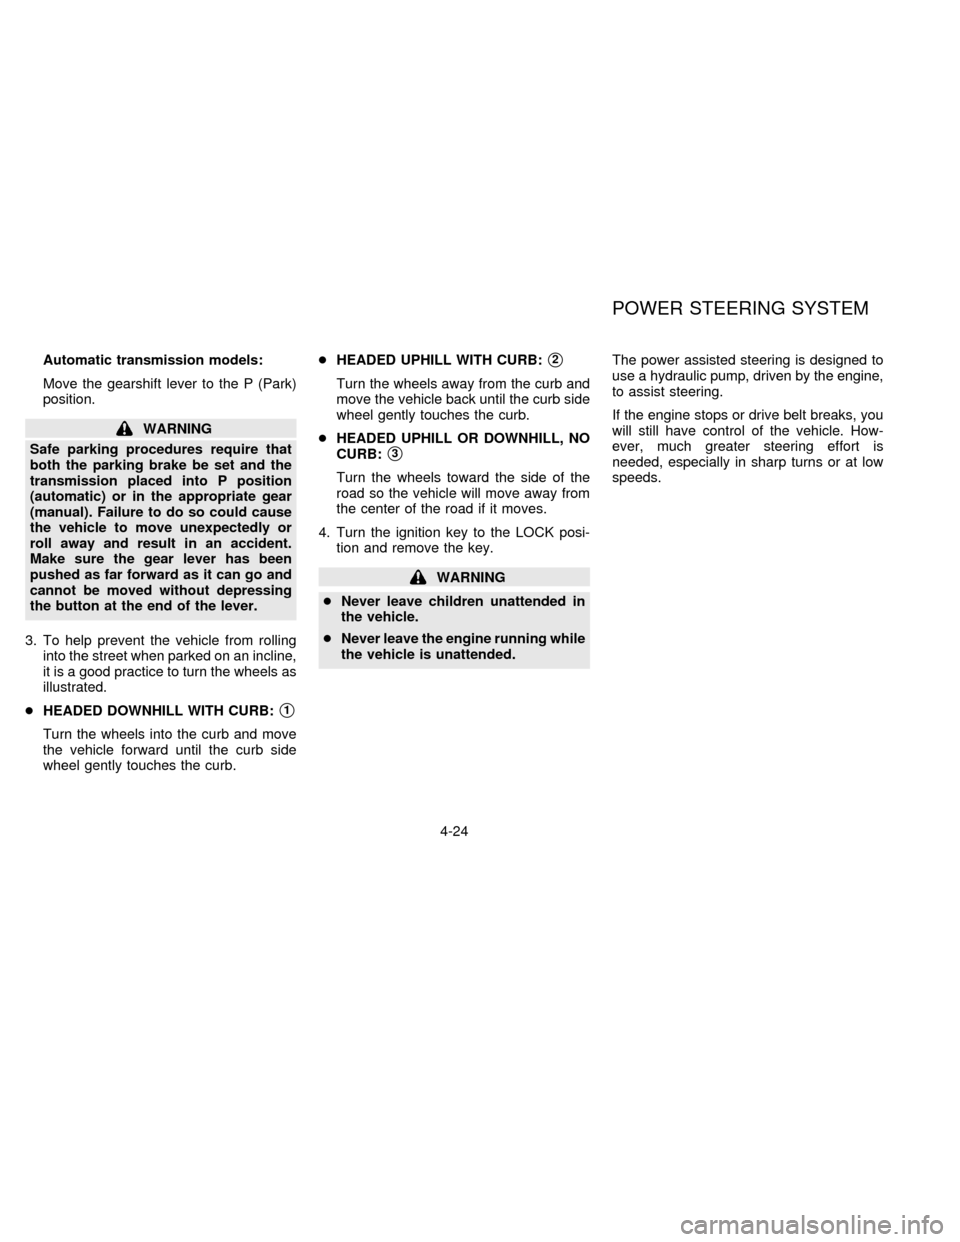
3. To help prevent the vehicle from rolling
into the street when parked on an incline,
it is a good practice to turn the wheels as
illustrated.
cHEADED DOWNHILL WITH CURB:
s1
Turn the wheels into the curb and move
the vehicle forward until the curb side
wheel gently touches the curb.cHEADED UPHILL WITH CURB:
s2
Turn the wheels away from the curb and
move the vehicle back until the curb side
wheel gently touches the curb.
cHEADED UPHILL OR DOWNHILL, NO
CURB:
s3
Turn the wheels toward the side of the
road so the vehicle will move away from
the center of the road if it moves.
4. Turn the ignition key to the LOCK posi-
tion and remove the key.
WARNING
cNever leave children unattended in
the vehicle.
cNever leave the engine running while
the vehicle is unattended.The power assisted steering is designed to
use a hydraulic pump, driven by the engine,
to assist steering.
If the engine stops or drive belt breaks, you
will still have control of the vehicle. How-
ever, much greater steering effort is
needed, especially in sharp turns or at low
speeds.
POWER STEERING SYSTEM
4-24
ZX
Page 107 of 204
lenoids controlled by a computer. The com-
puter has a built-in diagnostic feature that
tests the system each time you start the
engine and move the vehicle at a low speed
in forward or reverse. When the self-test
occurs, you may hear a ``clunk'' noise
and/or feel a pulsation in the brake pedal.
This is normal and is not an indication of any
malfunction. If the computer senses any
malfunction, it switches the rear anti-lock
brake system off and turns on the ABS
brake warning light in the dashboard. The
brake system then operates normally, but
without anti-lock assistance.
If an abnormality occurs in the system, the rear
anti-lock function will cease but the ordinary
brakes will continue to operate normally. The
ABS brake warning light will then come on.
If the light comes on while you are driving,
contact your NISSAN dealer for repair.
The rear anti-lock brake system
may only be effective when driving in the
2-wheel drive mode.
When driving in the 4-wheel drive mode, the
rear anti-lock brake system may not be
effective in many cases because the front
axle is connected with the rear axle throughthe transfer gear. The rear wheels lock if the
front wheels lock. If this happens, the rear
anti-lock brake system may cease function-
ing but the ordinary brakes will continue to
operate normally. The ABS brake warning
light will then come on.
The above condition is not a malfunction
and the rear anti-lock brake system recov-
ers when the engine is started again. The
ABS brake warning light then goes off.
Using the System
Depress the brake pedal and hold it down.
WARNING
Do not pump the brake pedal. Doing so
may result in increased stopping dis-
tances.
WARNING
The rear anti-lock brake system is a
sophisticated device. But it cannot pre-
vent accidents resulting from careless
or dangerous driving techniques. It can
help maintain vehicle control undersome conditions, but remember that
the stopping distance on slippery sur-
faces will be longer than on normal
surfaces even with rear wheel ABS.
Stopping distances may also be longer
on rough, gravel, or snow covered
roads, or if you are using tire chains.
Always maintain a safe distance from
the vehicle in front of you. Ultimately,
the responsibility for safety of self and
others rests in the hands of the driver.
Tire type and condition may also affect
braking effectiveness.
cWhen replacing tires, install the
specified size of tires on all four
wheels.
cWhen installing a spare tire, make
sure it is the proper size and type as
specified on the tire placard. See
``Tire placard'' in the ``Technical and
consumer information'' section.
4-26
ZX
Page 114 of 204
Jacking up the vehicle and remov-
ing the wheel
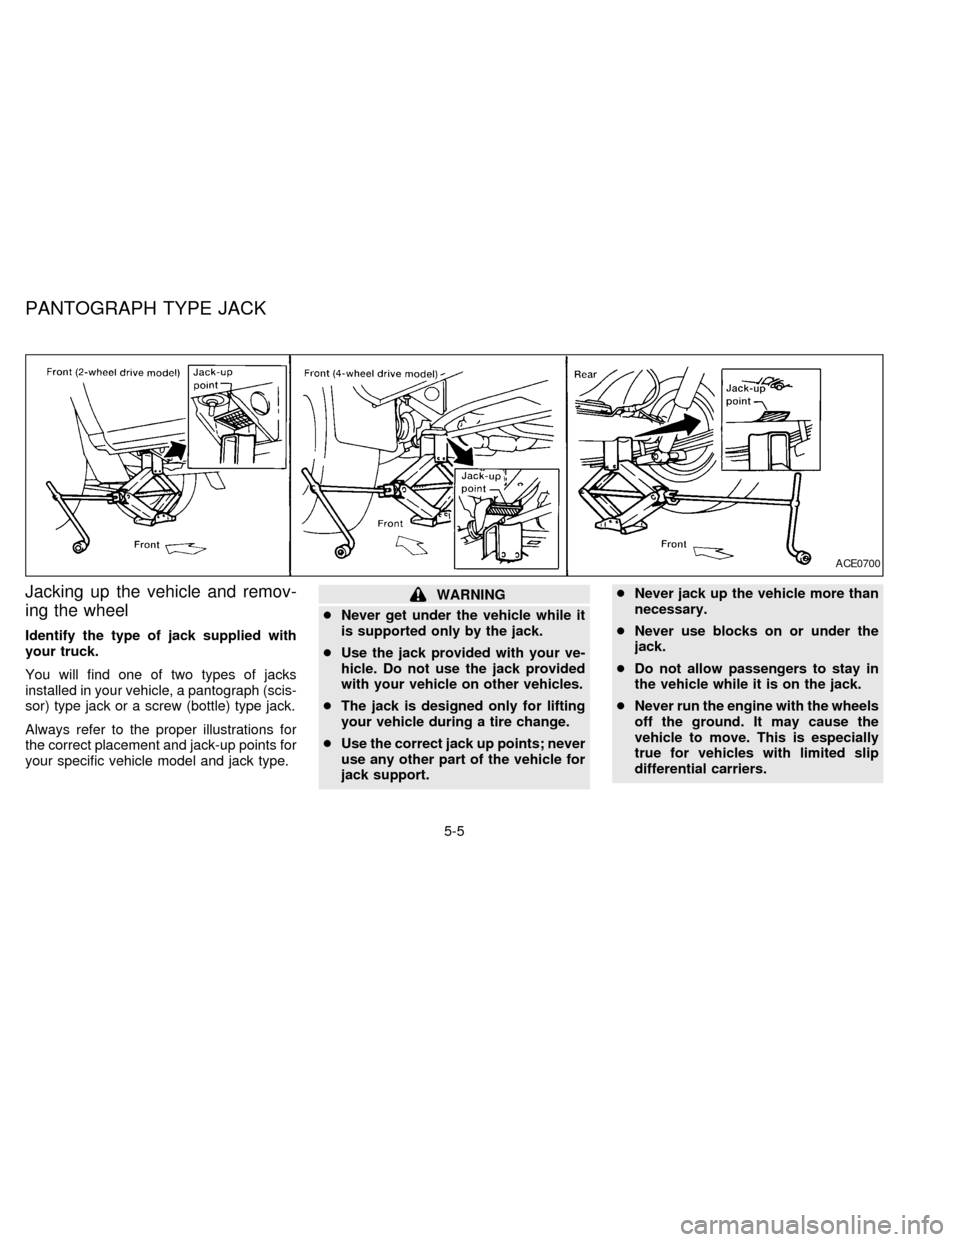
Identify the type of jack supplied with
your truck.
You will find one of two types of jacks
installed in your vehicle, a pantograph (scis-
sor) type jack or a screw (bottle) type jack.
Always refer to the proper illustrations for
the correct placement and jack-up points for
your specific vehicle model and jack type.
WARNING
cNever get under the vehicle while it
is supported only by the jack.
cUse the jack provided with your ve-
hicle. Do not use the jack provided
with your vehicle on other vehicles.
cThe jack is designed only for lifting
your vehicle during a tire change.
cUse the correct jack up points; never
use any other part of the vehicle for
jack support.cNever jack up the vehicle more than
necessary.
cNever use blocks on or under the
jack.
cDo not allow passengers to stay in
the vehicle while it is on the jack.
cNever run the engine with the wheels
off the ground. It may cause the
vehicle to move. This is especially
true for vehicles with limited slip
differential carriers.
ACE0700
PANTOGRAPH TYPE JACK
5-5
ZX
Page 126 of 204
choosing the proper product.
cWax your vehicle only after a thorough
washing. Follow the instructions supplied
with the wax.
cDo not use a wax containing any abra-
sives, cutting compounds or cleaners
that may damage the vehicle finish.
cIf the surface does not polish easily, use
a ``road tar'' remover and wax again.
Machine compounding or aggressive pol-
ishing on a base coat/clear coat paint finish
may dull the finish or leave swirl marks.
Only apply black wax or black shoe polish to
the black urethane or polypropylene
bumper.
Removing spots
Remove tar and oil spots, industrial dust,
insects and tree sap as quickly as possible
from the surface of the paint to avoid per-
manent damage or staining. Special clean-
ing products are available at your NISSAN
dealer or any automotive accessories store.
Underbody
In areas where road salt is used in winter, it
is necessary to clean the underbody regu-larly in order to prevent dirt and salt from
building up and causing corrosion on the
underbody and suspension. Before the win-
ter period and again in the spring, the
underseal must be checked and, if neces-
sary, retreated.
Cleaning glass
Use glass cleaner to remove smoke and
dust film from the glass surfaces. It is nor-
mal for glass to be coated with a film after
the vehicle is parked in the hot sun. Glass
cleaner and a soft cloth easily remove this
film.
CAUTION
When cleaning the inside of the win-
dow, do not use any sharp-edged tools
or abrasive cleaners or chlorine-based
disinfectant cleaners. They could dam-
age the electrical conductors, radio an-
tenna elements or rear window defog-
ger elements.
Cleaning aluminum alloy wheels
Wash regularly, especially during winter
months in areas where road salt is used.
Salt could discolor the wheel if not removed.
Chrome parts
Clean all chrome parts regularly with a
non-abrasive chrome polish to maintain the
finish.
Cleaning interior
Occasionally remove loose dust from the
interior trim, plastic parts and seats using a
vacuum cleaner or soft brush. Wipe the
vinyl and leather surfaces with a clean, soft
cloth dampened in mild soap solution, then
wipe clean with a dry soft cloth. Before
using any fabric protector, read the manu-
facturer's recommendations. Some fabric
protectors contain chemicals that stain or
bleach the seat material.
CAUTION
cNever use benzine, thinner or any
similar material.
cNever use fabric protectors unless
recommended by the manufacturer.
6-3
ZX
Page 127 of 204
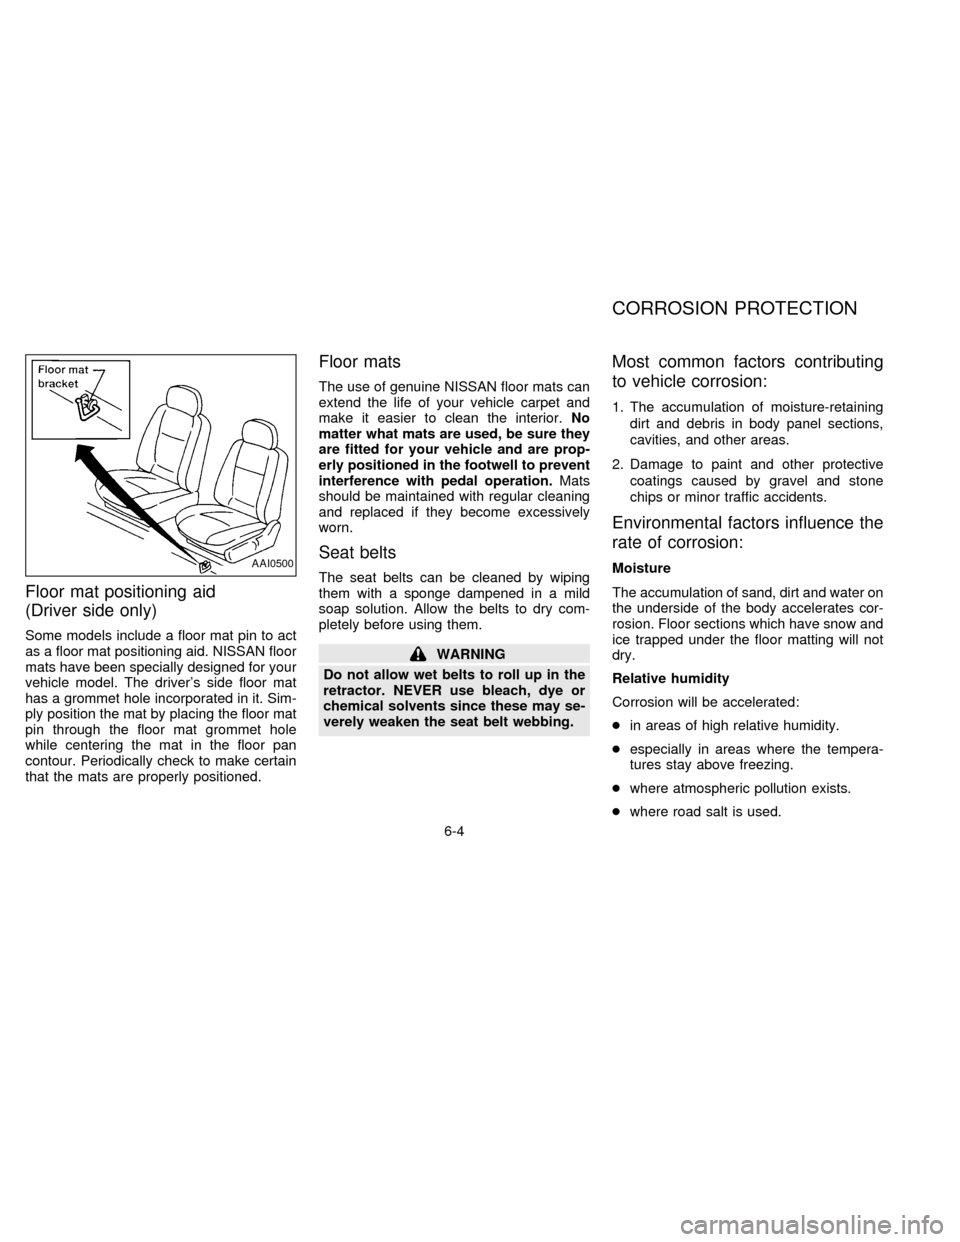
Floor mat positioning aid
(Driver side only)
Some models include a floor mat pin to act
as a floor mat positioning aid. NISSAN floor
mats have been specially designed for your
vehicle model. The driver's side floor mat
has a grommet hole incorporated in it. Sim-
ply position the mat by placing the floor mat
pin through the floor mat grommet hole
while centering the mat in the floor pan
contour. Periodically check to make certain
that the mats are properly positioned.
Floor mats
The use of genuine NISSAN floor mats can
extend the life of your vehicle carpet and
make it easier to clean the interior.No
matter what mats are used, be sure they
are fitted for your vehicle and are prop-
erly positioned in the footwell to prevent
interference with pedal operation.Mats
should be maintained with regular cleaning
and replaced if they become excessively
worn.
Seat belts
The seat belts can be cleaned by wiping
them with a sponge dampened in a mild
soap solution. Allow the belts to dry com-
pletely before using them.
WARNING
Do not allow wet belts to roll up in the
retractor. NEVER use bleach, dye or
chemical solvents since these may se-
verely weaken the seat belt webbing.
Most common factors contributing
to vehicle corrosion:
1. The accumulation of moisture-retaining
dirt and debris in body panel sections,
cavities, and other areas.
2. Damage to paint and other protective
coatings caused by gravel and stone
chips or minor traffic accidents.
Environmental factors influence the
rate of corrosion:
Moisture
The accumulation of sand, dirt and water on
the underside of the body accelerates cor-
rosion. Floor sections which have snow and
ice trapped under the floor matting will not
dry.
Relative humidity
Corrosion will be accelerated:
cin areas of high relative humidity.
cespecially in areas where the tempera-
tures stay above freezing.
cwhere atmospheric pollution exists.
cwhere road salt is used.AAI0500
CORROSION PROTECTION
6-4
ZX
Page 161 of 204

Your new NISSAN has been designed to
have minimum maintenance requirements
with longer service intervals to save you
both time and money. However, some day-
to-day and regular maintenance is essential
to maintain your NISSAN's good mechani-
cal condition, as well as its emission and
engine performance.
It is the owner's responsibility to make sure
that the specified maintenance, as well as
general maintenance, is performed.
As the vehicle owner, you are the only one
who can ensure that your vehicle receives
the proper maintenance care. You are a
vital link in the maintenance chain.
General maintenance
General maintenance includes those items
which should be checked during normal
day-to-day operation of the vehicle. They
are essential if your vehicle is to continue to
operate properly. It is your responsibility to
perform these procedures regularly as pre-
scribed.
These checks or inspections can be done
by yourself, a qualified technician or, if you
prefer, your NISSAN dealer.
Periodic maintenance
The maintenance items listed in this section
are required to be serviced at regular inter-
vals.
However, under severe driving conditions,
additional or more frequent maintenance
will be required.
Where to go for service
If maintenance service is required or your
vehicle appears to malfunction, have the
systems checked and tuned by an autho-
rized NISSAN dealer.
NISSAN technicians are well-trained spe-
cialists and are kept up to date with the
latest service information through technical
bulletins, service tips, and in-dealership
training programs. They are completely
qualified to work on NISSAN's vehicles
beforethey work on your vehicle, rather
than after they have worked on it.
You can be confident that your NISSAN
dealer's service department performs the
best job to meet the maintenance require-
ments on your vehicle Ð in a reliable and
economic way.During the normal day-to-day operation of
the vehicle, general maintenance should be
performed regularly as prescribed in this
section. If you detect any unusual sounds,
vibrations or smells, be sure to check for the
cause or have your NISSAN dealer do it
promptly. In addition, you should notify your
NISSAN dealer if you think that repairs are
required.
When performing any checks or mainte-
nance work, closely observe the precau-
tions in the ``Do-it-yourself operations'' sec-
tion.
OUTSIDE THE VEHICLE
The maintenance items listed here should
be performed from time to time, unless
otherwise specified.
Additional information on the following
items with ``*'' is found in the ``Do-it-
yourself operations'' section.
Tires*Check the pressure with a gauge
periodically when at a service station, in-
cluding the spare, and adjust to the speci-
fied pressure if necessary. Check carefully
for damage, cuts or excessive wear.
Wheel nuts*When checking the tires,
GENERAL MAINTENANCE
8-2
ZX