1997 NISSAN ALTIMA instrument panel
[x] Cancel search: instrument panelPage 8 of 203

1Instruments and controls
Meters and gauges ................................................1-2
Speedometer and odometer ..................................1-3
Tachometer ............................................................1-3
Engine coolant temperature gauge and fuel
gauge .....................................................................1-4
Warning/indicator lights and chimes ......................1-5
Theft warning (if so equipped) ...............................1-9
Windshield wiper and washer switch ...................1-10
Rear window defogger switch ..............................1-11
Headlight and turn signal switch ..........................1-12
Daytime running light system (for Canada) .........1-13
Cornering light (if so equipped)............................1-13
Instrument brightness control ...............................1-14
Front fog light switch (if so equipped)..................1-14Hazard warning flasher switch .............................1-14
Cigarette lighter (accessory) and ash tray ...........1-15
Cup holder ............................................................1-16
Manual windows ...................................................1-16
Power windows ....................................................1-17
Automatic power window switch ..........................1-17
Rear power windows ............................................1-18
Sunroof (if so equipped).......................................1-18
If the sunroof does not close ...............................1-19
Clock instrument panel (if so equipped) ..............1-20
Interior light...........................................................1-20
Trunk light.............................................................1-21
Spotlight (if so equipped) .....................................1-21
ZX
Page 18 of 203
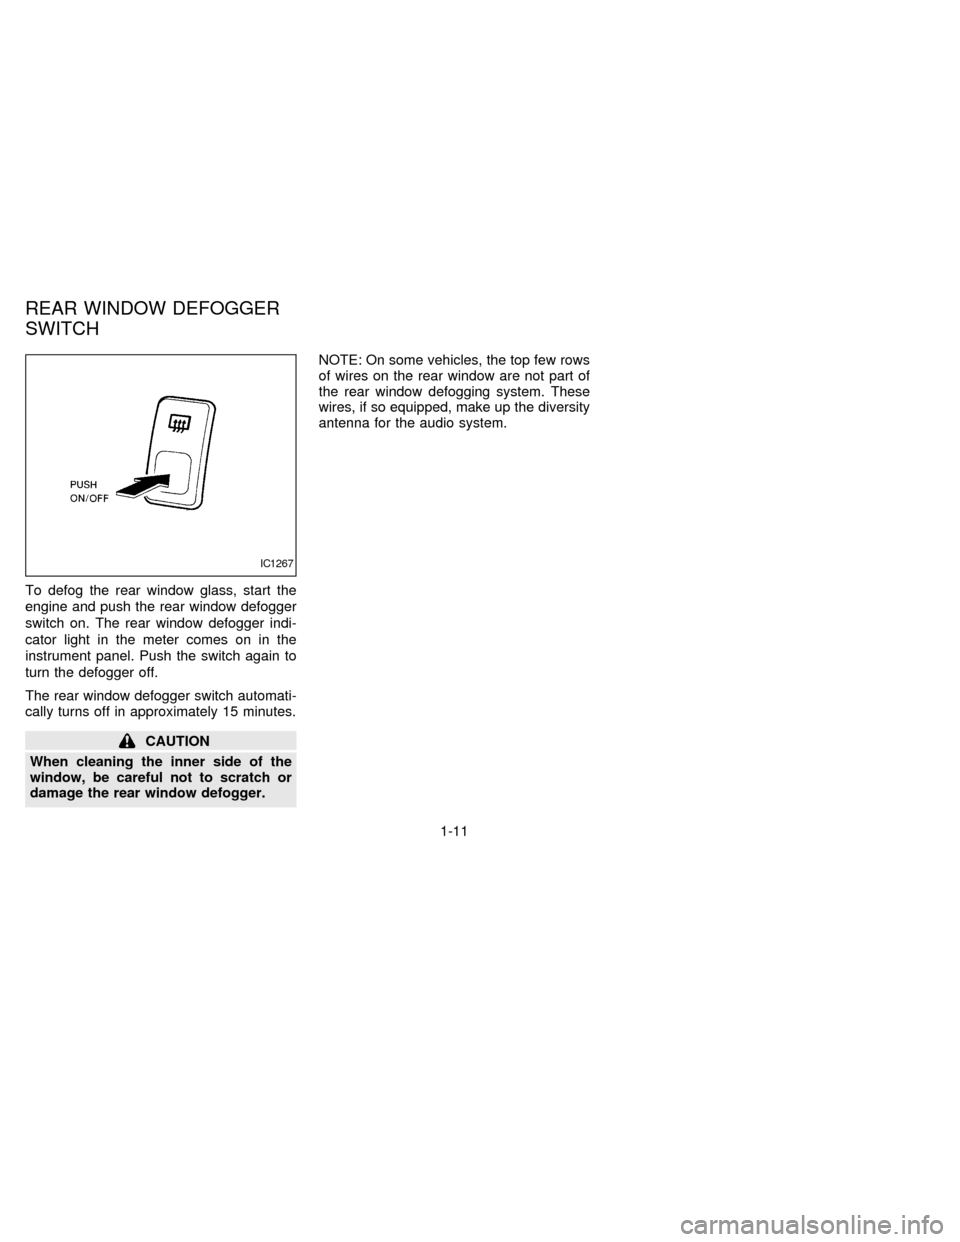
To defog the rear window glass, start the
engine and push the rear window defogger
switch on. The rear window defogger indi-
cator light in the meter comes on in the
instrument panel. Push the switch again to
turn the defogger off.
The rear window defogger switch automati-
cally turns off in approximately 15 minutes.
CAUTION
When cleaning the inner side of the
window, be careful not to scratch or
damage the rear window defogger.NOTE: On some vehicles, the top few rows
of wires on the rear window are not part of
the rear window defogging system. These
wires, if so equipped, make up the diversity
antenna for the audio system.
IC1267
REAR WINDOW DEFOGGER
SWITCH
1-11
ZX
Page 19 of 203

Lighting
Turn the switch to theposition: The
front clearance, side marker, tail, license
plate and instrument panel lights come on.
Turn the switch to the
position:The headlights come on and all the other
lights remain on.
To select the high beam function, push the
lever forward. The high beam lights come
on and the indicator light illuminates. Pull it
back to select the low beam.
AIC0505
HEADLIGHT AND TURN
SIGNAL SWITCH
1-12
ZX
Page 21 of 203
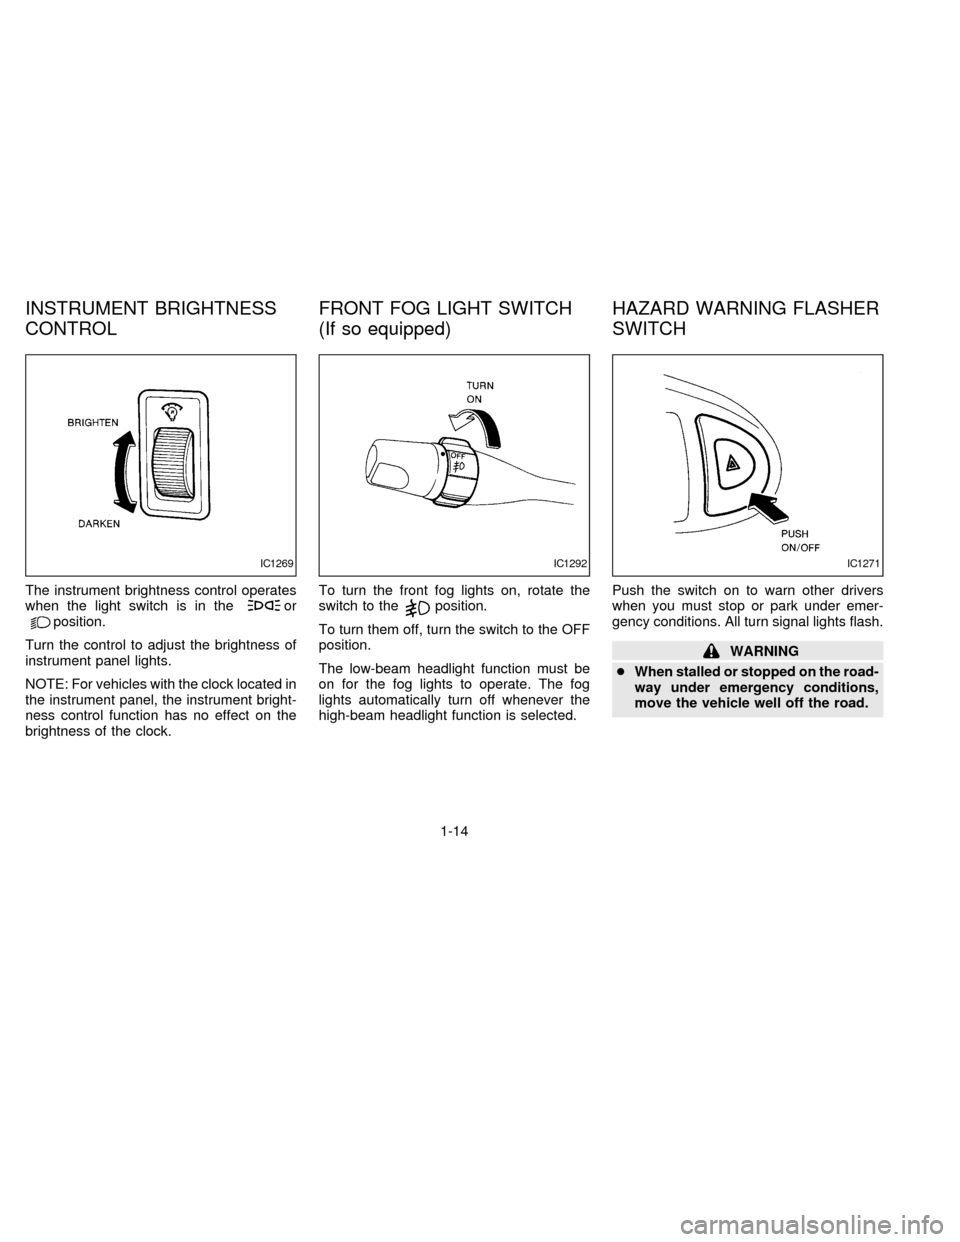
The instrument brightness control operates
when the light switch is in theorposition.
Turn the control to adjust the brightness of
instrument panel lights.
NOTE: For vehicles with the clock located in
the instrument panel, the instrument bright-
ness control function has no effect on the
brightness of the clock.To turn the front fog lights on, rotate the
switch to theposition.
To turn them off, turn the switch to the OFF
position.
The low-beam headlight function must be
on for the fog lights to operate. The fog
lights automatically turn off whenever the
high-beam headlight function is selected.Push the switch on to warn other drivers
when you must stop or park under emer-
gency conditions. All turn signal lights flash.
WARNING
cWhen stalled or stopped on the road-
way under emergency conditions,
move the vehicle well off the road.
IC1269IC1292IC1271
INSTRUMENT BRIGHTNESS
CONTROLFRONT FOG LIGHT SWITCH
(If so equipped)HAZARD WARNING FLASHER
SWITCH
1-14
ZX
Page 27 of 203
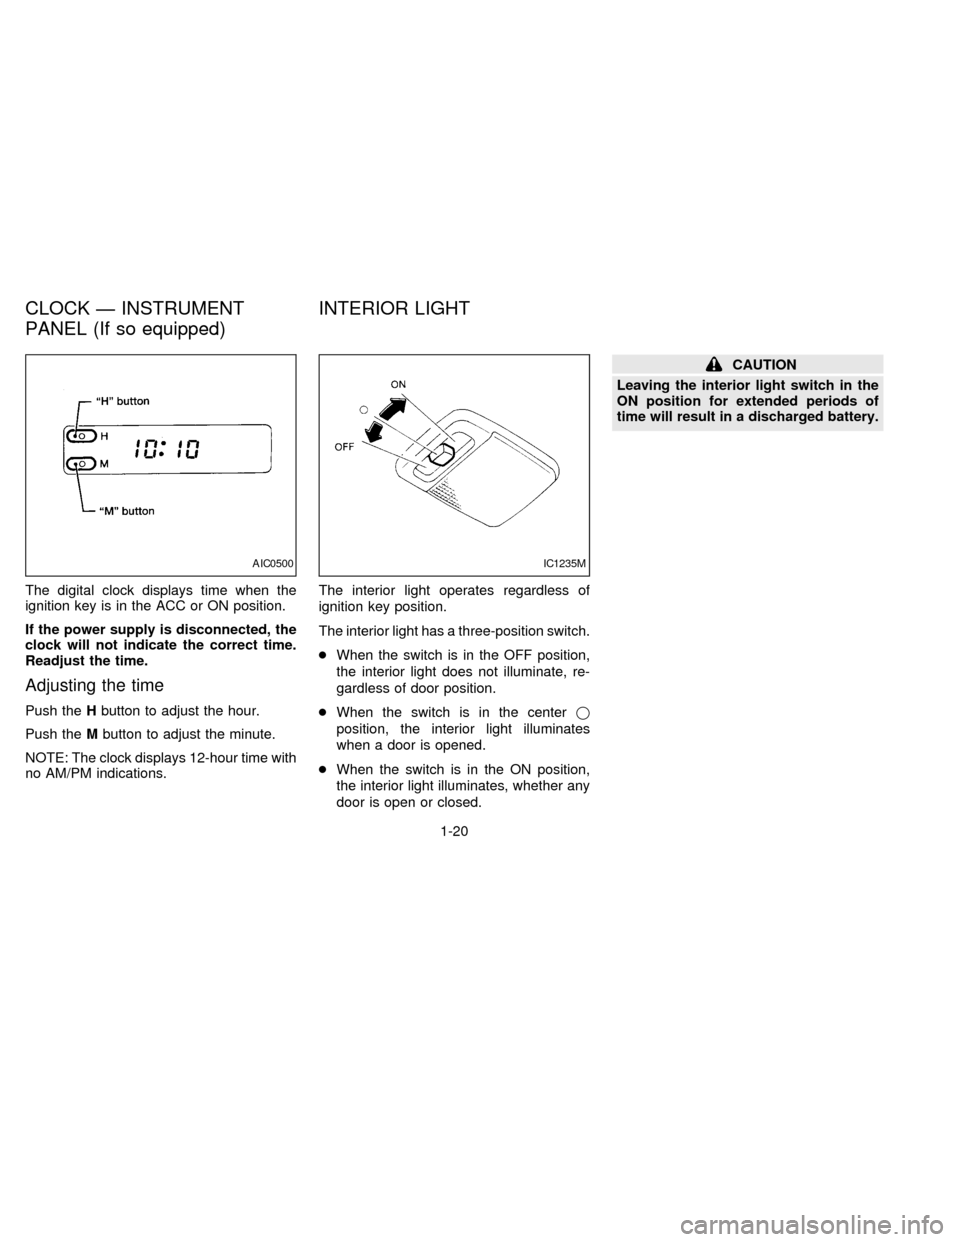
The digital clock displays time when the
ignition key is in the ACC or ON position.
If the power supply is disconnected, the
clock will not indicate the correct time.
Readjust the time.
Adjusting the time
Push theHbutton to adjust the hour.
Push theMbutton to adjust the minute.
NOTE: The clock displays 12-hour time with
no AM/PM indications.The interior light operates regardless of
ignition key position.
The interior light has a three-position switch.
cWhen the switch is in the OFF position,
the interior light does not illuminate, re-
gardless of door position.
cWhen the switch is in the centerj
position, the interior light illuminates
when a door is opened.
cWhen the switch is in the ON position,
the interior light illuminates, whether any
door is open or closed.
CAUTION
Leaving the interior light switch in the
ON position for extended periods of
time will result in a discharged battery.
AIC0500IC1235M
CLOCK Ð INSTRUMENT
PANEL (If so equipped)INTERIOR LIGHT
1-20
ZX
Page 37 of 203
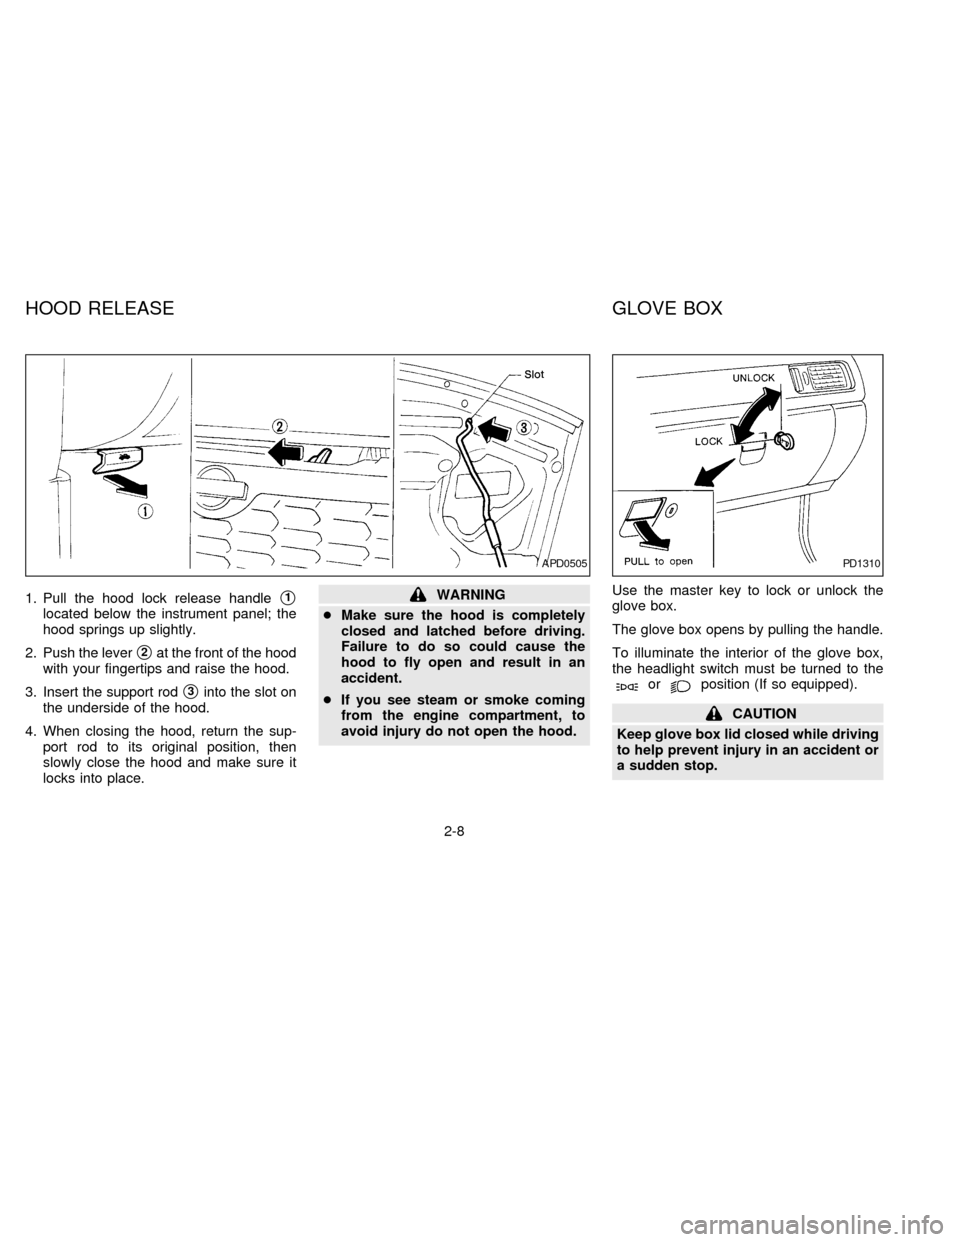
1. Pull the hood lock release handles1
located below the instrument panel; the
hood springs up slightly.
2. Push the lever
s2at the front of the hood
with your fingertips and raise the hood.
3. Insert the support rod
s3into the slot on
the underside of the hood.
4. When closing the hood, return the sup-
port rod to its original position, then
slowly close the hood and make sure it
locks into place.
WARNING
cMake sure the hood is completely
closed and latched before driving.
Failure to do so could cause the
hood to fly open and result in an
accident.
cIf you see steam or smoke coming
from the engine compartment, to
avoid injury do not open the hood.Use the master key to lock or unlock the
glove box.
The glove box opens by pulling the handle.
To illuminate the interior of the glove box,
the headlight switch must be turned to the
orposition (If so equipped).
CAUTION
Keep glove box lid closed while driving
to help prevent injury in an accident or
a sudden stop.
APD0505PD1310
HOOD RELEASE GLOVE BOX
2-8
ZX
Page 45 of 203
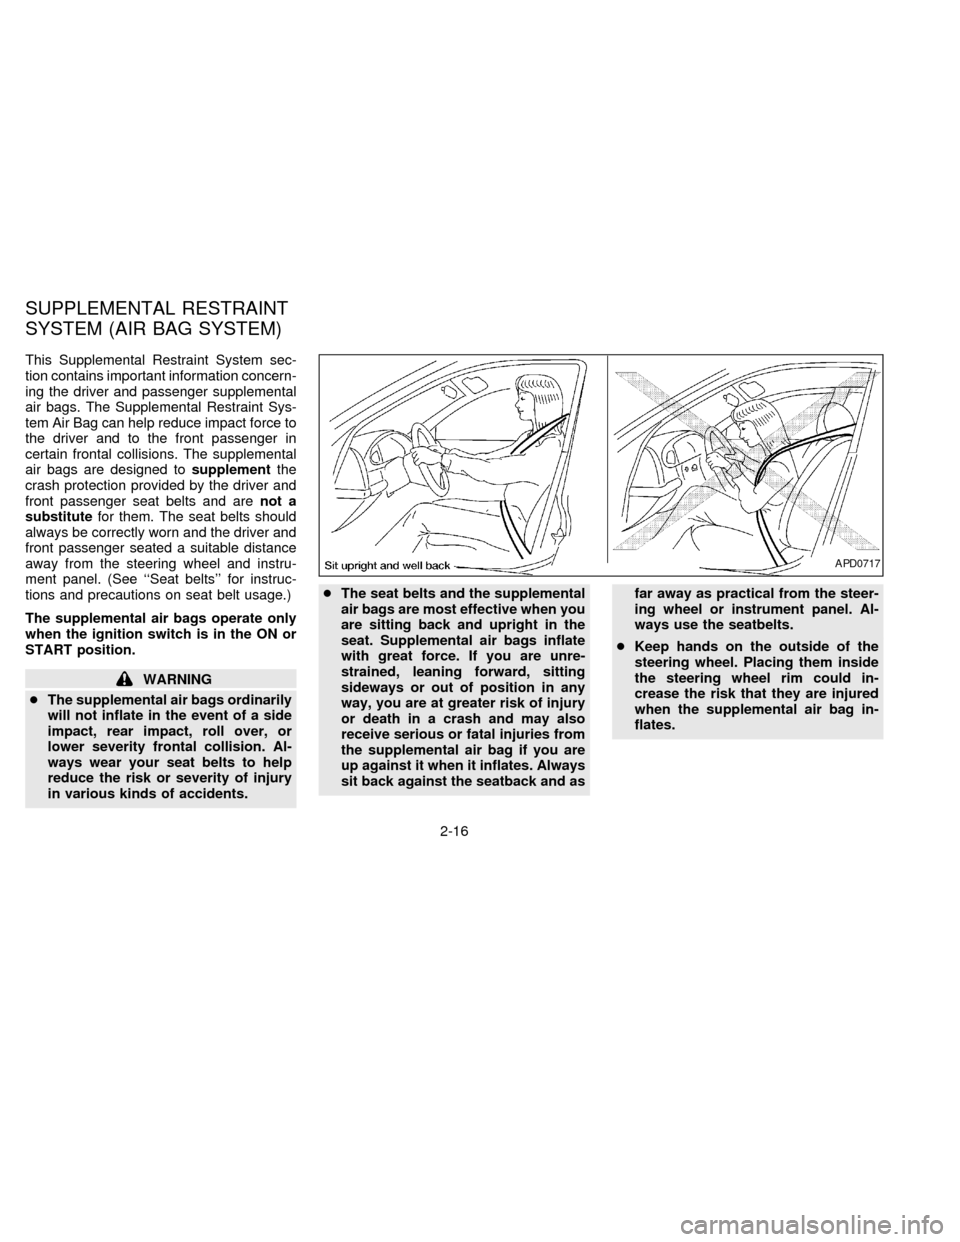
This Supplemental Restraint System sec-
tion contains important information concern-
ing the driver and passenger supplemental
air bags. The Supplemental Restraint Sys-
tem Air Bag can help reduce impact force to
the driver and to the front passenger in
certain frontal collisions. The supplemental
air bags are designed tosupplementthe
crash protection provided by the driver and
front passenger seat belts and arenot a
substitutefor them. The seat belts should
always be correctly worn and the driver and
front passenger seated a suitable distance
away from the steering wheel and instru-
ment panel. (See ``Seat belts'' for instruc-
tions and precautions on seat belt usage.)
The supplemental air bags operate only
when the ignition switch is in the ON or
START position.
WARNING
cThe supplemental air bags ordinarily
will not inflate in the event of a side
impact, rear impact, roll over, or
lower severity frontal collision. Al-
ways wear your seat belts to help
reduce the risk or severity of injury
in various kinds of accidents.cThe seat belts and the supplemental
air bags are most effective when you
are sitting back and upright in the
seat. Supplemental air bags inflate
with great force. If you are unre-
strained, leaning forward, sitting
sideways or out of position in any
way, you are at greater risk of injury
or death in a crash and may also
receive serious or fatal injuries from
the supplemental air bag if you are
up against it when it inflates. Always
sit back against the seatback and asfar away as practical from the steer-
ing wheel or instrument panel. Al-
ways use the seatbelts.
cKeep hands on the outside of the
steering wheel. Placing them inside
the steering wheel rim could in-
crease the risk that they are injured
when the supplemental air bag in-
flates.
APD0717
SUPPLEMENTAL RESTRAINT
SYSTEM (AIR BAG SYSTEM)
2-16
ZX
Page 48 of 203
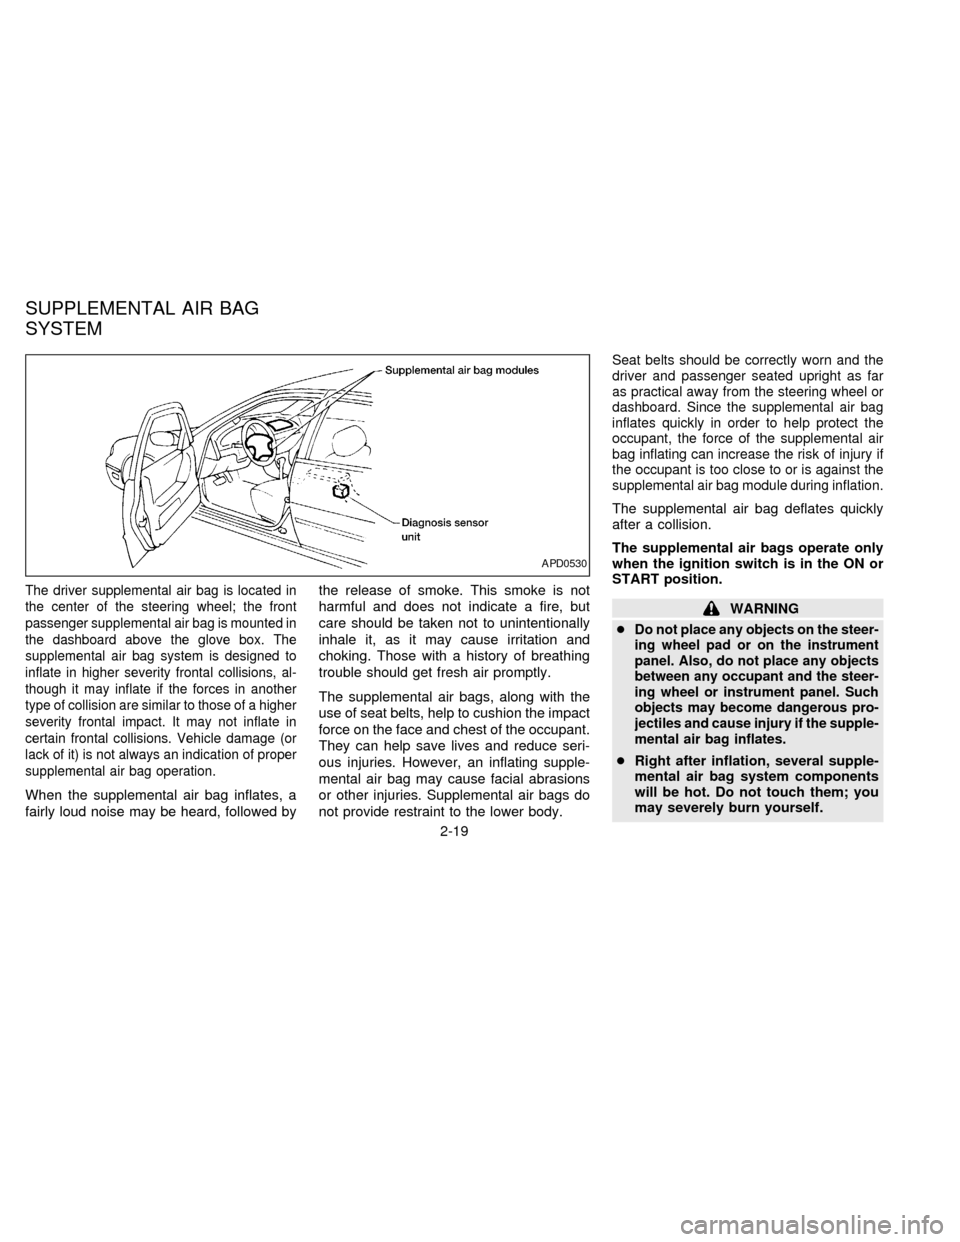
The driver supplemental air bag is located in
the center of the steering wheel; the front
passenger supplemental air bag is mounted in
the dashboard above the glove box. The
supplemental air bag system is designed to
inflate in higher severity frontal collisions, al-
though it may inflate if the forces in another
type of collision are similar to those of a higher
severity frontal impact. It may not inflate in
certain frontal collisions. Vehicle damage (or
lack of it) is not always an indication of proper
supplemental air bag operation.
When the supplemental air bag inflates, a
fairly loud noise may be heard, followed bythe release of smoke. This smoke is not
harmful and does not indicate a fire, but
care should be taken not to unintentionally
inhale it, as it may cause irritation and
choking. Those with a history of breathing
trouble should get fresh air promptly.
The supplemental air bags, along with the
use of seat belts, help to cushion the impact
force on the face and chest of the occupant.
They can help save lives and reduce seri-
ous injuries. However, an inflating supple-
mental air bag may cause facial abrasions
or other injuries. Supplemental air bags do
not provide restraint to the lower body.
Seat belts should be correctly worn and the
driver and passenger seated upright as far
as practical away from the steering wheel or
dashboard. Since the supplemental air bag
inflates quickly in order to help protect the
occupant, the force of the supplemental air
bag inflating can increase the risk of injury if
the occupant is too close to or is against the
supplemental air bag module during inflation.
The supplemental air bag deflates quickly
after a collision.
The supplemental air bags operate only
when the ignition switch is in the ON or
START position.
WARNING
c
Do not place any objects on the steer-
ing wheel pad or on the instrument
panel. Also, do not place any objects
between any occupant and the steer-
ing wheel or instrument panel. Such
objects may become dangerous pro-
jectiles and cause injury if the supple-
mental air bag inflates.
cRight after inflation, several supple-
mental air bag system components
will be hot. Do not touch them; you
may severely burn yourself.
APD0530
SUPPLEMENTAL AIR BAG
SYSTEM
2-19
ZX