1997 MERCEDES-BENZ ML500 foo
[x] Cancel search: fooPage 4 of 4133

Several situations may arise requiring some form of disposal action, including:
Scrapping a vehicle containing a deployed air bag module and/or ETR.
Scrapping a vehicle with a live air bag module and/or ETR.
Disposal of a live but electrically faulty air bag module and/or ETR.
Disposal of a deployed air bag module and/or ETR.
DEPLOYED AIR BAG OR ETR
Deployed air bag module and/or ETR unit can be thrown away. None of its components are reusable. Deployed
air bag module is NOT classified as hazardous material.
SCRAPPED VEHICLE
1. Before proceeding, follow service precautions. See SERVICE PRECAUTIONS . Move vehicle
outdoors to a remote area, away from workshop and other personnel. Disconnect and shield negative
battery cable. Open all vehicle windows and doors.
2. Ensure air bag module is secured to steering wheel, and passenger air bag is secured to dash. Ensure ETR
seat belt assemblies are secured to "B" pillars and all seat belt buckles are latched. Remove loose objects
from front seat. DO NOT allow anyone inside vehicle.
3. Disable air bag system. See DISABLING & ACTIVATING AIR BAG SYSTEM
. Connect Trigger
Device (126-589-00-90-00) and Adapter Cable (126 589 21 63 00) to SRS system connector (X29/9)
located at passenger footwell area. See Fig. 5
. Move away from vehicle as far as trigger device wiring
will allow.
4. To deploy driver air bag and ETR, turn rotary knob on trigger device to position No. 1. Push battery
check pushbutton and ignition pushbutton simultaneously. Trigger light should illuminate indicating
driver air bag and ETR deployed. If trigger light is illuminated and driver air bag and/or ETR did not
deploy, driver air bag module and/or ETR is faulty. See UNDEPLOYED AIR BAG/ETR
.
5. To deploy passenger air bag detonator No. 1, turn rotary knob on trigger device to position No. 2. Push
battery check pushbutton and ignition pushbutton simultaneously. Trigger light should illuminate
indicating passenger air bag detonator No. 1 deployed. If trigger light is illuminated and passenger air bag
detonator No. 1 did not deploy, passenger air bag module is faulty. See UNDEPLOYED AIR
BAG/ETR .
6. To deploy passenger air bag detonator No. 2, turn rotary knob on trigger device to position No. 3. Push
battery check pushbutton and ignition pushbutton simultaneously. Trigger light should illuminate
indicating passenger air bag detonator No. 2 deployed. If trigger light is illuminated and passenger air bag
detonator No. 2 did not deploy, passenger air bag module is faulty. See UNDEPLOYED AIR
BAG/ETR . WARNING:An undeployed air bag module and/or ETR seat belt CANNOT be disposed
of without first being deployed. If this is not possible through procedures
outlined below, contact vehicle manufacturer for further instructions.
Perform remote deployment outdoors. Keep personnel at least 20 feet
away.
1998 Mercedes-Benz ML320
AIR BAG RESTRAINT SYSTEM 1998 AIR BAG RESTRAINT SYSTEMS Mercedes-Benz
me
Saturday, October 02, 2010 3:33:13 PMPage 4 © 2006 Mitchell Repair Information Company, LLC.
Page 14 of 4133
check to ensure system is functioning properly. See SYSTEM OPERATION CHECK .
Removal & Installation (SLK 230)
1. Before proceeding, see SERVICE PRECAUTIONS . Disable air bag system. See DISABLING &
ACTIVATING AIR BAG SYSTEM . Remove ignition key. Remove top section of instrument panel.
Fold vapor barrier toward front to reveal 2 screws. Disconnect passenger-side air bag module connector.
Remove 4 screws and passenger-side air bag module.
2. To install air bag module, reverse removal procedure. Activate air bag system. Perform system operation
check to ensure system is functioning properly. See SYSTEM OPERATION CHECK
.
SYSTEM OPERATION CHECK
SRS warning light indicates air bag and Emergency Tensioning Retractor (ETR) system readiness. Turn
ignition on. SRS warning light will light, and then go out after approximately 4 seconds indicating system is
functioning properly. If SRS warning light does not light, lights up while driving or lights all the time, there is a
system fault. Repair malfunctioning system. See DIAGNOSIS & TESTING
.
SERVICE PRECAUTIONS
Observe following precautions when working with air bag systems:
When working around steering column components and before any repairs are performed, disable air bag
system. See DISABLING & ACTIVATING AIR BAG SYSTEM
.
Before straightening any damage to body, or before performing electrical arc-welding, disable air bag
system. See DISABLING & ACTIVATING AIR BAG SYSTEM
.
Always wear safety glasses and gloves when handling a deployed air bag module. Air bag module may
contain sodium hydroxide deposits which are irritating to the skin.
DO NOT repair any portion of SRS wiring harness.
Always handle air bag module with trim cover away from your body. Always place air bag module on
workbench with trim cover up, away from loose objects.
DO NOT expose any SRS component to temperatures in excess of 212°F (100°C).
DO NOT expose any SRS component to cleaning agents such as solvents, gasoline, lye, etc.
DO NOT connect Hand-Held Tester (6511 0001 99) to Data Link Connector (DLC) with ignition on.
Damage to HHT may result.
DO NOT connect HHT (6511 0001 99) to vehicle if a battery charger is connected to vehicle battery.
Damage to HHT may result.
DISABLING & ACTIVATING AIR BAG SYSTEM DISABLING SYSTEM
Before proceeding, follow air bag service precautions. See SERVICE PRECAUTIONS
. Turn ignition off.
Disconnect and shield negative battery cable. Remove passenger foot mat. Remove passenger footrest.
Disconnect SRS system connector (X29/9) located at passenger footwell area. See Fig. 5
. System is now
disabled.
1998 Mercedes-Benz ML320
AIR BAG RESTRAINT SYSTEM 1998 AIR BAG RESTRAINT SYSTEMS Mercedes-Benz
me
Saturday, October 02, 2010 3:33:14 PMPage 14 © 2006 Mitchell Repair Information Company, LLC.
Page 183 of 4133
133 Interior equipment
Te ch n ica l
data Instruments
and controlsOperationDrivingInstrument
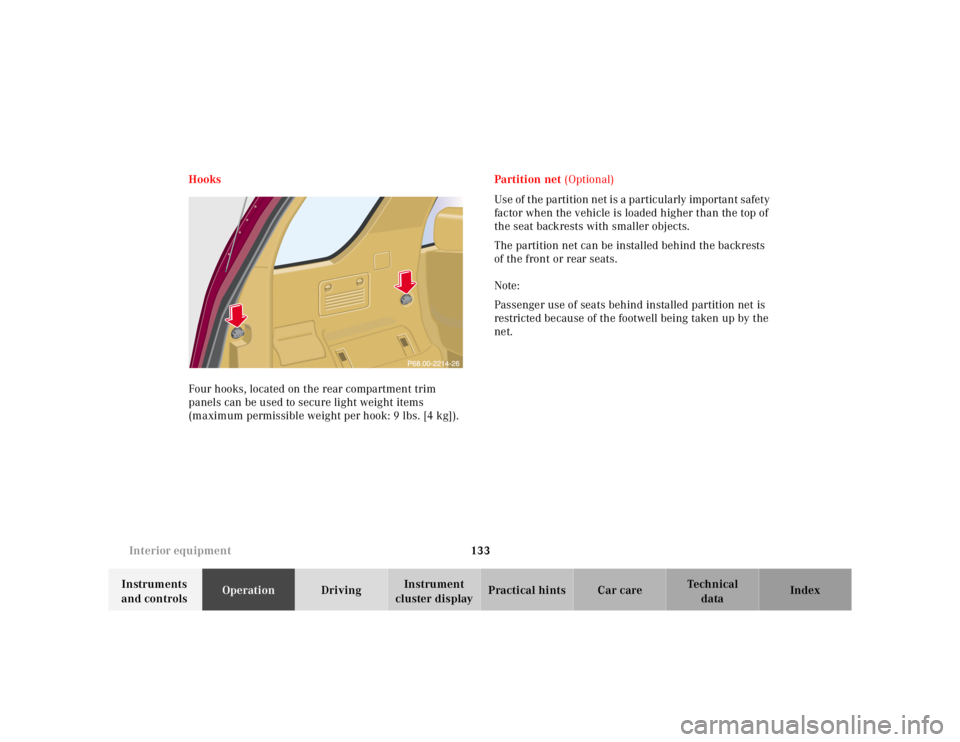
cluster displayPractical hints Car care Index Hooks
Four hooks, located on the rear compartment trim
panels can be used to secure light weight items
(maximum permissible weight per hook: 9 lbs. [4 kg]).Partiti on net (Optional)
Use of the partition net is a particularly important safety
factor when the vehicle is loaded higher than the top of
the seat backrests with smaller objects.
The partition net can be installed behind the backrests
of the front or rear seats.
Note:
Passenger use of seats behind installed partition net is
restricted because of the footwell being taken up by the
net.
Page 216 of 4133
166 Automatic transmission
Te ch n ica l
data Instruments
and controlsOperationDrivingInstrument
cluster displayPractical hints Car care Index
Driving
The selector lever is automatically locked while in
position “P”. To move the selector lever out of
position “P”, the service brake pedal must be firmly
depressed before the shift lock will release.
Shift selector lever to the desired position only when the
engine is idling normally and the service brake is
applied. Do not release the brake until ready to drive.
The vehicle may otherwise start creeping when the
selector lever is in drive or reverse position.Important!
After selecting any driving position from “N” or “P”,
wait a moment to allow the gear to fully engage before
accelerating, especially when the engine is cold.
Accelerator position
Partial throttle = early upshifting = normal acceleration
Full throttle = later upshifting = rapid acceleration
Kickdown (depressing the accelerator beyond full
throttle) = downshifting to a lower gear = maximum
acceleration. Once the desired speed is attained, ease up
on the accelerator – the transmission shifts up again.
Stopping
For brief stops, e.g. at traffic lights, leave the
transmission in gear and hold vehicle with the service
brake.
For longer stops with the engine idling, shift into “N”
or “P” and hold the vehicle with the service brake.
When stopping the vehicle on an uphill gradient, do not
hold it with the accelerator, use the brake. This avoids
unnecessary transmission heat build up.
Wa r n i n g !
It is dangerous to shift the selector lever out of “P”
or “N” if the engine speed is higher than idle speed.
If your foot is not firmly on the brake pedal, the
vehicle could accelerate quickly forward or in
reverse. You could lose control of the vehicle and
hit someone or something. Only shift into gear
when the engine is idling normally and when your
right foot is firmly on the brake pedal.
Page 224 of 4133
174 Driving instructions
Te ch n ica l
data Instruments
and controlsOperationDrivingInstrument
cluster displayPractical hints Car care Index
Driving instructions
Drive sensibly – save fuel
Fuel consumption, to a great extent, depends on driving
habits and operating conditions.
To save fuel you should:
•keep tires at the recommended inflation pressures,
•remove unnecessary loads,
•remove roof rack when not in use,
•allow engine to warm up under low load use,
•avoid frequent acceleration and deceleration,
•have all maintenance work performed at regular
intervals by an authorized Mercedes-Benz Light
Truck Center.
Fuel consumption is also increased by driving in cold
weather, in stop-and-go traffic, on short trips and in hilly
country.Drinking and driving
Pedals
Wa r n i n g !
Drinking or taking drugs and driving can be a very
dangerous combination. Even a small amount of
alcohol or drugs can affect your reflexes,
perceptions and judgement.The possibility of a serious or even fatal accident is
sharply increased when you drink or take drugs
and drive.Please don’t drink or take drugs and drive or allow
anyone to drive after drinking or taking drugs.Wa r n i n g !
Keep driver’s foot area clear at all times. Objects
stored in this area may impair pedal movement.
Page 225 of 4133
175 Driving instructions
Te ch n ica l
data Instruments
and controlsOperationDrivingInstrument
cluster displayPractical hints Car care Index Power assistance
BrakesThe condition of the parking brake system is checked
each time the vehicle is in the shop for the required
maintenance service.
If the parking brake is released and the brake warning
lamp in the instrument cluster stays on and there is no
audible warning (EBP), the brake fluid level in the
reservoir is too low.
Brake pad wear or a leak in the system may be the
reason for low brake f luid in the reservoir.
Have the brake system inspected at an authorized
Mercedes-Benz Light Truck Center immediately.
All checks and service work on the brake system should
be carried out by an authorized Mercedes-Benz Light
Truck Center.
Install only brake pads and brake fluid recommended by
Mercedes-Benz.
Wa r n i n g !
When the engine is not running, the brake and
steering systems are without power assistance.
Under these circumstances, a much greater effort is
necessary to stop or steer the vehicle.Wa r n i n g !
After driving in heavy rain for some time without
applying the brakes or through water deep enough
to wet brake components, the first braking action
may be somewhat reduced and increased pedal
pressure may be necessary to obtain expected
braking effect. Be sure to maintain a safe distance
from vehicles in front.Resting your foot on the brake pedal will cause
excessive and premature wear of the brake pads.It can also result in the brakes overheating thereby
significantly reducing their effectiveness. It may
not be possible to stop the vehicle in sufficient time
to avoid an accident.
Wa r n i n g !
If other than recommended brake pads are
installed, or other than recommended brake fluid
is used, the braking properties of the vehicle can be
degraded to an extent that safe braking is
substantially impaired. This could result in an
accident.
Page 226 of 4133
176 Driving instructions
Te ch n ica l
data Instruments
and controlsOperationDrivingInstrument
cluster displayPractical hints Car care Index
Caution!
When driving down long and steep grades, relieve the
load on the brakes by shifting into a lower gear to use
the engine’s braking power. This helps prevent
overheating of the brakes and reduces brake pad wear.
After hard braking, it is advisable to drive on for some
time, rather than immediately parking, so the air stream
will cool down the brakes faster.
Driving off
Apply the service brakes to test them briefly after
driving off. Perform this procedure only when the road
is clear of other traffic.
Warm up the engine smoothly. Do not place full load on
the engine until the operating temperature has been
reached.
When starting off on a slippery surface, do not allow one
drive wheel to spin for an extended period with the ESP
switched off. Doing so may cause serious damage to the
drive train which is not covered by the Mercedes-Benz
Limited Warranty.Parking
Important!
It is advisable to set the parking brake whenever
parking or leaving the vehicle. In addition, move
selector lever to position “P”.
When parking on hills, always set the parking brake.
Wa r n i n g !
To reduce the risk of personal injury as a result of
vehicle movement, before
turning off the engine
and leaving the vehicle, always:
1. Keep right foot on the service brake pedal.
2. Firmly depress parking brake pedal.
3. Move the selector lever to position “P”.
4. Slowly release the service brake pedal.
5. Turn front wheels towards the road curb.
6. Turn the key to steering lock position 0 and
remove.
7. Take the key and lock vehicle when leaving.
Page 245 of 4133
195 Driving instructions
Te ch n ica l
data Instruments
and controlsOperationDrivingInstrument
cluster displayPractical hints Car care Index At very steep inclines, not manageable with selector
lever in position “1”, switch transfer case to LOW
RANGE, see page 209 for instructions on how to engage
LOW RANGE.
When going down a long hill, shift into a lower gear and
use the engine’s braking effect. Avoid riding the brakes,
thus overheating the vehicle and trailer brakes.
If the engine coolant rises to an extremely high
temperature (coolant temperature needle approaching
the red zone) when the air conditioner is on, turn off the
air conditioner. Engine coolant heat can be additionally
vented by opening the windows, switching the climate
control fan speed to high and setting the temperature
control to the maximum hot position.
Extreme care must be exercised since your vehicle with
a trailer will require additional passing distance ahead
than when driving without a trailer. Because your
vehicle and trailer is longer than your vehicle alone, you
will also need to go much farther ahead of the passed
vehicle before you can return to your lane.Parking
Wa r n i n g !
To reduce the risk of personal injury, or damage to
the vehicle powertrain, as a result of vehicle/trailer
movement, always:1. Keep right foot on brake pedal.2. Shift gear selector lever to position “N”.3. Have a second person place wheel chocks on
downhill side of left and right trailer wheels.4. Slowly release brake pedal and let vehicle and
trailer roll into chocks until stopped.5. Firmly depress parking brake pedal.6. Move gear selector lever to position “P”.7. On inclines turn front wheels towards the road
curb.